HS50_advance_level 2.pdf - 第239页
Stud ent Gu ide HS-5 0 Adva nced II 07/2 002 Ed ition 8 Y- Axis 21 5HP RYLQJW KHSU LPDU\ S DUWRI WKHOLQHD UPRWRU ➠ Remove th e X-axis motor unit. (1) L i nea r moto r - pr imary part (2) X -axi s mot or un…

07/2002 Edition Student Guide HS-50 Advanced II
8 Y-Axis
20
➠ Remove the permanent magnets from the gantry concerned:
*DQWU\RU
➠ Loosen the four M6 x 12 hexagon socket-head screws on the permanent magnet (see item 1A
or 2A in Fig. 8.5 - 1
).
➠ Lift the permanent magnet and place it on a clean, non-magnetic surface (such as a plank of
wood).
➠ Loosen the 16 M6 x 12 hexagon socket-head screws on the permanent magnet (item 1B or 2B
in Fig. 8.5 - 1
).
➠ Set down the permanent magnet.
*DQWU\RU
➠ Loosen the 16 M6 x 12 hexagon socket-head screws on the permanent magnets (see item 2C
and 2D or 1C and 1D in Fig. 8.5 - 1
).
➠ Lift the permanent magnet and place it on a clean, non-magnetic surface (such as a plank of
wood).

Student Guide HS-50 Advanced II 07/2002 Edition
8 Y-Axis
21
5HPRYLQJWKHSULPDU\SDUWRIWKHOLQHDUPRWRU
➠ Remove the X-axis motor unit.
(1) Linear motor - primary part
(2) X-axis motor unit
(3) X/Y distributor
(4) Socket X4 for the connecting cable of the primary part
(5) Gantry
07/2002 Edition Student Guide HS-50 Advanced II
8 Y-Axis
22
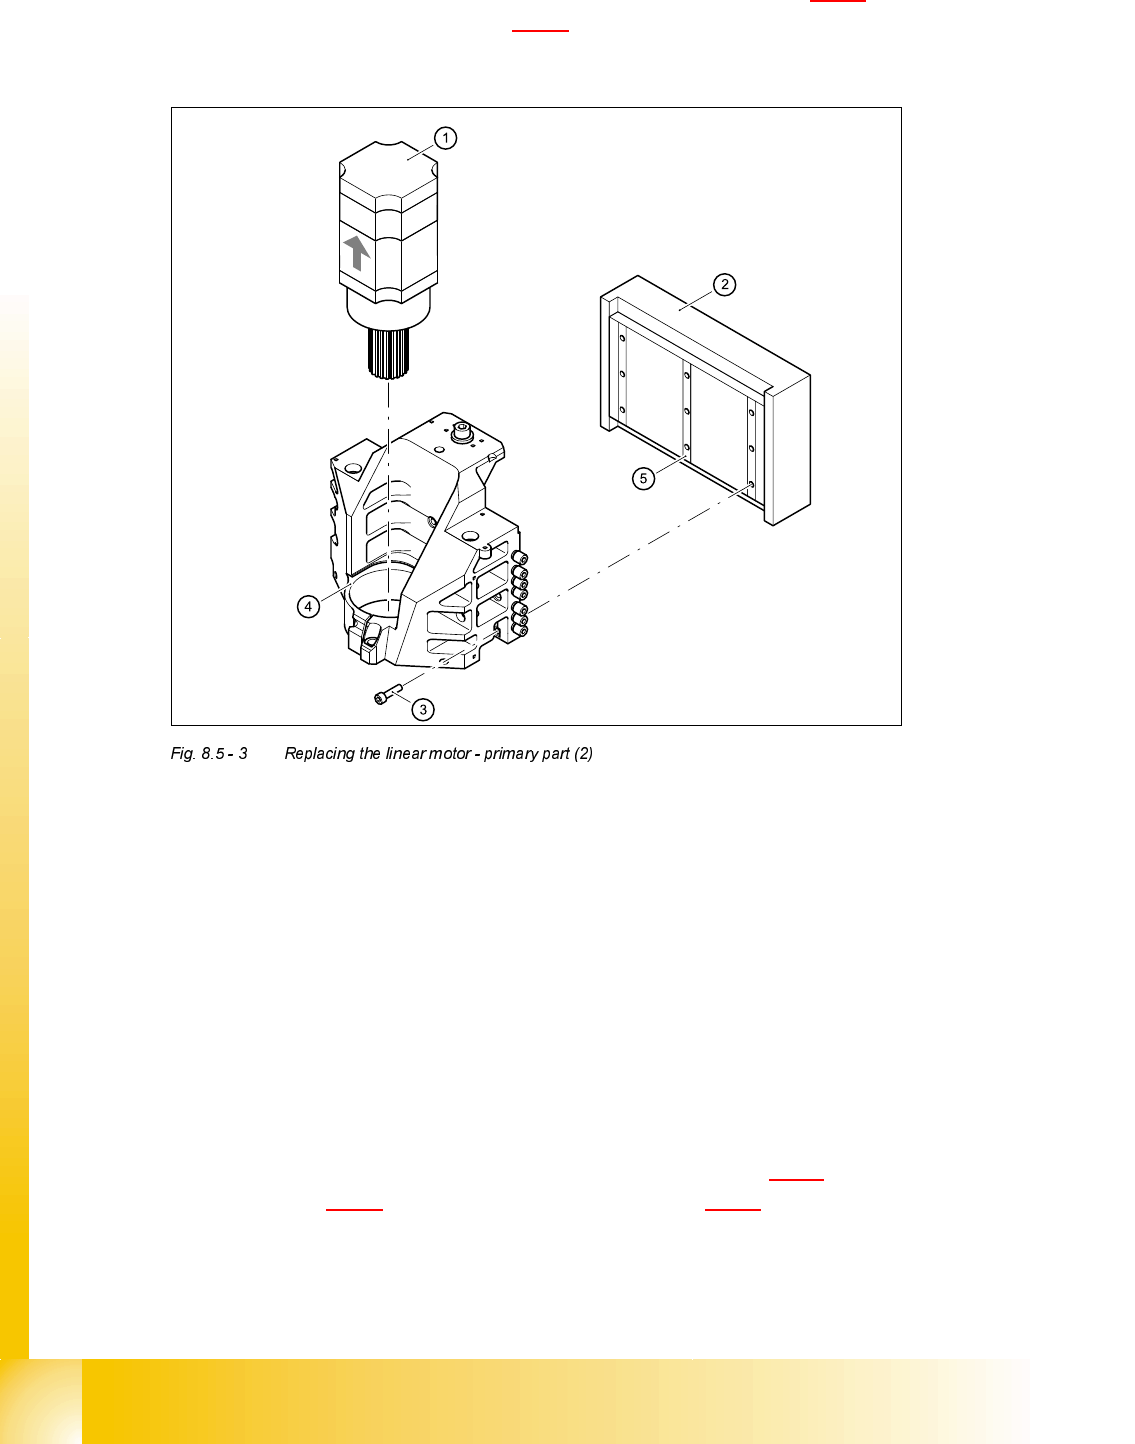
➠ Loosen the nine M5 x 20 hexagon socket-head screws (item 3 in Fig. 8.5 - 3) and remove the
primary part laterally (item 2 in Fig. 8.5 - 3
).
➠ Make sure that the lock rails will not drop.
(1) X-axis motor unit
(2) Linear motor - primary part
(3) 9 x M5 x 20 hexagon socket-head screws
(4) Motor bracket with press-fit connection (pneumatic system)
(5) Lockrail
,QVWDOOLQJWKHSULPDU\SDUWRIWKHOLQHDUPRWRU
➠ Fit scotch tape on the lower edge of the primary part of the linear motor to prevent the lockrails
from dropping.
➠ Push in the primary part from the side.
➠ Use the nine M5 x 20 hexagon socket-head screws (item 3 in Fig. 8.5 - 3) to fix the primary part
(item 2 in Fig. 8.5 - 3
) to the motor bracket (item 4 in Fig. 8.5 - 3).
Make sure that the primary part is aligned in parallel to the permanent magnet.
➠ Fit the X-axis motor unit.
➠ Fix all the cables with cable ties.