HS50_advance_level 2.pdf - 第69页
Stud ent Gu ide HS-5 0 Adva nced II 07/2 002 Ed ition 3 Power Supply 31 ➠ Loose n the M5 hexagon sock et-head scre ws (3) and remo ve the swi tch. )LWWLQ JWKHPDLQVZLWFK ➠ Fix the ma in swi tch in pl ace using…
07/2002 Edition Student Guide HS-50 Advanced II
3 Power Supply
30
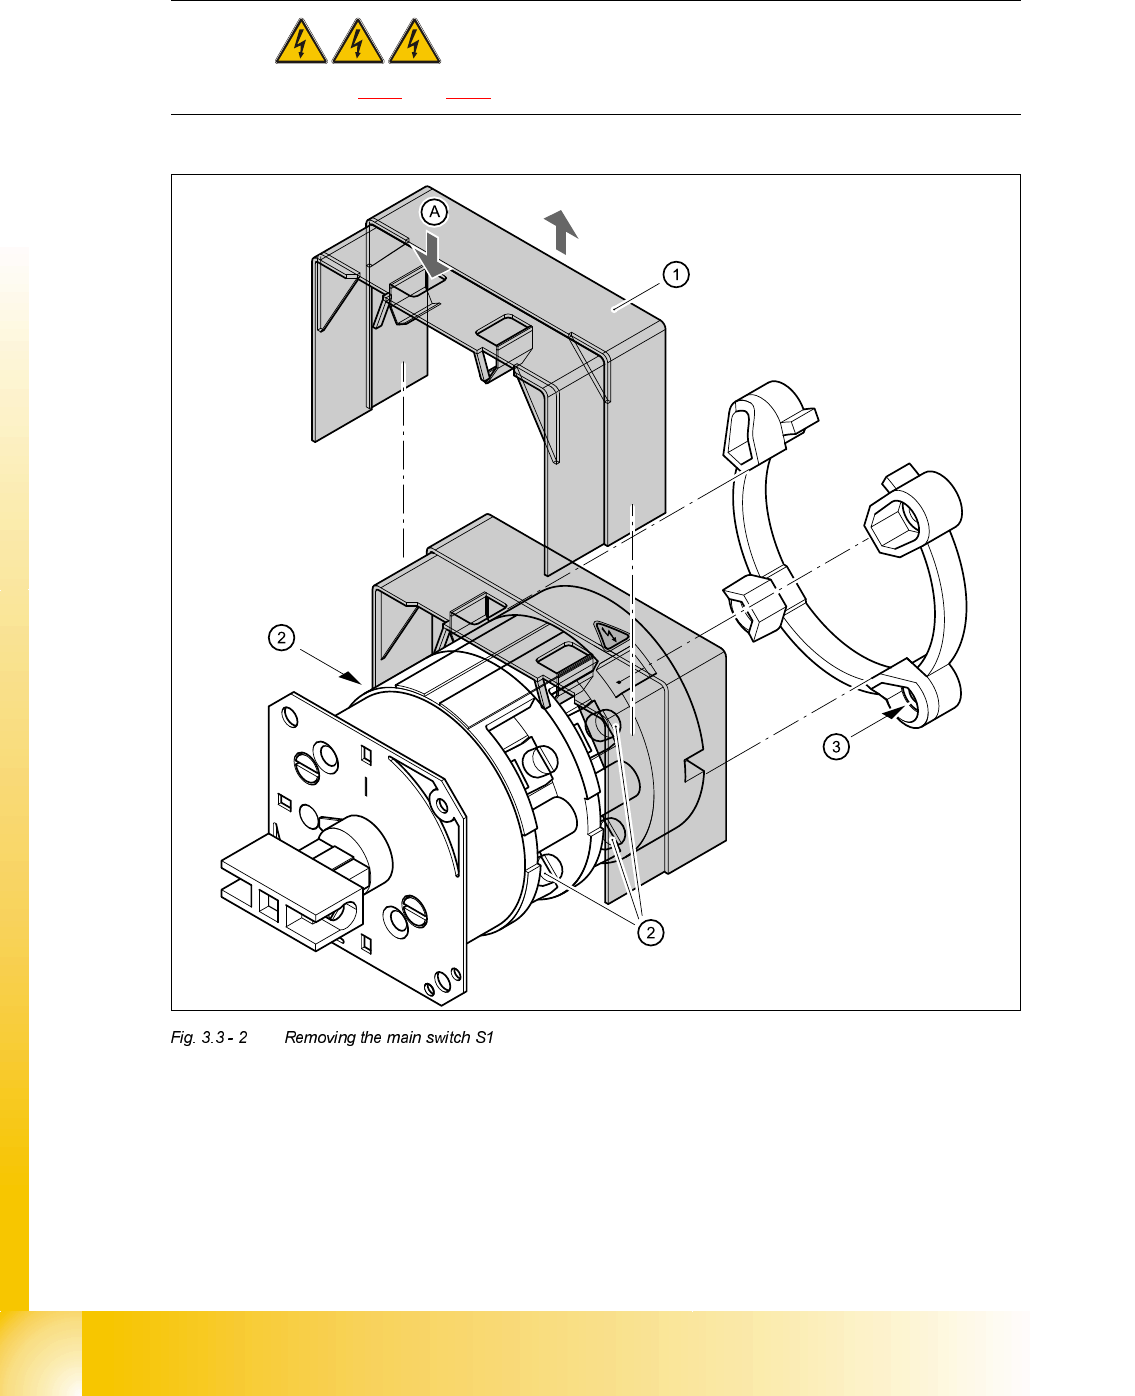
5HPRYLQJWKHPDLQVZLWFK
DANGER Switch off the placement system and disconnect from the power
supply (see sections 3.3.1 and 3.3.2).
➠ Use the screwdriver to bend back the lug (A) of the touch guard (1) slightly and then pull the
guard up and off.
➠ Loosen and remove the cable clamping screws (2) one by one and identify with adhesive la-
bels.
,QSXW 2XWSXW
Cable colour brown black
Student Guide HS-50 Advanced II 07/2002 Edition
3 Power Supply
31
➠ Loosen the M5 hexagon socket-head screws (3) and remove the switch.
)LWWLQJWKHPDLQVZLWFK
➠ Fix the main switch in place using M5 hexagon socket-head screws (3).
➠ Reconnect the labelled cables.
➠ Use the digital voltmeter to measure the voltages at terminals L1, L2, L3 or T1, T2 and T3.
➠ Switch off the placement system and disconnect from the power supply (see sections 3.3.1 and
3.3.2
).
➠ Replace the touch guard (item 1 in Fig. 3.3 - 2 on page 3 - 30) over the main switch.
➠ Complete the servicing work as described in section 3.3.3 on page 3 - 29.
5HSODFLQJWKHPRWRUWULSEORFN06$
7RROVDQGHTXLSPHQW
– Set of slotted-head screwdrivers
– Digital multimeter
– HS-50 detailed circuit diagrams
3DUWV
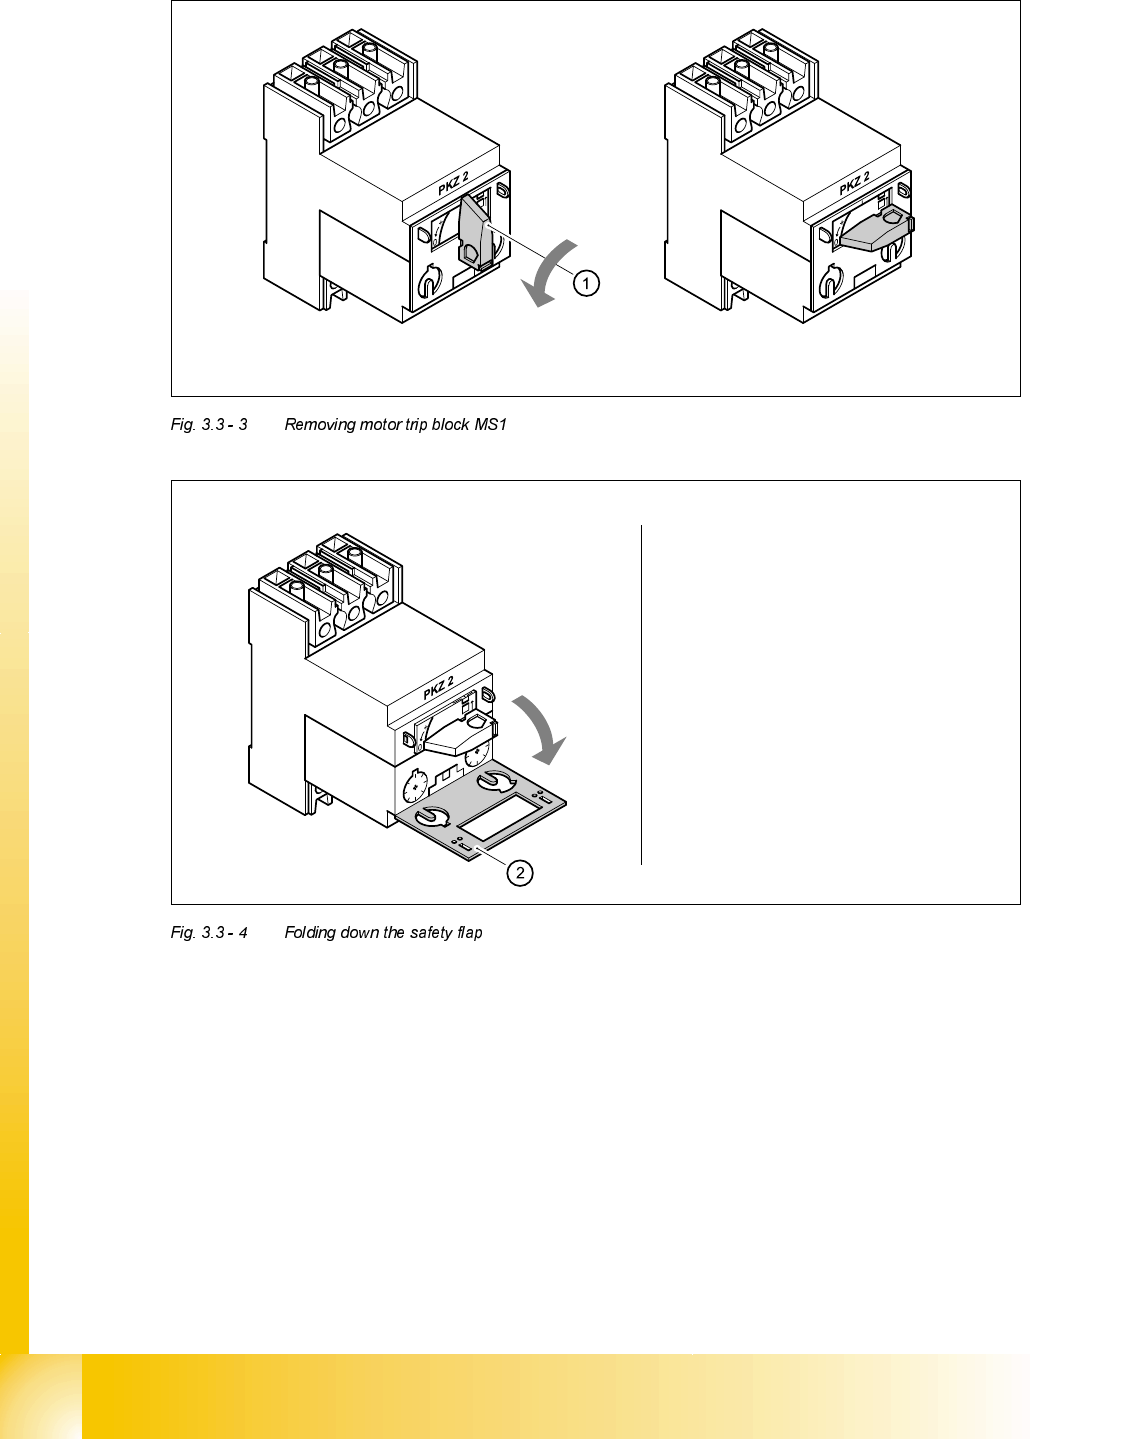
5HPRYLQJWKHPRWRUWULSEORFN
DANGER Switch off the placement system and disconnect from the power
supply (see sections 3.3.1 and 3.3.2).
'HVLJQDWLRQ ,WHPQXPEHU
Motor trip block ZM-16-PKZ2 00342495-01
for 3 x 380 VAC / 3 x 400 VAC / 3 x 415 VAC main power connection
Motor trip block ZM-32-PKZ2 00342496-01
for 3 x 204 VAC for USA / 3 x 230 VAC
07/2002 Edition Student Guide HS-50 Advanced II
3 Power Supply
32
Turn the switch (1) counter-clockwise to position "0"
Fold down the safety flap (2)