HS50_advance_level 2.pdf - 第87页
Stud ent Gu ide HS-5 0 Adva nced II 07/2 002 Ed ition 3 Power Supply 49 ➠ Loosen the c lamping sc rews (1). Pu ll the termi nal wires out one by one and identify with adhe- sive la bels. ➠ Use the screwdr iver to press d…
07/2002 Edition Student Guide HS-50 Advanced II
3 Power Supply
48
5HSODFLQJWKHFRPELQHGFRQWDFWRUSURWHFWLYHGHYLFH66.
7RROVDQGHTXLSPHQW
– Set of slotted-head screwdrivers
– Self-adhesive labels
– Digital multimeter
– HS-50 detailed circuit diagrams
3DUWV
3TK2805/24 VDC/5S-1NC combined contactor/protective device, item number 00341222-01
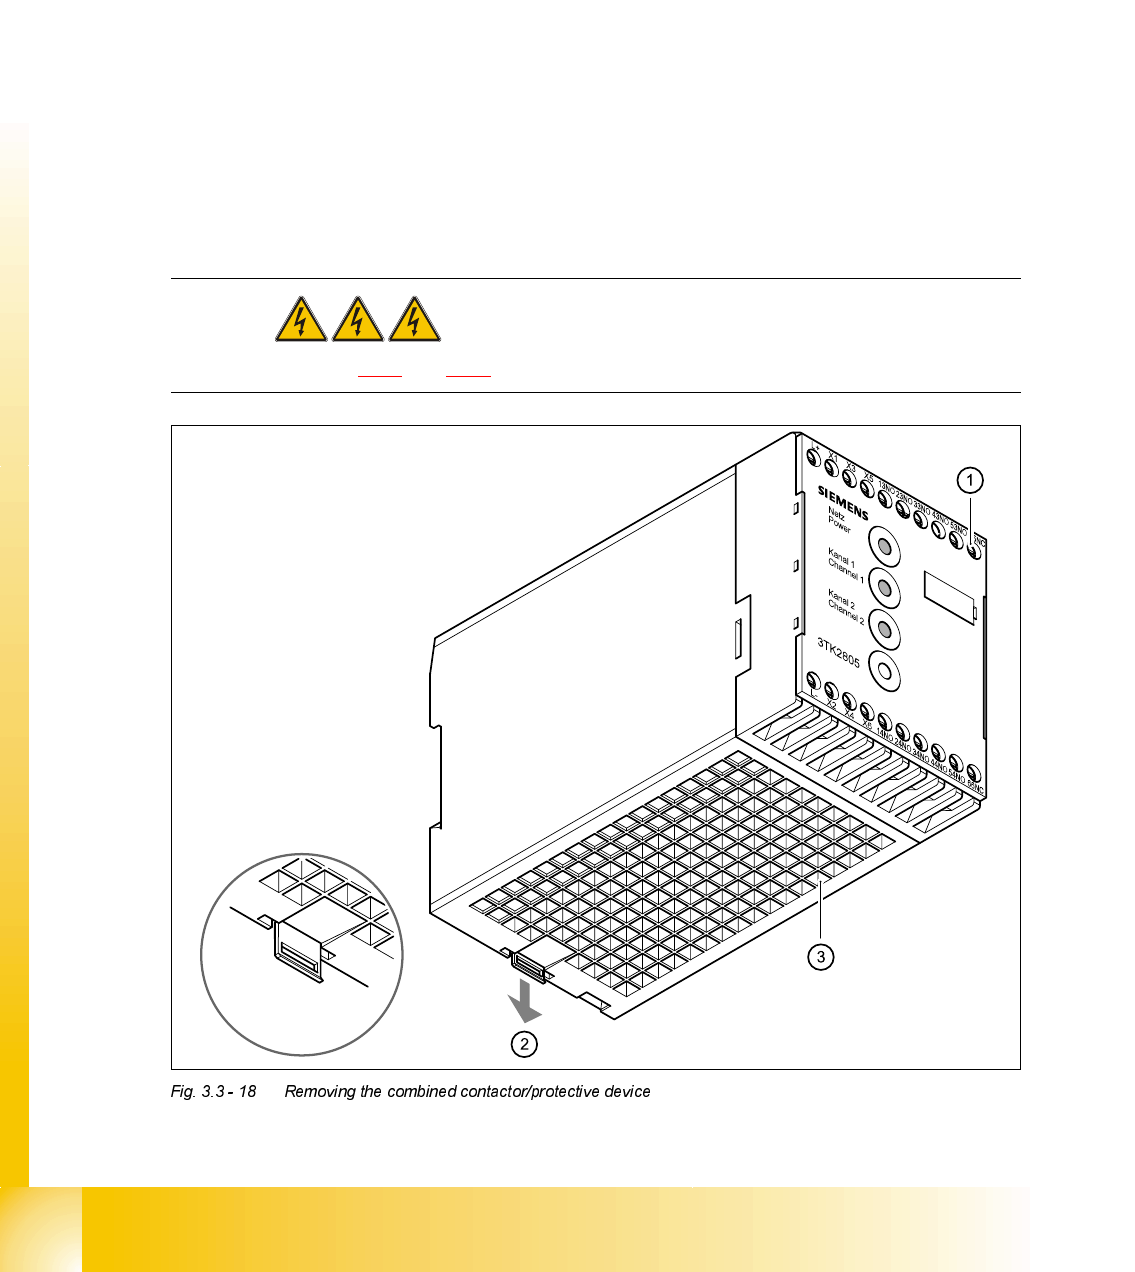
5HPRYLQJWKHFRPELQHGFRQWDFWRUSURWHFWLYHGHYLFH
DANGER Switch off the placement system and disconnect from the power
supply (see sections 3.3.1 and 3.3.2).

Student Guide HS-50 Advanced II 07/2002 Edition
3 Power Supply
49
➠ Loosen the clamping screws (1). Pull the terminal wires out one by one and identify with adhe-
sive labels.
➠ Use the screwdriver to press down on the locking lug (2) on the back of the combined contac-
tor/protective device (3).
➠ Tilt the combined contactor/protective device upwards slightly and remove.
)LWWLQJWKHFRPELQHGFRQWDFWRUSURWHFWLYHGHYLFH
➠ Place the combined contactor/protective device on the top-hat rail and snap into place.
➠ Connect up the terminal wires.
➠ Switch the placement system on and start it up.
➠ Use the digital voltmeter to measure the voltages at the terminals as per circuit diagram
00336145-XXXXXX-LD4.
➠ Complete the servicing work as described in 3.3.3 on page 3 - 29.
5HSODFLQJWUDQVIRUPHU7
7RROVDQGHTXLSPHQW
– Set of slotted-head screwdrivers
– Open-ended spanner, size 13
– DIN 911 Allen key, size 6
– Self-adhesive labels
–Fork-lift truck
– Tripod with block and tackle for lifting the transformer
– Digital multimeter
– HS-50 detailed circuit diagrams
3DUWV
11.1 kVA transformer, item number 00345634-01
5HPRYLQJWUDQVIRUPHU7
DANGER Switch off the placement system and disconnect from the power
supply (see sections 3.3.1 and 3.3.2).
07/2002 Edition Student Guide HS-50 Advanced II
3 Power Supply
50
WARNING
The power supply unit is very heavy (the transformer alone weighs 70 kg) so two people will be
needed to remove it.
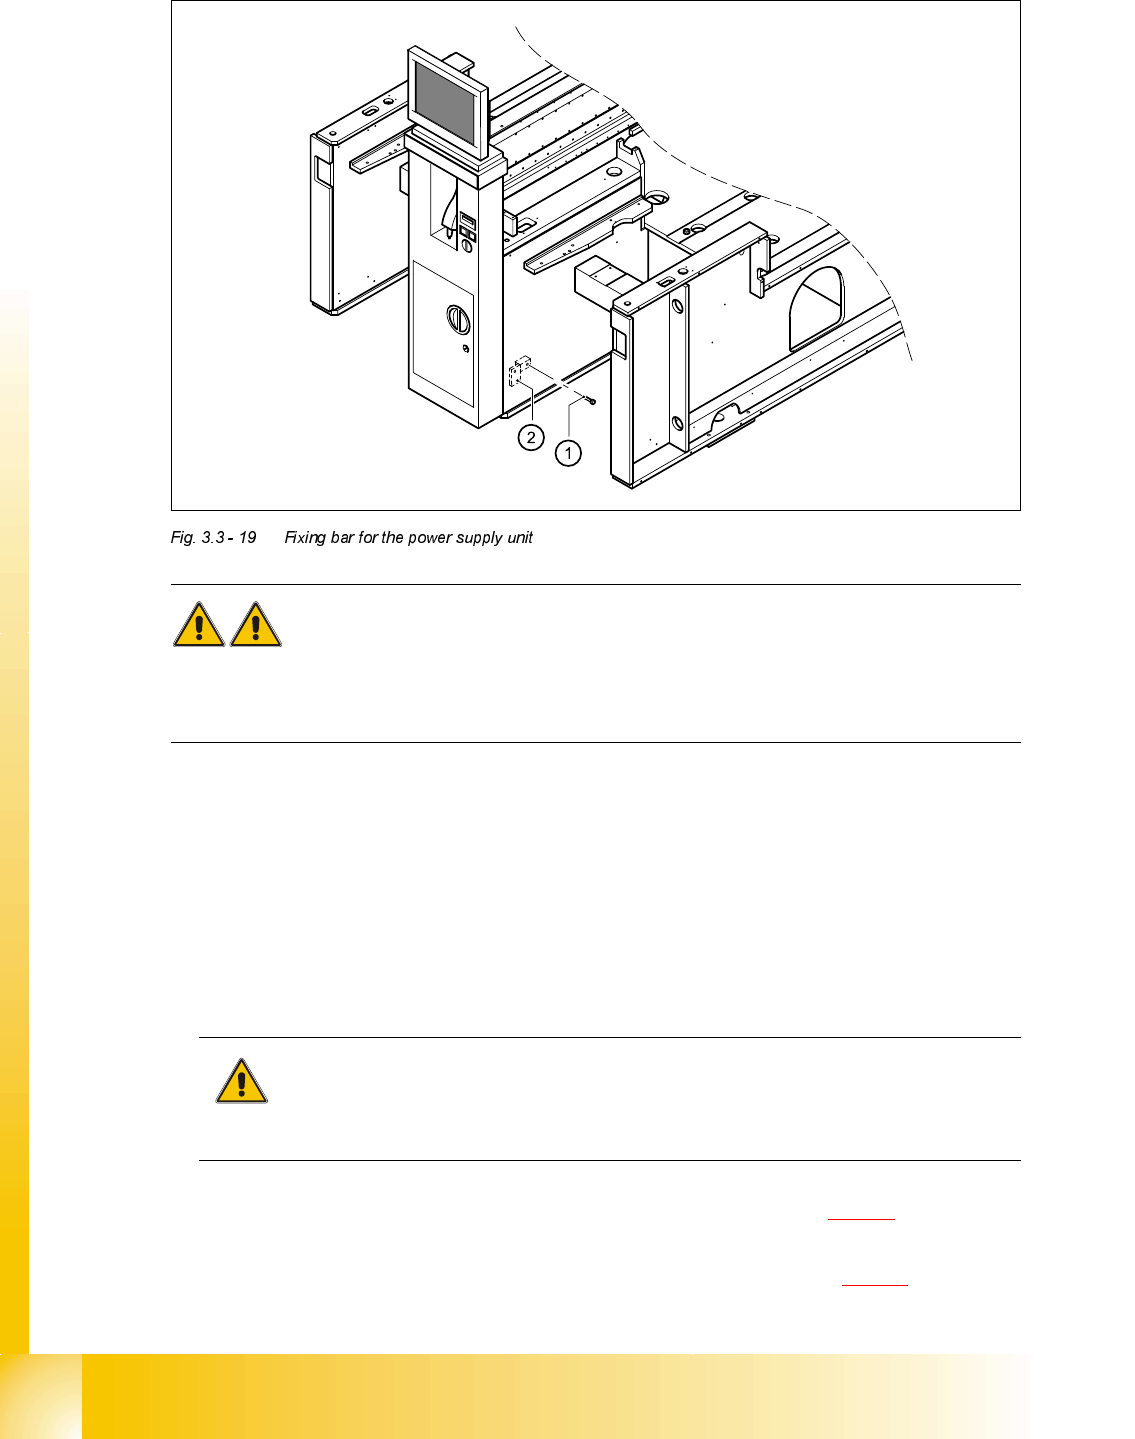
➠ Lift the power supply unit until it is half-way out.
➠ Loosen the M8 hexagon socket-head screw (1) and remove the fixing bar (2).
➠ Push the forks of the fork-lift truck beneath the power supply unit.
➠ Raise the forks until the power supply unit is resting on them.
➠ Push the power supply unit until the entire weight is resting on the forks. To do this, one person
should hold the truck in position while the other person pushes the power supply unit onto the
forks.
CAUTION
Ensure that the cables do not become trapped otherwise the insulation will be damaged.
➠ Detach the terminal wires from the primary terminal strip (item 1 in Fig. 3.3 - 20) one by one
and identify with adhesive labels.
➠ Detach the terminal wires from the secondary terminal strip (item 2 in Fig. 3.3 - 21) one by one
and identify with adhesive labels.