HS50_advance_level 2.pdf - 第89页
Stud ent Gu ide HS-5 0 Adva nced II 07/2 002 Ed ition 3 Power Supply 51 ➠ Loosen th e M8 he xagon nuts (item 3 in the Fig. 3.3 - 20 and 3.3 - 21 ). ➠ Remove th e four pl ain washe rs (4) an d four rubbe r washer s (5) ( …
07/2002 Edition Student Guide HS-50 Advanced II
3 Power Supply
50
WARNING
The power supply unit is very heavy (the transformer alone weighs 70 kg) so two people will be
needed to remove it.
➠ Lift the power supply unit until it is half-way out.
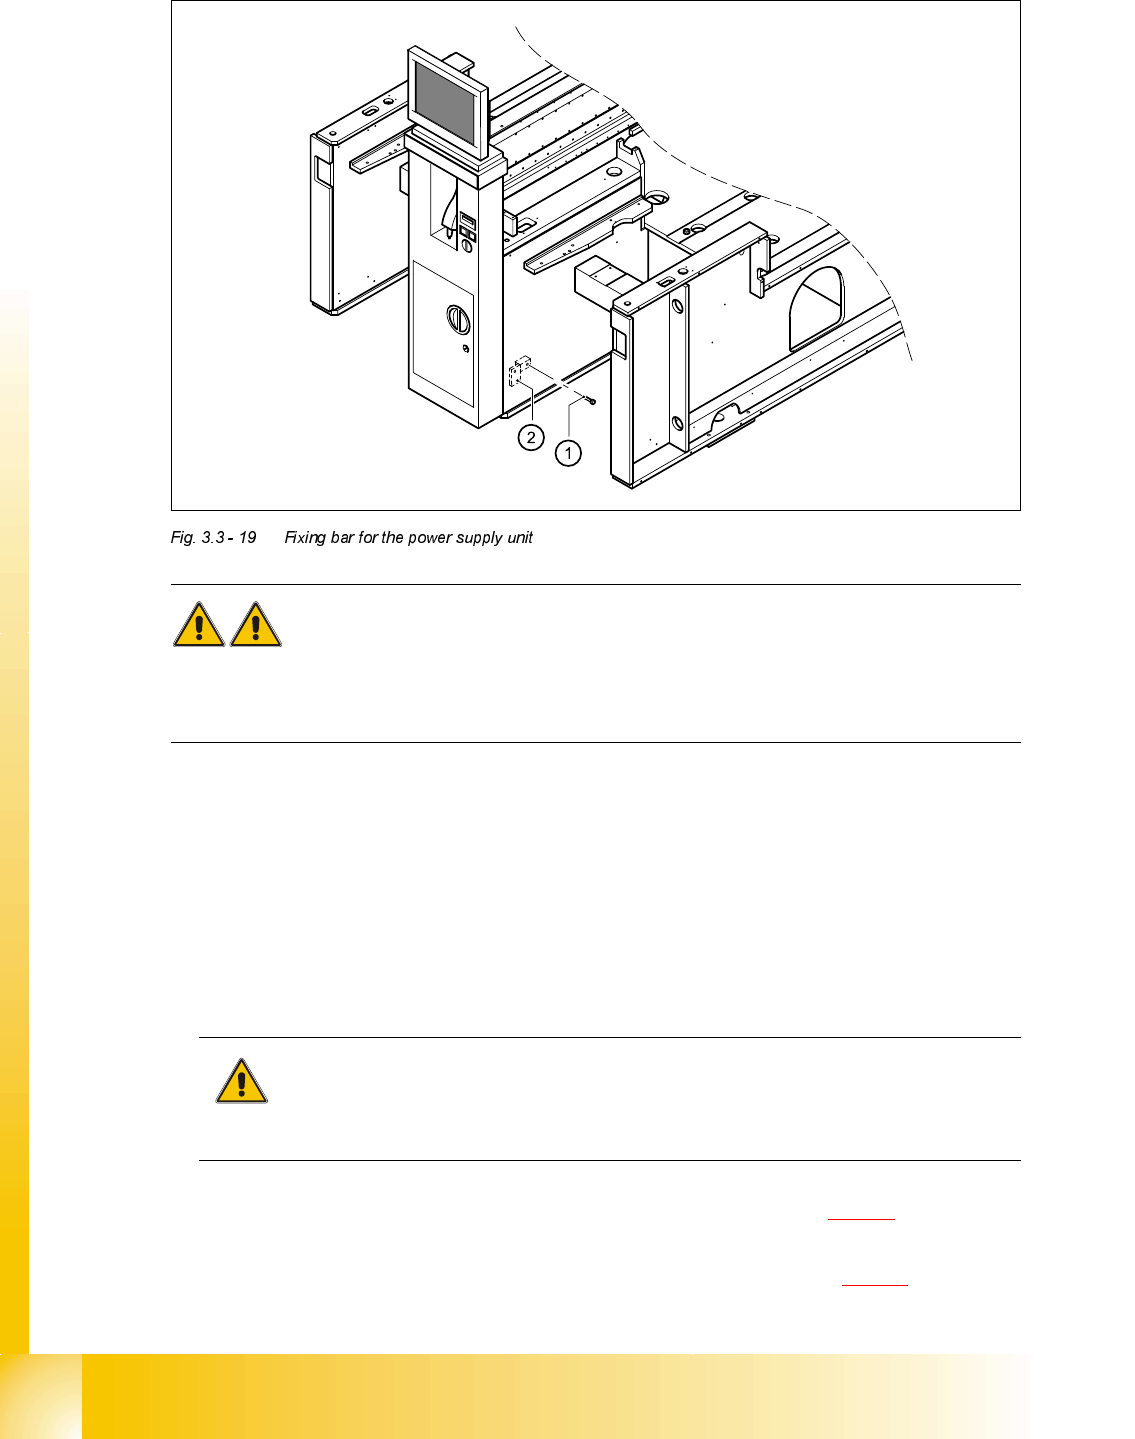
➠ Loosen the M8 hexagon socket-head screw (1) and remove the fixing bar (2).
➠ Push the forks of the fork-lift truck beneath the power supply unit.
➠ Raise the forks until the power supply unit is resting on them.
➠ Push the power supply unit until the entire weight is resting on the forks. To do this, one person
should hold the truck in position while the other person pushes the power supply unit onto the
forks.
CAUTION
Ensure that the cables do not become trapped otherwise the insulation will be damaged.
➠ Detach the terminal wires from the primary terminal strip (item 1 in Fig. 3.3 - 20) one by one
and identify with adhesive labels.
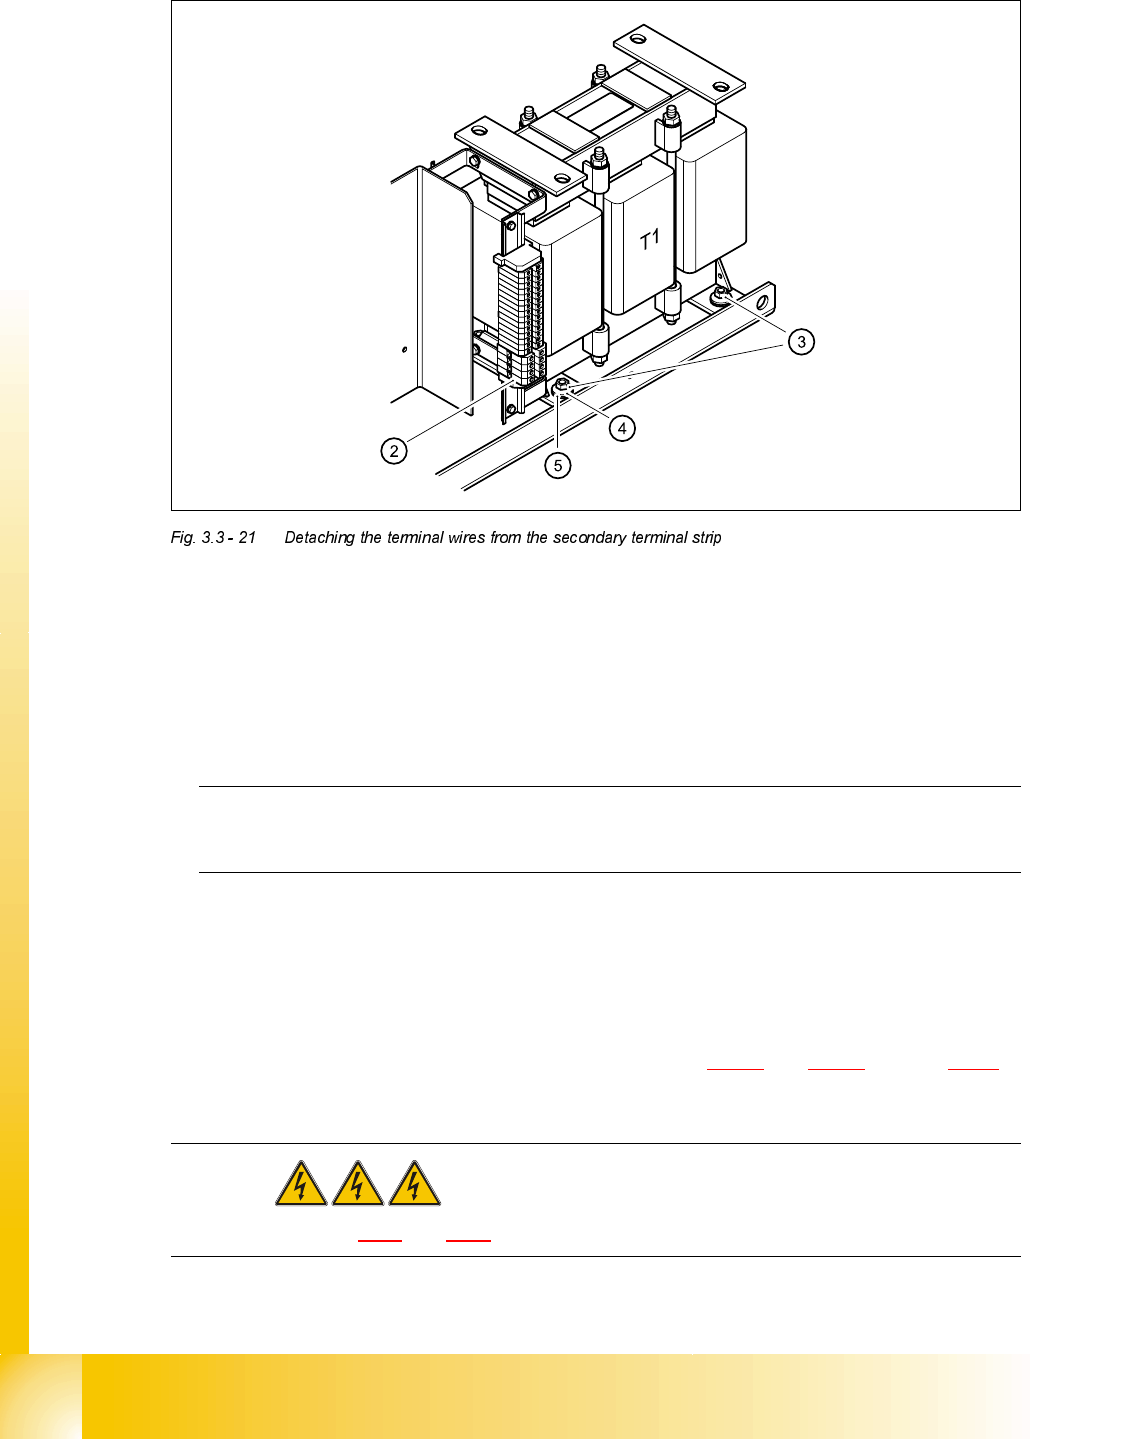
➠ Detach the terminal wires from the secondary terminal strip (item 2 in Fig. 3.3 - 21) one by one
and identify with adhesive labels.

Student Guide HS-50 Advanced II 07/2002 Edition
3 Power Supply
51
➠ Loosen the M8 hexagon nuts (item 3 in the Fig. 3.3 - 20 and 3.3 - 21).
➠ Remove the four plain washers (4) and four rubber washers (5) (see Figs. 3.3 - 20 and 3.3 -
21).
➠ Lift the transformer out of the unit.
WARNING The transformer is very heavy so it should either be lifted by two
people or by one person using a tripod with block and tackle.
07/2002 Edition Student Guide HS-50 Advanced II
3 Power Supply
52
)LWWLQJWKHWUDQVIRUPHU7
➠ Check that there are four rubber washers and four plain washers on the screw bolts on the bot-
tom of the unit.
➠ Place the transformer in the power supply unit.
➠ Place the four rubber washers (5) on the screw bolts.
PLEASE NOTE:
These rubber washers are important because they absorb noise and vibration.
➠ Attach the four plain washers (4).
➠ Use the four M8 hexagon nuts to fix the transformer T1 in place.
➠ Connect the terminal wires to the primary and secondary terminals.
➠ Switch the placement system on and use the digital voltmeter to measure the voltages on the
primary and secondary sides of the transformer (see Fig. 3.2 - 4
and 3.2 - 5 on page 3 - 18.
DANGER Switch off the placement system and disconnect from the power
supply (see sections 3.3.1 and 3.3.2).
➠ Push the power supply unit so that it is half-way in the placement system.