00197089-02_AI_EA-Verl_X-Serie_S_de_en - 第67页
Installation 3.2.8 Output Conveyor – Conveyor Side D Overview of Conversion (Before/After) Extension Input/Output Conveyor and Hand Guard Ein-/Ausga beband verlängerung und Eingreifschutz 67 3.2.8 3 . 2 . 8 O u t p u t C…
Installation
Overview of Conversion (Before/After) 3.2.7 Output Conveyor – Conveyor Side C
66 Extension Input/Output Conveyor and Hand Guard Ein-/
3.2.7
3.2.7 Output Conveyor – Conveyor Side C
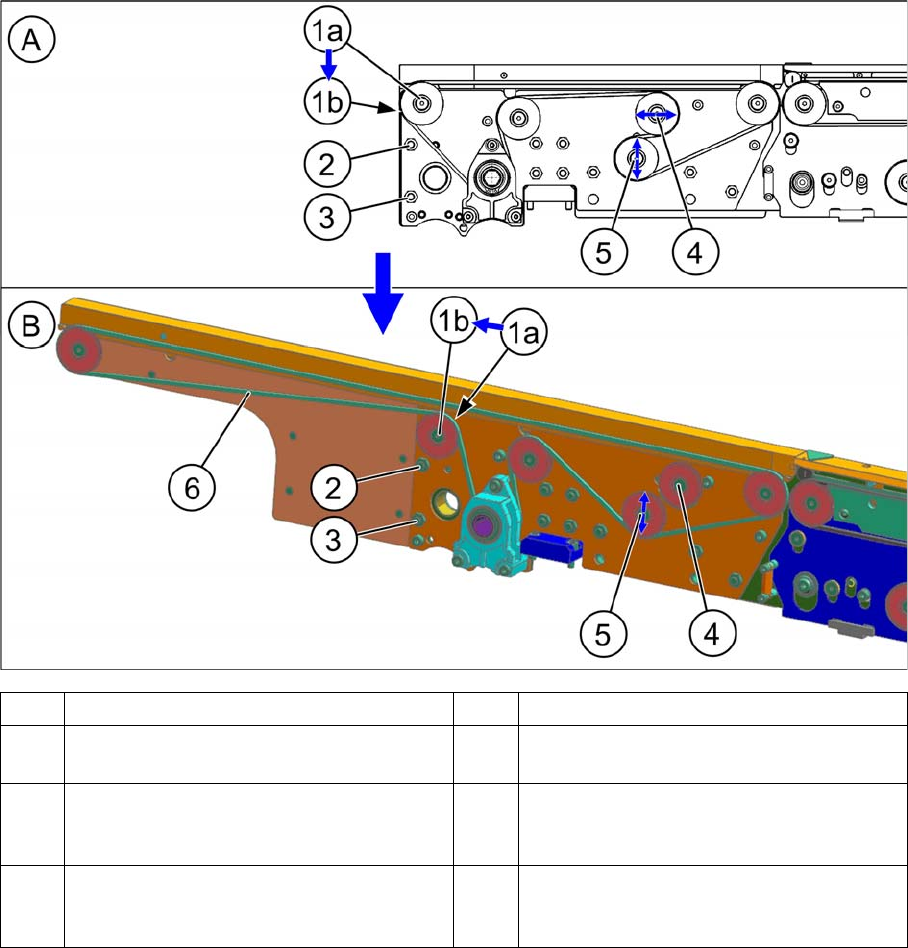
Output Conveyor – Conveyor Side C
A Conveyor side without extension B Conveyor side with extension
1 The idler pulley is converted from (1a) to
(1b).
2 The screw M5x16 (TX25) with nut remains.
3 The screw M5x16 (TX25) with nut remains. 4 The old idler is no longer required. It is
moved over to the machine center. It must
not touch the new idler (5).
5 This deflection pulley already present takes
on the job of the idler. (No conversion re-
quired, just loosen)
6 Measurement point for belt tension: 81+-
8Hz
Installation
3.2.8 Output Conveyor – Conveyor Side D Overview of Conversion (Before/After)
Extension Input/Output Conveyor and Hand Guard Ein-/Ausgabebandverlängerung und Eingreifschutz 67
3.2.8
3.2.8 Output Conveyor – Conveyor Side D
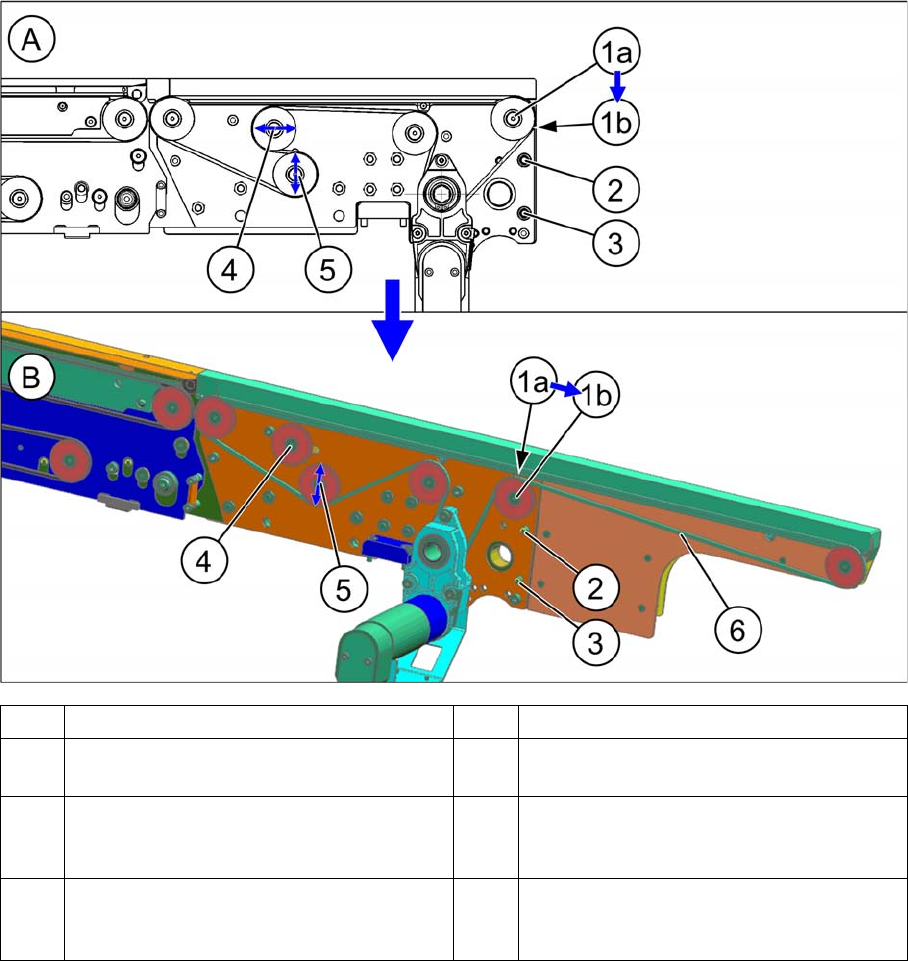
Output Conveyor – Conveyor Side D
A Conveyor side without extension B Conveyor side with extension
1 The idler pulley is converted from (1a) to
(1b).
2 The screw M5x16 (TX25) with nut remains.
3 The screw M5x16 (TX25) with nut remains. 4 The old idler is no longer required. It is
moved over to the machine center. It must
not touch the new idler (5).
5 This deflection pulley already present takes
on the job of the idler. (No conversion re-
quired, just loosen)
6 Measurement point for belt tension: 81+-
8Hz
Installation
Preparatory Steps 3.2.8 Output Conveyor – Conveyor Side D
68 Extension Input/Output Conveyor and Hand Guard Ein-/
3.3
3.3 Preparatory Steps
Preparatory Steps
► Use the software to move the conveyor sides into the position which allows you best access. Alter-
natively, you can also loosen the conveyor side clamps on the dual conveyor. (see service manual)
► Switch off the machine, disconnect it from the power supply and secure it to prevent unauthorized
reactivation. Observe the instructions in section "1.2 Preparatory Work..." [ ➙ 47].
► To improve access to the single conveyor, you may want to loosen the screws fastening the fixed
side and move this to the center of the conveyor.
NOTICE
Tip
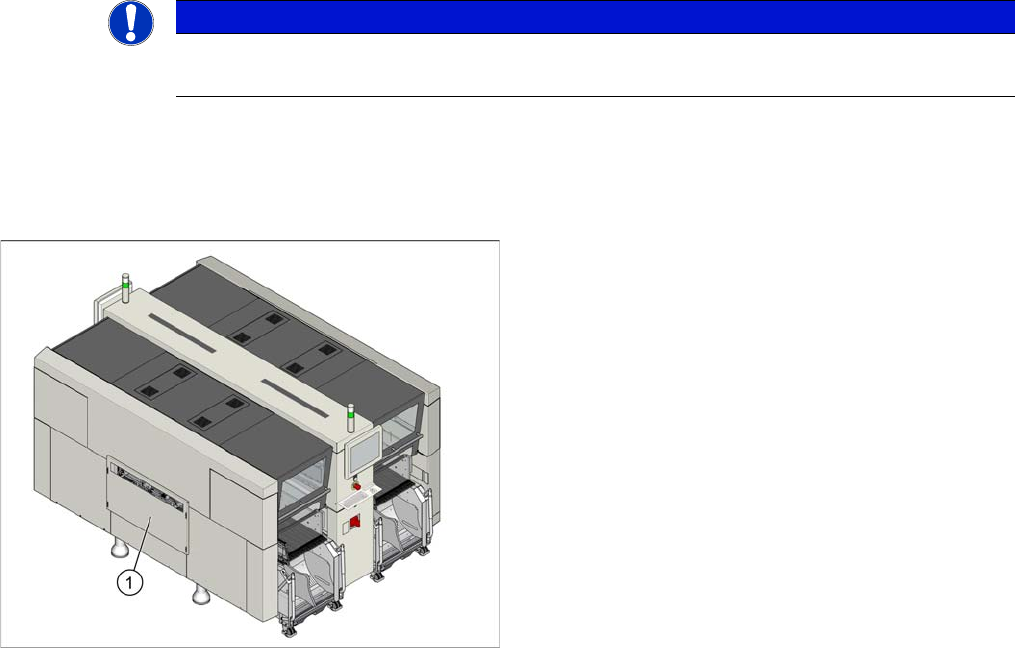
Conveyor configuration: 268 mm outer, both lanes approx. 200 mm width
► Dismantle any standard hand guard (1). Loosen the
4 fastening screws to do this. Then remove the bolts
behind.