ASM_MANUAL_TYPHOON_USC_en_100620_online.PDFA - 第41页
3 TYPHOON UNDER STENCIL CLEANER 3.8 ADJUSTMENTS AND SETTINGS STANDALONE MANUAL TYPHOON UNDER STENCIL CLEANER 06/2020 41 31. At the right-hand end of the USC assembly, use a 4mm Allen key to loosen end bracket fasteners (…
3 TYPHOON UNDER STENCIL CLEANER
3.8 ADJUSTMENTS AND SETTINGS
40 STANDALONE MANUAL TYPHOON UNDER STENCIL CLEANER 06/2020
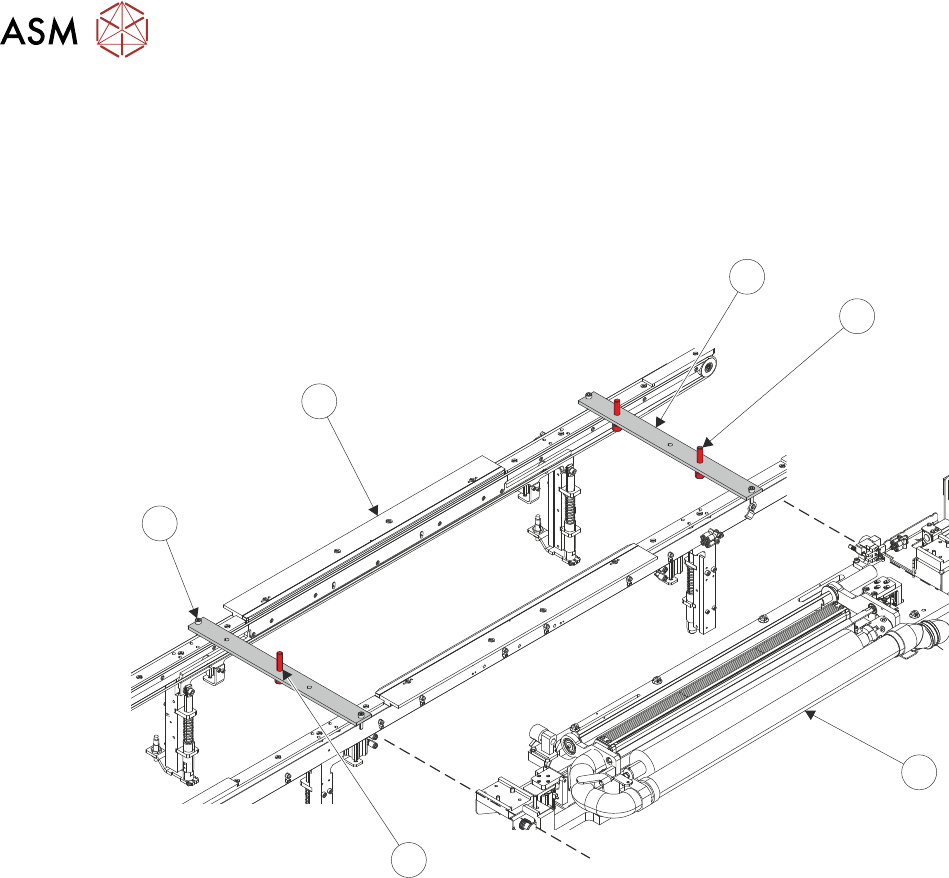
29. Place setting jig rails (1) across the machine's transport rails (6), as close to being inline with
the edges of the USC assembly (3) as possible. The setting rail position screws (5) should
hang just on the outside of the transport rails. The left-hand setting rail has one central lifting
screw (4), the right-hand setting rail has two lifting screws (2).
NOTE
The position of the setting jig rails differs depending on the variant of rail fitted.
1
2
3
4
5
6
30. Remove the plenum chamber (see 3.7.2.1 "Plenum Chamber Removal (Standard
USC)" [}33]).
3 TYPHOON UNDER STENCIL CLEANER
3.8 ADJUSTMENTS AND SETTINGS
STANDALONE MANUAL TYPHOON UNDER STENCIL CLEANER 06/2020 41
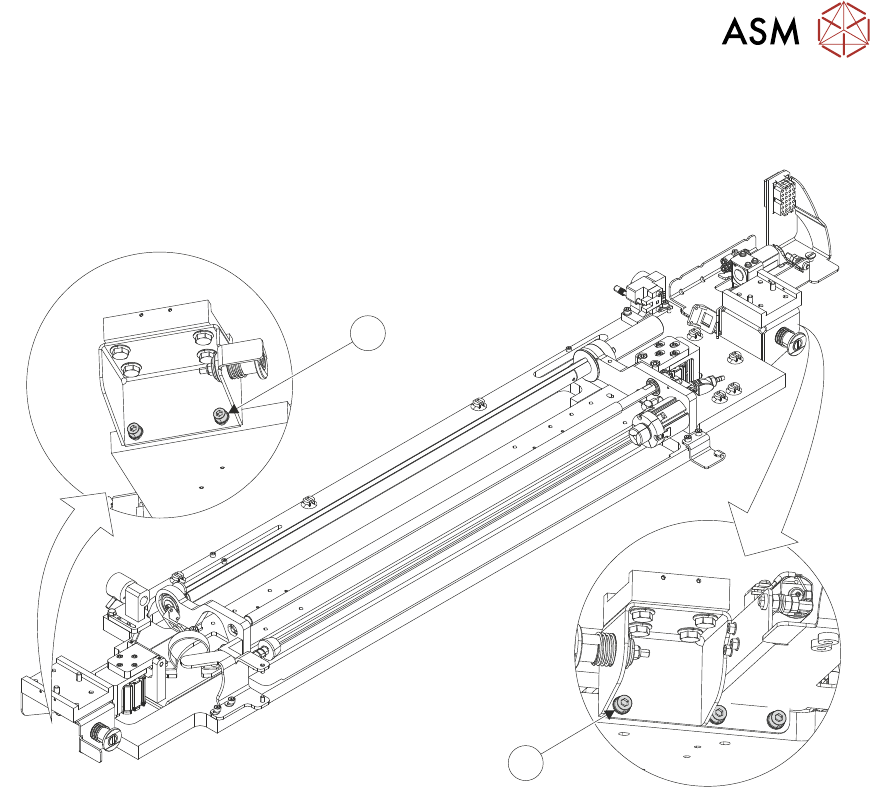
31. At the right-hand end of the USC assembly, use a 4mm Allen key to loosen end bracket
fasteners (8).
7
8
32. At the left-hand end of the USC assembly, use a 4mm Allen key to loosen end bracket fasten-
ers (7).
3 TYPHOON UNDER STENCIL CLEANER
3.8 ADJUSTMENTS AND SETTINGS
42 STANDALONE MANUAL TYPHOON UNDER STENCIL CLEANER 06/2020
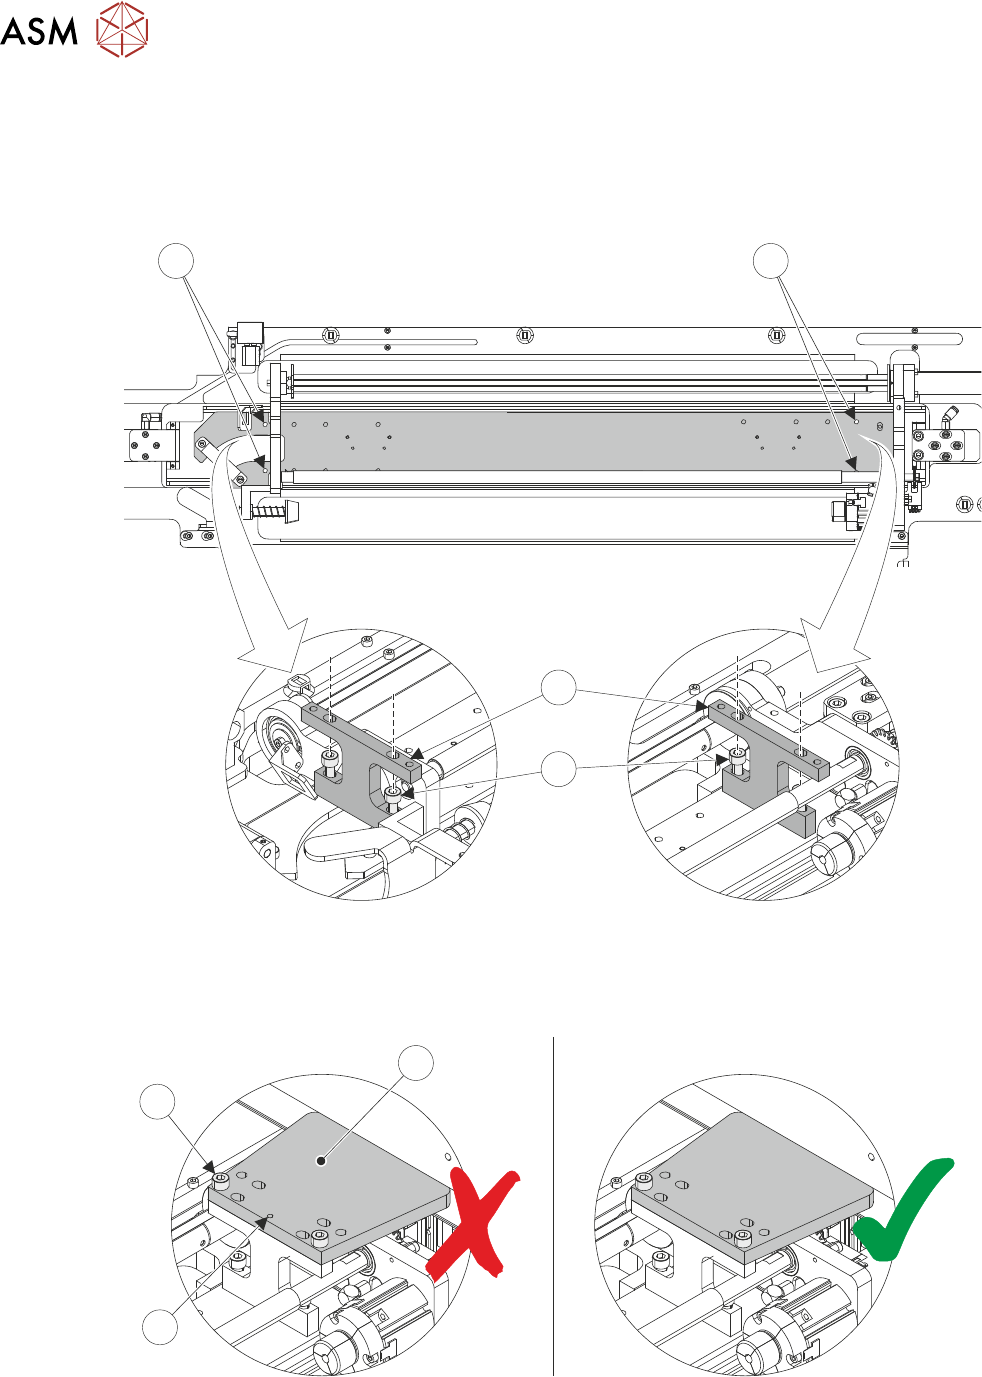
33. Using a 4mm Allen key and two M5 cap head screws (10), install a setting jig block (11) at the
left-hand end (12) of the USC assembly.
NOTE
The setting blocks (11) have extra holes in the top to make tightening the lower retaining
screws (6) easier.
9
12
11
10
34. Repeat Step 33 for the right-hand end (9) of the USC assembly.
35. Using a 4mm Allen key and two M5 cap head screws (15), install a setting jig plate (13) onto
the right-hand setting jig block. Ensure the jig plate datum mark (14) is on the underside.
13
14
15