00198481-01_Technical_Training_E_by_DEK_EN - 第20页
3 Setting up the Machine Room for Your Sketches and Notes 20 Technical Training E by DEK 12/2017

3 Setting up the Machine
Room for Your Sketches and Notes
Technical Training E by DEK 12/2017 19

3 Setting up the Machine
Room for Your Sketches and Notes
20 Technical Training E by DEK 12/2017
4 Conveyor System
4.1 Main Overview
Technical Training E by DEK 12/2017 21
4 Conveyor System
4.1 Main Overview
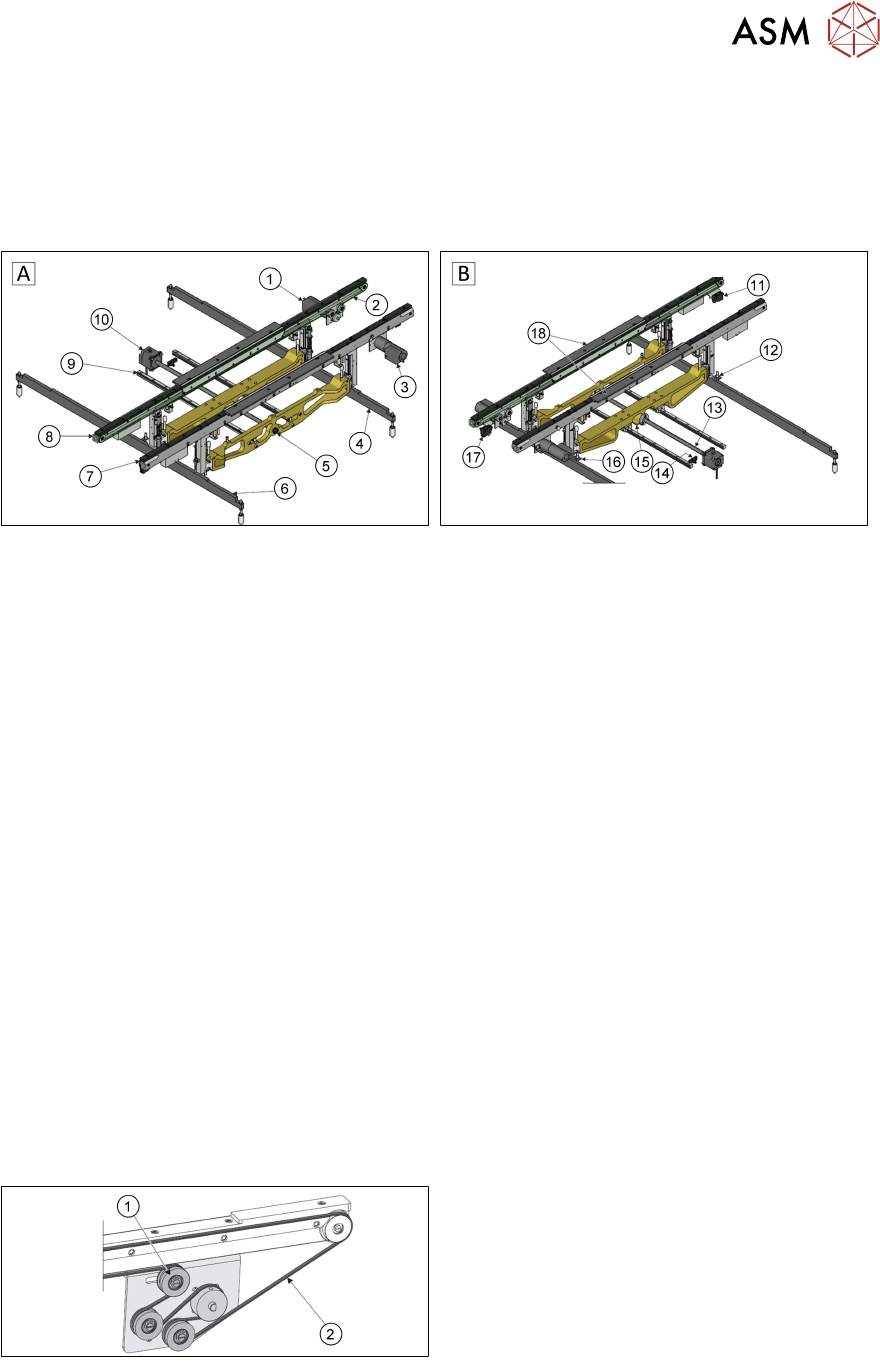
Transport Rail Style 2
A - View on Front B - View on Rear
1. Rear Transport Belt Drive Motor 11. Board at Left Sensor
2. Transport Belt (2 positions) 12. Left Rail Lift Sensor
3. Front Transport Belt Drive Motor 13. Rail Width Leadscrew
4. Right Hand Clatter Bar 14. Moving Rail Home Sensor
5. Manual Rail Adjuster 15. Moving Rail Home Vane
6. Left Hand Clatter Bar 16. Right Rail Lift Sensor
7. Fixed Front Rail 17. Board at Right Sensor
8. Moving Rear Rail 18. Board Clamps
9. Moving Rear Rail Linear Guide (2 positions)
10. Rail Width Drive Motor
4.2 Conveyor Functionality
The system has a programmable width conveyor system, set by the board width parameter, in the
product file. The rails transport the board, using belts, from the upline machine into the printer,
where the board is positioned, clamped, and printed. After printing, the board is transferred, using
the same belts, to the downline machine.The heavyboard option is available for heavy substrates.
This can transport substrates up to 6kg and for this purpose is equipped with special bearings and
transport belts (flat belts).
An option is available for heavy boards; the transport rails can transport boards weighing up to 6kg.
This is achieved using an extra drive pulley on each rail and flat profiled transport belts.
1. Tension pulley
2. Flat profiled transport belt