晶圆测试说明书Cascade-11861-6-Manual.pdf - 第52页
28 • Summit 11K/12K Probe Station User’ s Guide 1. Unbolt (from underneath the pall et) the (4) bolts holding the probe station to the bottom pallet ( fig. 12 ). 2. Use the forklift to position the probe station ne xt to…
Chapter 3: Installing •
27
UNPACK
To unpack your probe station
1. Your probe station weighs approximately 163 kg (360 lb.) by itself. You
received two or more crates that together weigh up to 272 kg (600 lb.).
Position the crates as close as possible to your work area using a forklift
(minimum 272 kg or 600 lb. capacity).
2. Cut the bands holding the crates together. Remove the top crate and set it on
the floor.
3. Your probe station is bolted to a pallet, and then a crate is bolted over the
station. Unbolt (six bolts); lift off the wooden top and set it on the floor.
4. Unpack both crates and check the parts against the packing list.
5. Unbolt the crate sides (eight bolts) and lift them off the station. At this point,
the probe station is still bolted to the bottom pallet.
6. Remove the probe station's plastic vapor barrier so you can see the probe
station.
7. Screw in the lift handles (two on each side). Note that the front handles may
not screw in all the way (fig. 11).
Fig. 11. Lifting handles.
28
• Summit 11K/12K Probe Station User’s Guide
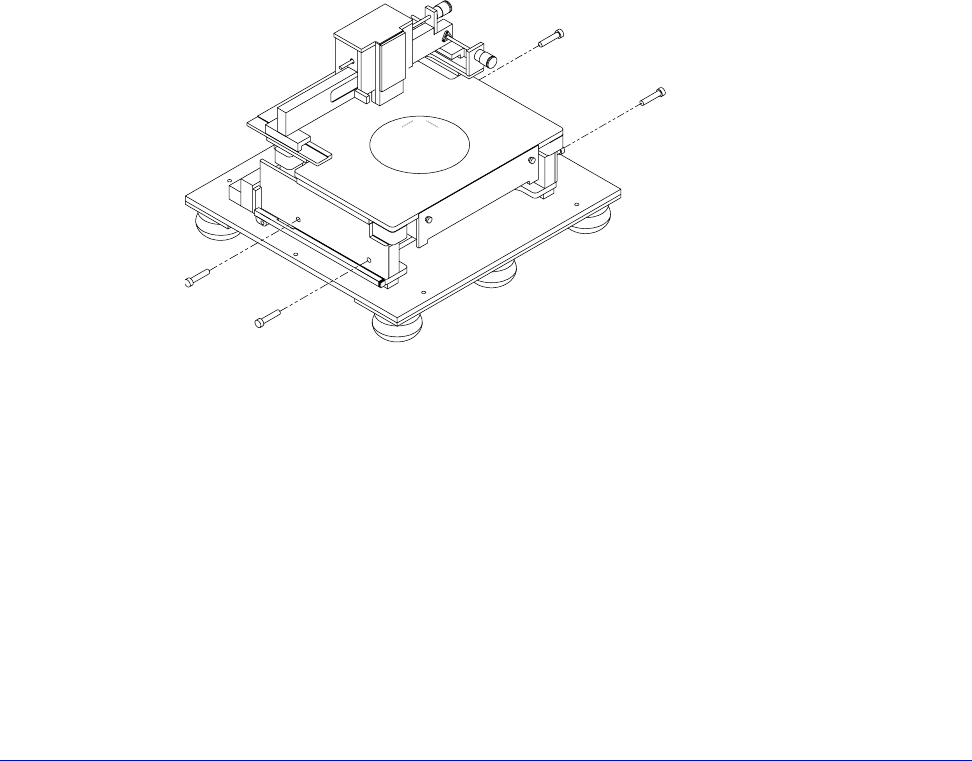
1. Unbolt (from underneath the pallet) the (4) bolts holding the probe station to
the bottom pallet (fig. 12).
2. Use the forklift to position the probe station next to, and at the same height
as, your workbench.
3. Four people should lift and slide the probe station onto the workbench.
4. Once the station is positioned, you can unscrew the lift handles and cover the
screw holes with the black snap-in covers.
WARNING
The probe station weighs 163 kg (360 lb). Prevent injuries by having at least four
people move it.
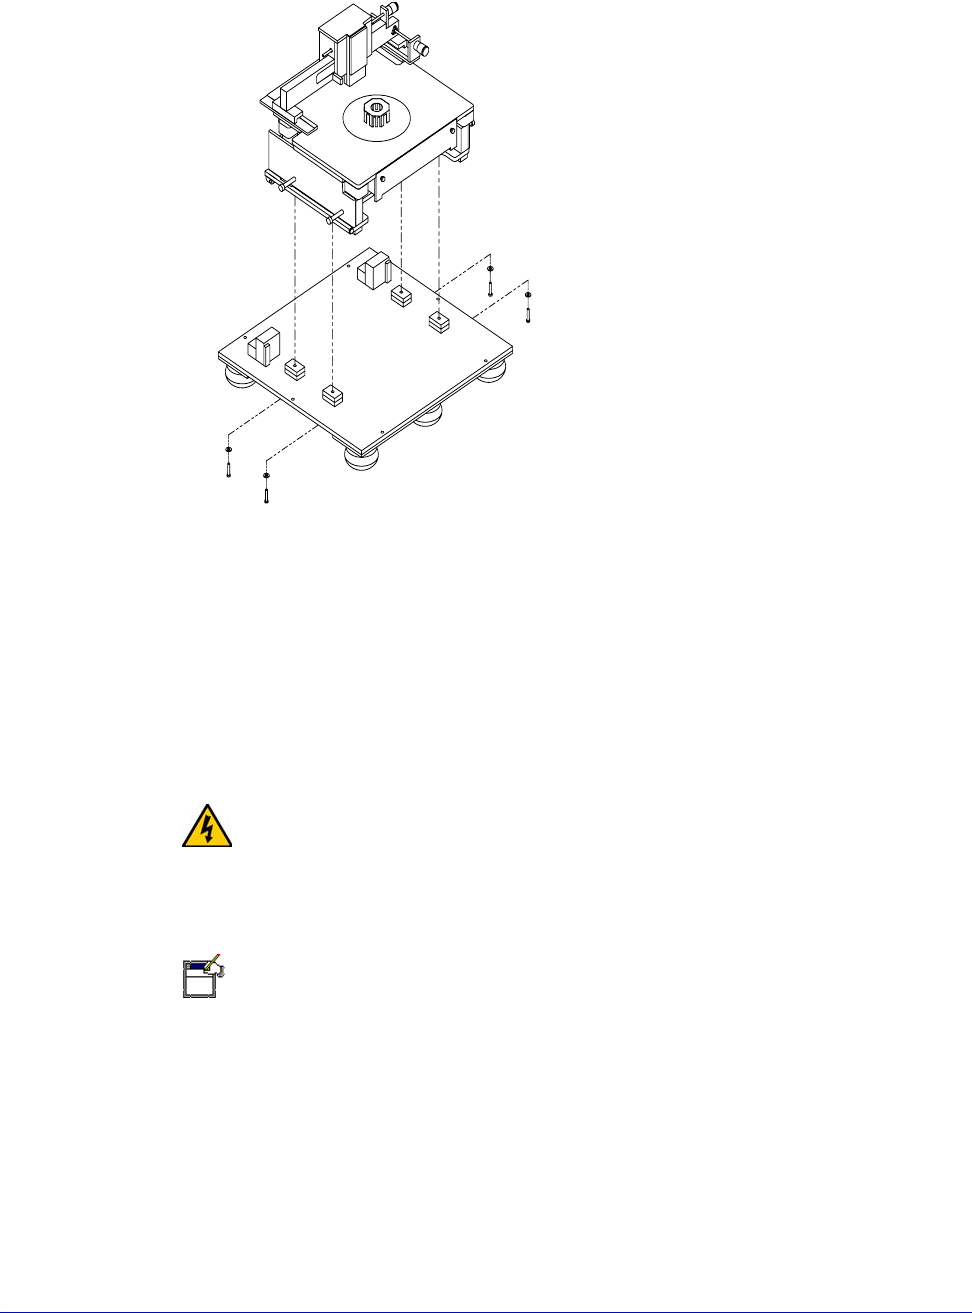
REMOVE AND SAVE SHIPPING RESTRAINTS
NOTE
Remove the shipping restraint screws with a 9/64-inch hex wrench that was
packed with the station.
Save the shipping restraints. If Cascade’s Customer Service requests that you
return the station, you will need to put the shipping restraints back into position.
To remove the roll-out stage shipping restraints
1. Turn the knobs inward and open the door (fig. 13).
Fig. 12. Hold-down bolts.
Chapter 3: Installing •
29
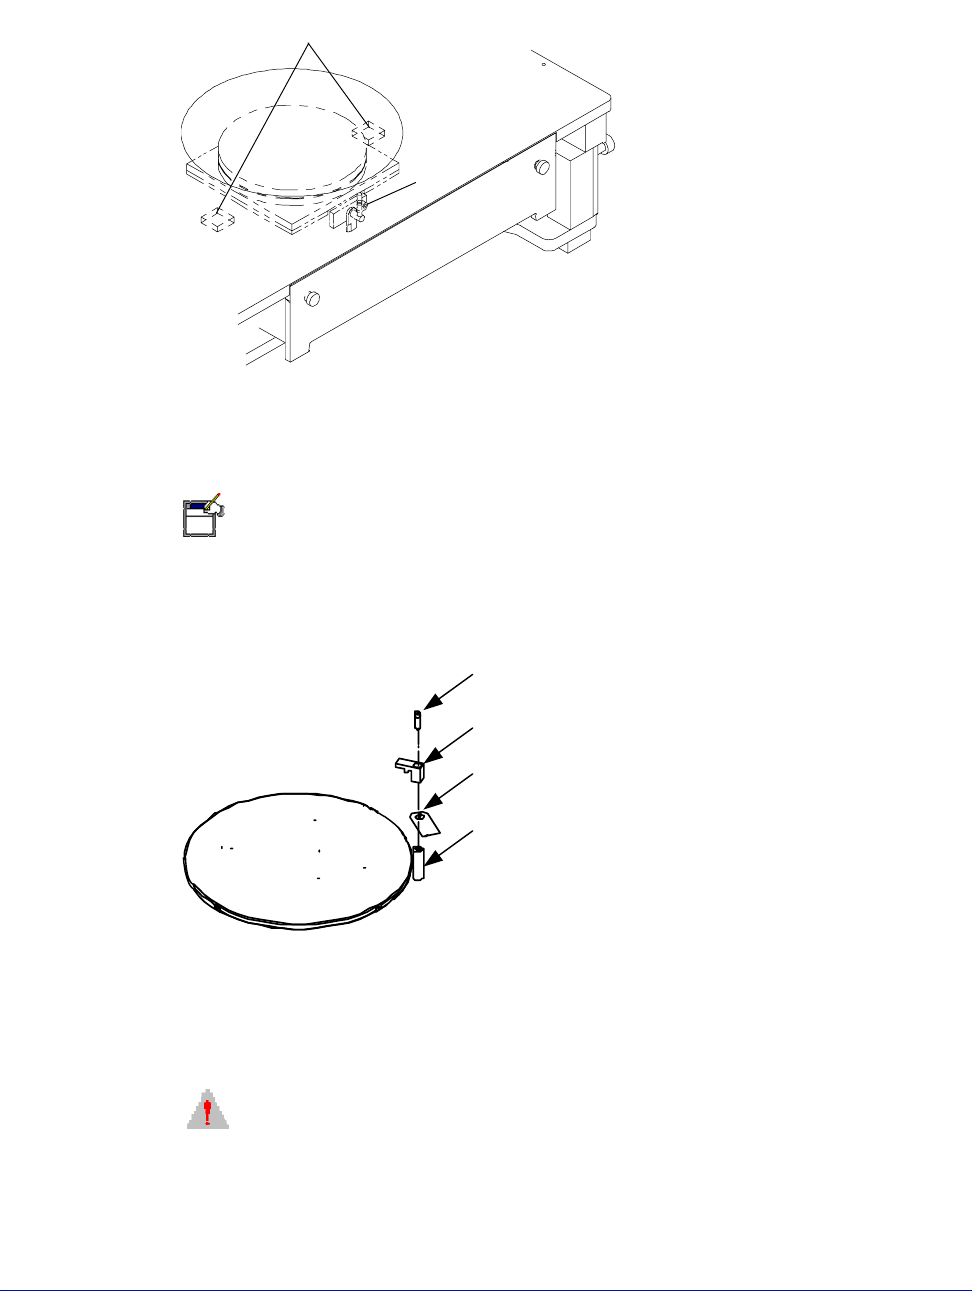
2. Remove the #8 screw from the roll-out stage and remove the two foam blocks
between the sliding plates.
To remove the GT chuck shipping restraints
NOTE
High temperature thermal (HT) chucks have similar shipping restraints (marked
with red tag).
1. Use a 7/64-inch hex wrench to remove the restraints.
2. Save all parts.
To remove the platen lift handle shipping restraint
1. Remove the #8 screw on the lift handle (marked with red tag).
CAUTION
Do not raise the platen lift handle until the following second step is completed.
Fig. 13. Shipping restraints between the sliding plates and roll-out stage.
foam blocks inside the microchamber
between the sliding plates and
the rollout stage (2)
#8 screw
Fig. 14. High temperature chuck shipping restraints.
Bracket, top
Bracket, bottom
Bolt
Shipping bolt tag