PS288_OwnersMnl_PriorTo2009 - 第114页
Operation • Administrato r Functions 3—54 PS288 Owner’s Manual Figur e 3-71—Select Log File 2. The LogFile window— 2a) Information is displayed about the successful or un successful comple- tion of any operation of the P…

Operation • Administrator Functions
PS288 Owner’s Manual 3—53
System Maintenance
System maintenance is critical to maintaining high yields. Periodic cleaning,
adjustment and replacement of worn elements will ensure the best possible
performance. These periodic procedures are outlined in Chapter 5—Mainte-
nance and should be followed closely.
Careful system calibration is also critical to maintaining high yields. While
not normally required during steady operation, calibration of the PS288
should be checked anytime yields fall to unacceptable levels. See “Adjust-
ments, Calibrations, and Functional Tests” on page 5-29.
Process Errors
Finally, a number of process errors can result in reduced yield. While an
automated approach eliminates most human error during production, errors
in system setup or maintenance programs can result in reduced yield:
) Using old algorithms may affect programming yields. PS288 algo-
rithms are updated weekly at http://www.dataio.com/algorithms/ and
are available depending on your maintenance plan.
) Selecting the wrong part number in a job, thus using the wrong algo-
rithm.
) Changing programming parameters (sector protection, security
options, verify options, continuity testing, blank checking).
) Measuring yields too infrequently, so that a drop in yield rates is not
detected until a large number of devices have failed.
) Using the wrong data file.
) Socket abuse, such as digging failed devices out with sharp instru-
ments.
) Changing to second or third vendor source. Lower quality devices tend
to produce lower yields.
Monitor Daily Operation Logs
Daily operation logs are saved for each operation that the PS288 performs.
As the operation is performed, its completion status is noted in the log for
statistical purposes, or for troubleshooting if necessary.
To view the daily operation logs:
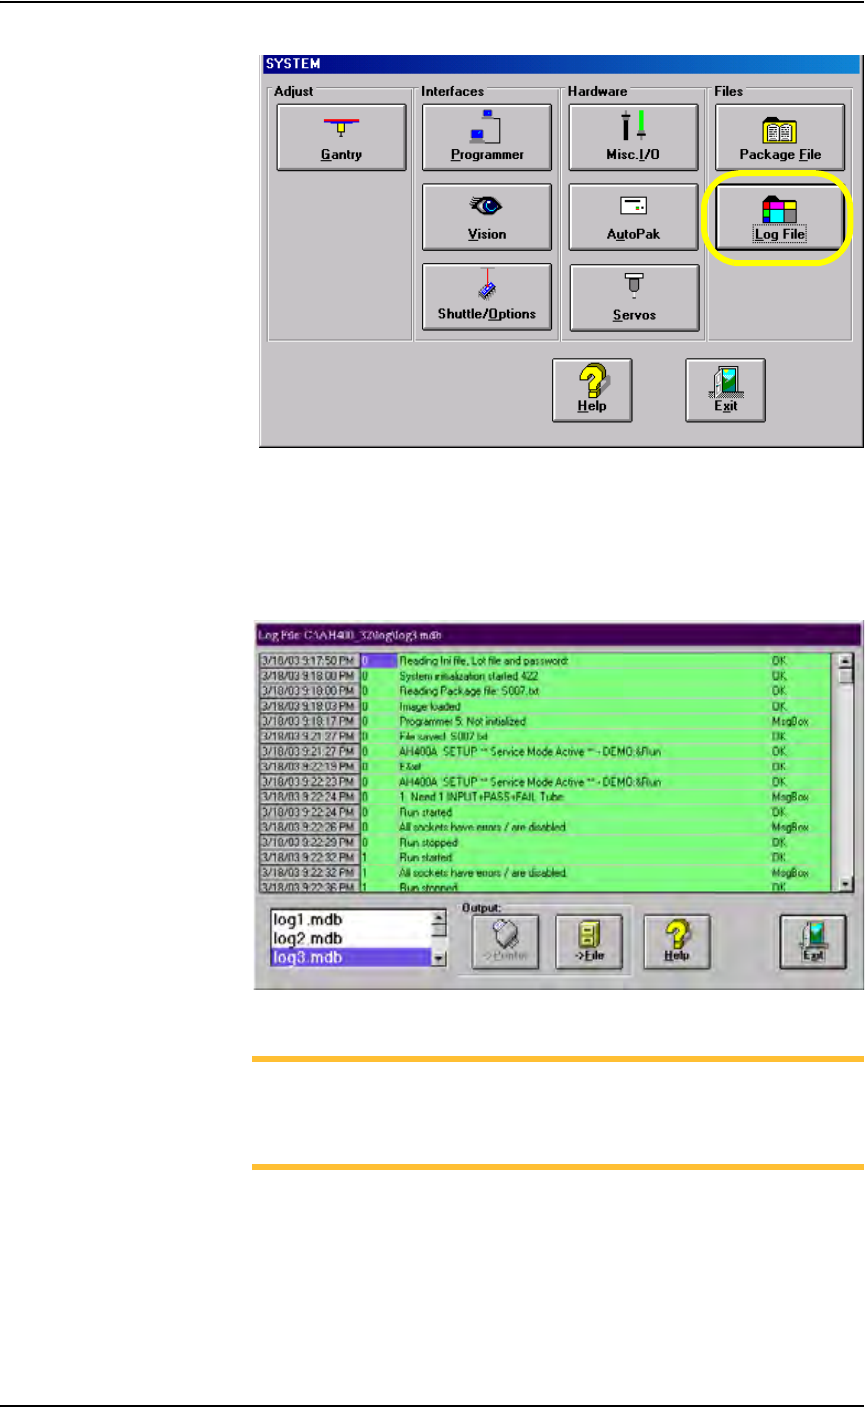
1. Prepare the system—
1a) On the Setup window, select System.
1b) From the System window, select Log File. See Figure 3-71.
Operation • Administrator Functions
3—54 PS288 Owner’s Manual
Figure 3-71—Select Log File
2. The LogFile window—
2a) Information is displayed about the successful or unsuccessful comple-
tion of any operation of the PS288.
2b) (Optional) View, print, or store daily operation logs to another location.
Figure 3-72—LogFile window
NOTE: The Log Files are named log1.mdb, log2.mdb, log3.mdb,
and so on up to log7.mdb. They correspond to the days of the week,
where log1.mdb is the Log File for Sunday, log2.mdb is the Log
File for Monday, and so on up to log7.mdb for Saturday.
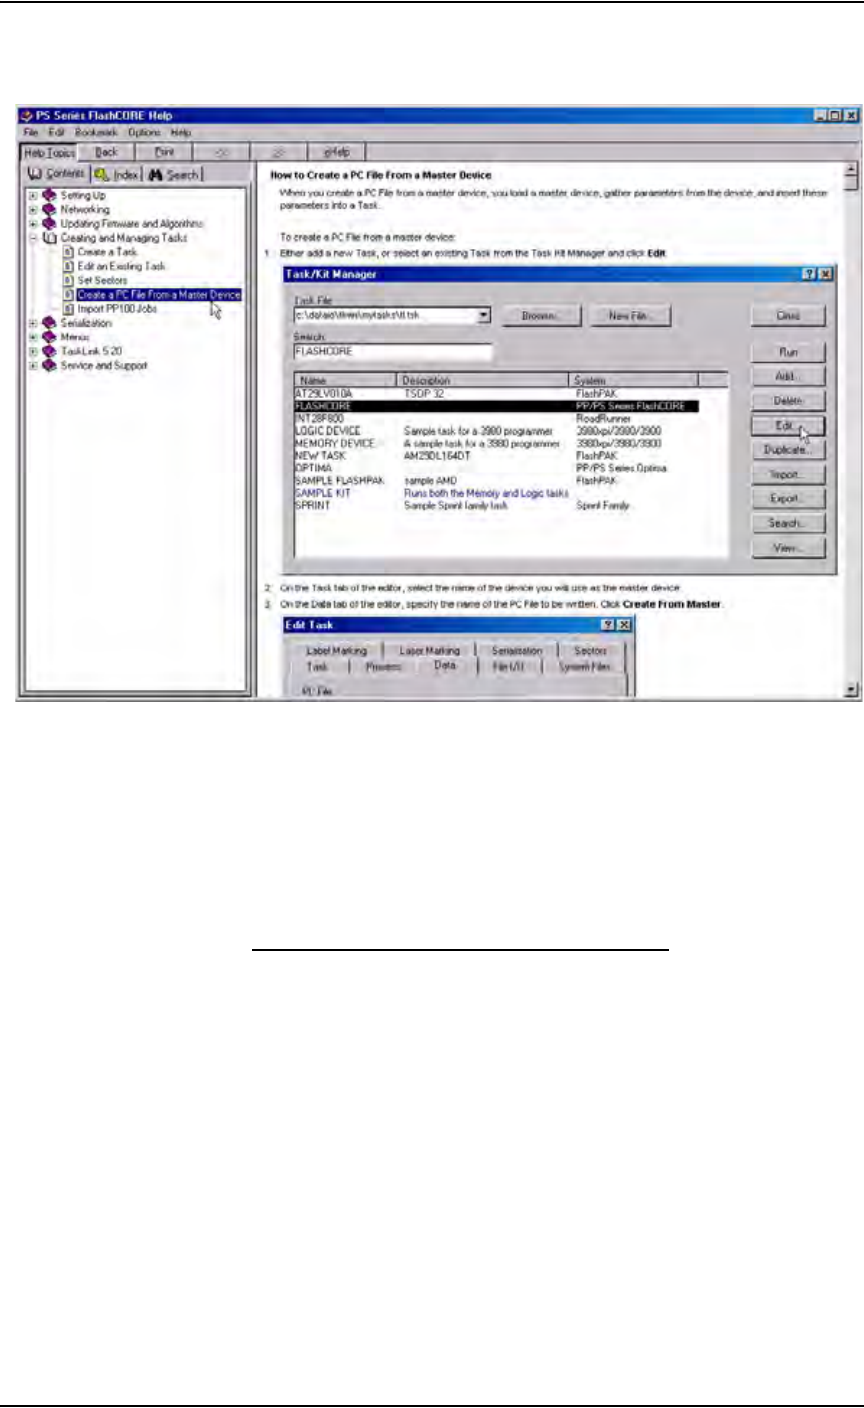
(Optional) Create a Data File from a Master Device
The PS288 can read data from a master device and create a data file (PC file)
that can then be used in programming jobs.
Operation • Administrator Functions
PS288 Owner’s Manual 3—55
For complete instructions on creating a data file from a master device, see
TaskLink online Help.
Figure 3-73—Procedure for creating PC file from master device
(Optional) Create a Laser Marking File
Laser graphics used to mark devices are generated using the WinMark Pro
software on the Laser Computer. Any style of marking (whether text-based,
graphic-based, or both) can be generated and used for marking devices. The
only limitation is the size of the device to be marked.
Creating an Image File for the Laser System
To create an image file for the laser system to use in laser marking devices:
1. Prepare the system—
1a) Select the Laser Computer. Copy and paste Template.mkh to create
Copy of Template.mkh.
1b) Rename Copy of Template.mkh to the name you gave the laser marking
(drawing) file in the job creation process, e.g. Ver7.mkh.
1c) Start WinMark Pro by double-clicking the WinMark icon on the desk-
top.
2. Load the file—
2a) From the menu at the top of the window, select File > Load.
2b) Select your laser marking file from the list that appears, or navigate to
the location and select the file.
2c) Click Open to load the file.