PS288_OwnersMnl_PriorTo2009 - 第120页
Operation • Administrato r Functions 3—60 PS288 Owner’s Manual Figur e 3-81—Synrad W inMa rk contr ol window 4c) Click St a r t – F 1 . The W inMark software is now waiti ng for commands from the Handler Computer to begi…
Operation • Administrator Functions
PS288 Owner’s Manual 3—59
2. Open WinMark Pro—
Start WinMark Pro by double-clicking the WinMark icon on the desk-
top.
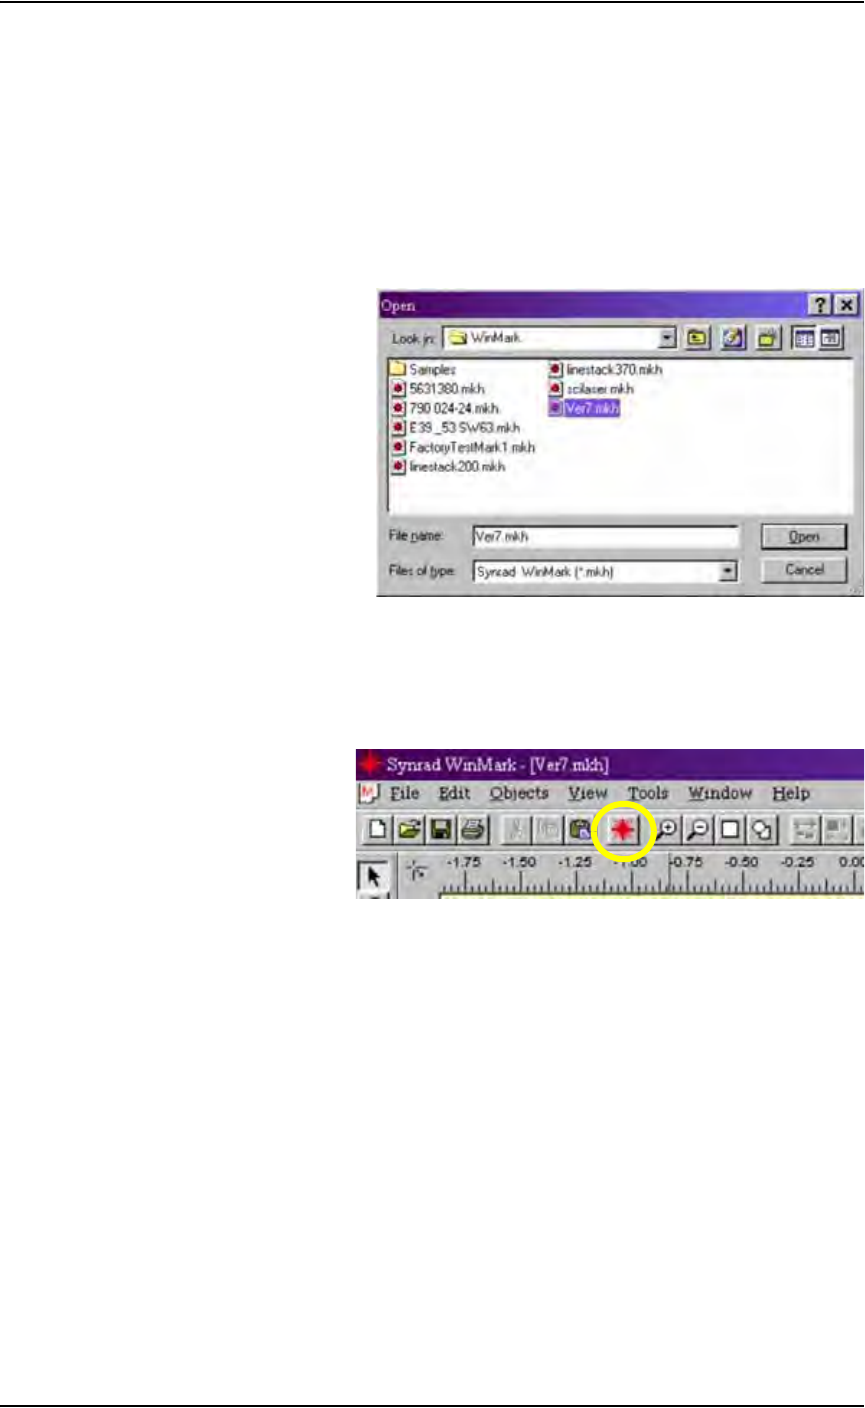
3. Load the file—
3a) From the menu at the top of the window, select File > Load.
3b) Select your laser marking file from the list that appears, or navigate to
the location and select the file.
3c) Click Open to load the file.
Figure 3-79—Selecting the laser marking file
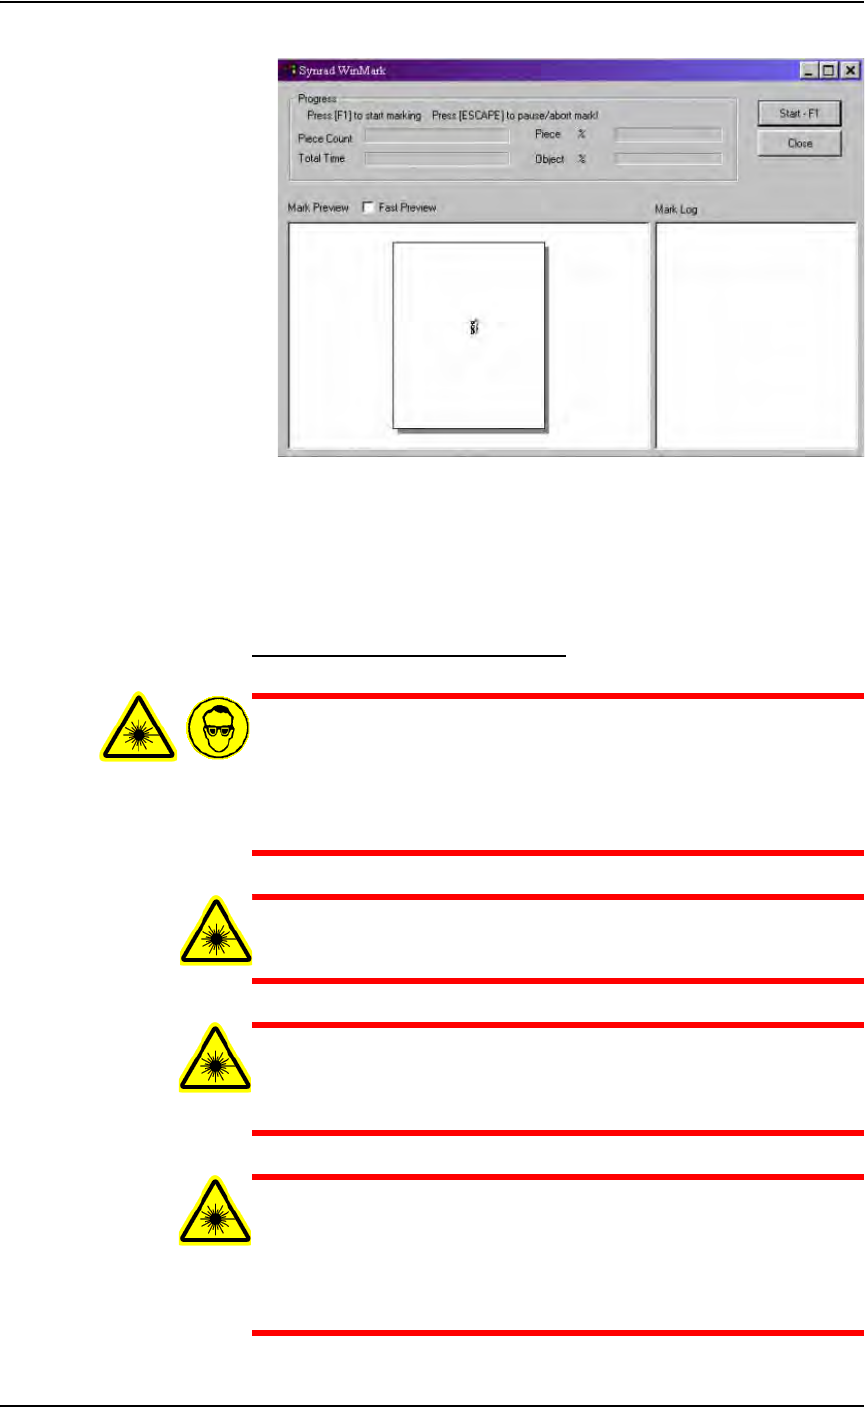
4. The Mark icon—
4a) From the tool bar at the top of the WinMark window, click the Mark
icon.
Figure 3-80—The Mark icon on the tool bar
4b) The Synrad WinMark control window opens and displays the marking
graphic that was created.
Operation • Administrator Functions
3—60 PS288 Owner’s Manual
Figure 3-81—Synrad WinMark control window
4c) Click Start–F1.
The WinMark software is now waiting for commands from the Handler
Computer to begin marking devices.
Verifying Proper Laser Operation
WARNING: Blindness hazard! Always wear eye protection when
the laser safety shields are open, such as during service. Direct or
diffuse laser radiation can damage eyes. Goggles must block
10.6 µm laser radiation. Goggles protect against scattered energy
but not against direct viewing of the laser beam or reflections
from metallic surfaces.
WARNING: Serious burn hazard! Direct or diffuse laser radia-
tion can cause serious burns. Keep hands and other parts of the
body out of the path of the laser bean when servicing.
WARNING: Toxic fume hazard! Laser marking generates vapors,
fumes, and particles that may be noxious, toxic, or even fatal.
Follow maintenance procedures on the fume extractor. Use
proper ventilation.
WARNING: The following procedures must NEVER be per-
formed with the laser safety shield removed from the laser mark-
ing assembly. The laser system is aligned at the factory for
optimal performance. If there are gross inaccuracies with the
laser marking system, a factory service person should be called to
service the machine.
Operation • Administrator Functions
PS288 Owner’s Manual 3—61
These tests will verify the proper operation of the laser marking system:
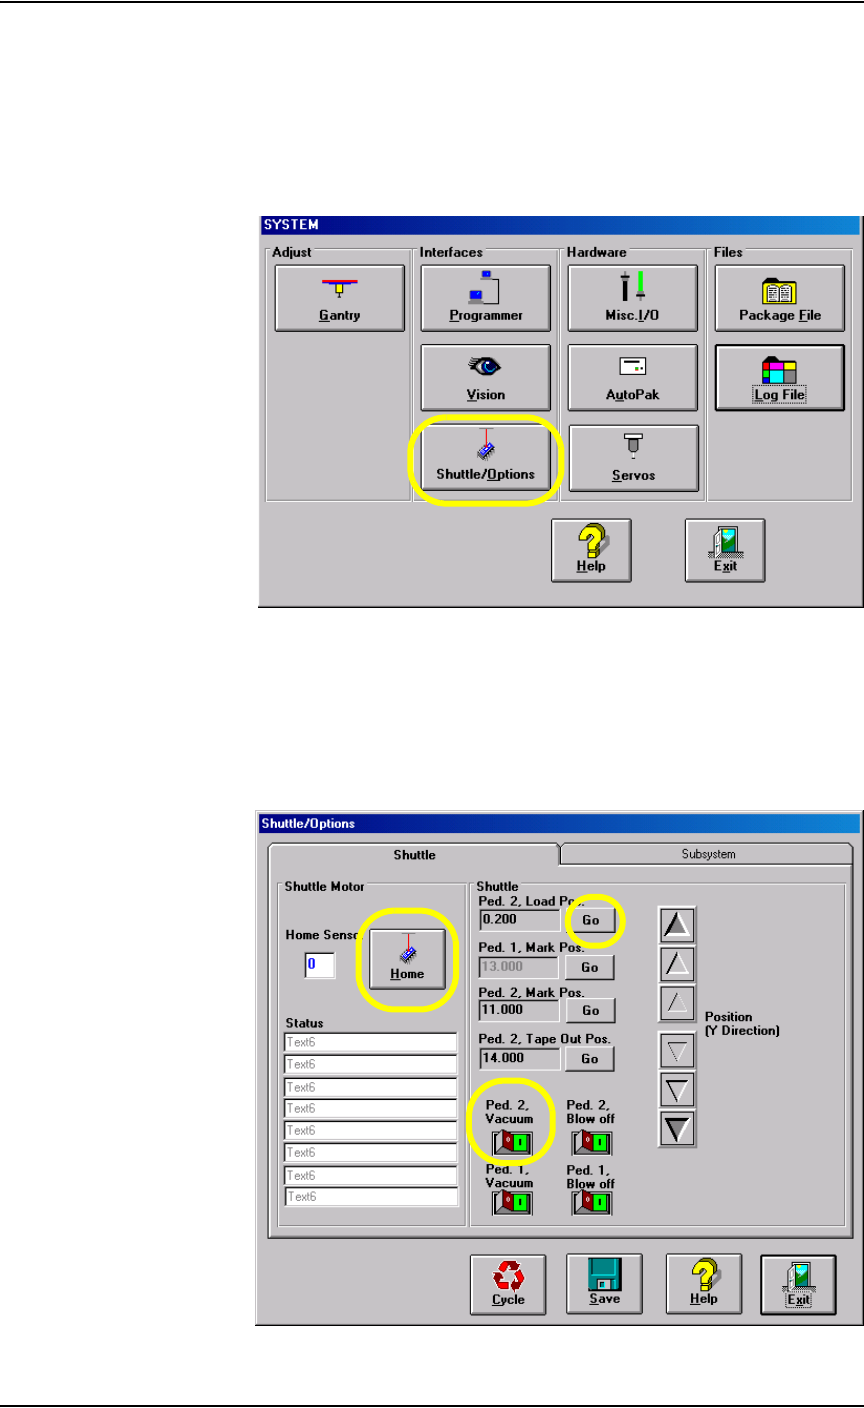
1. Prepare the system—
1a) Start the AH500 software.
1b) From the AH500 Setup window, click System.
1c) From the System window, select Shuttle/Options.
Figure 3-82—Select Shuttle/Options
2. Shuttle/Options window—
2a) On the Shuttle/Options window, click Home.
2b) Click Go next to Ped.2 Load Pos. to move the laser marking shuttle to
the front of the marking assembly.
2c) Click the Ped. 2 Vacuum switch to the ON position.
Figure 3-83—Shuttle tab