PS288_OwnersMnl_PriorTo2009 - 第121页
Operation • Administrator Functi ons PS288 Owner’s Manual 3—61 These tests will verify the proper op eration of the laser marking system: 1. Prepar e the system— 1a) Start the AH500 softw are. 1b) From the AH500 Setup wi…
Operation • Administrator Functions
3—60 PS288 Owner’s Manual
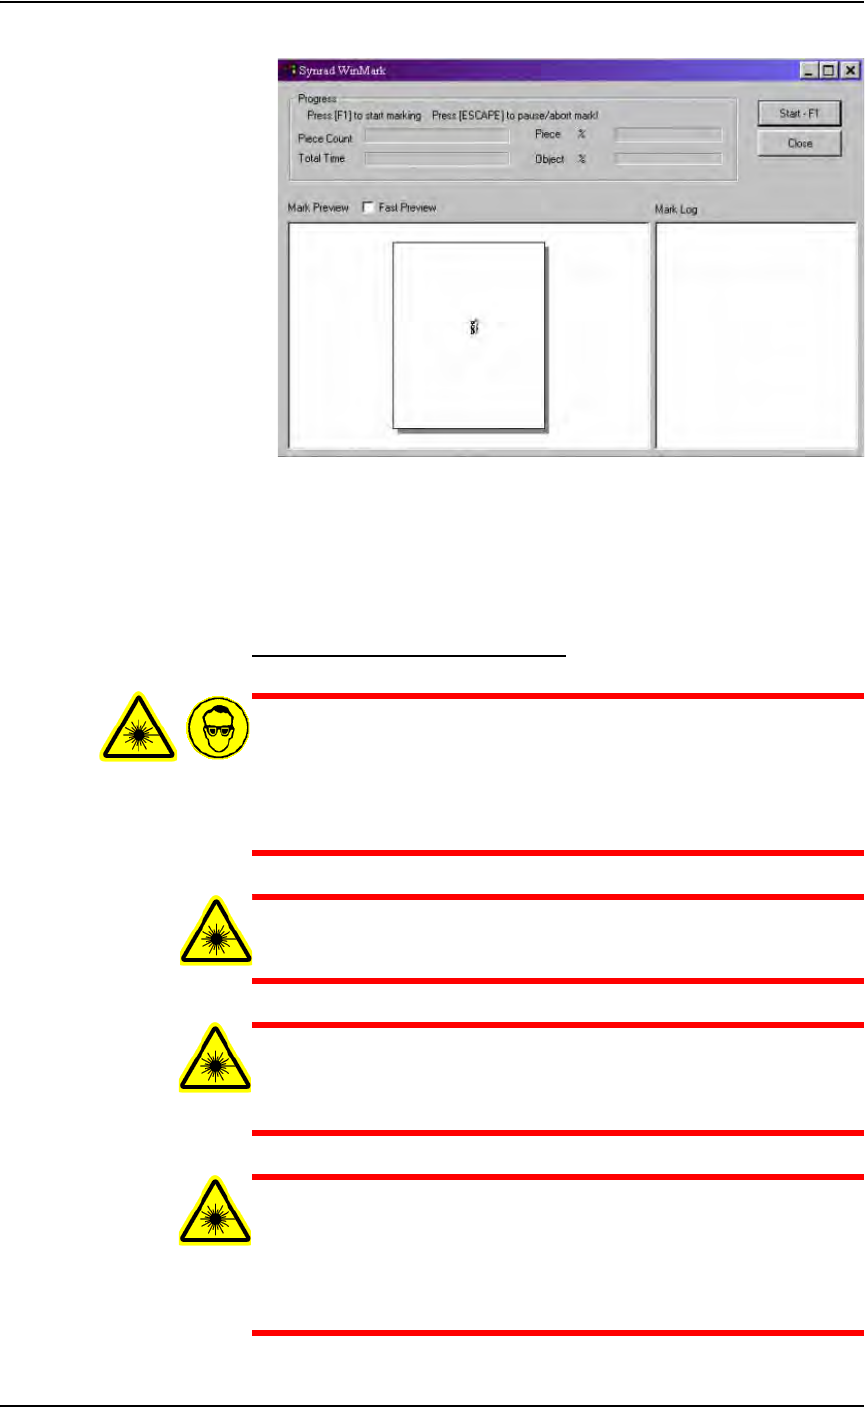
Figure 3-81—Synrad WinMark control window
4c) Click Start–F1.
The WinMark software is now waiting for commands from the Handler
Computer to begin marking devices.
Verifying Proper Laser Operation
WARNING: Blindness hazard! Always wear eye protection when
the laser safety shields are open, such as during service. Direct or
diffuse laser radiation can damage eyes. Goggles must block
10.6 µm laser radiation. Goggles protect against scattered energy
but not against direct viewing of the laser beam or reflections
from metallic surfaces.
WARNING: Serious burn hazard! Direct or diffuse laser radia-
tion can cause serious burns. Keep hands and other parts of the
body out of the path of the laser bean when servicing.
WARNING: Toxic fume hazard! Laser marking generates vapors,
fumes, and particles that may be noxious, toxic, or even fatal.
Follow maintenance procedures on the fume extractor. Use
proper ventilation.
WARNING: The following procedures must NEVER be per-
formed with the laser safety shield removed from the laser mark-
ing assembly. The laser system is aligned at the factory for
optimal performance. If there are gross inaccuracies with the
laser marking system, a factory service person should be called to
service the machine.
Operation • Administrator Functions
PS288 Owner’s Manual 3—61
These tests will verify the proper operation of the laser marking system:
1. Prepare the system—
1a) Start the AH500 software.
1b) From the AH500 Setup window, click System.
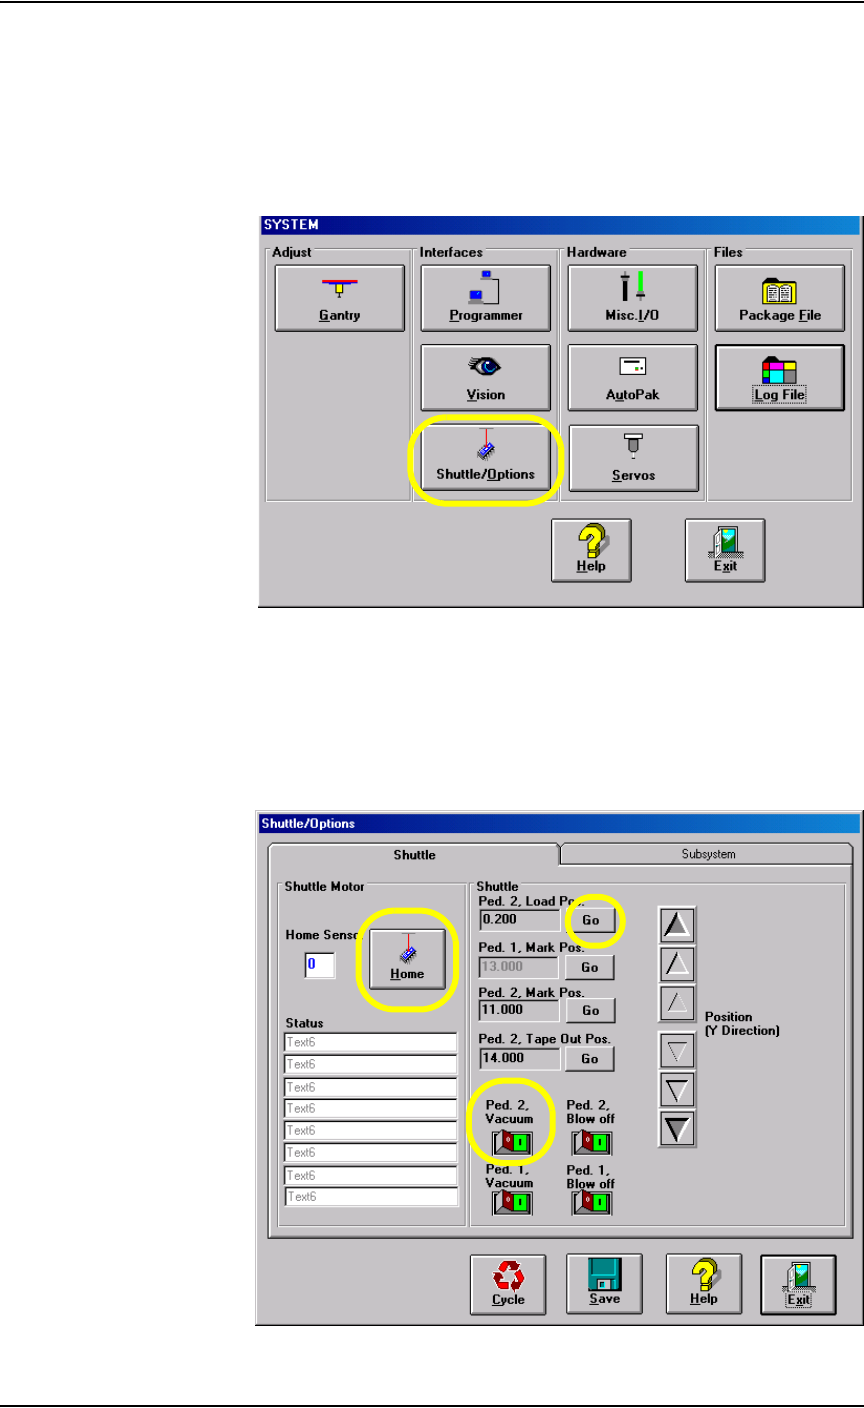
1c) From the System window, select Shuttle/Options.
Figure 3-82—Select Shuttle/Options
2. Shuttle/Options window—
2a) On the Shuttle/Options window, click Home.
2b) Click Go next to Ped.2 Load Pos. to move the laser marking shuttle to
the front of the marking assembly.
2c) Click the Ped. 2 Vacuum switch to the ON position.
Figure 3-83—Shuttle tab

Operation • Administrator Functions
3—62 PS288 Owner’s Manual
WARNING: Do not perform any of the following steps if the laser
safety shields have been removed. Extreme burns can occur to
anyone in the area of the laser if proper safety equipment is not in
place. If these procedures fail, contact Data I/O Customer Sup-
port to place a service call.
2d) Place a device to be marked on marking Pedestal 2, ensuring that it is
centered.
2e) Click Go next to Ped. 2 Mark Pos. to move the laser marking shuttle
to the marking position.
CAUTION: Never fire the laser without a device on the transport
pedestal. Damage to the pedestal O-rings can result.
2f) Select the Subsystem tab.
2g) Click Laser Marker to fire the laser.
2h) When the Done Marking message appears, click the Shuttle tab.
2i) On the Shuttle tab, click Go next to Ped. 2 Load Pos. to move the laser
shuttle to the front of the marking assembly.
3. Verify marking graphic—
3a) Verify that the marking graphic is centered on the device.
3b) If the graphic is not centered, adjust the value in the Ped. 2 Mark Pos.
field until properly centered.
NOTE: Manually placing the device on the transport pedestal will
not be as accurate as allowing the PNP head to place the device.
Manual placement should only be used as a rough alignment when
necessary. Check the laser marking on the devices after the PNP
head has had the opportunity to place them. Make fine adjustments
to the marking position measurements at this time.
4. Troubleshooting—
If the device is not marked, perform the following:
4a) Lay a sheet of paper in the laser bay over the pedestals and fire the
laser.
4b) If the image appears, move the pedestal to center the marking on the
device.
4c) If no image appears, verify power is applied to the laser marking
assembly and that it is turned on.
4d) If all appears correct, contact Data I/O Customer Support for further
assistance.