PS288_OwnersMnl_PriorTo2009 - 第140页
Maintenance • Preventive Maintenance PS288 Owner’s Manual 5—5 Check Automatic T ray Feede r 1. Feeder— 1a) Check the automatic tray feeder for damaged or broken parts. 1b) Contact Data I/O Customer Support if you find da…

Maintenance • Preventive Maintenance
5—4 PS288 Owner’s Manual
Procedures Performed Every Day
Clean and Check the Sockets on the Socket Module
1. Use clean, dry compressed air to remove dirt from the sockets.
2. Check the sockets for wear and replace if necessary.
NOTE: The socket replacement cycle depends upon the type of
socket used and the socket manufacturer. For the most current
replacement guidelines, refer to the documentation shipped with
your sockets.
Procedures Performed Every Week
Clean the General System
General cleaning should be performed on a weekly basis. General cleaning
includes but is not limited to the following:
1. Remove all dropped devices, debris, and other manufacturing materials
from all working areas.
2. Remove all devices and manufacturing materials that may have fallen
inside the system.
3. Use dry compressed air to remove all dust and debris from the table
surface, under the machine, and from all other visible areas.
4. Dust the safety shields, inside and outside, with an antistatic cleaner.
5. Wipe the top and side skins to remove grease, fingerprints, and dust.
6. Dust the top surfaces of the input/output modules.
Clean the Vision Camera Lens
1. Dry compressed air—
Use dry compressed air to remove all dust and other foreign material
from the camera lens.
2. Lens cleaning tissue—
Clean the lens using a lens cleaning tissue dampened with isopropyl
alcohol if required.
Check the Device Probe Tips
A worn or damaged probe tip on the PNP head or the tape output PNP head
(if installed) will cause dropped devices and placement problems.
1. Check device probe tip—
1a) Check the device probe tip for cracks or tears in the rubber.
1b) If necessary, replace with a probe tip of the same size.
2. Verify vacuum on new probe tip—
2a) From the Setup window, click System.
2b) Click Gantry to open the Gantry window.
2c) Click the Vacuum switch to ON.
2d) Place a device on the probe tip.
2e) If the vacuum does not firmly hold the device, replace the probe tip
with a probe tip of the same size.
Maintenance • Preventive Maintenance
PS288 Owner’s Manual 5—5
Check Automatic Tray Feeder
1. Feeder—
1a) Check the automatic tray feeder for damaged or broken parts.
1b) Contact Data I/O Customer Support if you find damaged or broken
parts.
2. Conveyor belts—
2a) Check the orange conveyor belts for dirt, nicks, or other signs of dam-
age.
2b) If the conveyor belts are dirty, clean with dry compressed air or wipe
with a dry, lint-free cloth.
Procedures Performed Every Month
Clean the Input Air Filter and Assembly
1. Disconnect the input factory air line from the input air filter assembly.
2. Remove the air contamination collection bowl.
3. Check the collection bowl and input air filter for dirt, oil, or water.
Clean as necessary.
4. Reconnect the collection bowl and air filter.
5. Reconnect the air line.
6. Restore air pressure to the PS288.
Clean the Shuttle Assembly
1. Prepare the system—
1a) Verify that the PS288 is shut down and the main power switch is in the
OFF position.
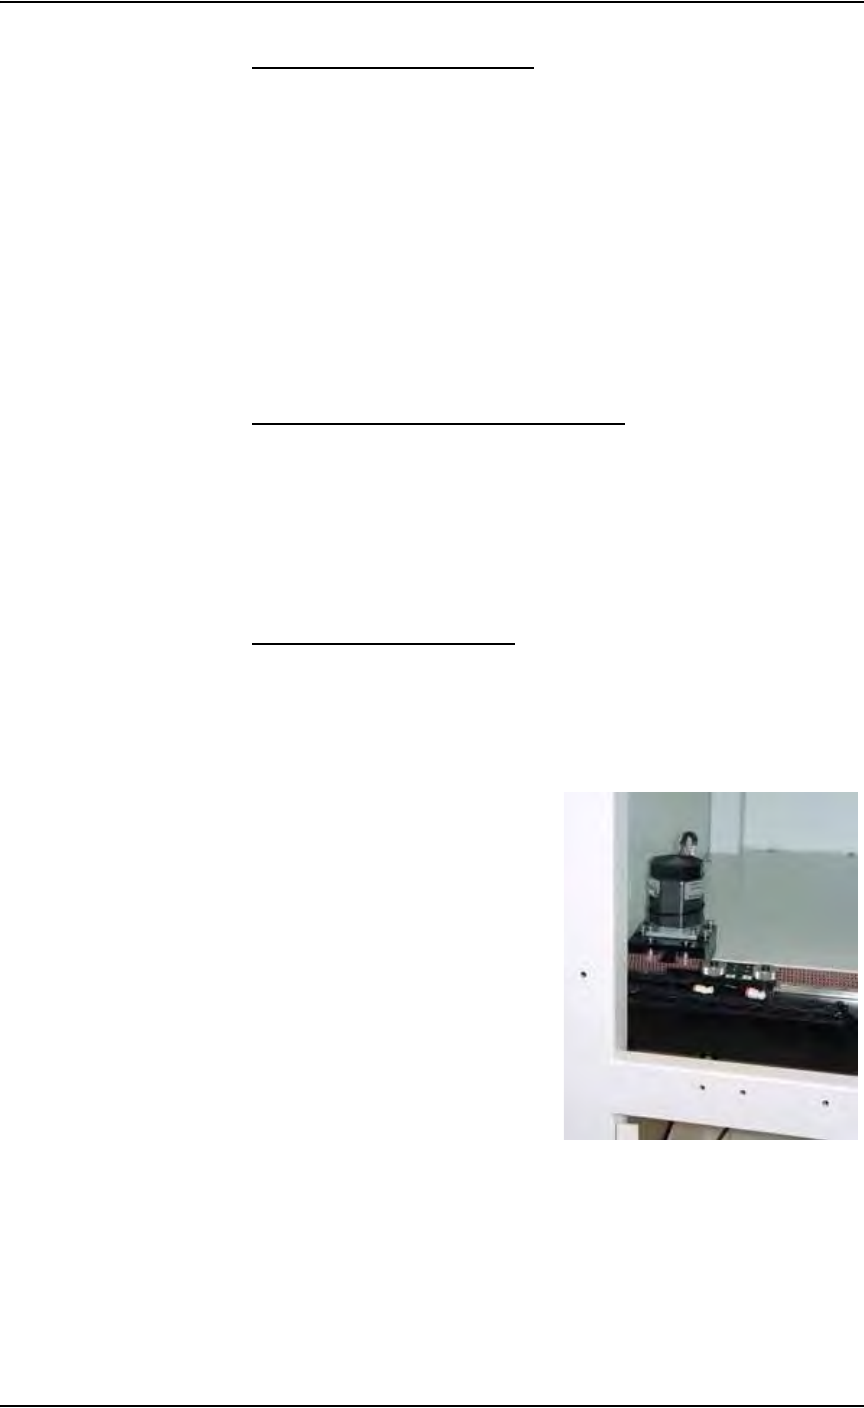
1b) Remove the upper left Option Bay panel. Figure 5-1 shows the panel
removed and the shuttle transfer assembly is visible.
Figure 5-1—Upper left Option Bay panel removed
2. Clean—
Clean the shuttle track using isopropyl alcohol.
3. Lubricate—
Use Tri-Flow lubricant to lubricate the bearing block and shuttle track.
Maintenance • Preventive Maintenance
5—6 PS288 Owner’s Manual
CAUTION: Use a small amount of lubricant, just enough to allow
the bearing block to move freely on the track. Too much lubricant
will aid in the build up of contamination and cause stalling.
4. Reinstall—
Reinstall all guards and panels.
Adjust Tension on the Shuttle Belt
WARNING: Electric shock hazard. Shut down the PS288 (see
“Shut Down the System” on page 3-12) and turn off the main
power switch before removing any panels.
1. Prepare the system—
1a) Verify that the PS288 is shut down and the main power switch is in the
OFF position.
1b) Remove the upper left Option Bay panel.
2. Check the shuttle belt—
Check the belt for wear and replace if necessary.
3. Adjust shuttle belt tension—
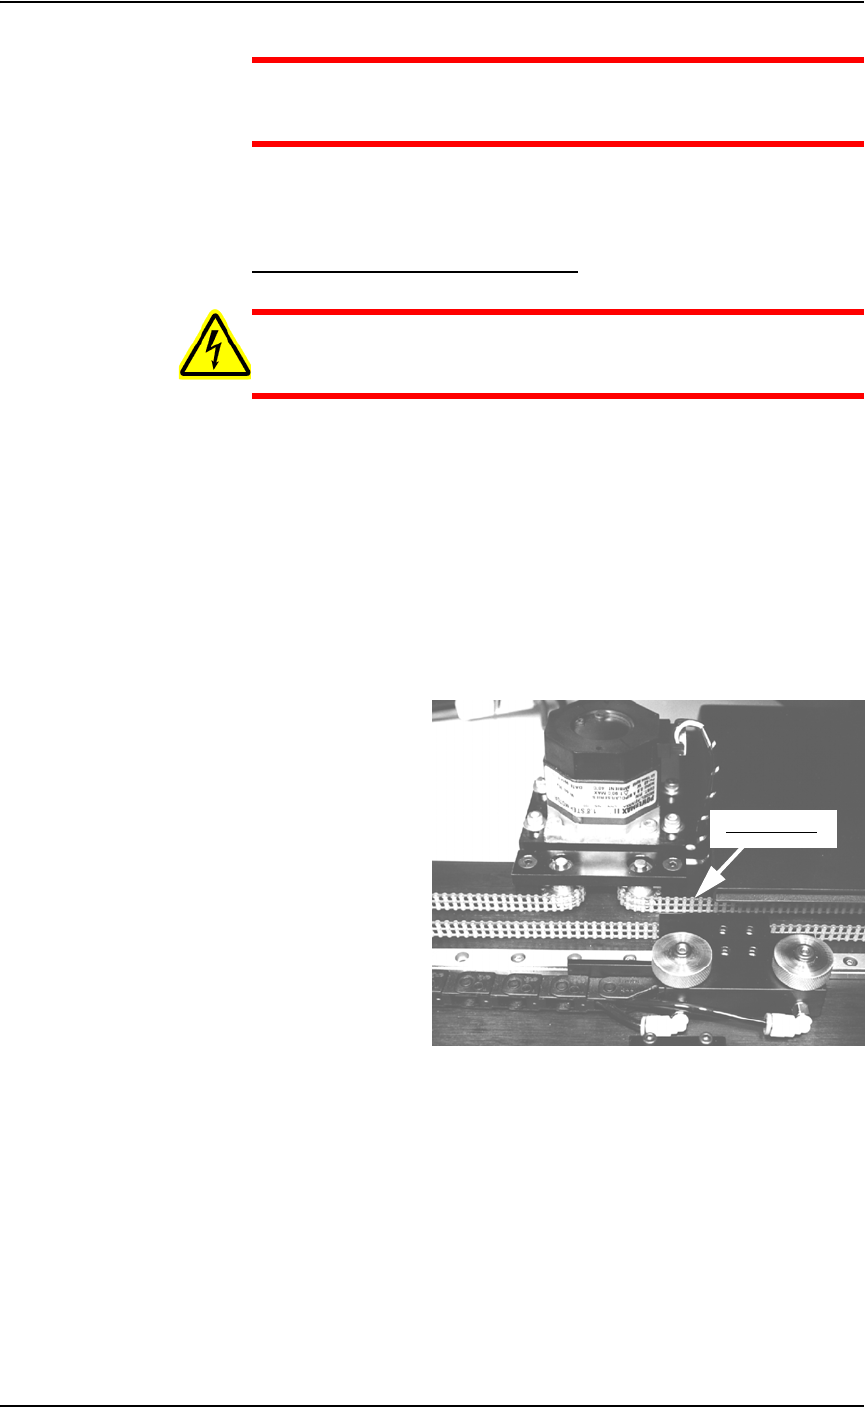
3a) Pull slightly on the center of the shuttle belt to the right of the motor.
See Figure 5-2.
Figure 5-2—Shuttle belt and motor
3b) If the belt moves more than 12 mm (0.5 inch) off its path, loosen the
four motor mounting screws (see Figure 5-3), and then push the motor
away from the belt until the belt tension is correct.
Pull belt here