PS288_OwnersMnl_PriorTo2009 - 第146页
Maintenance • Preventive Maintenance PS288 Owner’s Manual 5—11 Check the PNP Head V acuum Filter and Silencer A clogged or dirty vacuum filter or silencer will cause vacuu m problems, dropped devices, an d placement prob…

Maintenance • Preventive Maintenance
5—10 PS288 Owner’s Manual
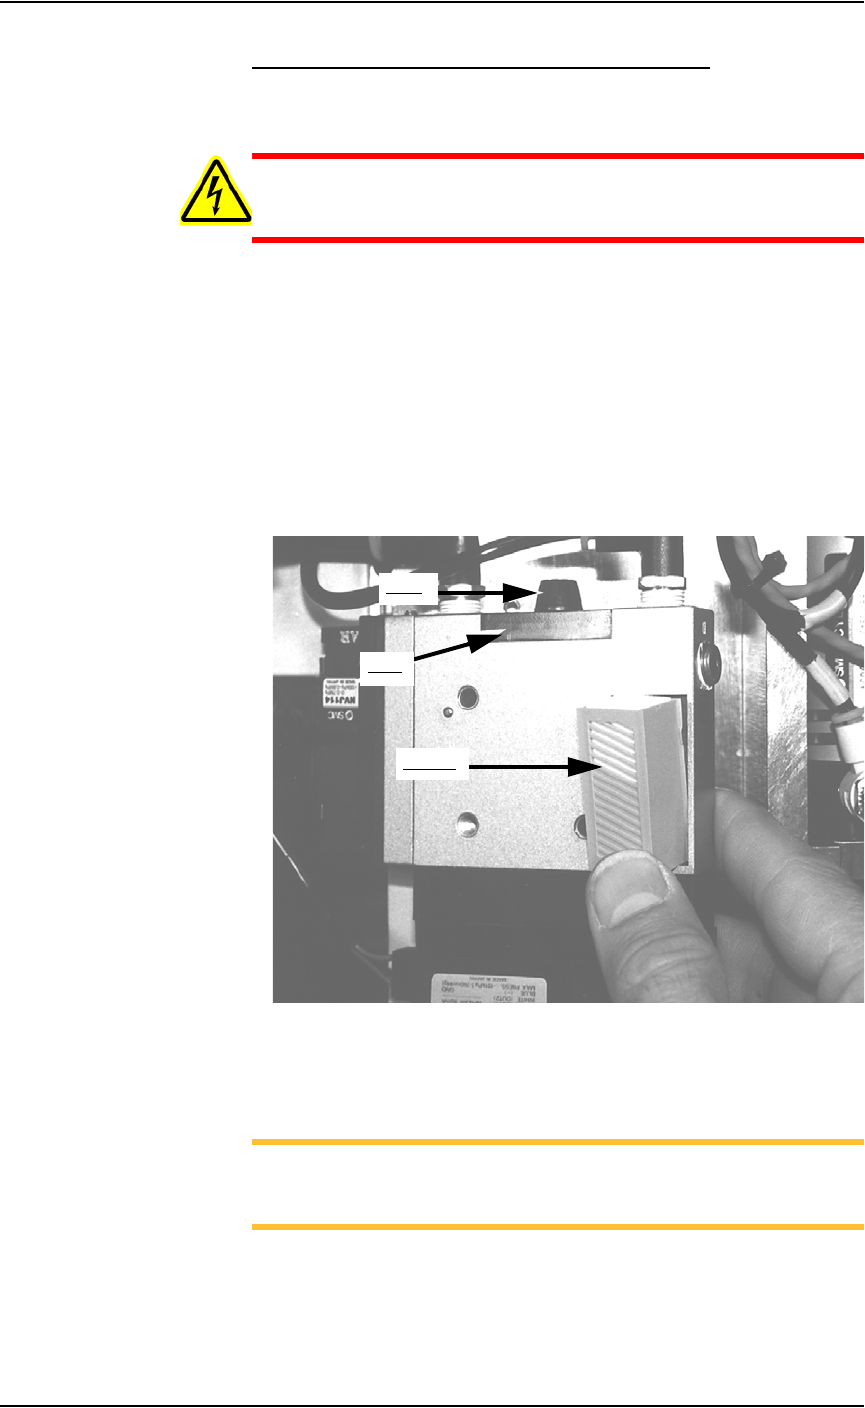
Figure 5-5—Upper left laser housing with panel removed
2. Clean—
2a) Use a damp paper towel and antistatic cleaner to wipe laser marking
dust and other foreign material from the housing into a sealable plastic
bag.
2b) Place the paper towel in a sealable plastic bag. Pull off the disposable
protective gloves, place them in the sealable plastic bag, and close and
tightly seal the bag.
WARNING: Numerous government regulations apply to the stor-
age of hazardous waste. Ensure that contaminated filters are
properly labeled and stored in your hazardous waste storage area.
Also, make sure that they are not stored on your site longer than
government regulations allow (the typical limit is 90 days). Check
your government (local, state, and federal) regulations for haz-
ardous waste storage requirements.
2c) Clean the laser shuttle track using isopropyl alcohol.
3. Lubricate—
Use Tri-Flow lubricant to lubricate the bearing block and shuttle track.
NOTE: Use a small amount of lubricant, just enough to allow the
bearing block to move freely on the track. Too much lubricant will
aid in the build up of contamination and cause stalling.
4. Reinstall—
Reinstall all guards and panels.
Laser head
Lens
Maintenance • Preventive Maintenance
PS288 Owner’s Manual 5—11
Check the PNP Head Vacuum Filter and Silencer
A clogged or dirty vacuum filter or silencer will cause vacuum problems,
dropped devices, and placement problems.
WARNING: Electric shock hazard. Shut down the PS288 (see
“Shut Down the System” on page 3-12) and turn off the main
power switch before removing the PNP head vacuum filter.
1. Prepare the system—
1a) Verify that the PS288 is shut down and the main power switch is in the
OFF position.
1b) Remove the two bolts that hold the vacuum generator to the PNP head.
2. Check silencer and filter—
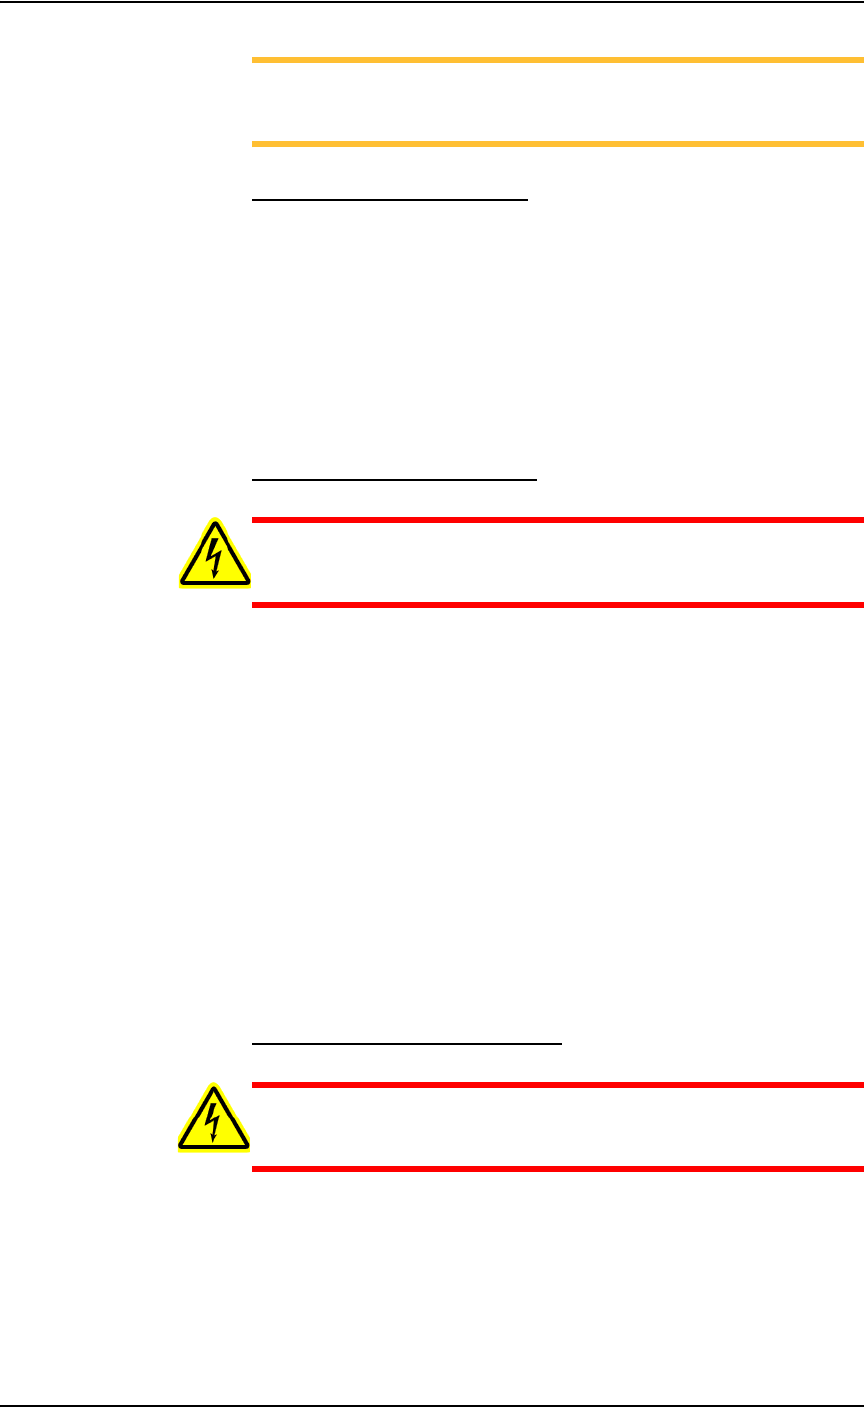
2a) Push the silencer out of the vacuum generator. If dirty or clogged,
replace with new silencer (Data I/O part number 288 5500 902).
2b) Loosen knob and remove vacuum filter. If dirty or clogged, replace
with new filter (Data I/O part number 288 5500 901). See Figure 5-6.
Figure 5-6—Removing the PNP head vacuum filter and silencer
3. Reinstall generator—
Reinstall the generator.
NOTE: For systems with an Option Bay, there are two additional
vacuum generators: for Ped 1 and for Ped 2. Follow the procedure
described above to check and replace if necessary.
Knob
Filter
Silencer
Maintenance • Preventive Maintenance
5—12 PS288 Owner’s Manual
NOTE: For systems with a tape output system, there is an addi-
tional vacuum generator on the tape output PNP head. Follow the
procedure described above to check and replace if necessary.
Clean Automatic Tray Feeder
1. Conveyor belts and tray platform—
Clean conveyor belts with dry compressed air or dry, lint-free cloth.
Clean the tray platform with lint-free cloth and isopropyl alcohol.
2. Pinch roller—
Check the urethane pinch roller attached to the tray clamping mecha-
nism for signs of wear or damage. Replace if necessary.
Procedures Performed Every Three Months
Replacing a Worn Shuttle Belt
WARNING: Electric shock hazard. Shut down the PS288 (see
“Shut Down the System” on page 3-12) and turn off the main
power switch before removing any panels.
1. Prepare the system—
1a) Verify that the PS288 is shut down and the main power switch is in the
OFF position.
1b) Remove the upper left Option Bay panel.
2. Motor mount—
2a) Loosen the four motor mounting screws.
2b) Pull the motor all the way forward.
3. Remove belt—
3a) Remove the two Allen bolts from the top of the pedestals.
3b) Remove the belt.
4. Replace belt—
Replace the belt by reversing the above steps.
PNP Head (Z and R) Motor Amps
WARNING: Electric shock hazard. Shut down the PS288 (see
“Shut Down the System” on page 3-12) and turn off the main
power switch before removing any panels.
1. Prepare the system—
1a) Verify that the PS288 is shut down and the main power switch is in the
OFF position.
1b) Open the right side cabinet door and locate the R-axis and Z-axis servo
motor amps. See Figure 5-7.