PS288_OwnersMnl_PriorTo2009 - 第152页
Maintenance • Preventive Maintenance PS288 Owner’s Manual 5—17 Figur e 5-12—Upper carrier scr ew locatio ns (one is hidden in this view) 2c) Check the two screws on the lower carrier and tighten if necessary . See Figur …
Maintenance • Preventive Maintenance
5—16 PS288 Owner’s Manual
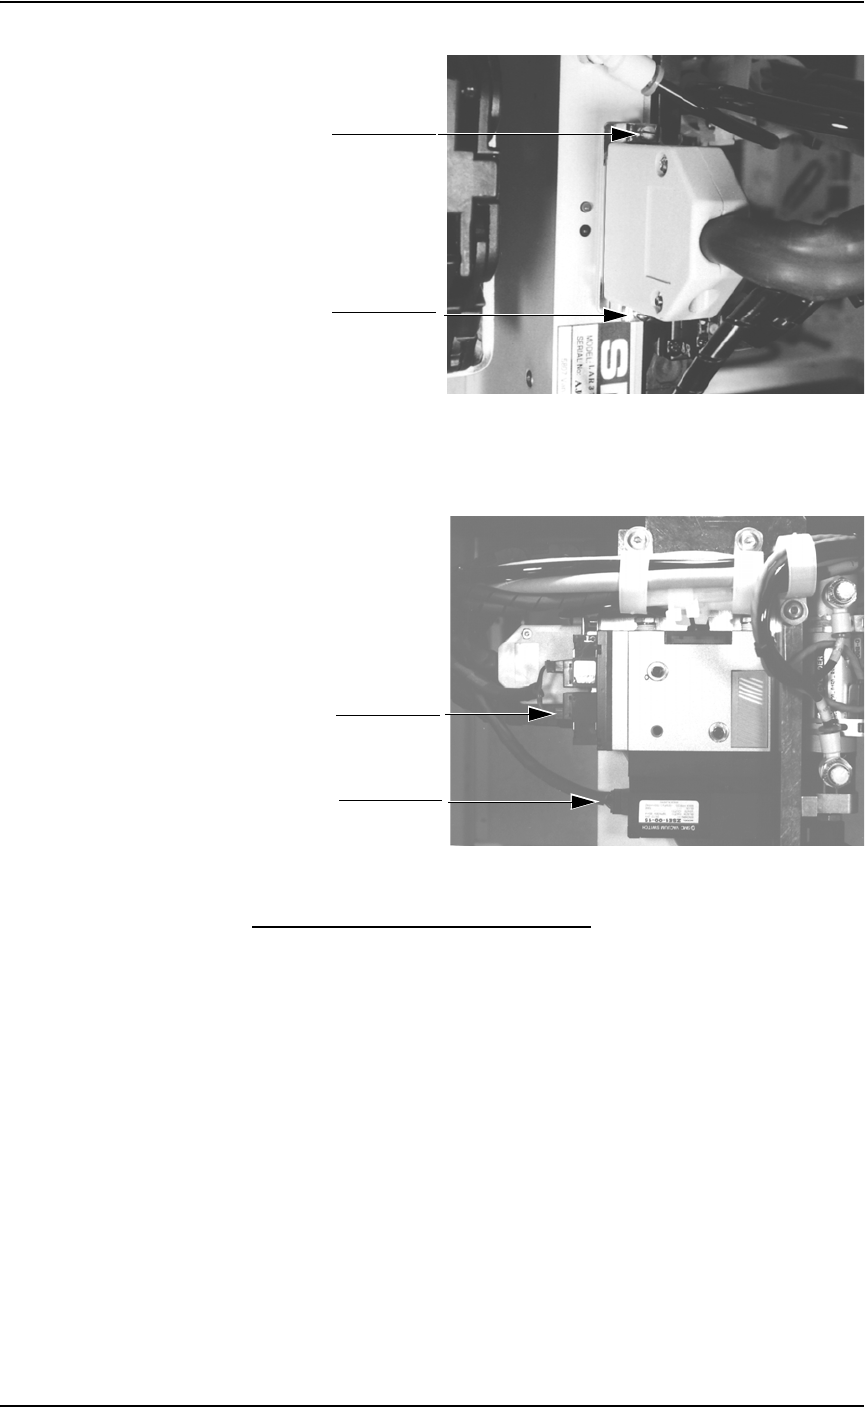
Figure 5-10—PNP head mounting screws
1b) Check PNP gantry wiring harness plug connections and make sure that
they are secure. See Figure 5-11.
Figure 5-11—PNP gantry wiring harness plug connections
Clean and Check the Cable Carriers
1. Clean—
Use dry compressed air to remove all foreign material from the cable
carriers.
2. Check—
2a) Check that the cables are not too loose or too tight. The cables should
be in good condition.
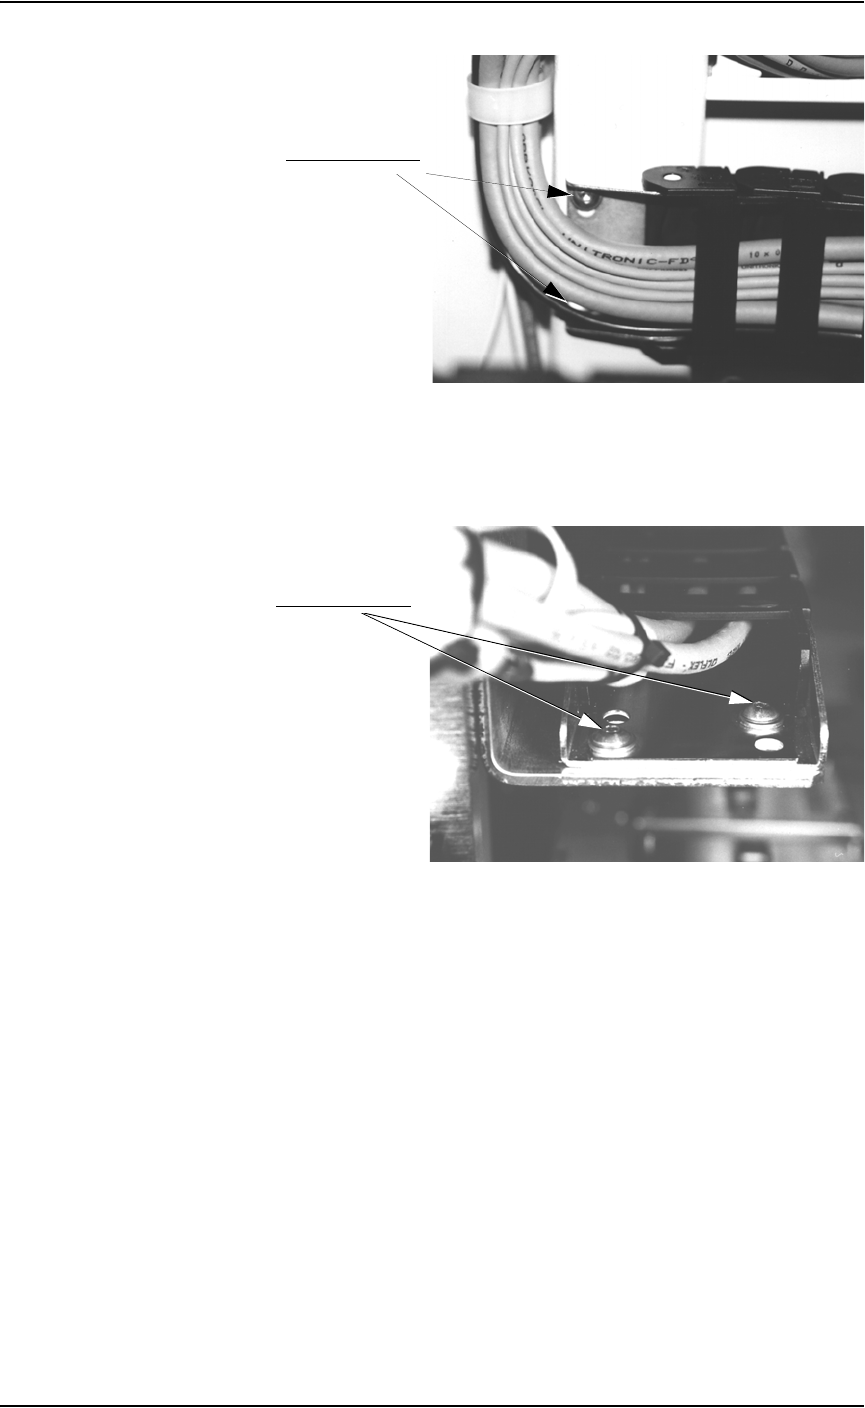
2b) Check the two screws on the upper carrier and tighten if necessary.
See Figure 5-12.
Mounting screw
Mounting screw
Plug connection
Plug connection
Maintenance • Preventive Maintenance
PS288 Owner’s Manual 5—17
Figure 5-12—Upper carrier screw locations (one is hidden in this view)
2c) Check the two screws on the lower carrier and tighten if necessary. See
Figure 5-13.
Figure 5-13—Lower carrier screw locations
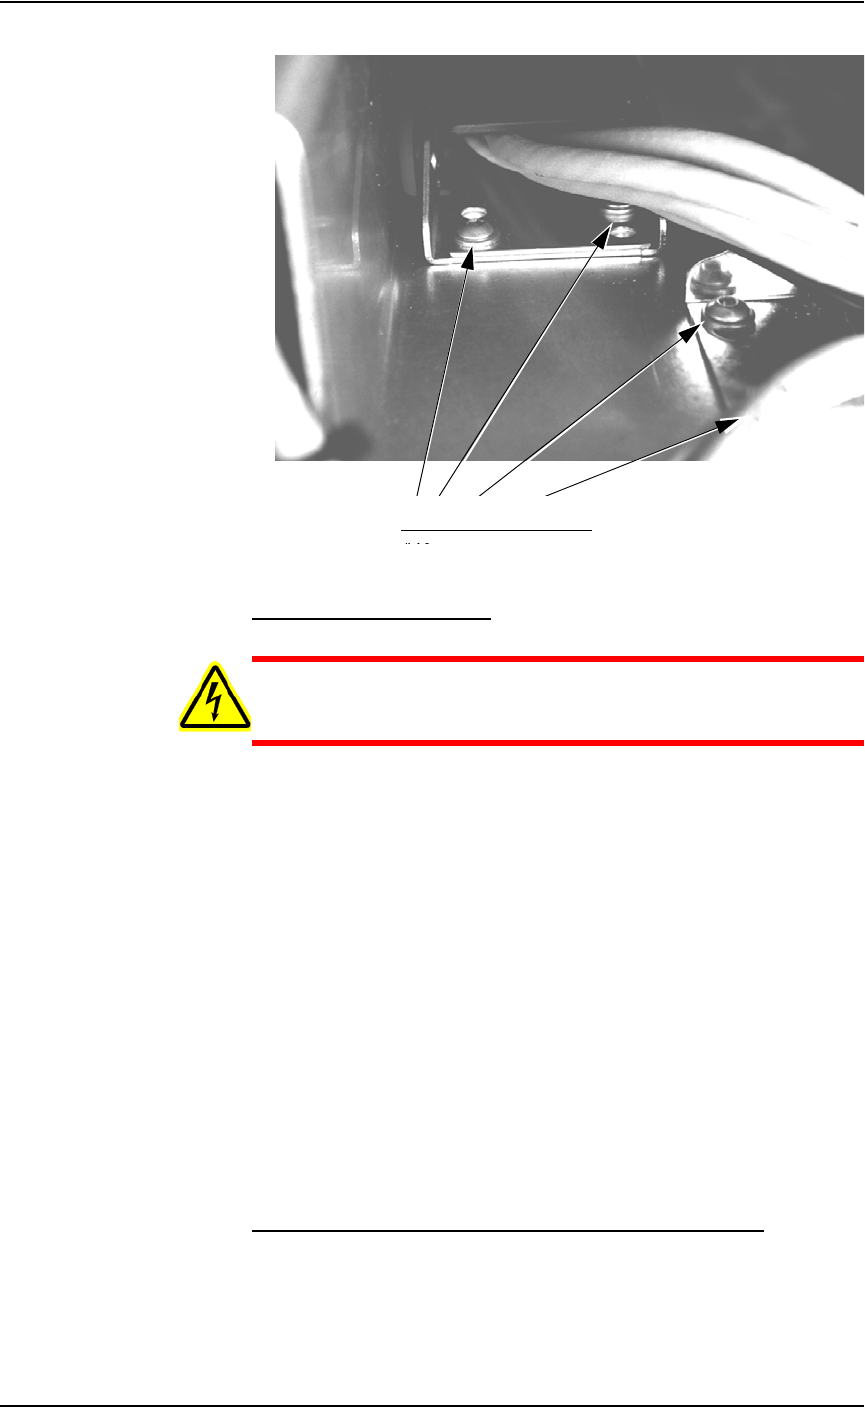
2d) Check the four screws on the center carrier and tighten if necessary.
See Figure 5-14.
Upper carrier screws
Lower carrier screws
Maintenance • Preventive Maintenance
5—18 PS288 Owner’s Manual
Figure 5-14—Center carrier screw locations (one is hidden in this view)
Check the Vision Camera
WARNING: Electric shock hazard. Shut down the PS288 (see
“Shut Down the System” on page 3-12) and turn off the main
power switch before removing any panels.
1. Prepare the system—
1a) Verify that the PS288 is shut down and the main power switch is in the
OFF position.
1b) Remove the right or rear cabinet panel, depending on where the camera
is mounted.
2. Check mounting bolts—
2a) Check the mounting bolts above the camera.
2b) Tighten if necessary.
3. Check knob—
3a) Check the knob behind the camera.
3b) Tighten if necessary.
4. Check thumb screws—
4a) Check the cable, aperture and focus thumb screws.
4b) Tighten if necessary.
4c) Reinstall all guards and panels.
Replace Pre-filter and Pleated Filter in Fume Extractor
The laser vacuum filters require changing on a regular basis. The mainte-
nance interval depends on the number of devices marked and the amount of
text marked. In general, the pre-filter and pleated filter should be changed
every six months, or more frequently if low air flow is detected. The carbon
Center carrier screw locations