PS288_OwnersMnl_PriorTo2009 - 第156页
Maintenance • Preventive Maintenance PS288 Owner’s Manual 5—21 W ARNING: Hazardous materia ls. Do not allow particulate mat- ter in the vacuum hose to be re leased into the work environment. 3. Release spring clips— 3a) …
Maintenance • Preventive Maintenance
5—20 PS288 Owner’s Manual
To replace the pre-filter and the pleated filter:
1. Prepare the system—
1a) Verify that the PS288 is shut down and the main power switch is in the
OFF position.
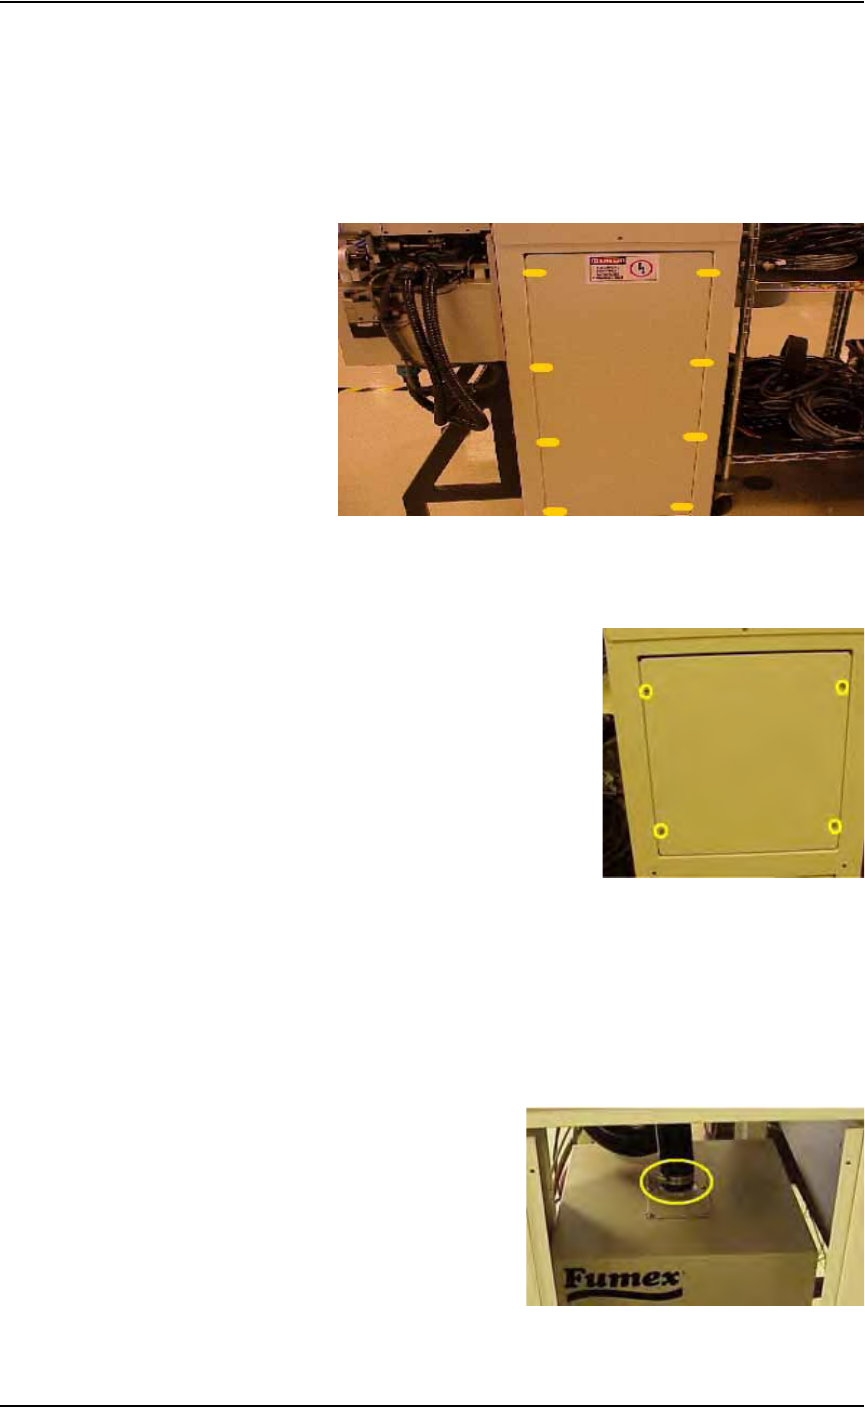
1b) Remove lower back laser housing panel from the laser enclosure by
removing the eight screws highlighted in yellow in Figure 5-16.
Figure 5-16—Lower back laser housing panel screw locations
1c) Remove side laser housing panel by removing the four screws high-
lighted in yellow in Figure 5-17.
Figure 5-17—Side laser housing panel screw locations
1d) Put on the disposable protective gloves and open the sealable plastic
bag.
2. Detach vacuum hose—
2a) Loosen the clamp holding the vacuum hose to the extractor top and
detach the vacuum hose from the extractor top. See Figure 5-18.
2b) Carefully set the vacuum hose aside.
Figure 5-18—Vacuum hose clamp
Maintenance • Preventive Maintenance
PS288 Owner’s Manual 5—21
WARNING: Hazardous materials. Do not allow particulate mat-
ter in the vacuum hose to be released into the work environment.
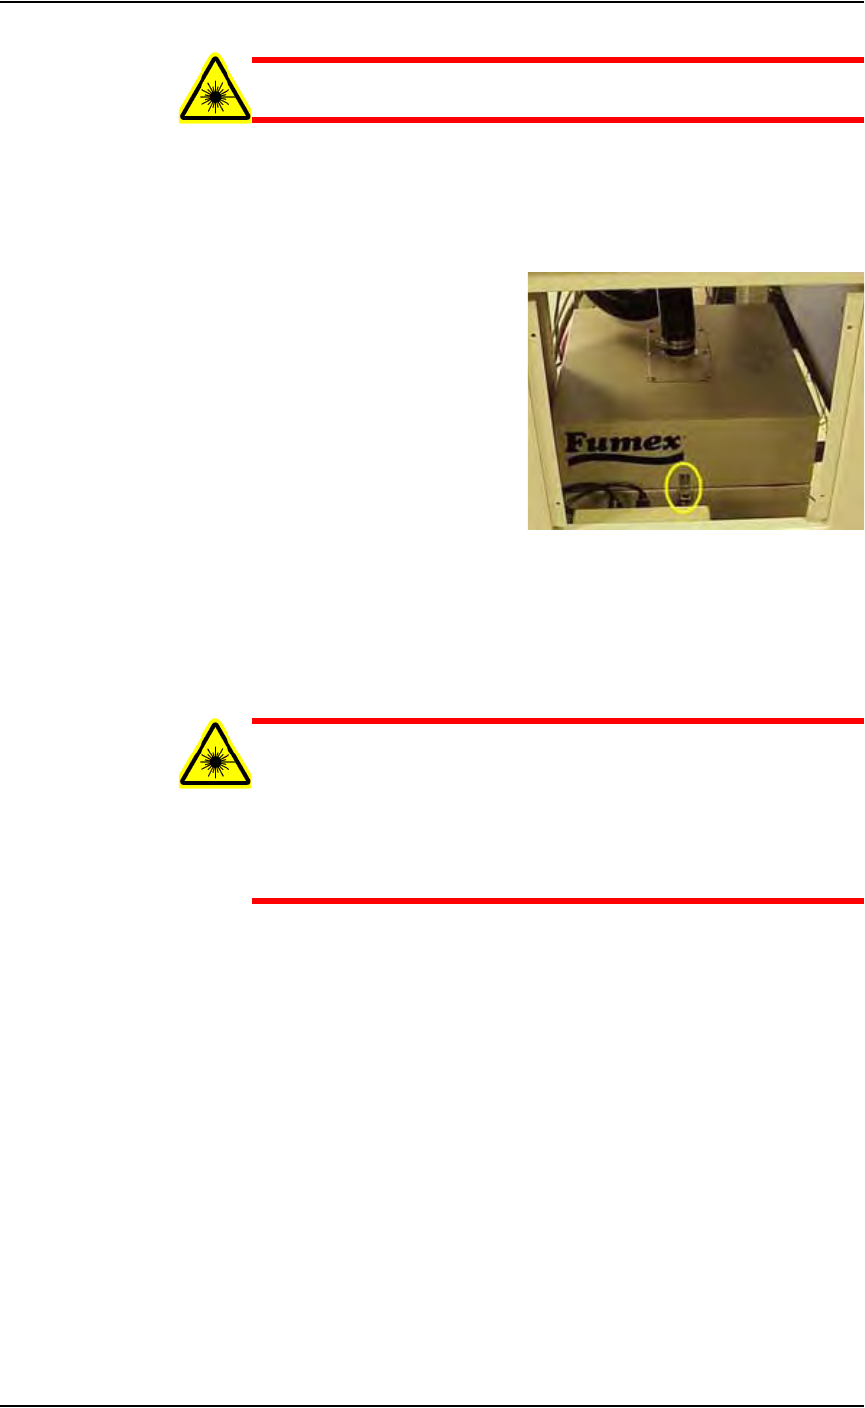
3. Release spring clips—
3a) Release the four spring clips (one on each side) securing the extractor
top to the filter system. See Figure 5-19 for location of one spring clip.
3b) Remove the extractor top and set aside.
Figure 5-19—Filter system spring clip
4. Remove pre-filter and pleated filter—
4a) Remove pre-filter and pleated filter and carefully place in sealable bag.
4b) Pull off the disposable protective gloves and place in sealable bag.
4c) Seal the bag and dispose of as hazardous waste.
WARNING: Numerous government regulations apply to the stor-
age and disposal of hazardous waste. Ensure that contaminated
filters are properly labeled and stored in your hazardous waste
storage area. Also, make sure that they are not stored on your site
longer than government regulations allow (the typical limit is 90
days). Check your government (local, state, and federal) regula-
tions for hazardous waste storage requirements.
5. Replace pre-filter and pleated filter—
5a) Replace the pre-filter with Data I/O Model Name Pre-Filter, Polyester.
5b) Replace the pleated filter with Data I/O Model Name Filter, Panel,
Pleated.
6. Re-install extractor top—
6a) Carefully place the extractor top back on the filter system.
6b) Attach the four spring clips that secure the extractor top in place.
7. Re-install vacuum hose—
7a) Carefully attach the vacuum hose to the extractor top.
7b) Tighten the clamp that secures the vacuum hose in place.
8. Re-install panels—
Re-install lower back laser housing panel and side laser housing panel.
Maintenance • Preventive Maintenance
5—22 PS288 Owner’s Manual
Change the Laser Computer Air Filter
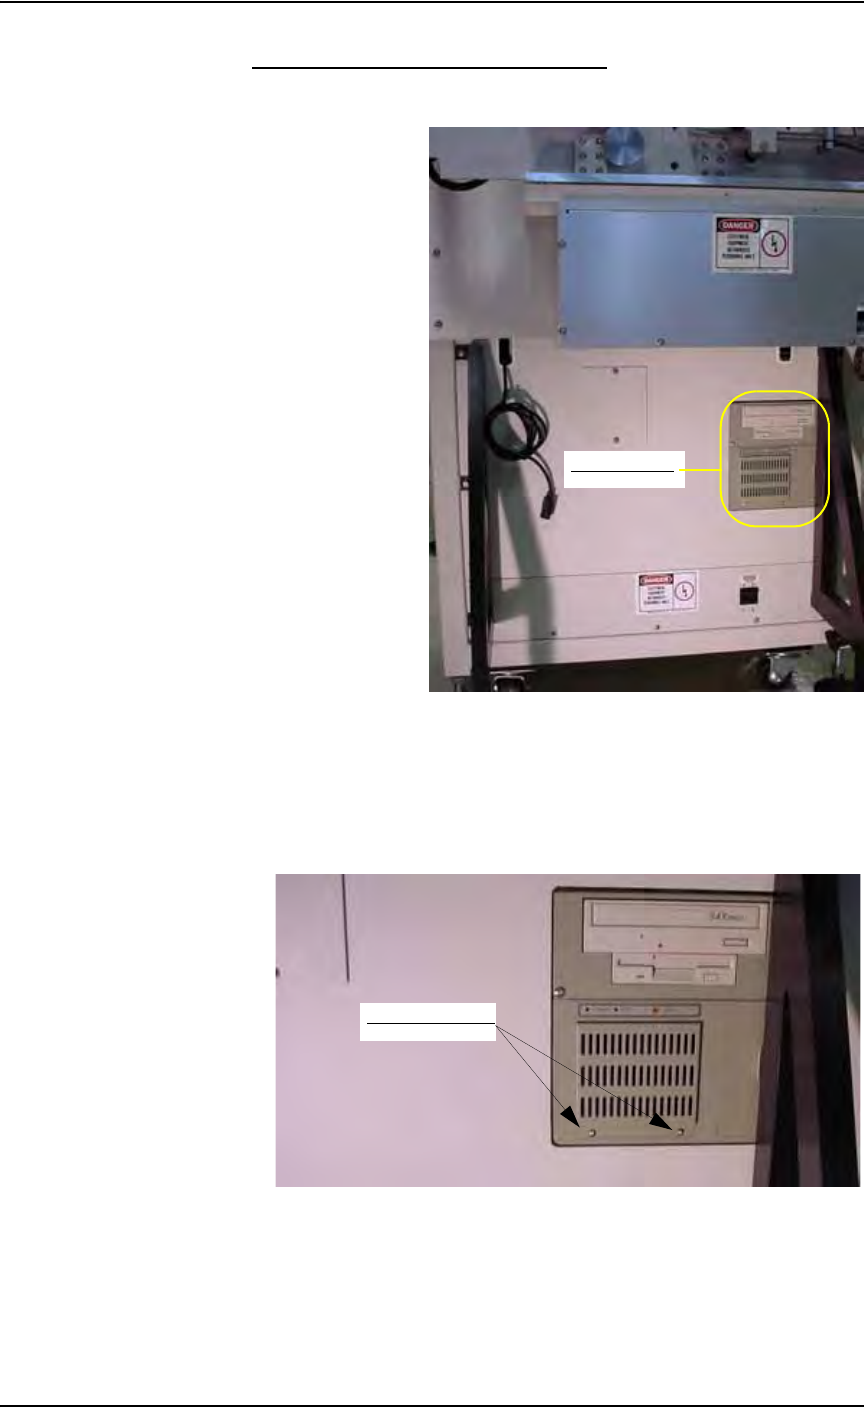
The Laser Computer is located in the Option Bay and can be accessed from
the back of the Option Bay. See Figure 5-20.
Figure 5-20—Location of Laser Computer
To change the Laser Computer air filter:
1. Remove cover—
Use a screwdriver to remove the two screws holding the filter cover to
the Laser Computer. See Figure 5-21.
Figure 5-21—Remove screws from Laser Computer filter cover
2. Replace air filter—
Remove the old air filter and replace with a new air filter. See Figure
5-22.
Laser Computer
Remove two screws