PS288_OwnersMnl_PriorTo2009 - 第158页
Maintenance • Preventive Maintenance PS288 Owner’s Manual 5—23 Figur e 5-22—Replace air filter 3. Reinstall cover— Use a screwdriver to tighten the two screws holding th e filter cover to the Laser Computer . Procedures …
Maintenance • Preventive Maintenance
5—22 PS288 Owner’s Manual
Change the Laser Computer Air Filter
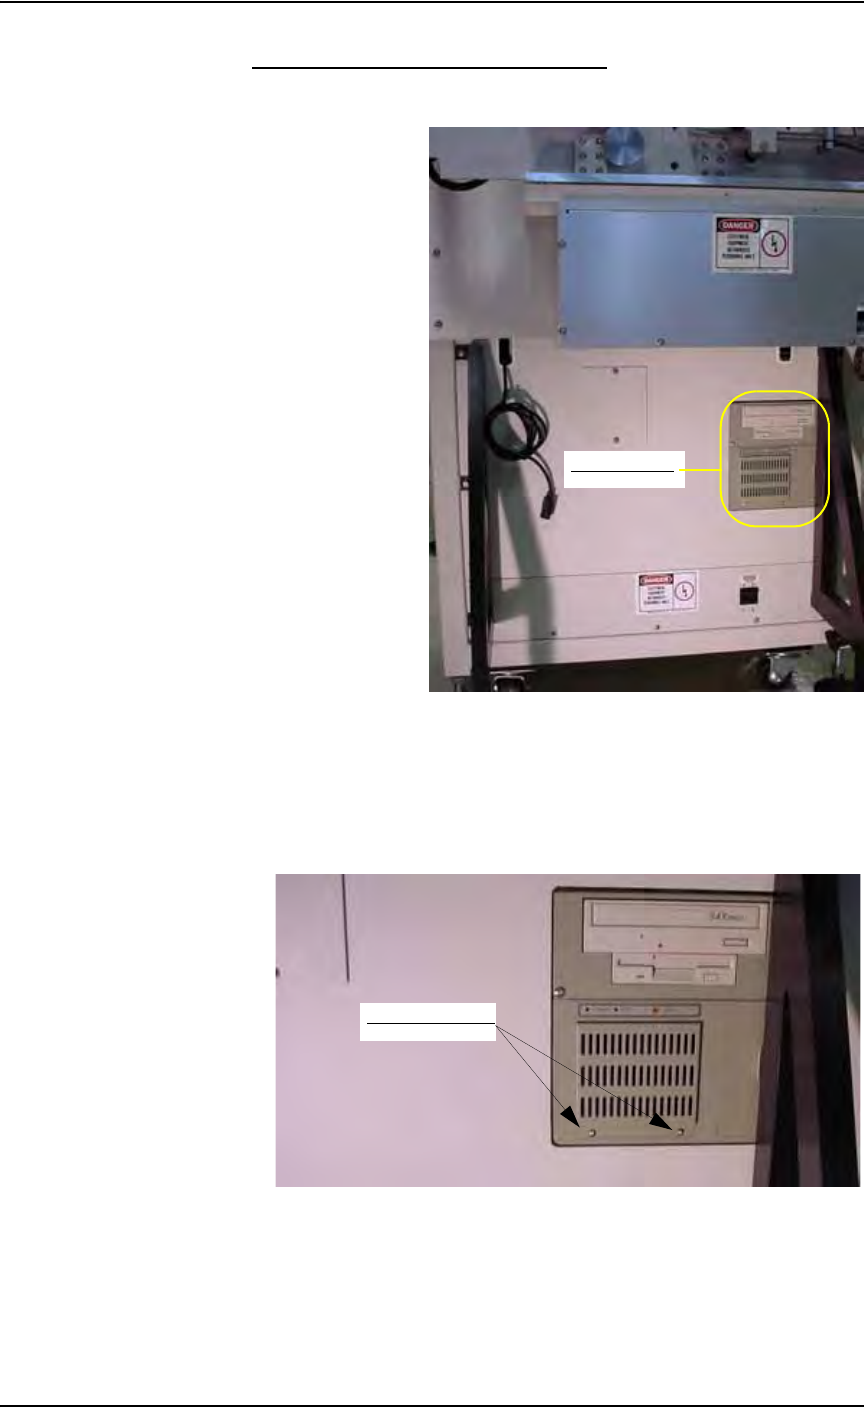
The Laser Computer is located in the Option Bay and can be accessed from
the back of the Option Bay. See Figure 5-20.
Figure 5-20—Location of Laser Computer
To change the Laser Computer air filter:
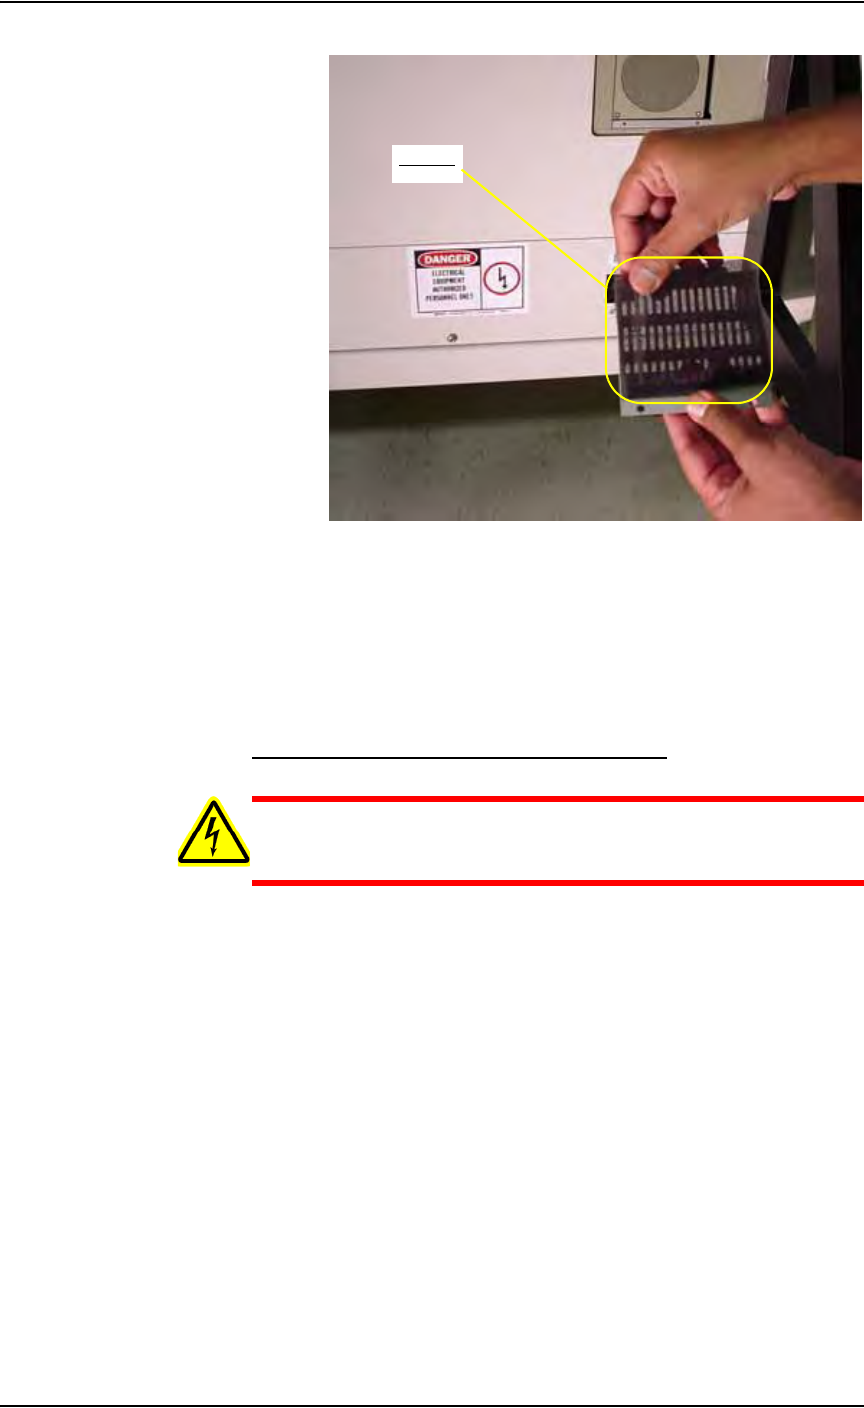
1. Remove cover—
Use a screwdriver to remove the two screws holding the filter cover to
the Laser Computer. See Figure 5-21.
Figure 5-21—Remove screws from Laser Computer filter cover
2. Replace air filter—
Remove the old air filter and replace with a new air filter. See Figure
5-22.
Laser Computer
Remove two screws
Maintenance • Preventive Maintenance
PS288 Owner’s Manual 5—23
Figure 5-22—Replace air filter
3. Reinstall cover—
Use a screwdriver to tighten the two screws holding the filter cover to
the Laser Computer.
Procedures Performed Once a Year
Lubricate the Gantry (X and Y) Lead Screws
WARNING: Electric shock hazard. Shut down the PS288 (see
“Shut Down the System” on page 3-12) and turn off the main
power switch before removing the lead screw shields.
1. Prepare the system—
1a) Verify that the PS288 is shut down and the main power switch is in the
OFF position.
1b) Remove the four bolts that hold the two lead screw shields to the gantry
rails.
1c) Remove the shields.
2. Remove old grease—
Using shop towels and isopropyl alcohol, remove the old grease and
dirt build up from the lead screws.
3. Apply new grease—
3a) Using a THK MG70 (or equivalent) grease gun, apply THK AFB Mul-
tipurpose lithium (or equivalent) grease to the lead screw grease fit-
tings. See Figure 5-23.
3b) Apply grease to the entire length of each lead screw.
Air filter
Maintenance • Preventive Maintenance
5—24 PS288 Owner’s Manual
CAUTION: Do not over-apply the grease. Over-applying will
cause grease to splatter inside the work envelope.
Figure 5-23—Grease fittings
3c) Reinstall the two lead screw shields.
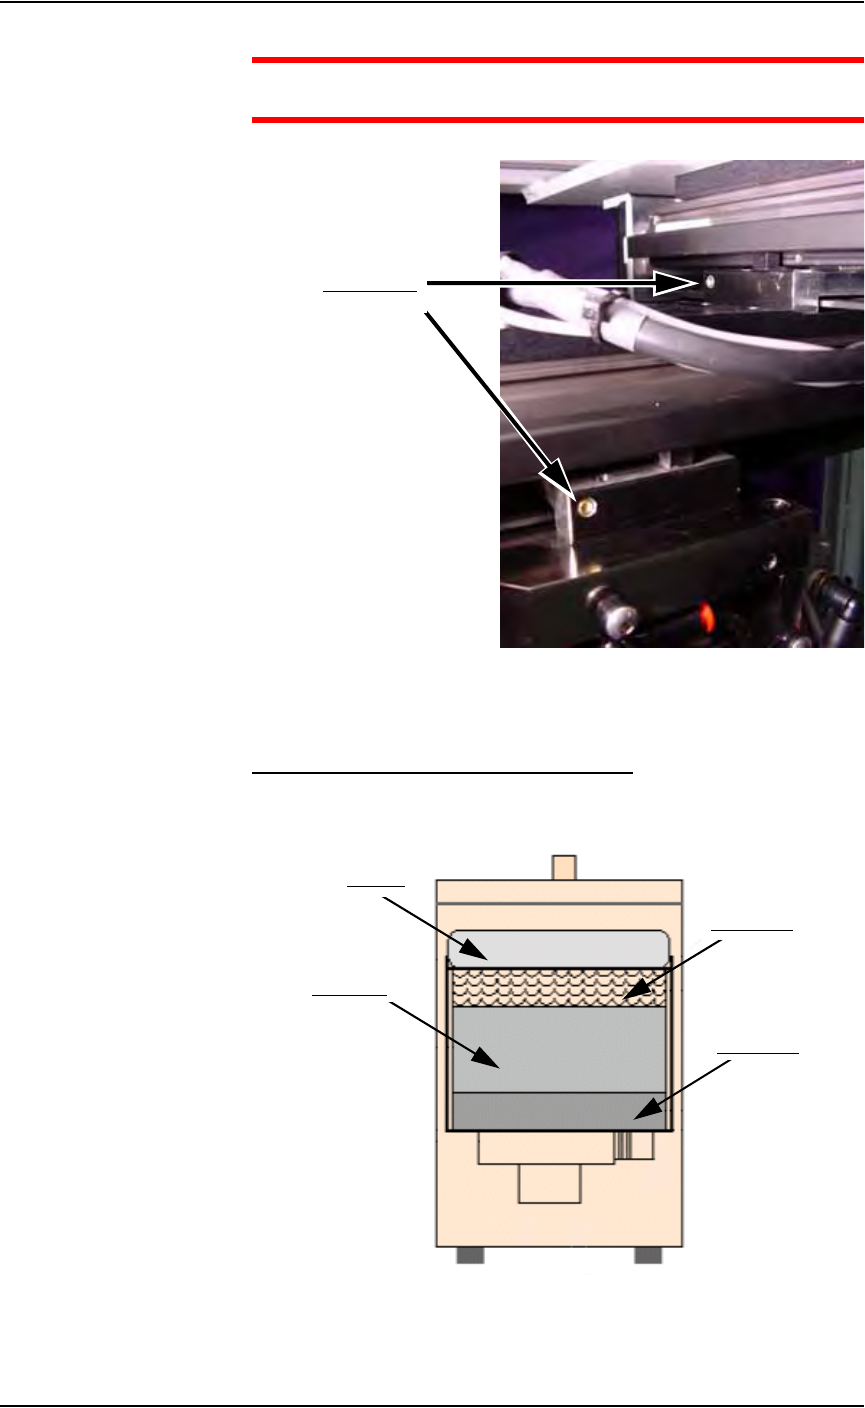
Replace all Filters in the Fume Extractor
Once a year, replace all filters in the laser marker fume extractor. See
Figure 5-24 for the location of the four replaceable laser vacuum filters.
Figure 5-24—Laser vacuum filter locations
Grease fittings
Pleated filter
Carbon filter
Pre-filter
HEPA filter