PS288_OwnersMnl_PriorTo2009 - 第61页
PS288 Owner’s Manual 3—1 Chapter 3 3 Operation The PS288 provides a configurable set of instructions fo r the rapid prog ram- ming of semiconductor devices. T wo primary levels of operation are: • Operator functions • Ad…

Set Up • (Optional) Setting Up the Laser Marking System
2—26 PS288 Owner’s Manual
NOTE: To create a label printer file, see “(Optional) Create a
Label Printer File” on page 3-63.
(Optional)
Setting Up the
Laser Marking
System
PS288 that is ordered with the optional laser marking system requires no
additional set up at a customer’s site. All mechanical connections are com-
plete, and the laser marking system is ready to use.
To use the laser marking system, a laser marking file must first be created
and added to a job file. For more information, see “(Optional) Create a Laser
Marking File” on page 3-55.
If the laser marking system is being installed for the first time on your
PS288, the WinAH400.ini file may need to be edited.
1. For first-time installation—
1a) Using Windows Explorer, open C:\AH400_32\WinAH400.ini.with
NOTEPAD editor.
1b) Locate the section
;------- marking system settings -----
1c) Ensure the value for Marking System corresponds to the laser system
installed on your PS288. For example, if your laser system is Synrad
Digital, the value should look like this:
;MarkerSystem=NONE
;MarkerSystem=LASERMARK
;MarkerSystem=SYNRAD
MarkerSystem=SYNRAD_DIGITAL
;MarkerSystem=ROFIN_SINAR
1d) Save the WinAH400.ini file and exit Windows Explorer.
PS288 Owner’s Manual 3—1
Chapter
3
3Operation
The PS288 provides a configurable set of instructions for the rapid program-
ming of semiconductor devices. Two primary levels of operation are:
• Operator functions
• Administrator functions
This chapter is divided into sections regarding each of these levels of opera-
tion.
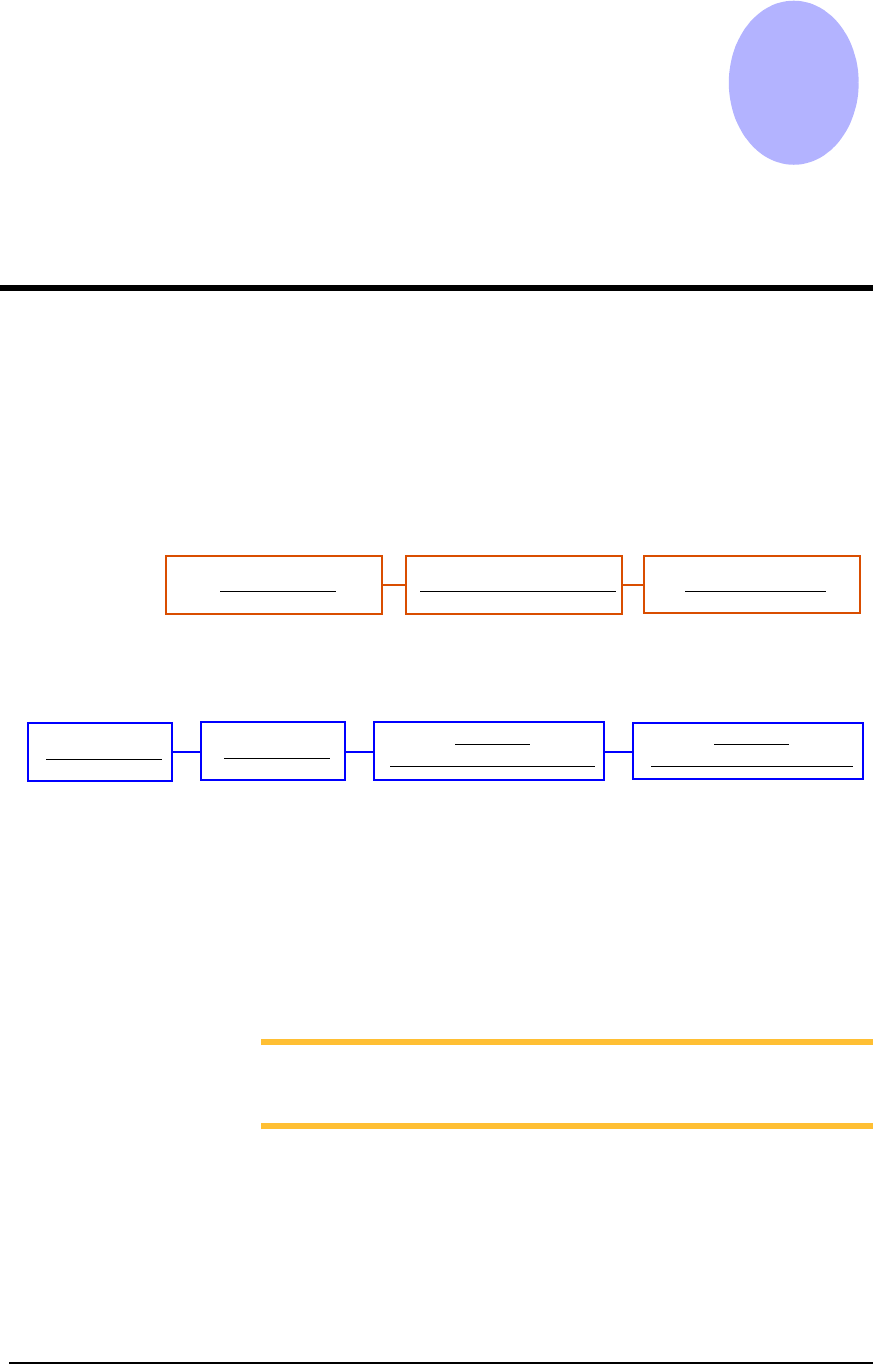
Operators follow this sequence to process devices on the PS288:
Figure 3-1—Operator Functions
Administrators follow this sequence to create Tasks for the PS288:
Figure 3-2—Administrator Functions
Operator
Functions
Operator functions include turning on the PS288, starting TaskLink, loading
a Job, and running a Job. Before these functions are performed, the operator
should be familiar with the information in Chapter 1—Introduction. It is
assumed that the hardware modules are already installed and adjusted, and
that the PS288 is ready to process devices.
NOTE: This section includes procedures for options that your
PS288 may not have. The illustrations in this manual may appear
different than your system, depending on the options installed.
These operator functions are described:
• “Check System Readiness” on page 3-2
• “Switch On System Power” on page 3-2
• “Start TaskLink and Load Job” on page 3-2
• “Configure Input/Output Settings” on page 3-4
• “Verify Job Information” on page 3-6
Start TaskLink Select Task and Load Job
Run Job on PS288
Create a Task
(Optional)
Change TaskLink Options
Start TaskLink
(Optional)
Change TaskLink Security

Operation • Operator Functions
3—2 PS288 Owner’s Manual
• “Prepare Input/Output Modules” on page 3-8
• “Run a Job” on page 3-9
• “Stop the System” on page 3-10
• “Shut Down the System” on page 3-12
• “Monitor the Light Tower” on page 3-13
• “Troubleshoot Programmer Problems” on page 3-13
• “(Optional) Preselect the Programmers” on page 3-15
• “(Optional) Change a Socket Adapter” on page 3-17
• “(Optional) Operate the TF20 Automatic Tray Feeder” on page 3-18
• “(Optional) Operate the TF30 Automatic Tray Feeder” on page 3-19
Check System Readiness
Before you switch on power, check that:
) The external air line is connected, and the air pressure switch is in the
ON position.
) All E-Stop buttons are in the released (operating) position.
) All safety shields are closed.
) The main circuit breaker switch on the front of the PS288 is in the ON
position.
) The power switch on the Handler Computer is in the ON position.
) The Socket Adapters for the job you want to run are installed on all
programmer sites. If necessary, change the Socket Adapters as
described in “(Optional) Change a Socket Adapter” on page 3-17.
Switch On System Power
After checking system readiness as described above:
1. Turn the main power switch clockwise to the ON position.
2. Press the I/O Controller START button.
Start TaskLink and Load Job
1. Double-click the TaskLink icon on the Handler Computer desktop.
Figure 3-3—TaskLink icon