PS288_OwnersMnl_PriorTo2009 - 第65页
Operation • Operat or Functions PS288 Owner’s Manual 3—5 . Figur e 3-9—Click Start 1b) From the Setup window , select the Options tab. 1c) W ith the cycle buttons, select the main Input and Outpu t media. The selections …
Operation • Operator Functions
3—4 PS288 Owner’s Manual
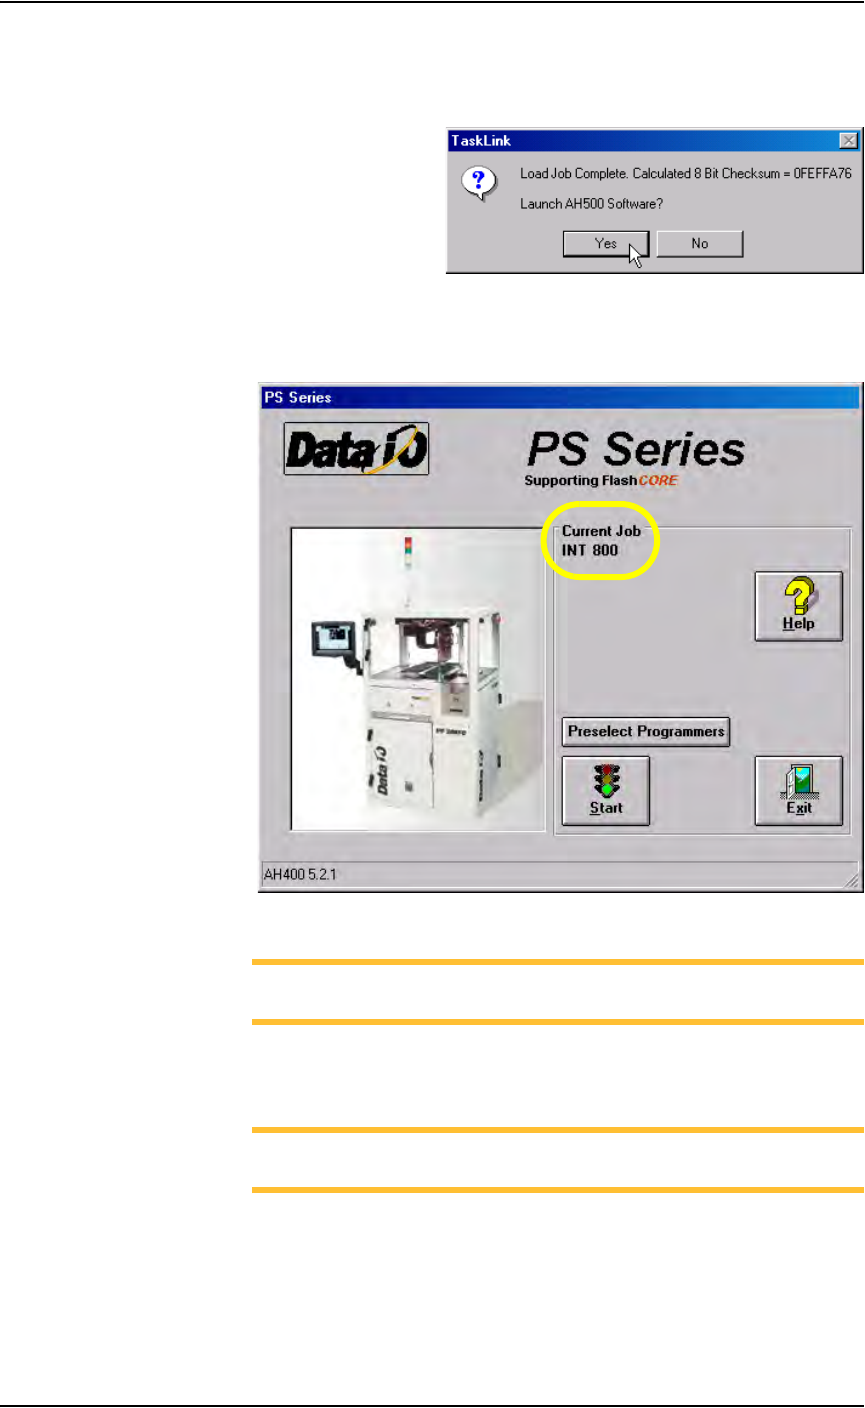
5. When Job loading is complete, TaskLink displays the calculated check-
sum value and prompts to launch the AH500 software. Click Ye s to
launch AH500. TaskLink then minimizes itself.
.
Figure 3-7—Launch AH500 software
6. The AH500 main window opens. Under Current Job, the name of the
Job just loaded is displayed.
.
Figure 3-8—AH500 main screen with Job loaded
NOTE: At this time, you can select which programmers are used.
See “(Optional) Preselect the Programmers” on page 3-15.
Configure Input/Output Settings
NOTE: If you preselected programmers [see “(Optional) Preselect
the Programmers” on page 3-15.], skip forward to Step 1b.
1. Prepare the system—
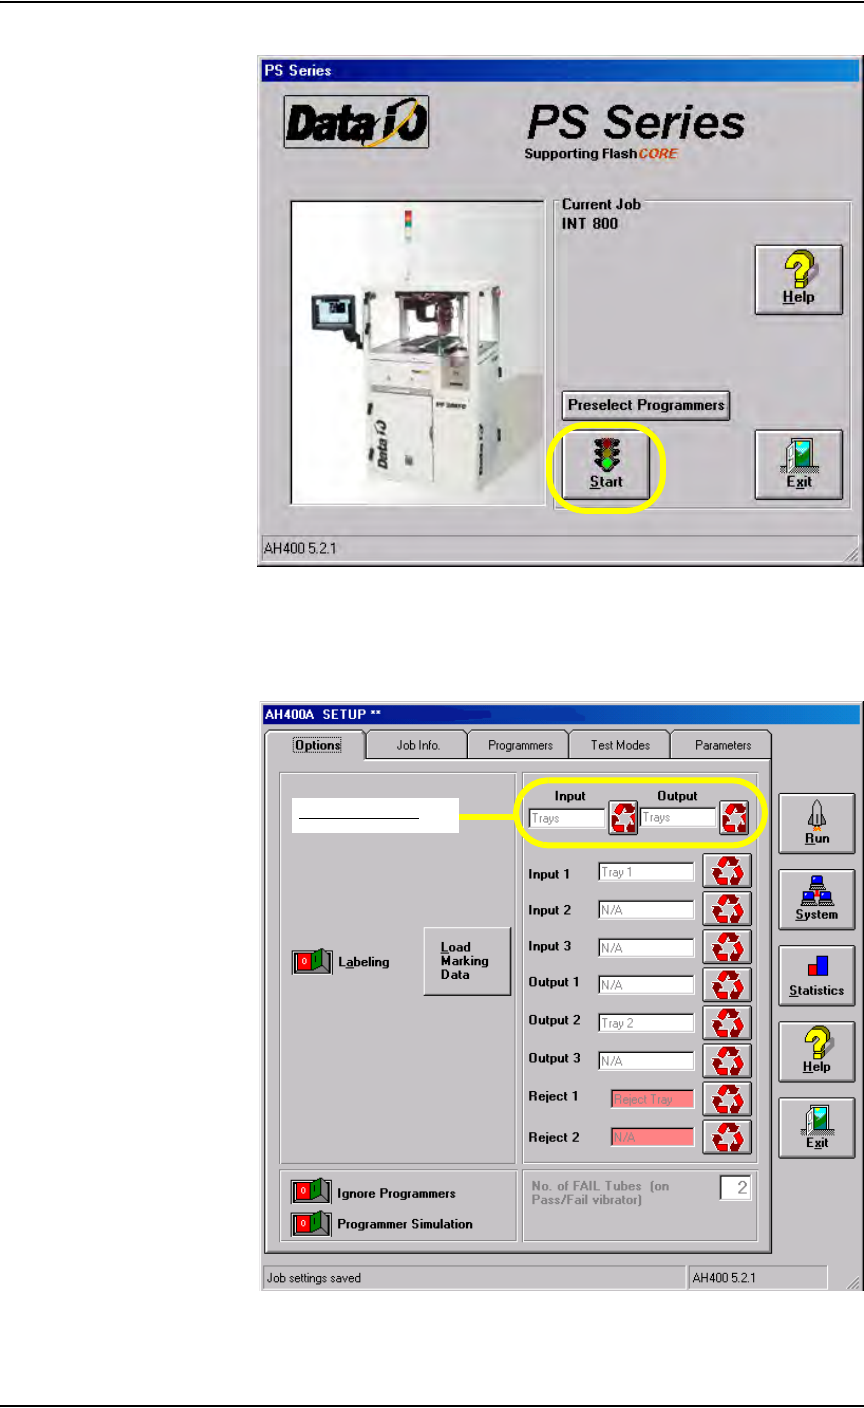
1a) On the AH500 main window, click Start.
Operation • Operator Functions
PS288 Owner’s Manual 3—5
.
Figure 3-9—Click Start
1b) From the Setup window, select the Options tab.
1c) With the cycle buttons, select the main Input and Output media. The
selections are Tube, Tape, and Tray.
Figure 3-10—Main Input/Output selections on Options tab
Main Input/Output
Operation • Operator Functions
3—6 PS288 Owner’s Manual
2. Input 1, 2, 3 and Output 1, 2, 3 media—
Select media for Input 1, 2, 3 and Output 1, 2, 3 with the cycle buttons
to the right of each field. Options vary depending on the selections
made for the main Input and Output media.
3. Reject media—
Select media for Reject 1 and Reject 2. These fields are highlighted in
red.
NOTE: When settings are changed for Input and Output media,
reject media are set to N/A. When Reject Media 1 is changed, Reject
Media 2 is set to N/A. Always set reject media last.
NOTE: Only applicable media are shown depending upon the
mode selected.
Verify Job Information
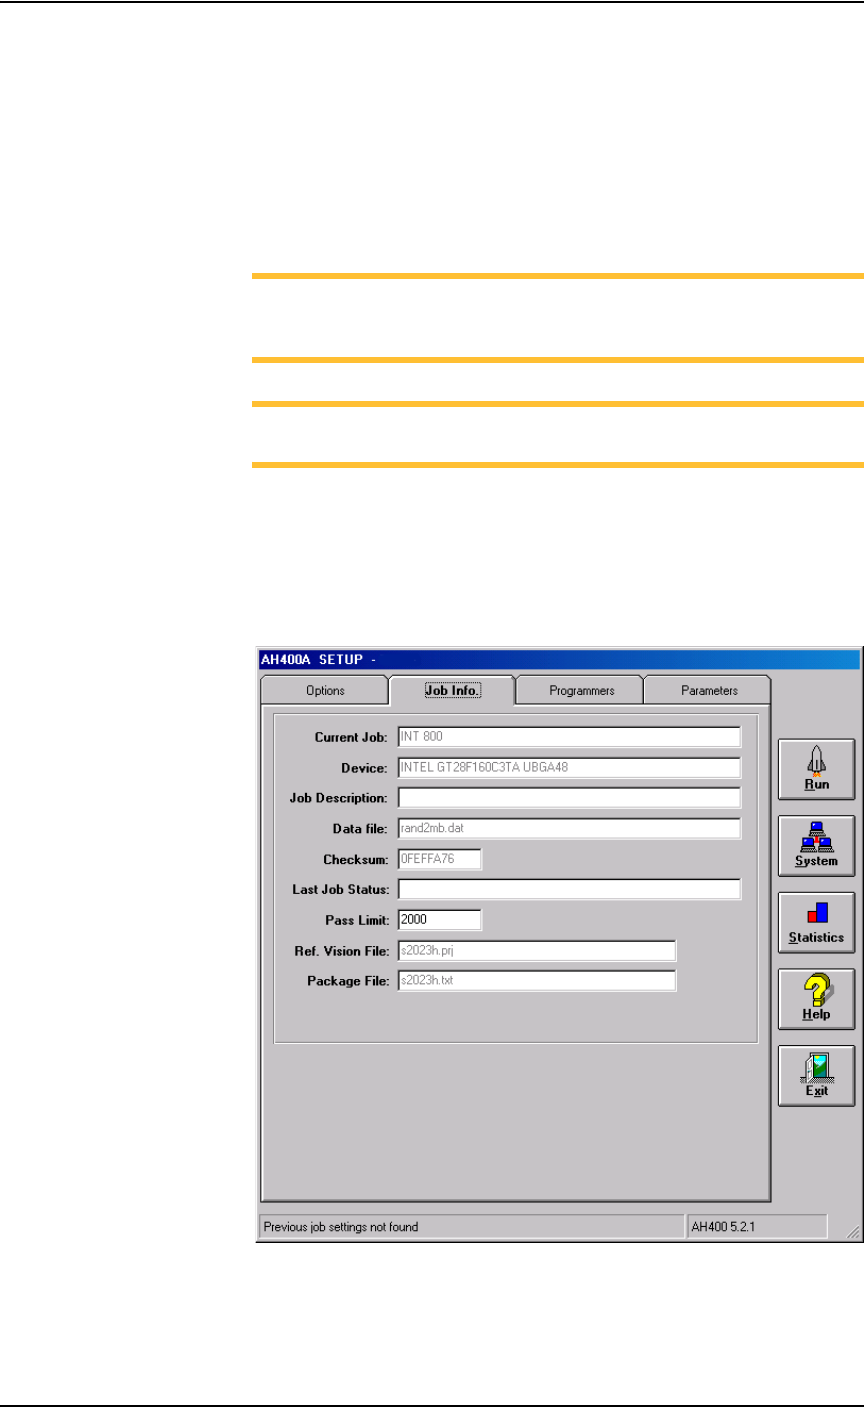
1. Select Job Info tab—
1a) On the Setup window, click the Job Info tab.
1b) Verify that all the information displayed matches the information for
this job. See Figure 3-11.
Figure 3-11—Job info