PS288_OwnersMnl_PriorTo2009 - 第71页
Operation • Operat or Functions PS288 Owner’s Manual 3—11 sides of the system. Pressing an E-Stop button immediately stops motion of the PNP head and the gantry . W ARNING: Do not use the Pause button in an emergency . P…
Operation • Operator Functions
3—10 PS288 Owner’s Manual
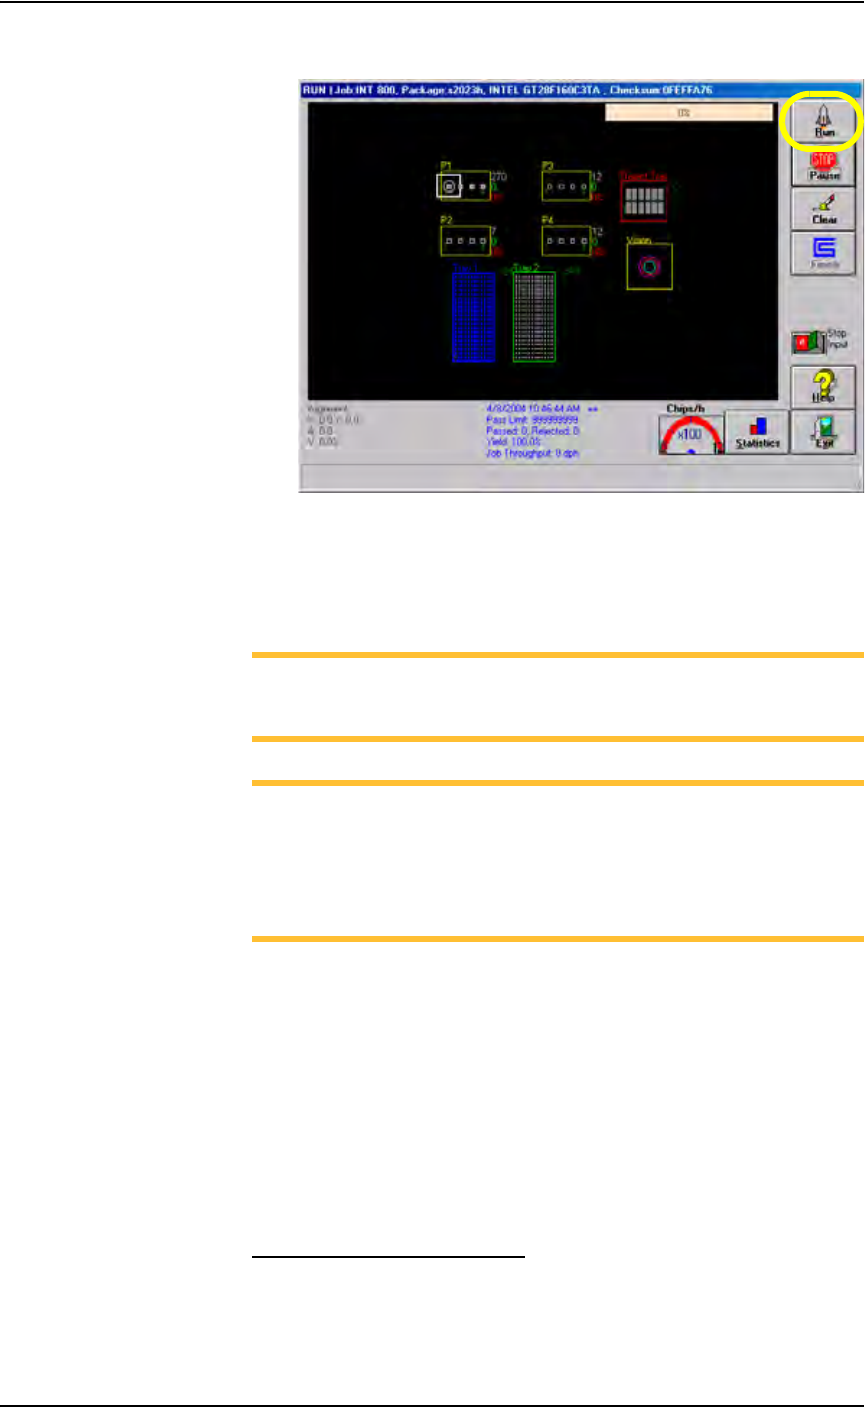
2. On the Run window, click Run.
Figure 3-16— Click Run on the Run window
The PNP head moves to the Park position and then starts the Job. Status
indicators appear inside the programmer outlines, and PNP head loca-
tion is tracked on the Run window.
NOTE: If the input/output media are tubes, you may need to adjust
tube vibration if devices do not move easily. Use the vibration con-
trols on the front of the PS288 to adjust tube vibration.
NOTE: To end a Job after the “pass” media is full, click Stop Input
to the ON position.The Stop Input switch can be selected while a
Job is running. If there are more devices in sockets than empty
spaces in the “pass” media, the system will load an additional tray
or tube before stopping. You can continue a Job stopped in this way
by clicking Run again.
Stop the System
There are three methods for stopping the PS288:
• Emergency Stop and Restart — Stop the movement of the PNP head
in an emergency.
• Pause a Programming Session — Pause a programming session to
perform routine tasks and then resume the programming session.
• End a Job — Complete the current programming cycle, remove
devices from the sockets, and place them into the output media (pass or
reject).
Emergency Stop and Restart
To prevent bodily injury or damage to equipment in an emergency, press
either of the red Emergency Stop (E-Stop) buttons located on the upper
Operation • Operator Functions
PS288 Owner’s Manual 3—11
sides of the system. Pressing an E-Stop button immediately stops motion of
the PNP head and the gantry.
WARNING: Do not use the Pause button in an emergency. Press-
ing Pause allows the PNP head to continue moving at full speed
until the current operation is complete. In an emergency, press
the E-Stop button.
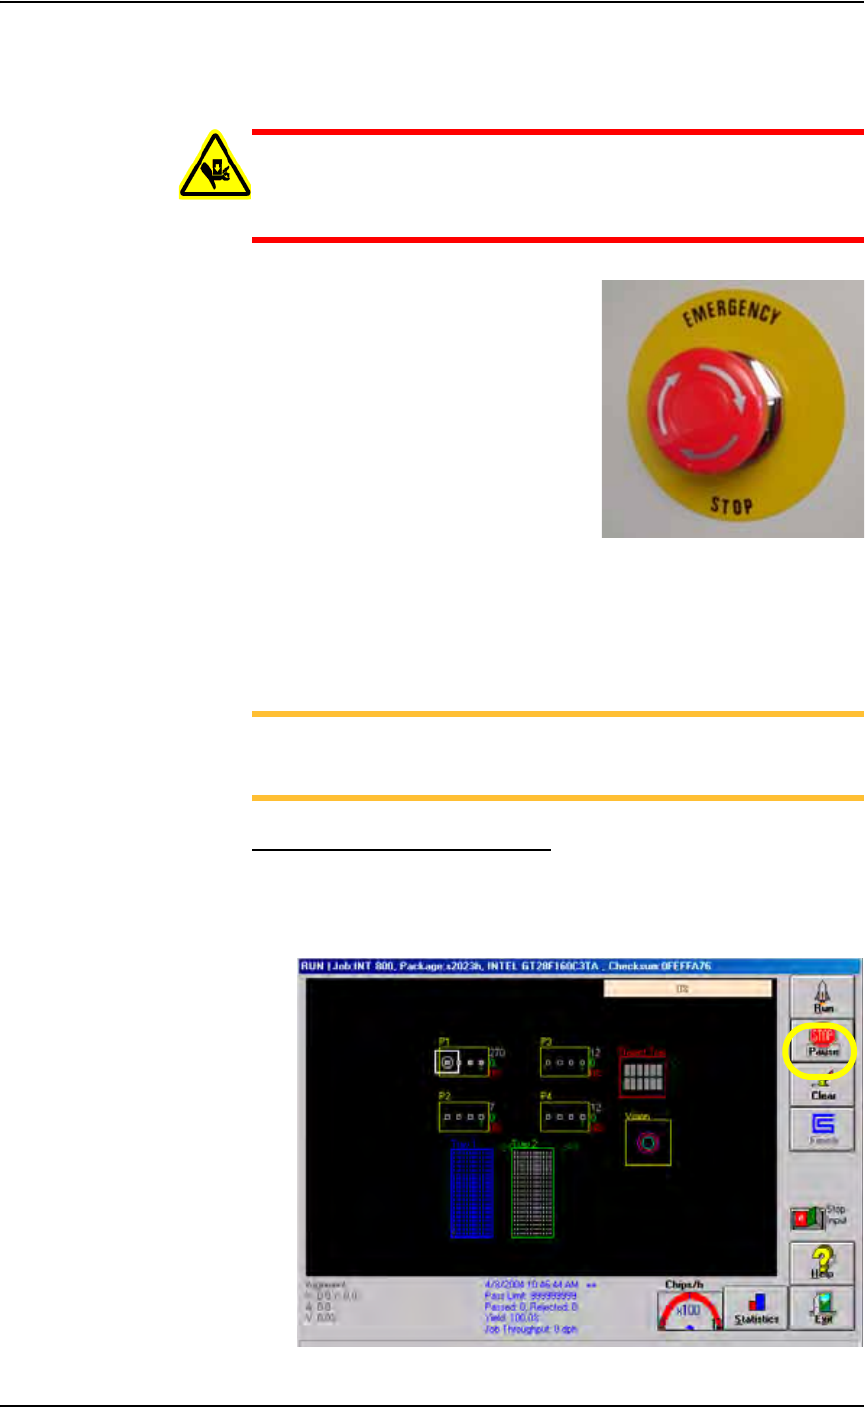
Figure 3-17—Emergency stop (E-Stop) button
To restart the system, turn the E-Stop button clockwise (in the direction of
the arrows) until it springs back to its full height. On the touch screen moni-
tor is the message “Check doors/E-stop!” Click OK. The system starts up
and resumes the interrupted operation.
NOTE: The PNP head shuts down if the input air pressure drops
below a factory-set threshold level. If the system stops for no appar-
ent reason, check the input air pressure and air line connections.
Pause a Programming Session
To pause a moving PNP head at the end of the current programming cycle,
click Pause on the Run window. This is the preferred method of pausing the
system in a non-emergency situation. To recover, click Run. See Figure
3-18.
Figure 3-18—Click Pause

Operation • Operator Functions
3—12 PS288 Owner’s Manual
NOTE: If you are using tape output, you also must press the red
reset button on the taping machine to continue running a job after
pausing.
To remove all devices that are currently in programmers, click Clear on the
Run window. All devices will be removed from the programming sockets
and placed in the reject module.
End a Job
To end a job, click Finish on the Run window. This completes the current
programming cycle. No more blank devices are picked from the input media,
and all devices in the sockets are removed and placed in the appropriate out-
put or reject modules.
Another method to end a job is to click the Stop Input switch to the ON
position. The job then ends after a “pass” tray or tube is full.
Shut Down the System
To remove power to all PS288 components, for instance when the system
will not be run overnight or before performing major service procedures, fol-
low these steps:
1. Complete or exit any Job that is running.
2. Remove all devices from the system.
3. Exit the laser software (if this option is installed), and shut down the
Laser Computer from the Windows Start menu.
4. Exit AH500 and TaskLink, and shut down the Handler Computer from
the Windows Start menu.
5. Turn the main power switch to the OFF (vertical) position.
6. (Optional) Padlock the main power switch so that it cannot be turned
back on until the padlock is removed.