PS288_OwnersMnl_PriorTo2009 - 第76页
Operation • Operator Functions 3—16 PS288 Owner’s Manual . Figur e 3-23—Pr eselect pr ogrammers 1b) Unlock the configuration by clicking the I (green) sid e to toggle to the Unlock Cnf position. 1c) Click the I (green) s…
Operation • Operator Functions
PS288 Owner’s Manual 3—15
Perform the following to disable a programmer:
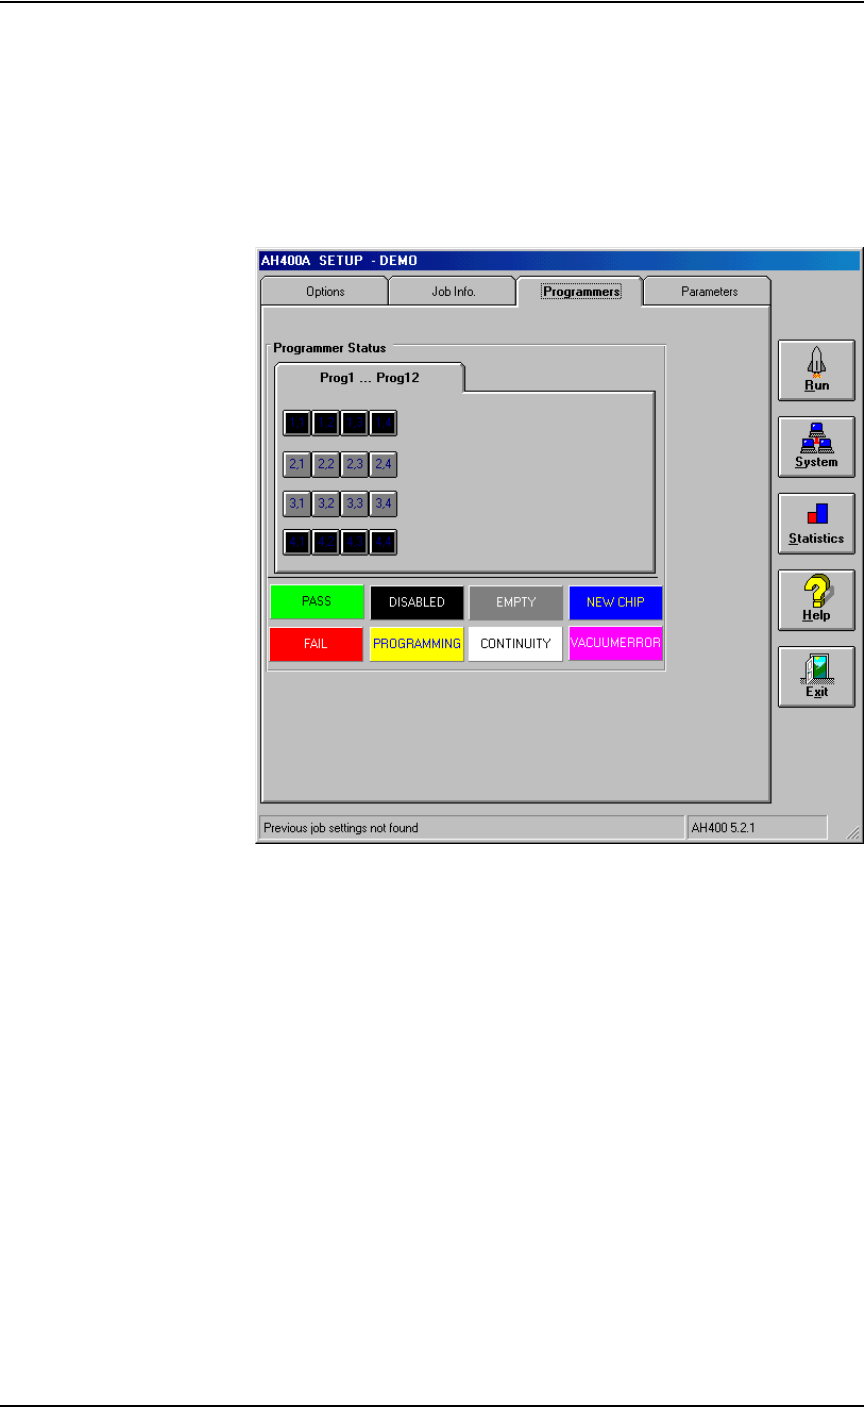
1. Setup window—
1a) From the Setup window, click the Programmers tab.
1b) Click the button for the failed programmers.
1c) Click the black DISABLED button. The programmer buttons change
to black. For example, in Figure 3-22, programmers 1 and 4 are dis-
abled.
Figure 3-22—Programmers 1 and 4 disabled
2. Resume job—
Click Run to resume the job.
(Optional) Preselect the Programmers
The PS288 has a FlashCORE Quad assembly that contains four FlashCORE
programmers. To improve efficiency, you may wish to shut off program-
mer(s) that are not used.
1. Preselect programmers —
1a) On the AH500 main window, click Preselect Programmers.
Operation • Operator Functions
3—16 PS288 Owner’s Manual
.
Figure 3-23—Preselect programmers
1b) Unlock the configuration by clicking the I (green) side to toggle to the
Unlock Cnf position.
1c) Click the I (green) side of the toggle switch to enable a programmer.
Click the O (red) side of the toggle switch to disable a programmer. In
Figure 3-24, programmers 1, 2, and 3 are enabled, and programmer 4 is
disabled.
Figure 3-24—Programmers selected
Operation • Operator Functions
PS288 Owner’s Manual 3—17
2. Lock configuration and start—
2a) To lock configuration (so that next time the system is switched on the
same programmers are selected), click the O (red) side of the Lock
Cnf. toggle switch.
2b) On the AH500 main window, click Start. This opens the Setup win-
dow.
(Optional) Change a Socket Adapter
To change a Socket Adapter:
1. If a job is running, click Finish on the Run screen and wait for the PNP
head to empty the sockets and return to Park.
2. Exit the AH500 software.
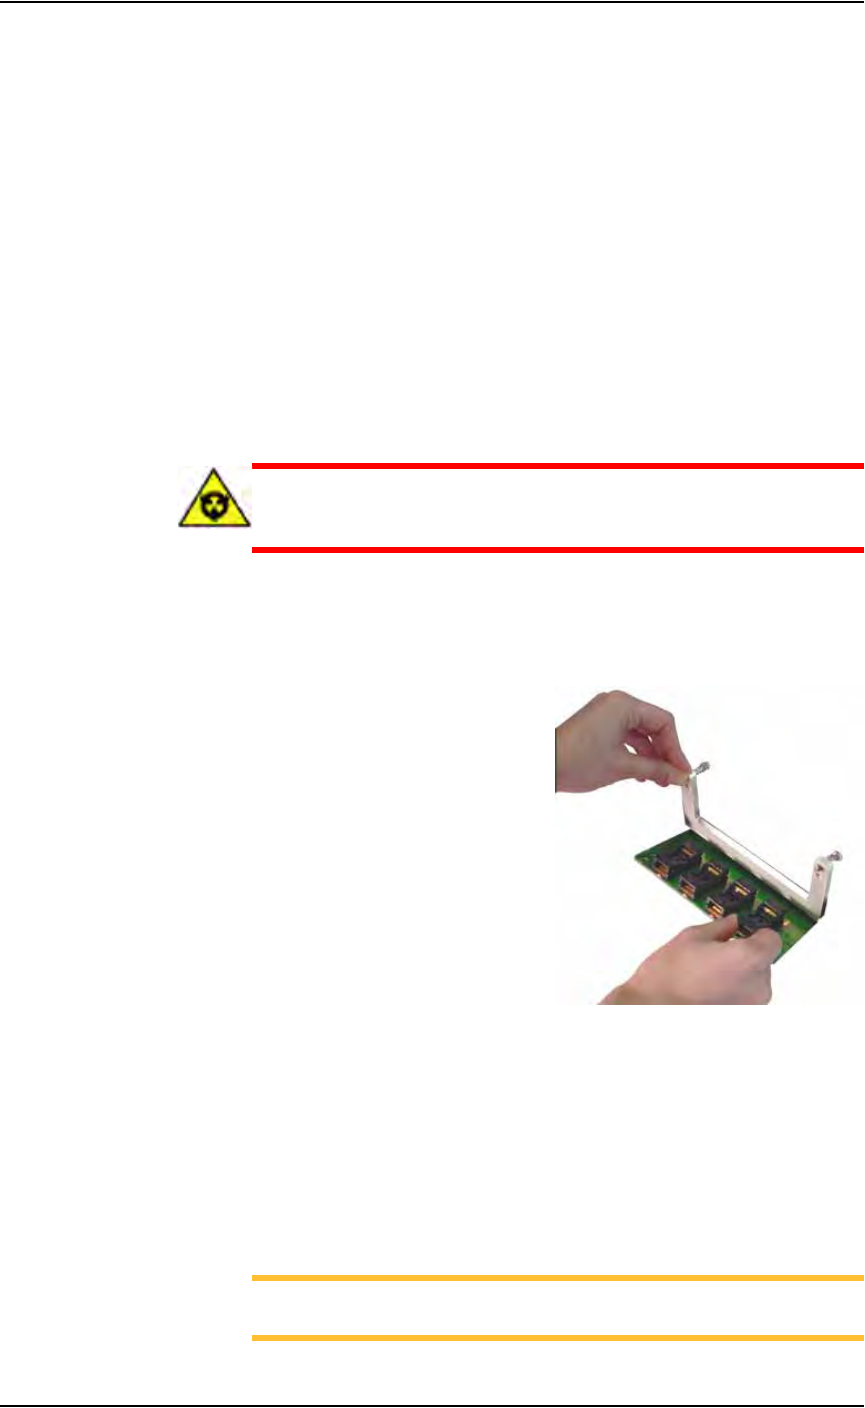
3. Open the safety shield that offers the easiest access to the program-
mer(s).
CAUTION: Electrostatic discharge may damage Socket Adapters
and devices. Wear an ESD strap or discharge static against a com-
mon ground.
4. Unscrew the two captive, 4 mm socket head screws and open the
Adapter Bracket.
5. Open the Adapter Bracket and lift up the Socket Adapter. (Programmer
not shown.) See Figure 3-25.
Figure 3-25— Lift the Socket Adapter
6. Without touching the gold contact surfaces on the bottom of the Socket
Adapter, lift it up off the dowel pins and remove.
7. Insert the correct Socket Adapter, making sure that it seats on the
dowel pins.
8. Screw in the two screws.
To restart a stopped Job, in TaskLink select the Job and click Run on the
Task/Kit Manager window.
NOTE: If you are using tape output, you also must press the red
reset button on the taping machine to continue.