PS288_OwnersMnl_PriorTo2009 - 第85页
Operation • Administrator Functi ons PS288 Owner’s Manual 3—25 4. Move device to the V ision system— 4a) Pick up the device by bringing the cursor over the programmer label and right-clicking the touchpad . 4b) On the Ga…
Operation • Administrator Functions
3—24 PS288 Owner’s Manual
•Click Ye s to overwrite previous values.
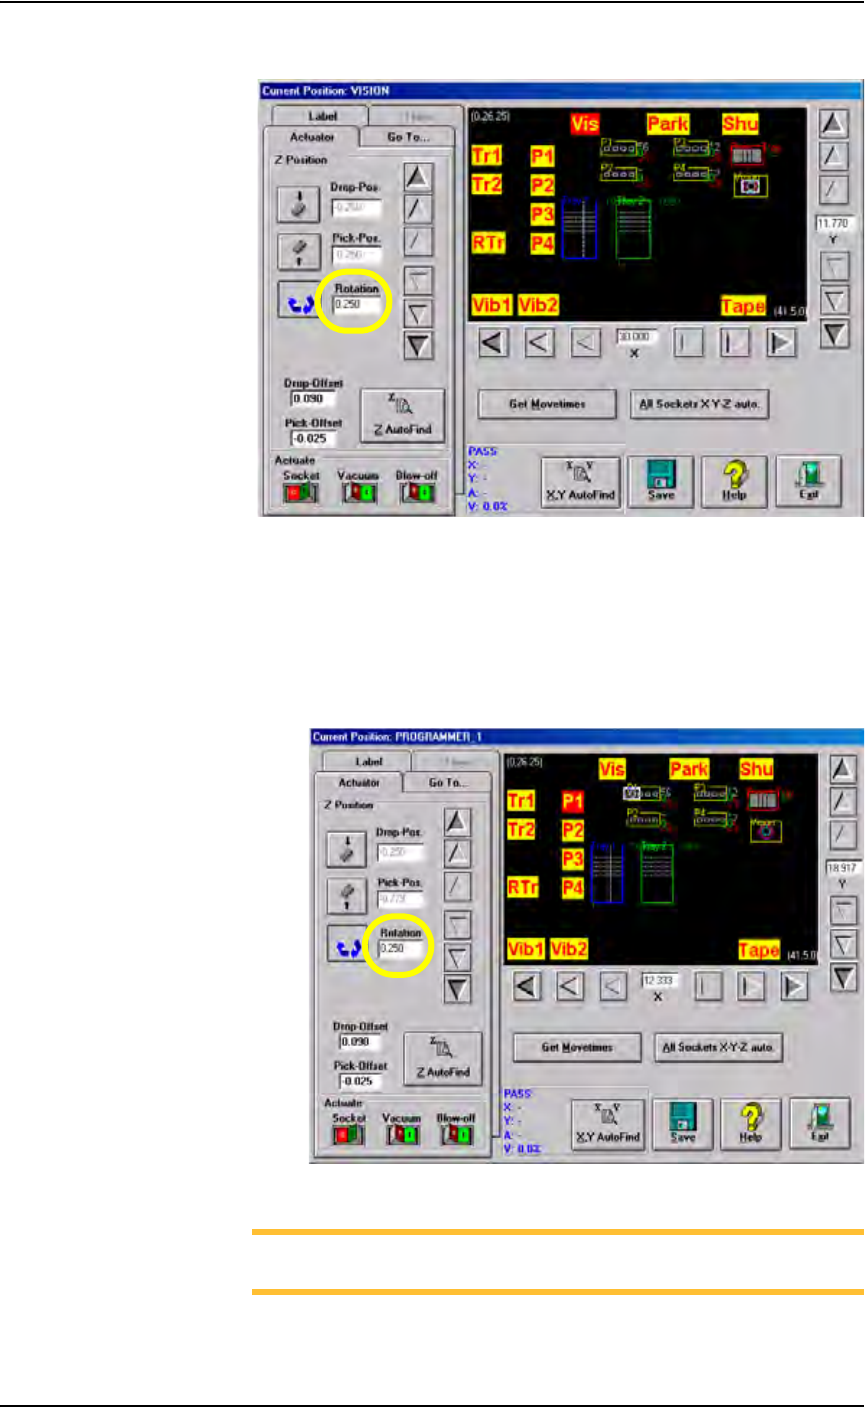
Figure 3-29— Rotation value at Vision
•Click P1. The gantry moves the PNP head to Programmer 1 location.
• Click the Rotation icon.
• Enter the same R-axis rotation value entered at the Vision location.
• Press <Enter>.
•Click Save.
•Click Ye s to overwrite previous values.
Figure 3-30—Rotation value at P1
NOTE: The R-axis value at ALL programmer locations and the
Vision location must be the same.
• Repeat for ALL programmer locations.
Operation • Administrator Functions
PS288 Owner’s Manual 3—25
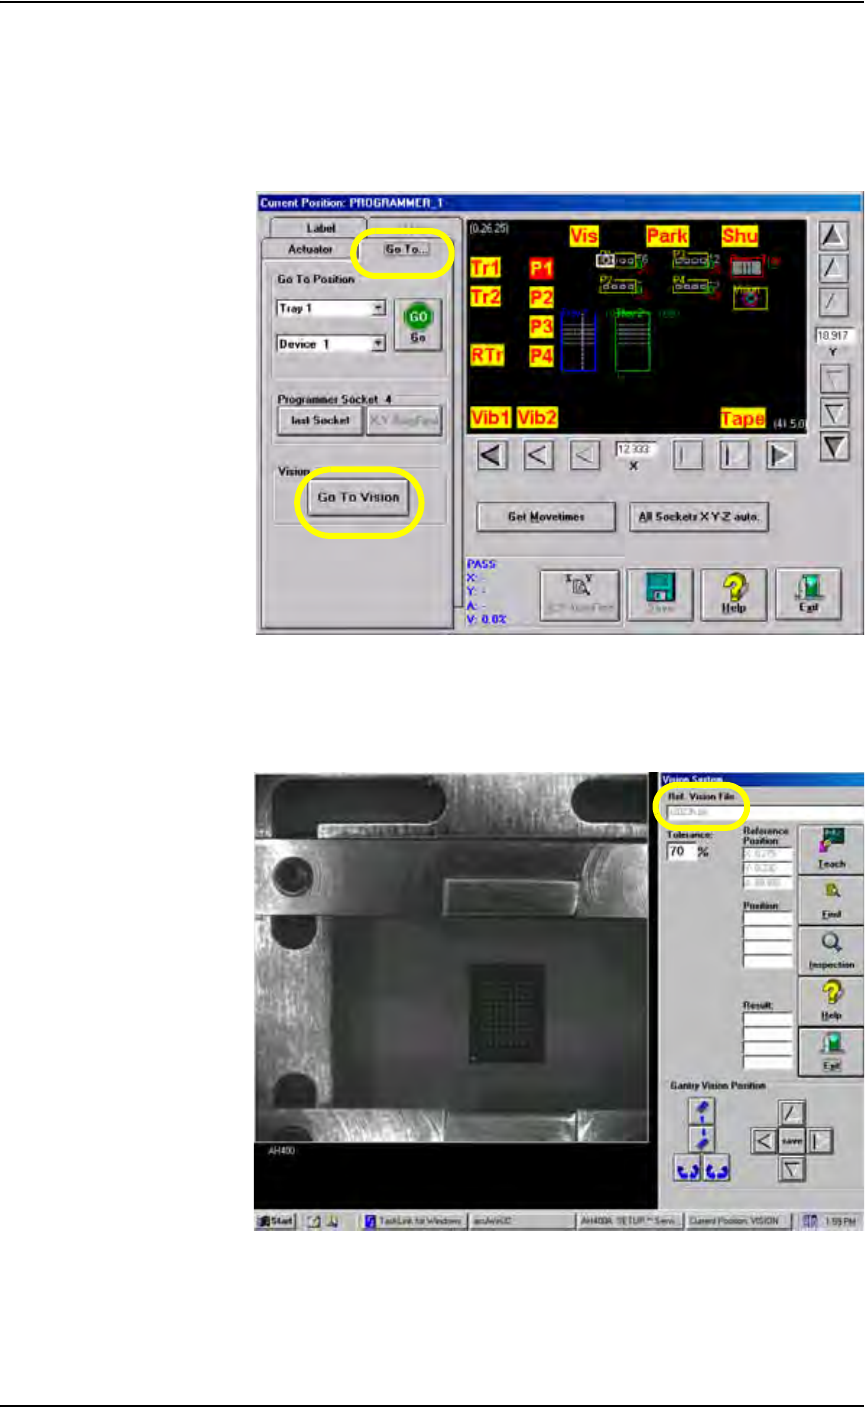
4. Move device to the Vision system—
4a) Pick up the device by bringing the cursor over the programmer label
and right-clicking the touchpad.
4b) On the Gantry window, select the Go To... tab.
4c) Click Go To Vision. The device moves to the Vision system.
Figure 3-31—On Go To tab, click Go to Vision
5. Verify correct file—
On the Vision System window, note that the name of the reference
vision file for this Job is displayed.
Figure 3-32—Reference vision file name
Operation • Administrator Functions
3—26 PS288 Owner’s Manual
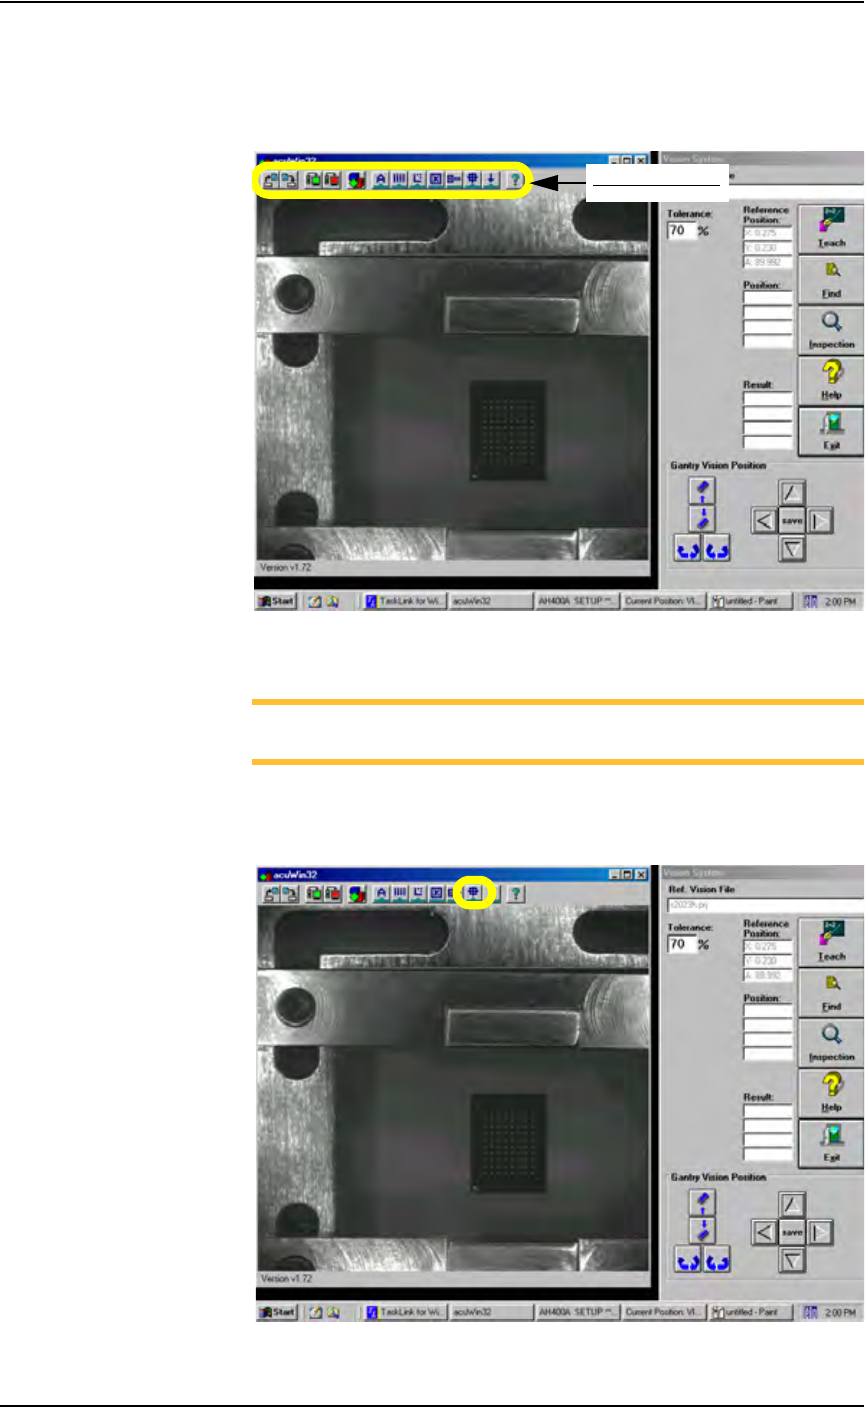
6. Display acuWin32 tool bar—
Bring the cursor anywhere inside the black and white vision image area
shown below and double-click. This opens the acuWin32 tool bar. See
Figure 3-33.
Figure 3-33—Click inside black and white vision image area to open the
AcuWin32 tool bar
NOTE: It may be necessary to adjust the device search area for this
device. If so, proceed with Step 7. If not, skip forward to Step 8.
7. Adjust device search area (if necessary) —
7a) On the acuWin32 tool bar, click the icon to open the Search Search dia-
log.
Figure 3-34—Click to open Search Search dialog
acuWin32 tool bar