PS288_OwnersMnl_PriorTo2009 - 第89页
Operation • Administrator Functi ons PS288 Owner’s Manual 3—29 Figur e 3-39—Click Te a c h 8b) In the acuW in32 window , size the de vice image area (red rectangle) so that it matches the edges of the device. In Figur e …
Operation • Administrator Functions
3—28 PS288 Owner’s Manual
Figure 3-37—Click green triangle to exit Area Search dialog
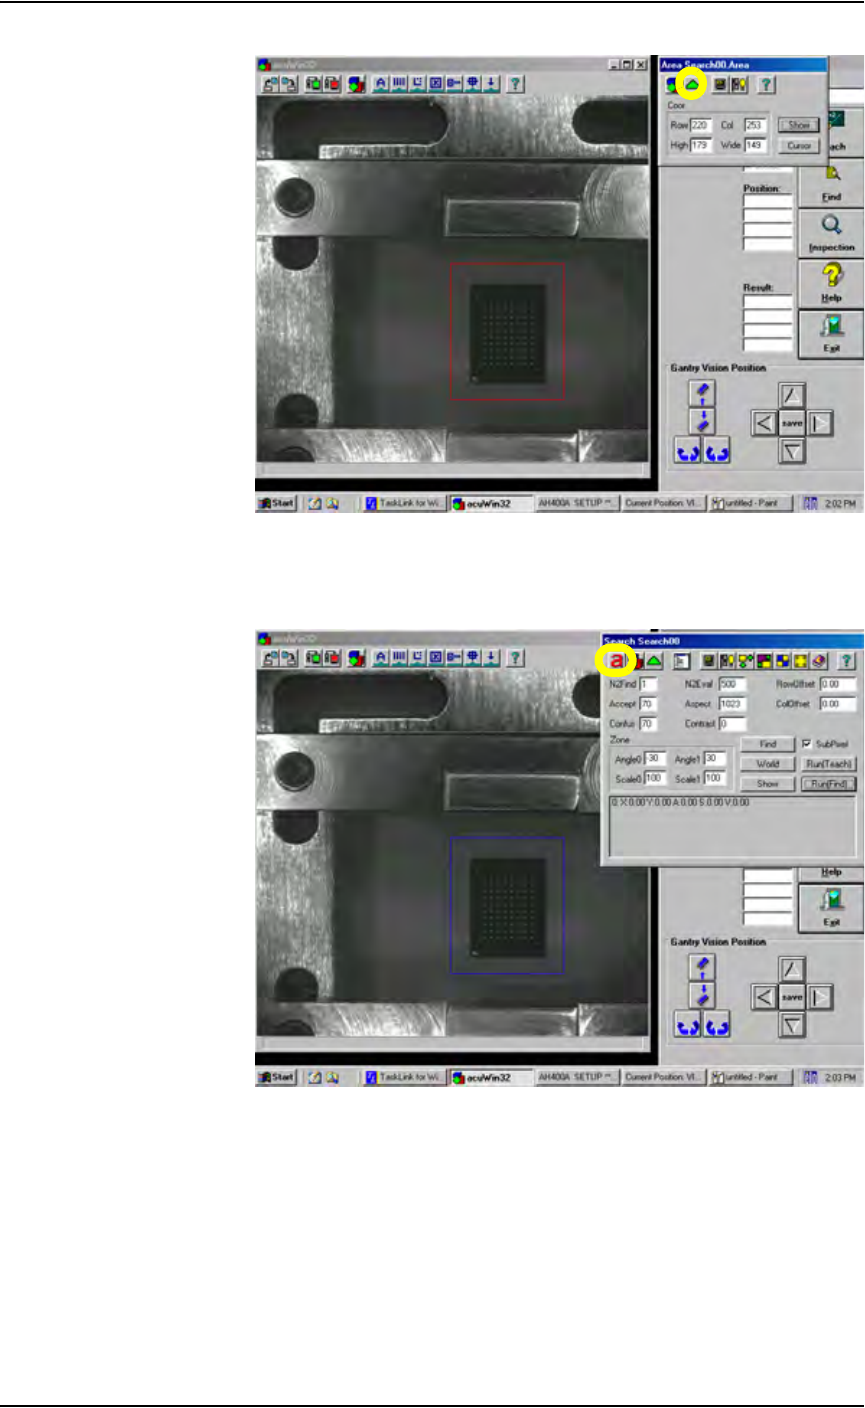
7e) On the Search Search dialog tool bar, click
a to hide the Search Search
dialog. See Figure 3-38.
Figure 3-38—Click
a to hide Search Search dialog
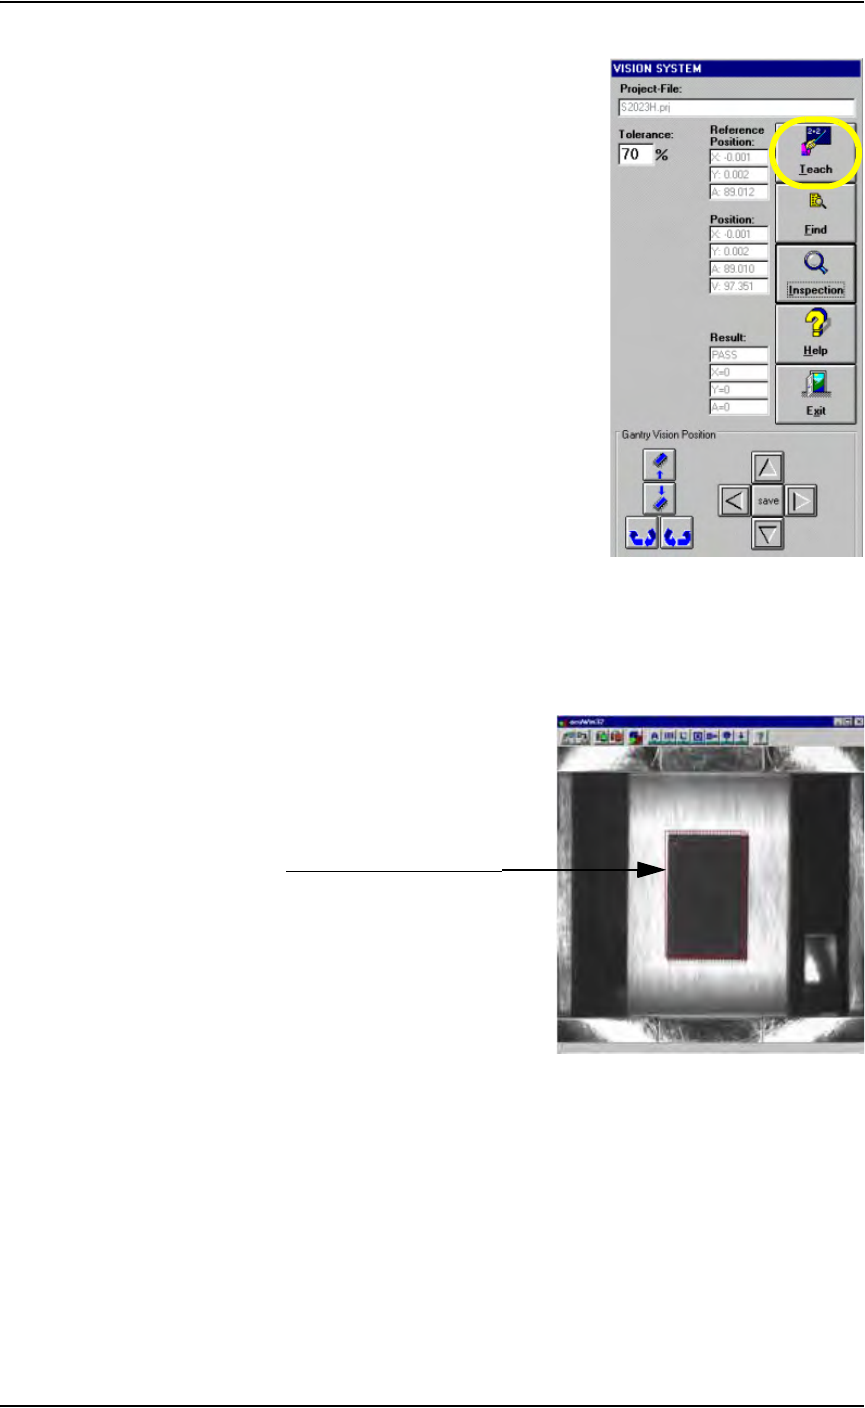
8. Teach—
8a) On the Vision System window, click Teach.
Operation • Administrator Functions
PS288 Owner’s Manual 3—29
Figure 3-39—Click Teach
8b) In the acuWin32 window, size the device image area (red rectangle) so
that it matches the edges of the device. In Figure 3-40, the device
image area is offset slightly from the device for clarity. In actuality, the
device image area needs to match the device exactly.
Figure 3-40—Device image area (red rectangle) matches the device
8c) When the device image area exactly matches the device, click OK.
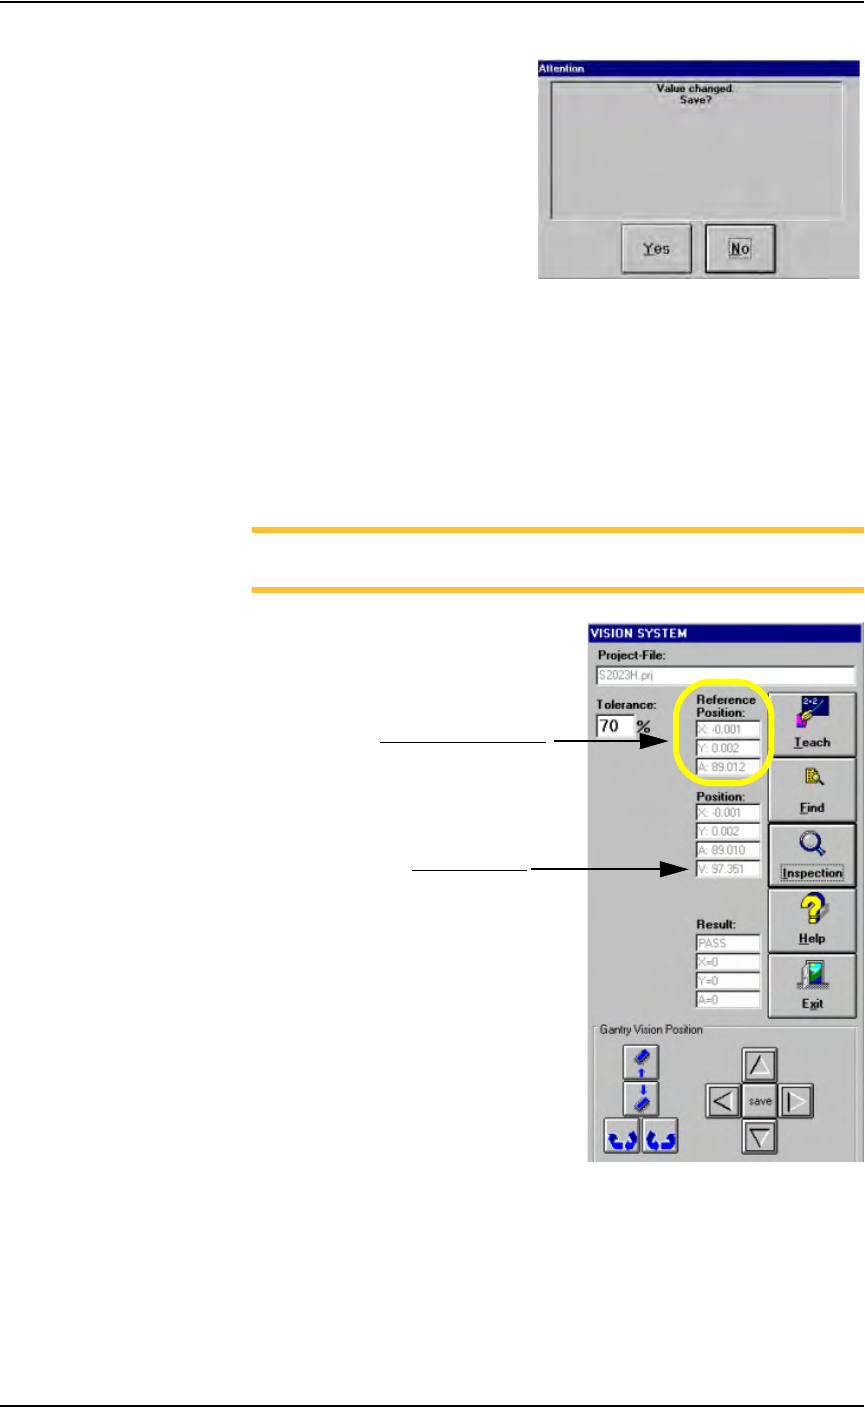
8d) If the Attention message box appears, click Ye s to save the changed
value. See Figure 3-41.
Device image area (red rectangle)
Operation • Administrator Functions
3—30 PS288 Owner’s Manual
Figure 3-41—Save changed value
9. Check new values—
9a) On the Vision System window, note the new Reference Position val-
ues for X and Y. Values are in inches. Ideally, these values are 0 (zero).
Values of ±0.005 inches are within tolerance. In the example shown
here, X = - 0.001 and Y = 0.002.
9b) Note the Verification value. This value should be greater than 95. In
the example shown here, the value is 97.351.
NOTE: If values are not within tolerance, proceed with Step 10. If
the values are within tolerance, skip forward to Step 11.
Figure 3-42—New values
10. Adjust device image area again (if necessary)—
10a) Adjust the device image area and move it in the X-axis and/or Y-axis
direction as required.
10b) On the Vision System window, click Teach again.
10c) On the Attention message box, click Yes to accept changed values.
Reference Position values
Verification value