PS288_OwnersMnl_PriorTo2009 - 第96页
Operation • Administrato r Functions 3—36 PS288 Owner’s Manual 4c) By hand, adjust the Socket Actuator so that the ribs open the socket as the probe tip descends and so the actuator does not interfere with the device as …
Operation • Administrator Functions
PS288 Owner’s Manual 3—35
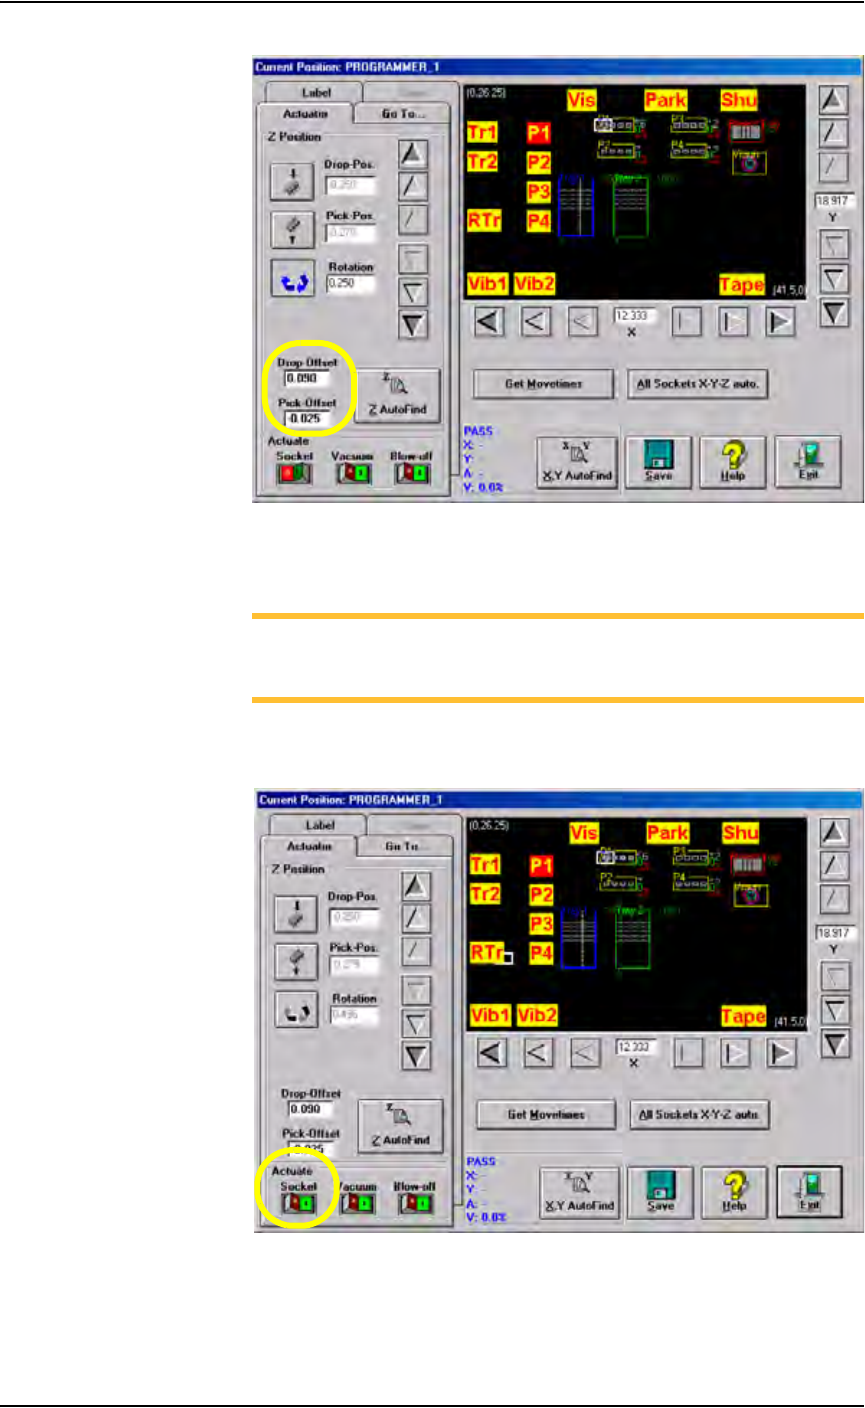
Figure 3-48—Drop and Pick offsets
4. Adjust Socket Actuator (if required)—
NOTE: Adjust the Socket Actuator only if the socket fails to open or
if devices are dropped. It is necessary to adjust the Socket Actuator
only once while teaching a package file.
4a) Click Socket ON. This lowers the Socket Actuator and opens the
socket.
Figure 3-49—Socket ON
4b) On the input panel, push the main air valve down to the OFF position.
Operation • Administrator Functions
3—36 PS288 Owner’s Manual
4c) By hand, adjust the Socket Actuator so that the ribs open the socket as
the probe tip descends and so the actuator does not interfere with the
device as it is picked up by the probe tip.
4d) On the input panel, push the main air valve up to the ON position.
4e) Click Socket OFF to raise the Socket Actuator.
5. Set R-axis value—
Follow the instructions in “Set R-axis rotation values” on page 3-22.
6. Pick the device—
6a) Click P1 to return the PNP head to Programmer 1.
6b) Press X,Y AutoFind. The PNP head picks the device, takes it to the
vision location and compares the orientation of the device to the orien-
tation in the reference vision file.
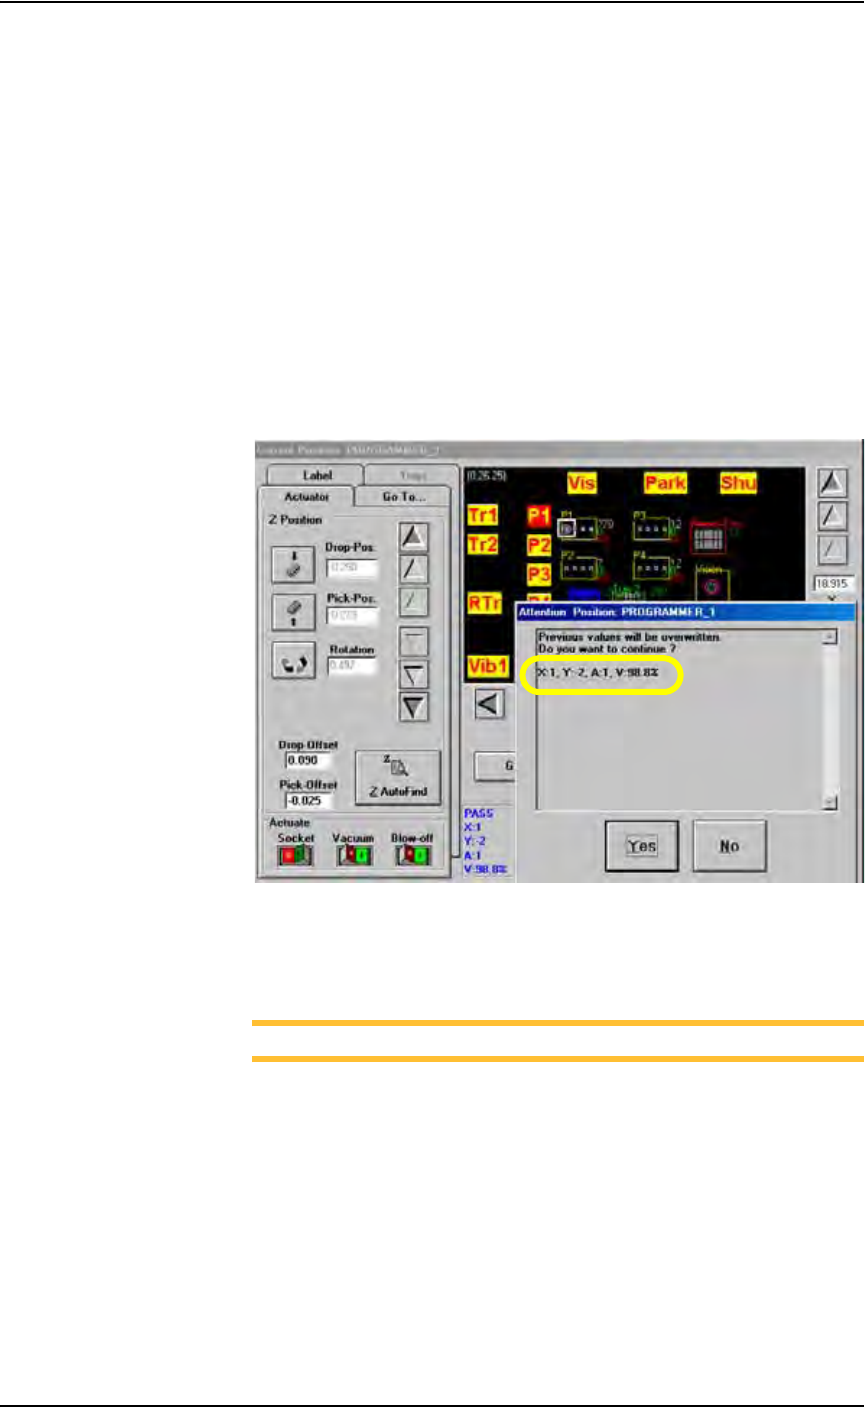
6c) When the Attention message box pops up, check the Results informa-
tion.
Figure 3-50—Results information
6d) If the new values for X and Y are >±5, press Ye s and repeat Step 6b.
If the new values for X and Y are <±5, press No.
NOTE: If the programmer has multiple sockets, complete Step 7.
7. Multiple socket programmers—
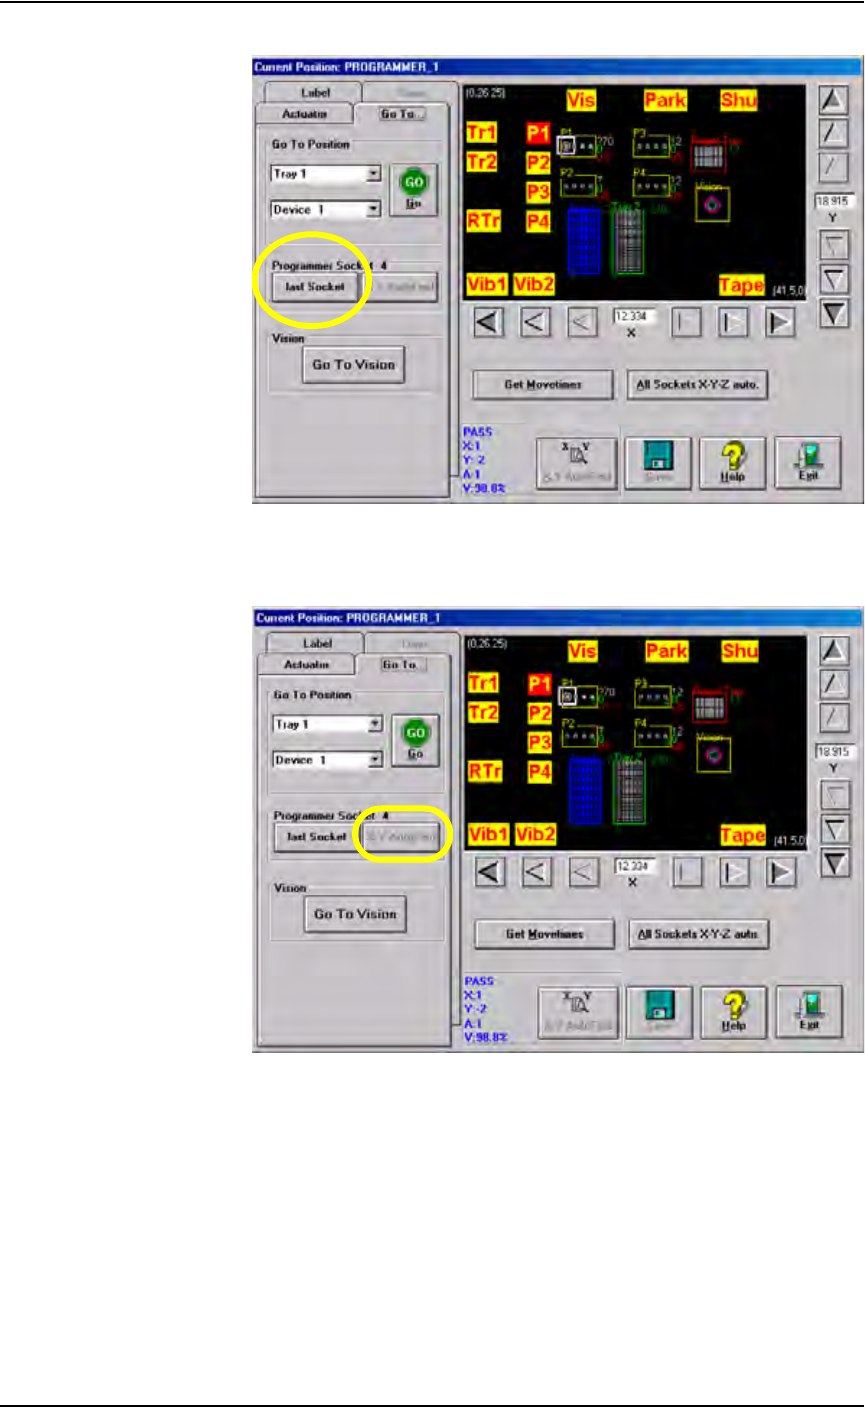
7a) On the Go To tab, click last Socket. See Figure 3-51.
Operation • Administrator Functions
PS288 Owner’s Manual 3—37
Figure 3-51— last Socket
7b) Click X,Y AutoFind.
Figure 3-52—X,Y AutoFind
7c) When the Attention message box pops up, check the Results field.
7d) If the new values for X and Y are >±5, press Ye s and repeat Step 7b.
If the new values for X and Y are <±5, press No.
This completes the process of teaching Programmer 1 locations. Repeat for
ALL programmers.