Apollo1_Operators_Manuel.pdf - 第33页
33 cab - Produkttechnik GmbH / Tharo Systems, Inc.
32 cab - Produkttechnik GmbH / Tharo Systems, Inc.
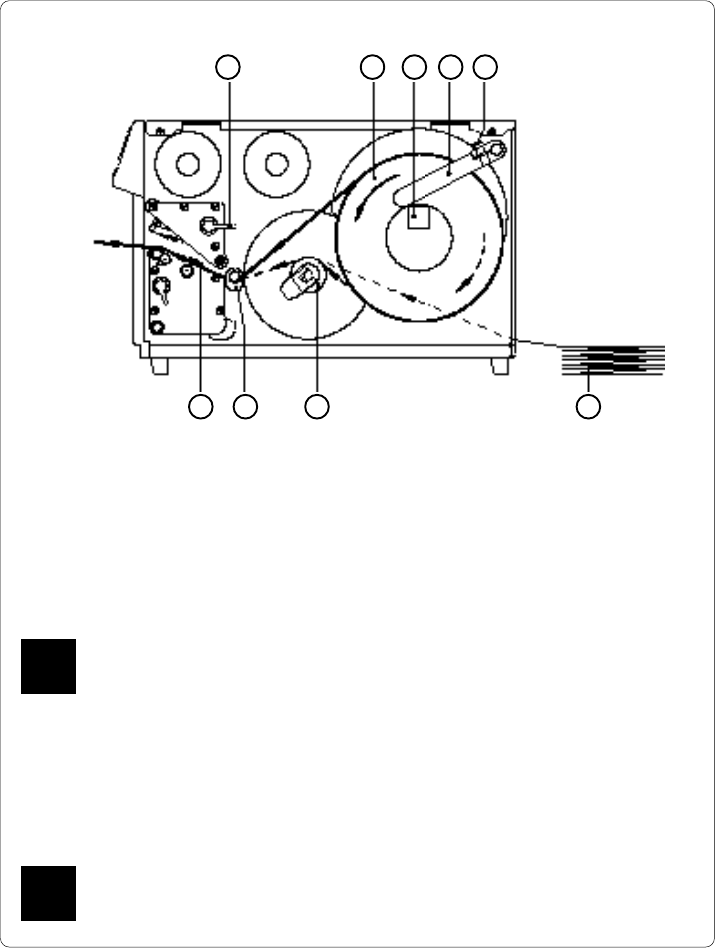
Fig. 6 b Media loading Apollo 2/3
4. Swing the media retainer (4) downwards to the media hub (3) and push it
inwards until it rests against the side of the label roll.
Tighten the knurled screw (5).
5. Slide the media guide (8) into its outermost position.
6. Unroll a length of label stock from the media roll and feed it through as
shown in Figure 6 a/b.
It is particularly important to ensure that the media strip slides properly
between the fittings of the adjustable photocell assembly (9).
7. Slide the media strip right through the space between the print roller and
the printhead until it comes out of the Apollo.
8. Slide the media guide (8) back towards the edge of the media strip.
9. Turn the lever (1) counter-clockwise until it stops and, thereby, lock the
printhead.
If you do not use the printer for an extended period of time, lift the
printhead to avoid possible flattening of the print roller.
1 2 3 4 5
9 78 6
F
F

33cab - Produkttechnik GmbH / Tharo Systems, Inc.
34 cab - Produkttechnik GmbH / Tharo Systems, Inc.
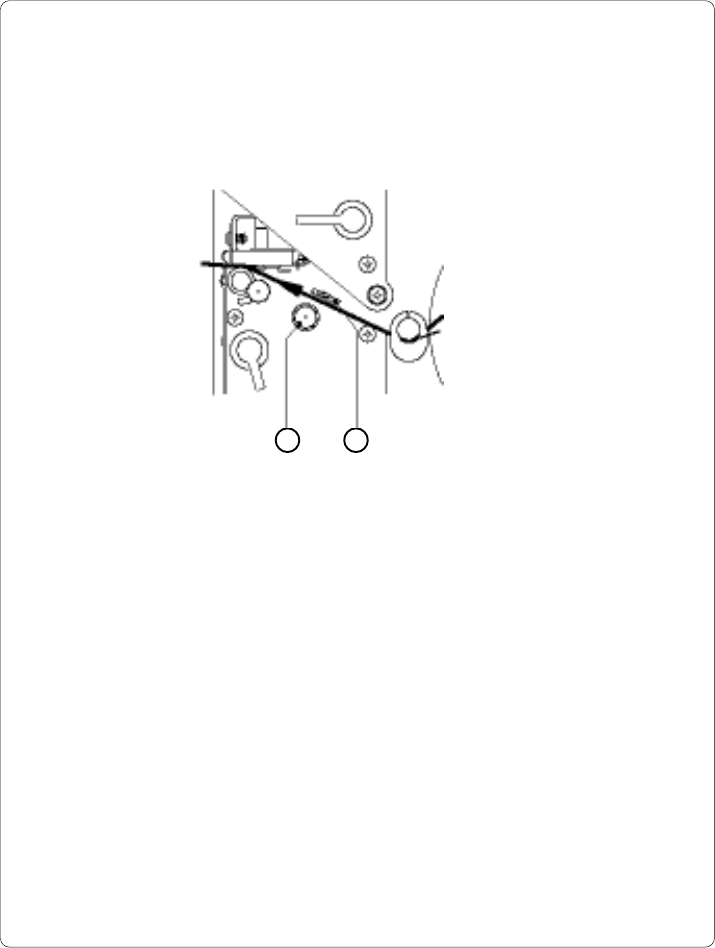
7 Adjustments Concerning the Labels
Adjustment of the Label Edge Sensor
2 1
Fig. 7 a Adjustment of the label edge sensor
To accommodate a variety of print jobs, the position of the label edge sensor
(1) can be adjusted at right angles to the path of the paper feed. This setting is
particularly useful if the required labels are either narrow, or have punch holes or
reflective markings, or deviate from the square or rectangular shape.
It is important to ensure that the sensor is positioned in a way that the gaps
between the labels or the markings can be recognized by the photocell. (the
position of the sensor is marked by a notch in the sensor holder)
If using labels with an unconventional shape (i.e. round or curved), the sensor
should be positioned at the front edge of the label.
Adjust the sensor position using the knurled knob (2).
By turning the knob clockwise the sensor moves outwards, and by turning the
knob counter-clockwise the sensor moves inwards.