Apollo1_Operators_Manuel.pdf - 第37页
37 cab - Produkttechnik GmbH / Tharo Systems, Inc. 8 Control Panel Fig. 8 Front control panel The front control panel of the Apollo is fitted with 4 function keys with indicator LEDs, and a 2x16 character digital LCD dis…
36 cab - Produkttechnik GmbH / Tharo Systems, Inc.
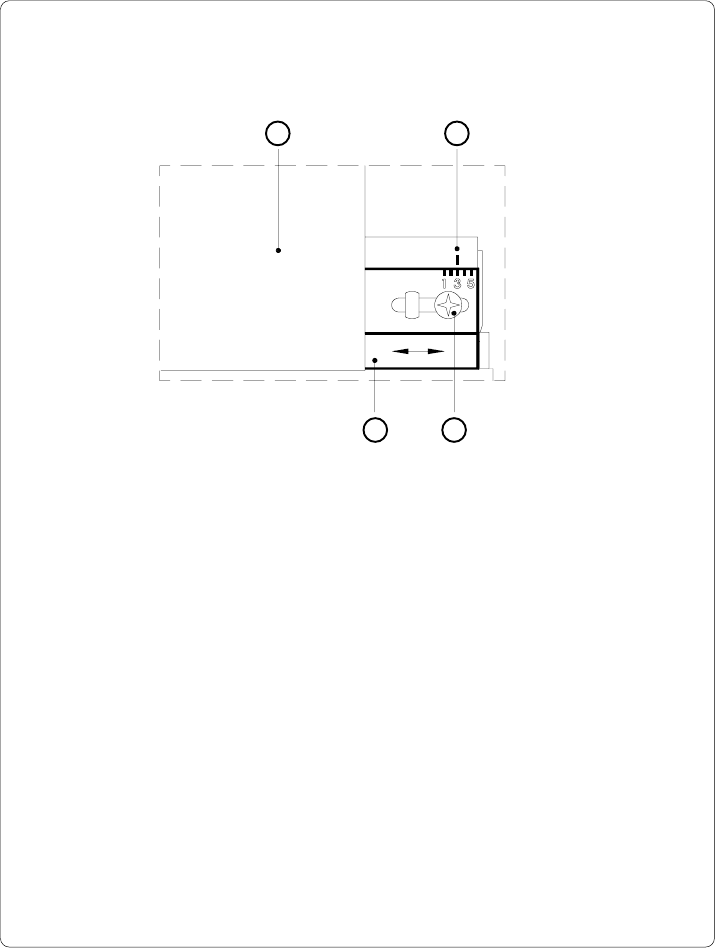
Adjustment of the Transfer Ribbon
Fig. 7 c Adjustment of the transfer ribbon
If creases, lines or black patches appear in the print image resulting in a poor
print quality, this may be caused by wrinkles in the transfer ribbon (1). To
remove the wrinkles, the tension of the ribbon should be made even from the
left to the right by moving the ribbon shield (4) up or down.
1. Loosen the adjustment screw (3).
2. Shift the transfer ribbon shield (4) sideways into the direction of the wrinkle.
Moving it to the left will increase the tension on the left.
Use the scale (2) provided to monitor the adjustments made. If the screw
is in position "1", the tension is highest on the outside, and if it is in position
"5", the tension is highest on the inside.
3. After completing the adjustment, tighten the securing screw (3).
1 2
34

37cab - Produkttechnik GmbH / Tharo Systems, Inc.
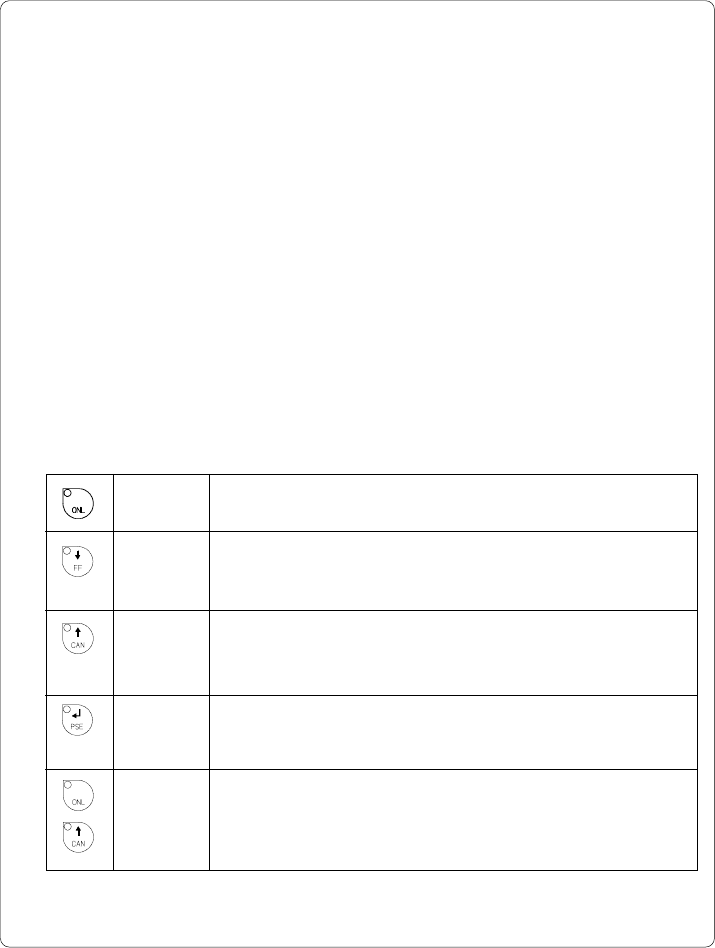
8 Control Panel
Fig. 8 Front control panel
The front control panel of the Apollo is fitted with 4 function keys with indicator
LEDs, and a 2x16 character digital LCD display.
The control panel display constantly provides the operator with the actual
information concerning the current printer mode and label processing. The
indicator LEDs support the information shown in the display by indicating which
keys have to be pressed. (e.g. in the event of a fault)
On the following pages, you will find descriptions of the system modes of the
Apollo, the related indications by the LCD display and the LEDs as well as a
description of the function keys under differing conditions.
38 cab - Produkttechnik GmbH / Tharo Systems, Inc.
ONL key Switch into OFFLINE mode. (LED ONL off)
FF key Provides label feed. The leading edge of the next label to be
printed is in print position.
CAN key Deletes data of the previous print job in internal memory.
Following that, "Pause reprint" is not available.
(see PSE key)
PSE key Repeats the print of the last label, after the previous print job has
been completed.
(only when setup parameter "Pause reprint" is on)
ONL key Pressing both keys together for at least 5 seconds will switch
into the SETUP mode.
+ (LED ONL off)
CAN key
System Mode ONLINE
The printer is switched ON and ready to receive data.
Display
The top line of the display shows "ONLINE".
The bottom line of the display shows the time of day.
During the transfer of data, a rotating pointer appears in the right hand corner
of the bottom line of the display.
When saving data on the PC card, a filled rectangle appears in the right hand
corner of the bottom line of the display.
LED Display
LED ONL on.
Function Keys
Table 8 a Key functions in ONLINE mode