DECAN_S1_Administrator′s_Guide(Eng_Ver1.5)_Print.pdf - 第217页
7-53 Part Registration <Up Foot L> edit box Set the length of the upper lead foot in Y direction <Up Lead P> edit box Set the pitch between upper leads. <Down Lead Num> edit box Set the number of …
7-52
Next Generation, Multi-Functional Placer DECAN S1 Administrator’s Guide
7.1.2.4. TR component data setting
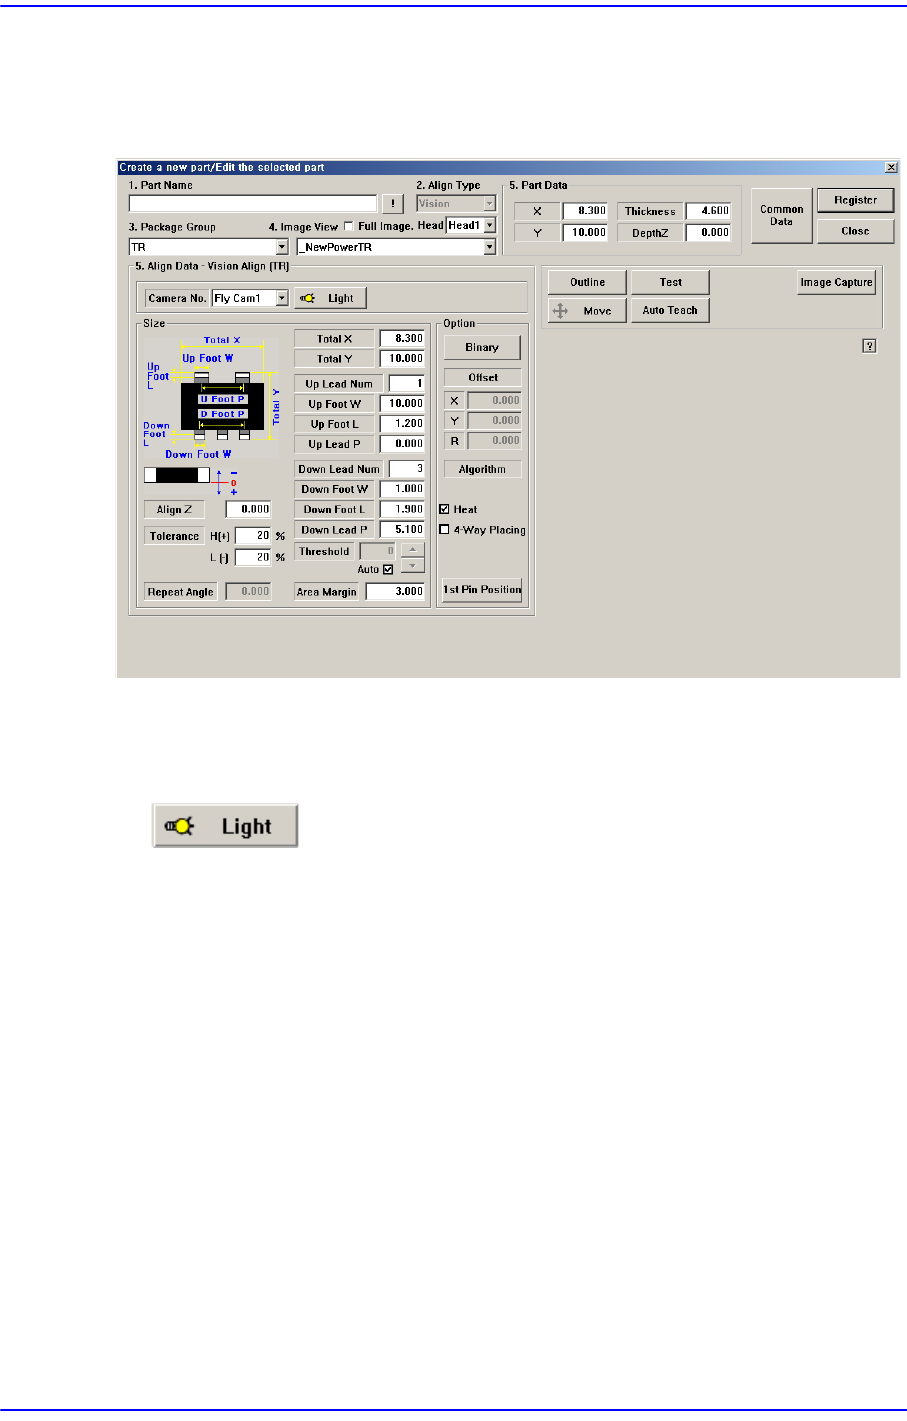
Set the align data for TR components.
Figure7.16 “Package Group =TR” dialog box
<Camera No.> combo box
Select the camera to recognize the component. Please refer to “7.1.1 Common Align
Data” for more information.
button
Set the light for the camera to recognize the component. Please refer to “7.1.1
Common Align Data” for more information.
<Size> group
Set the Align size.
<Total X> edit box
Set the component size in X direction.
<Total Y> edit box
Set the component size in Y direction.
<Up Lead Num> edit box
Set the number of upper leads.
<Up Foot W> edit box
Set the length of the upper lead foot in X direction.

7-53
Part Registration
<Up Foot L> edit box
Set the length of the upper lead foot in Y direction
<Up Lead P> edit box
Set the pitch between upper leads.
<Down Lead Num> edit box
Set the number of lower leads.
<Down Foot W> edit box
Set the length of lower lead foot in X direction.
<Down Foot L> edit box
Set the length of lower lead foot in Y direction.
<Down Lead P> edit box
Set the pitch between lower leads.
For other setups, please refer to “7.1.1 Common Align Data”.
<Option> group
Set align option data.
<Heat> check box
Performs checking when radiators are attached to the body of a part.
For other setups, please refer to“7.1.1 Common Align Data”.
<Move> button
Performs component pickups or moves to the fix camera. Please refer to“7.1.1
Common Align Data” for more information.
<Test> button
Tests component recognition by using the set align data. Please refer to “7.1.1
Common Align Data” for more information.
<Image Capture> button
Helps to specify the optimum lighting value. The lighting is gradually changed
automatically and the images are saved. The user can check the best image and
identify the optimum lighting value. Please refer to“7.1.1 Common Align Data” for
more information.
<Auto Teach> button
Automatically finds out the component align data. Please refer to “7.1.1 Common
Align Data” for more information.
7-54
Next Generation, Multi-Functional Placer DECAN S1 Administrator’s Guide
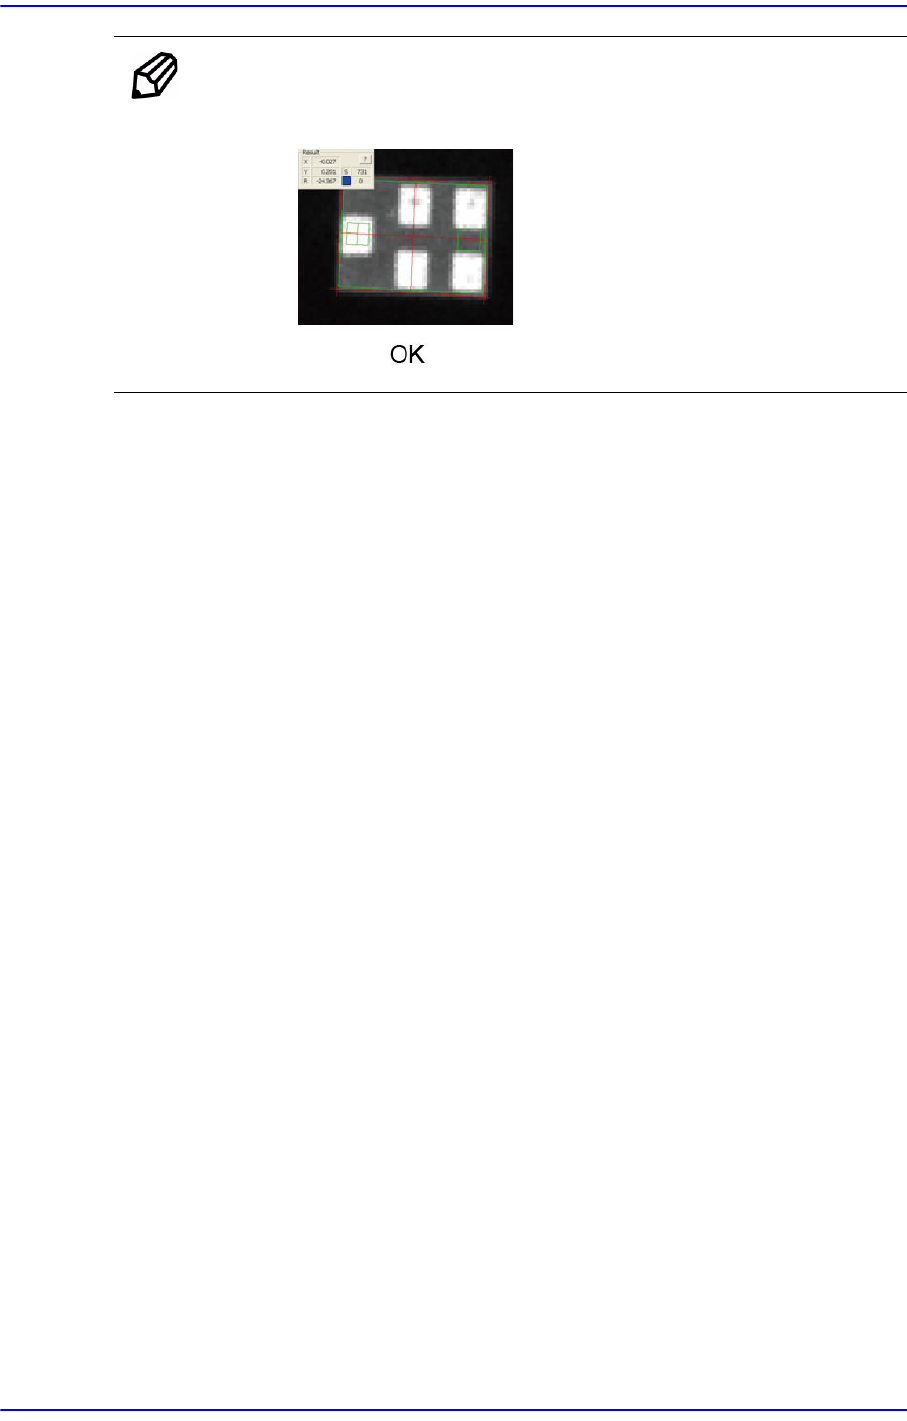
Memo Register the part with its image the same as the following as TR2 and
have the 3 leads recognized except for the lead at the center.
Selected for use with the inspection function when parts registered as TR flip over.