DECAN_S1_Administrator′s_Guide(Eng_Ver1.5)_Print.pdf - 第306页
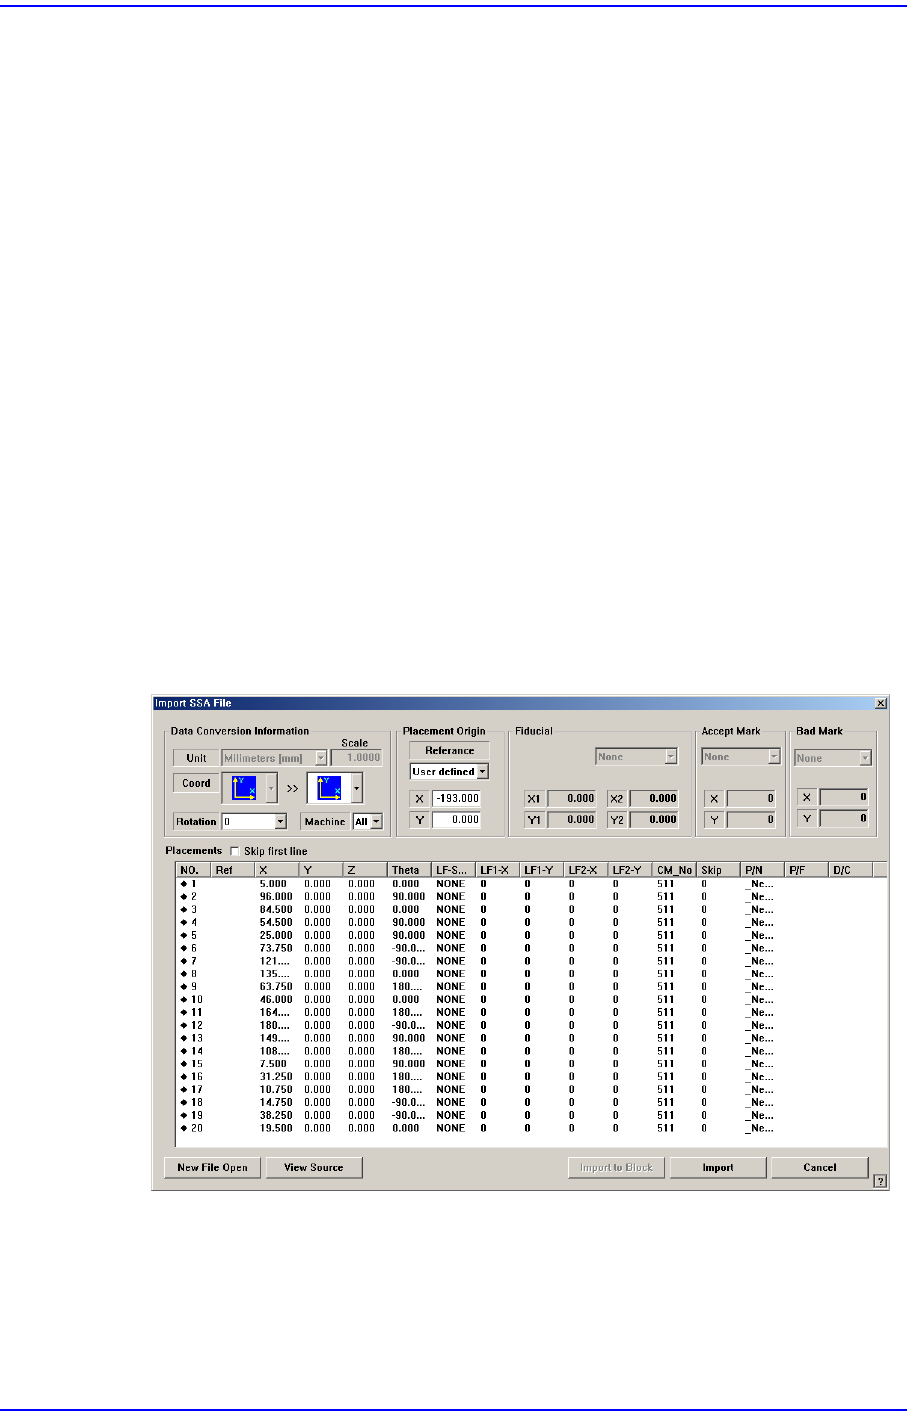
9-12 Next Generation, Multi-Functional Plac er DECAN S1 Administrator’s Guide Locate and select the location and file name of the CAD file to be imported. Select the machine to be operat ed using the imported SSA file.…
9-11
Step Programming
The step data generated by the fiducial camera of the instrument scans the pattern of
the bare PCB and the actual mounting position can be compared.
The basic usage scenarios for these features are as follows:
1)Prepare a PCB file with a registered mounting point.
2)Insert a blank PCB without soldering into the equipment.
3)In <PCB Edit>-<Board>, enter 'Initial Theta'.
4)Select the <Pos Tuning> button in <PCB Edit>-<Step> to create the <Teach Place
Position> window.
5)Scan each step using the <Inspect> or <Auto - All> function.
6)When the scan is complete, check the step where an NG has occurred using the filter
function, and select the <Move> and <Inspect> buttons to recognize the step
again.
7)Using the filter function, check if the coordinates of the scanned step are normal
compared to the existing step.
8)Select the <Update> button to apply as step data only up to the step whose 'Result' is
'OK'.
<Import…> button
Converts externally created ASCII data into step data for this machine.
If the <Import> button is clicked, the process that converts the corresponding data to
the step data is initialized.
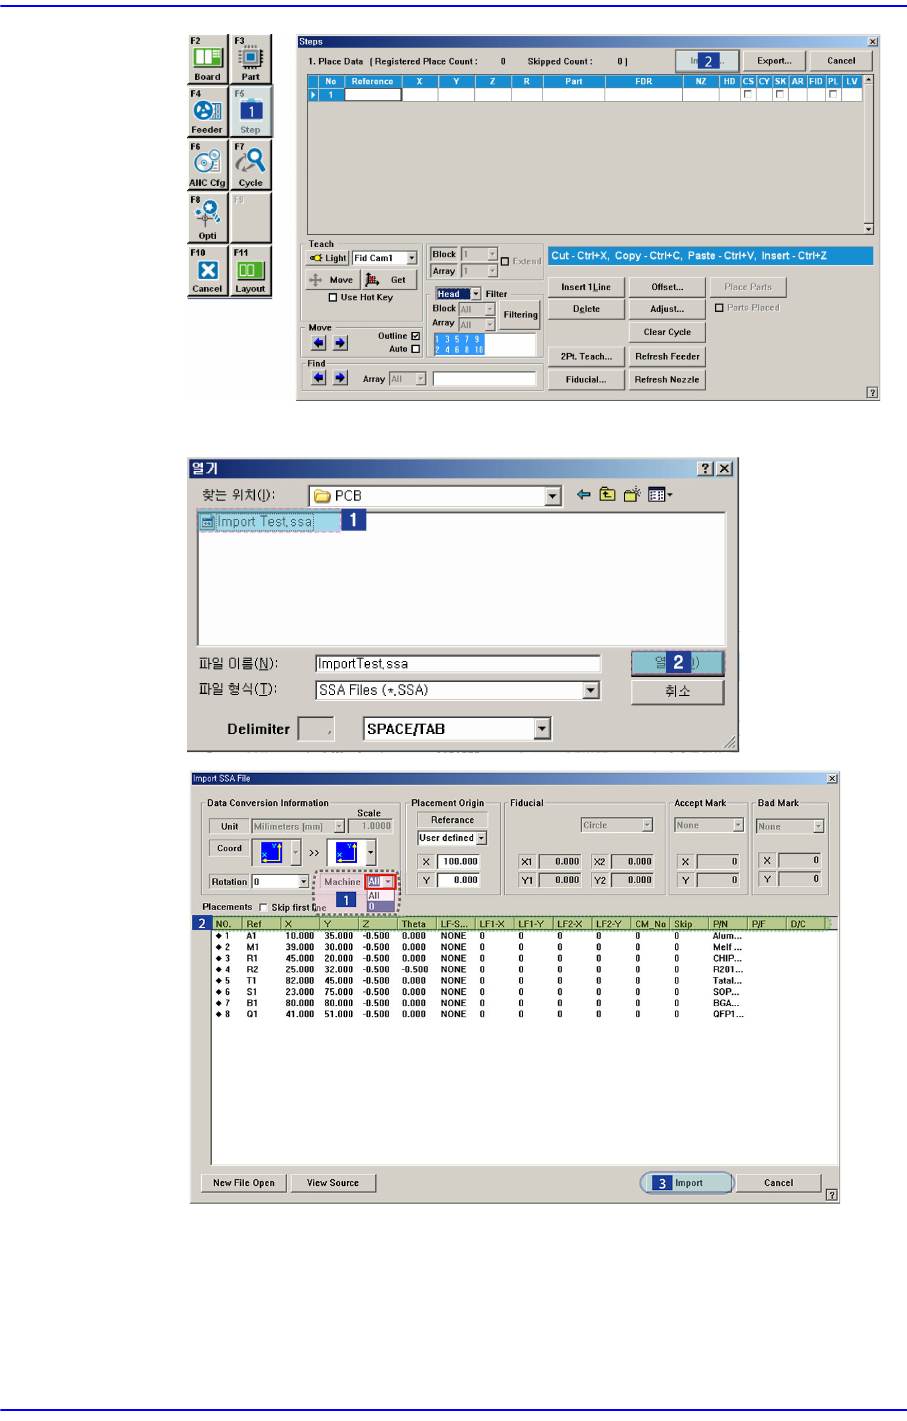
Click the <Import> button in the <Steps> dialog box.
9-12
Next Generation, Multi-Functional Placer DECAN S1 Administrator’s Guide
Locate and select the location and file name of the CAD file to be imported.
Select the machine to be operated using the imported SSA file.
Select the imported machine and confirm the name of the corresponding row of
placements. In the case of our standard format (SSA), the row value need not be
changed.
9-13
Step Programming
Executes Import.
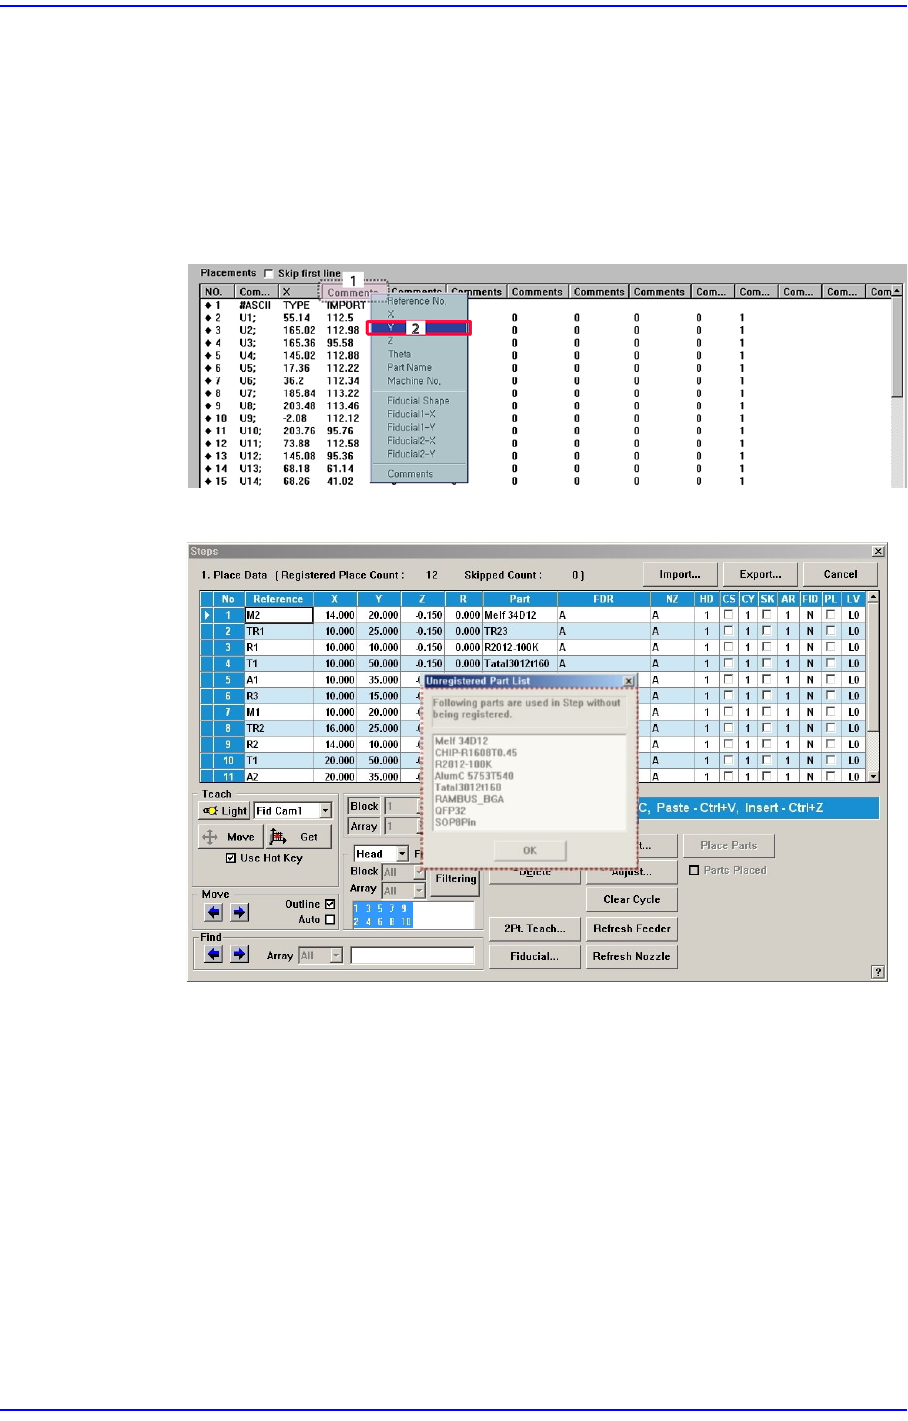
When importing a file in a format other than our standard format, the
corresponding information is indicated in a comment column as follows. Place the
mouse point on the column whose name is to be changed and right click the mouse
to display the menu and select the corresponding name. At this time, when there is
no column name corresponding to the column to be imported, set the column
name in the comment column.
The following figure shows the import completed screen.
When the component imported from the CAD data is not registered, the unregistered
component must be registered.
If the data of the part to be placed has not been registered in the Part DB of the
machine, the list screen of these parts (list for unregistered parts) is indicated in
the screen. Register the parts in this list in the “Parts” dialog box in the “Part”
menu.