DECAN_S1_Administrator′s_Guide(Eng_Ver1.5)_Print.pdf - 第416页
14-34 Next Generation, Multi-Functional Plac er DECAN S1 Administrator’s Guide 14.3.5.1. Procedure Conveyor Calibrati on me thod is as follows. 1. “Click the <Home All> button in the “Conveyor Calibration” dialog b…
14-33
Machine Calibration
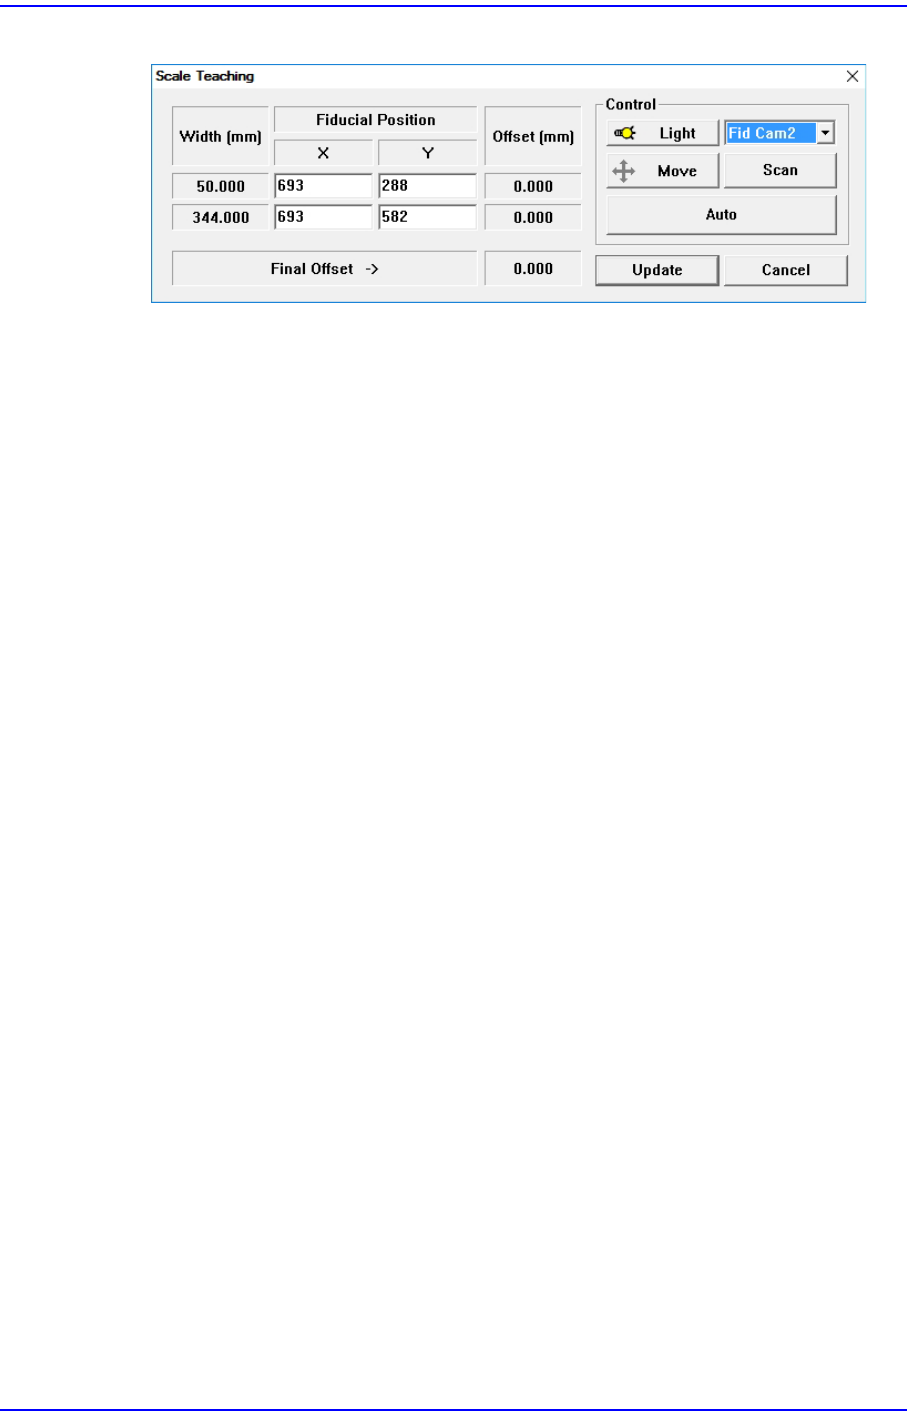
Figure14.10 “Scale Teach” dialog box
<Width (mm)> group
Displays the conveyor width provided by default for calibration.
<Fiducial Position> group
Displays the XY coordinates of the conveyor fiducial mark set by the MMI.
<Offset (mm)> group
Displays the Y value of the conveyor fiducial machine measured by the actual
machine as well as the offset of the Y value set by the MMI.
<Final Offset ->> group
A: Y offset when the conveyor width is 50mm
B: Y offset when the conveyor width is 344mm
Final Offset = B-A
<Move> Button
Moves the fiducial camera to the conveyor position selected from the <Fiducial
Position> group.
<Scan> Button
Scans the fiducial mark of the conveyor selected from the <Fiducial Position>
group and displays the Y offset in the <Offset (mm)> group.
<Auto> Button
Executes the Y offset teaching process of the conveyor fiducial mark
automatically.
<Light> Button
Sets the lighting value. Adjust the corresponding slide bar to set the lighting value.
<Update> Button
Applies changed values and closes the dialog box.
14-34
Next Generation, Multi-Functional Placer DECAN S1 Administrator’s Guide
14.3.5.1. Procedure
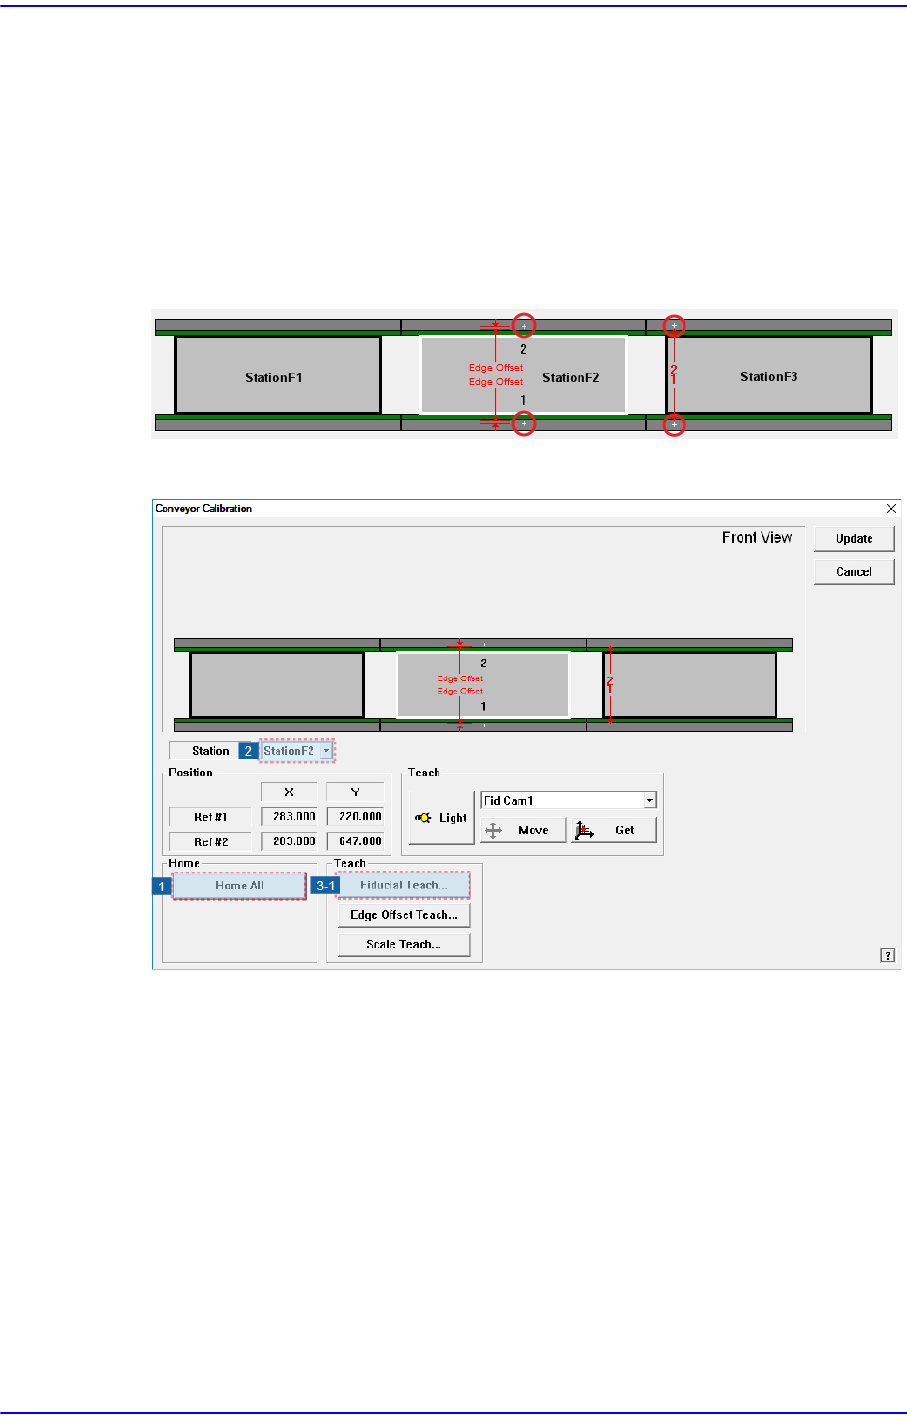
Conveyor Calibration method is as follows.
1. “Click the <Home All> button in the “Conveyor Calibration” dialog box.
2. Select the station to be calibrated from the <Stations> combo box. (StationF2,
StationF3)
3. Click the <Fiducial Teach…> button to teach the fiducial marks of the selected station
accurately and click the <Scan> button to scan the position accurately.
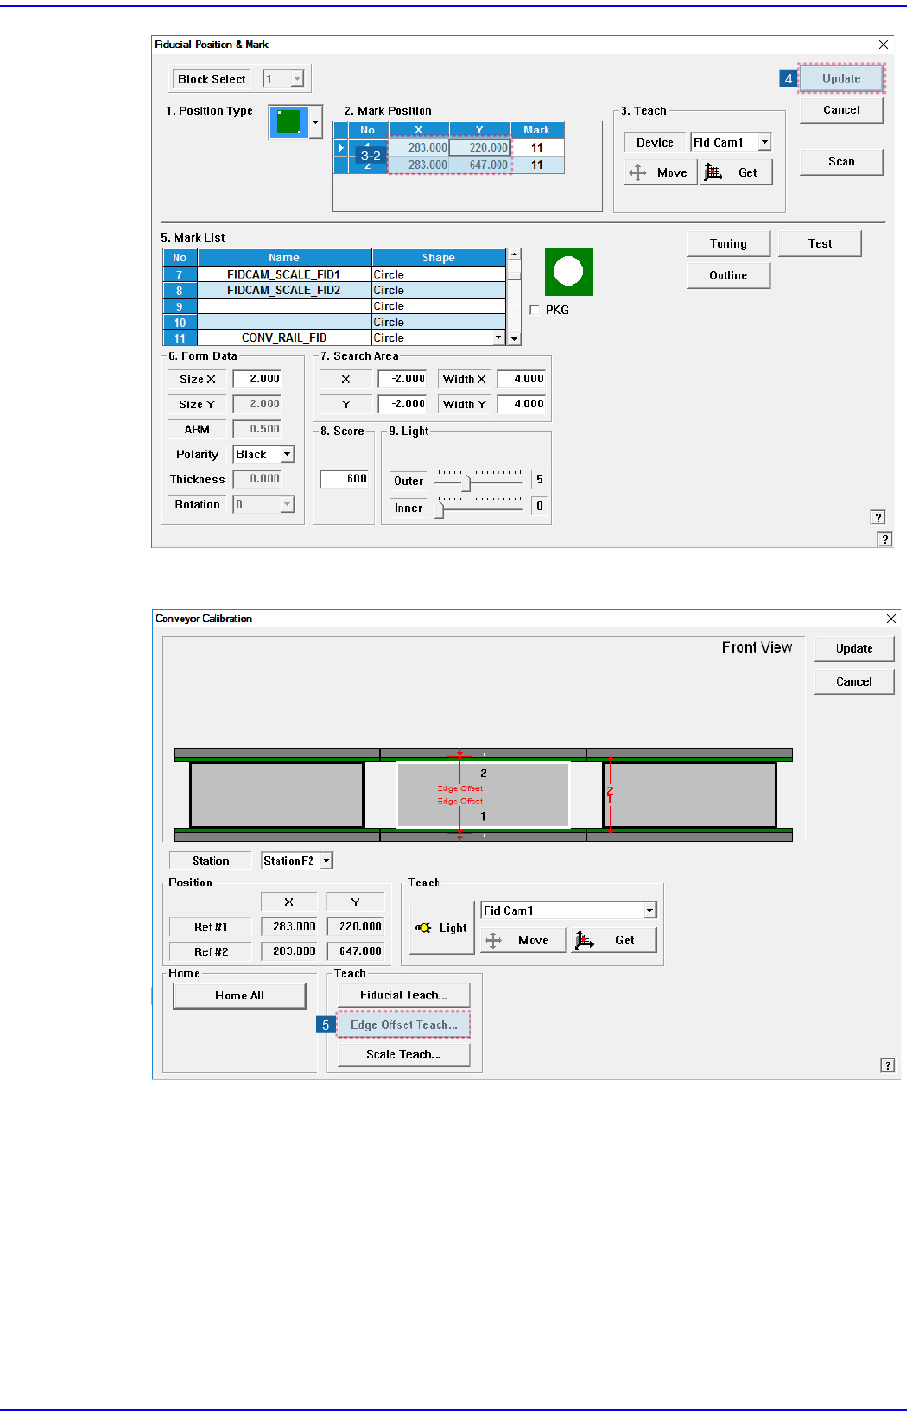
4. Click the <OK> button to update the information on the fiducial mark position.
14-35
Machine Calibration
5. Click the <Edge Offset Teach…> button
6. .Select the station to be calibrated from the <Stations> combo box.