DECAN_S1_Administrator′s_Guide(Eng_Ver1.5)_Print.pdf - 第433页
14-51 Machine Calibration 4. Then the message “1. First, Select Move Camera and Adjust Light Level. 2. After then, Select Fix Camera and Adjust Light Level. 3. T o Calibrate, Click [Next].” appears. Select "Fid Cam1…
14-50
Next Generation, Multi-Functional Placer DECAN S1 Administrator’s Guide
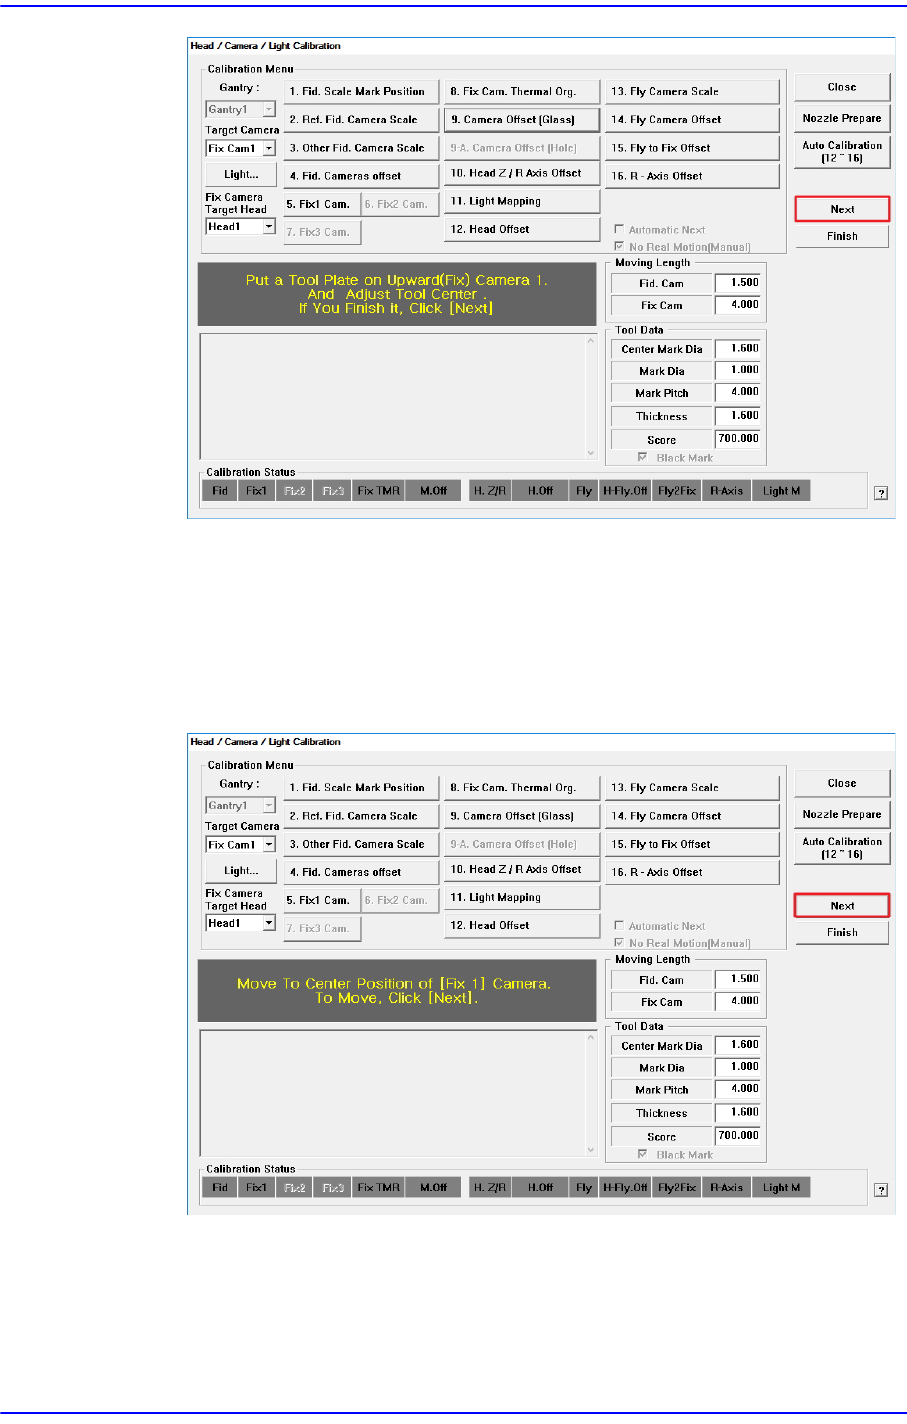
3. The message “Move To Center Position Of Calibration Tool. To Move,
Click[Next]” appears in the message window.
Click the <Next> button to move the fiducial camera to the calibration glass
position on the top surface of the fix camera. At this time, adjust the position of
the calibration glass so that the fiducial mark at the calibration glass is on the
center of the cross hair of the SMVision window.
14-51
Machine Calibration
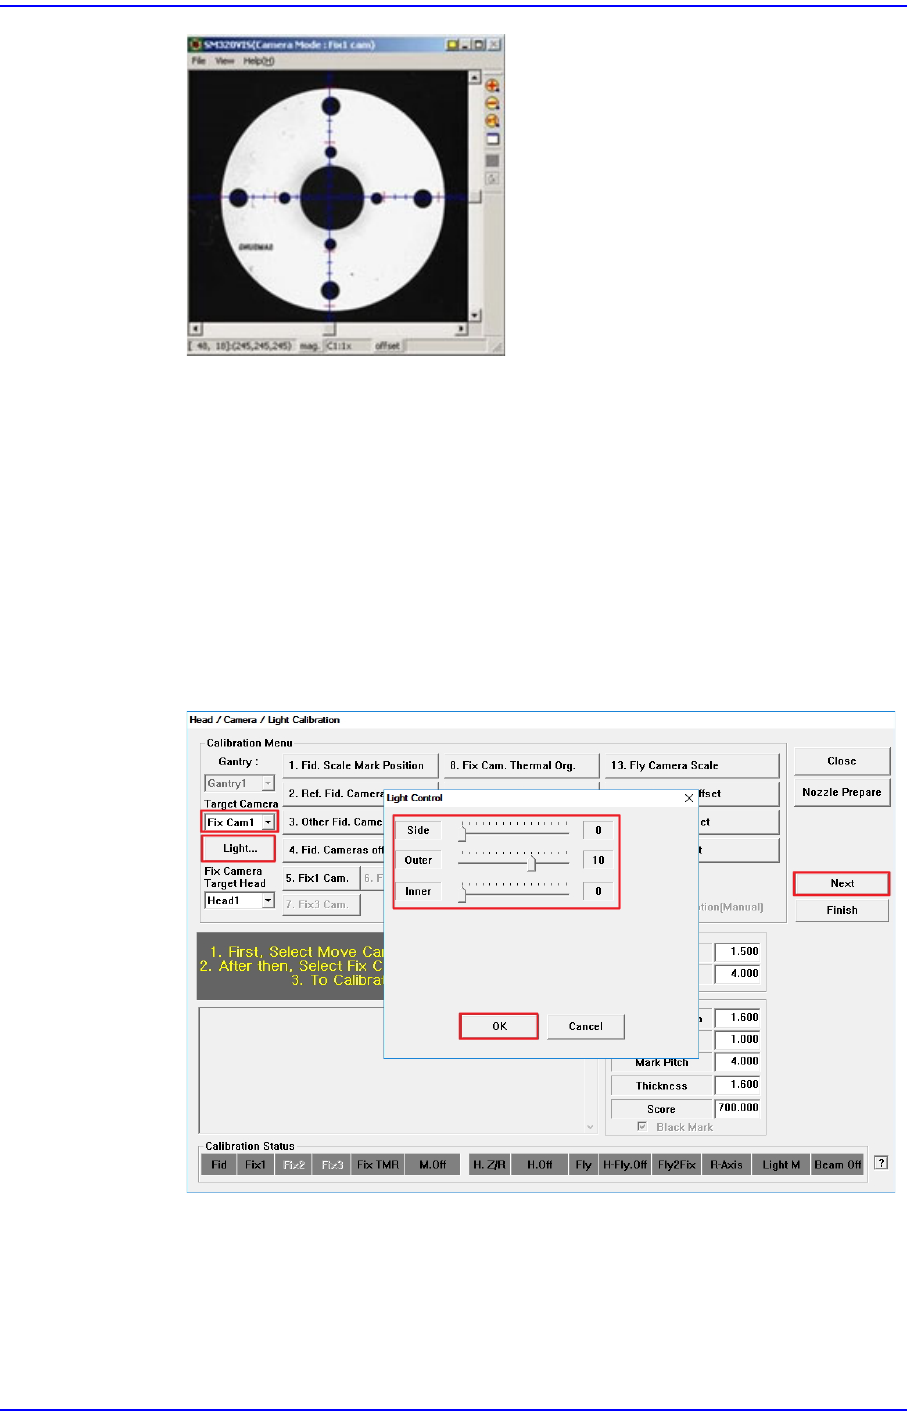
4. Then the message “1. First, Select Move Camera and Adjust Light Level. 2. After
then, Select Fix Camera and Adjust Light Level. 3. To Calibrate, Click [Next].”
appears.
Select "Fid Cam1" in the <Target Camera> combo box and click the <Light ...>
button to adjust the brightness of the lighting so that the Fiducial Mark of the
Calibration Glass shown in the SM Vision window is clearly visible.
Then, select "Fix Cam1" in the <Target Camera> combo box, and follow the same
procedure as for the fiducial camera.
When you have finished adjusting the brightness of the lighting, click the <Next>
button.
14-52
Next Generation, Multi-Functional Placer DECAN S1 Administrator’s Guide
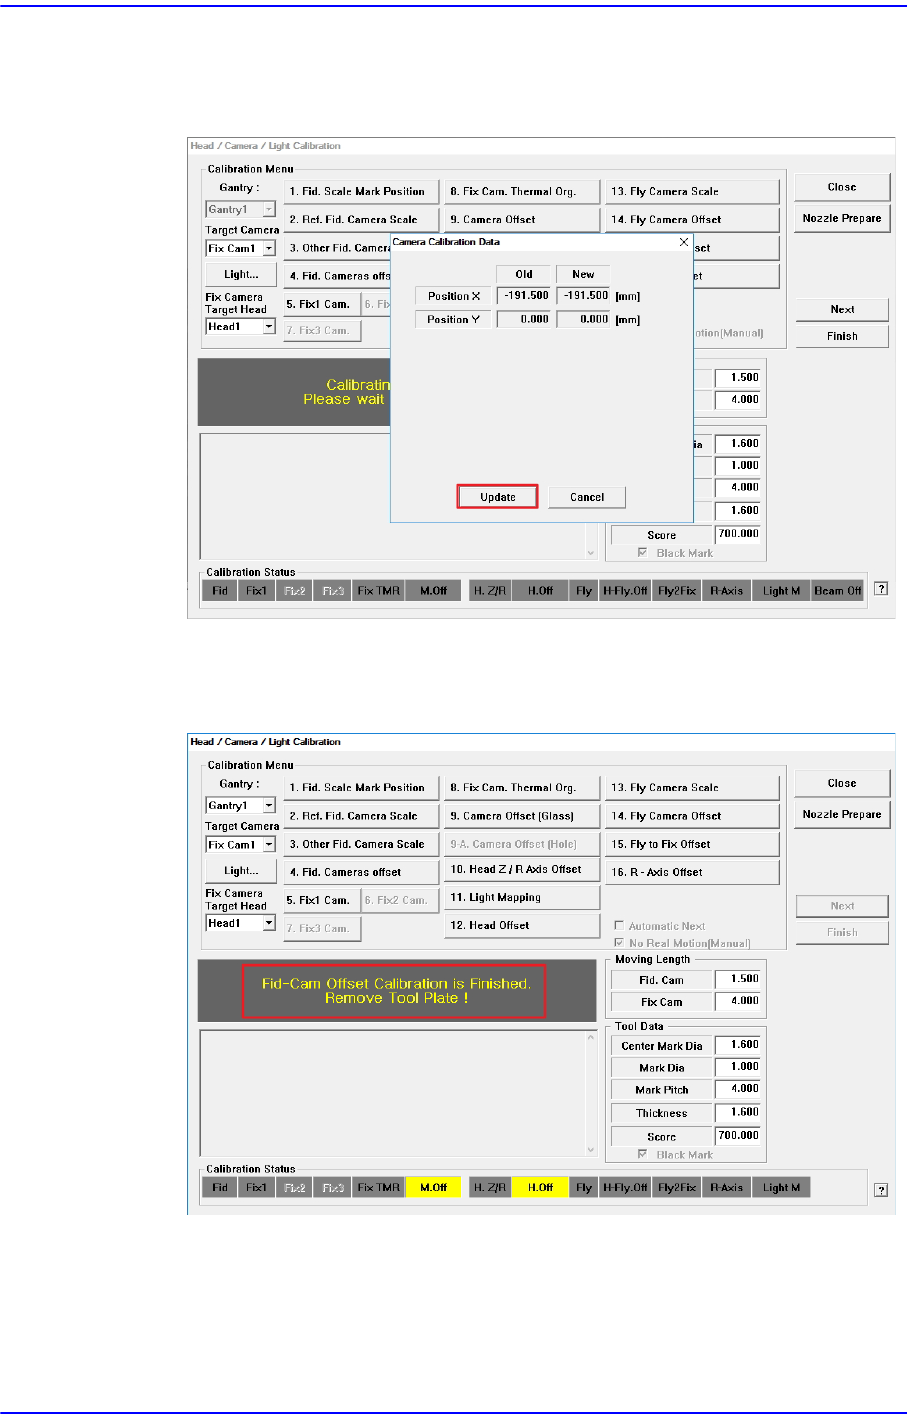
5. The calibration is performed automatically. If it is completed, the calibration result
is displayed as shown in the following figure. Click the <Update> button to apply
the new calibration value.
6. If the calibration procedure is completed properly, the result as shown in the
following figure is displayed and then the message, “Fid-Cam Offset Calibration
is Finished. Remove Tool Plate !”.
Then remove the calibration glass on the top surface of the fix camera.