DECAN_S1_Administrator′s_Guide(Eng_Ver1.5)_Print.pdf - 第435页
14-53 Machine Calibration The measurement result can be confirmed in the Head Offset dialog box. Memo The reference values for the calibration of the Camera Offset is as follows. Gantry 1 Offset X : -189.5 ~ -187.5 (mm…
14-52
Next Generation, Multi-Functional Placer DECAN S1 Administrator’s Guide
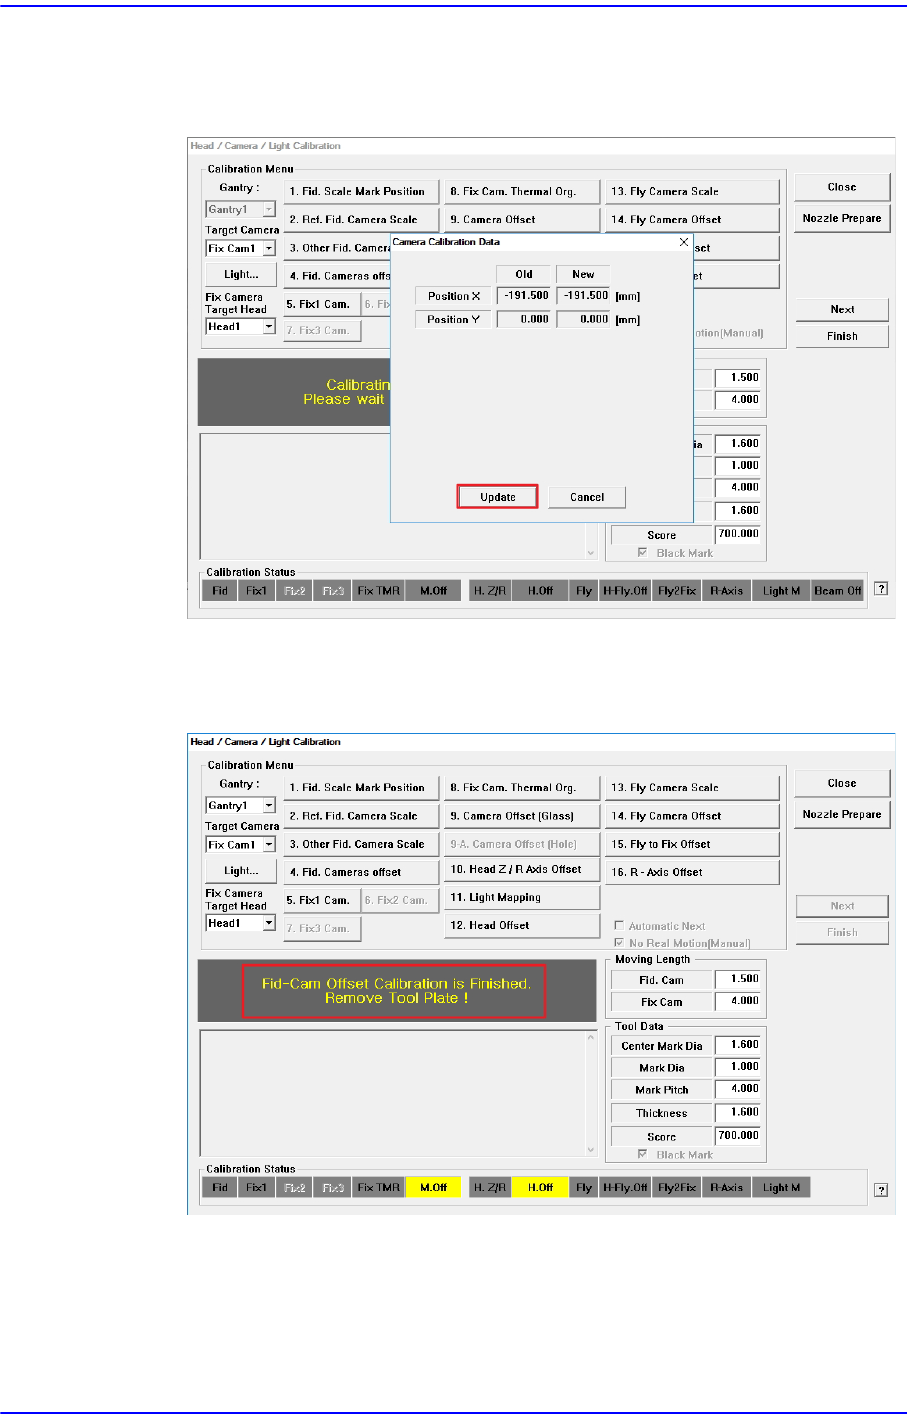
5. The calibration is performed automatically. If it is completed, the calibration result
is displayed as shown in the following figure. Click the <Update> button to apply
the new calibration value.
6. If the calibration procedure is completed properly, the result as shown in the
following figure is displayed and then the message, “Fid-Cam Offset Calibration
is Finished. Remove Tool Plate !”.
Then remove the calibration glass on the top surface of the fix camera.
14-53
Machine Calibration
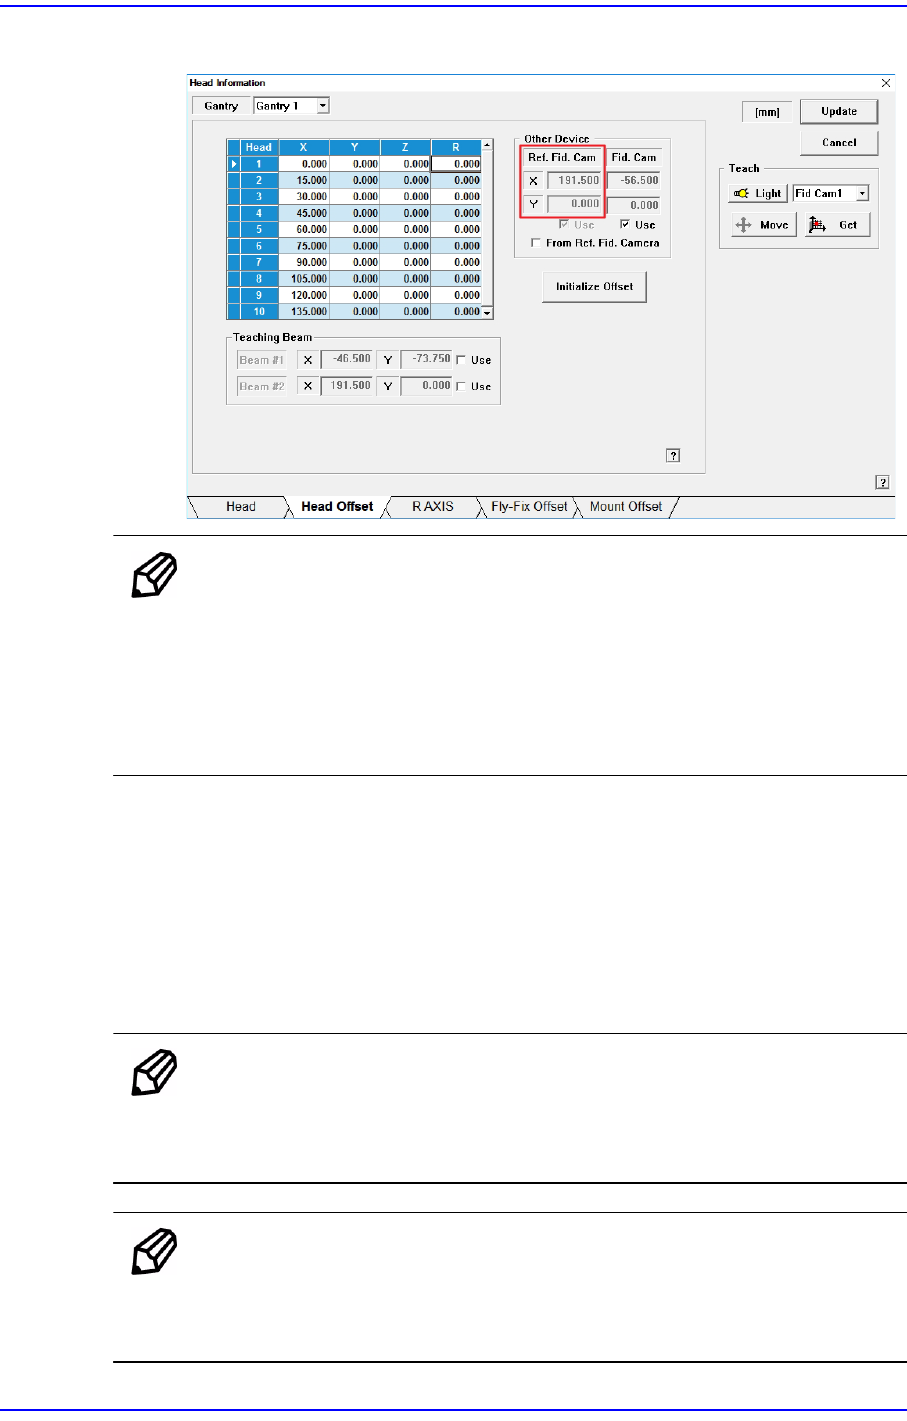
The measurement result can be confirmed in the Head Offset dialog box.
Memo The reference values for the calibration of the Camera Offset is as
follows.
Gantry 1
Offset X : -189.5 ~ -187.5 (mm)
Offset Y : -1.0 ~ 1.0 (mm)
Calibration using Fix Camera Hole (Optional)
This process is performed after calibrating with the Calibration Glass.
This calibration is performed in order to use the “Runtime Calibration” function. The
measured values are not reflected in the system calibration data, but are used only as
data necessary for the “Runtime Calibration” function. Perform calibration only when
the “Runtime Calibration” function is used.
Memo To activate the <9-A. Camera Offset (Hole)> button, the System
Constant setting must be made first. Please contact our CS or local
representative office.
Memo To use the “Runtime Calibration” function, System Constant setting
should first be performed. Please contact our CS or local
representative office.
14-54
Next Generation, Multi-Functional Placer DECAN S1 Administrator’s Guide
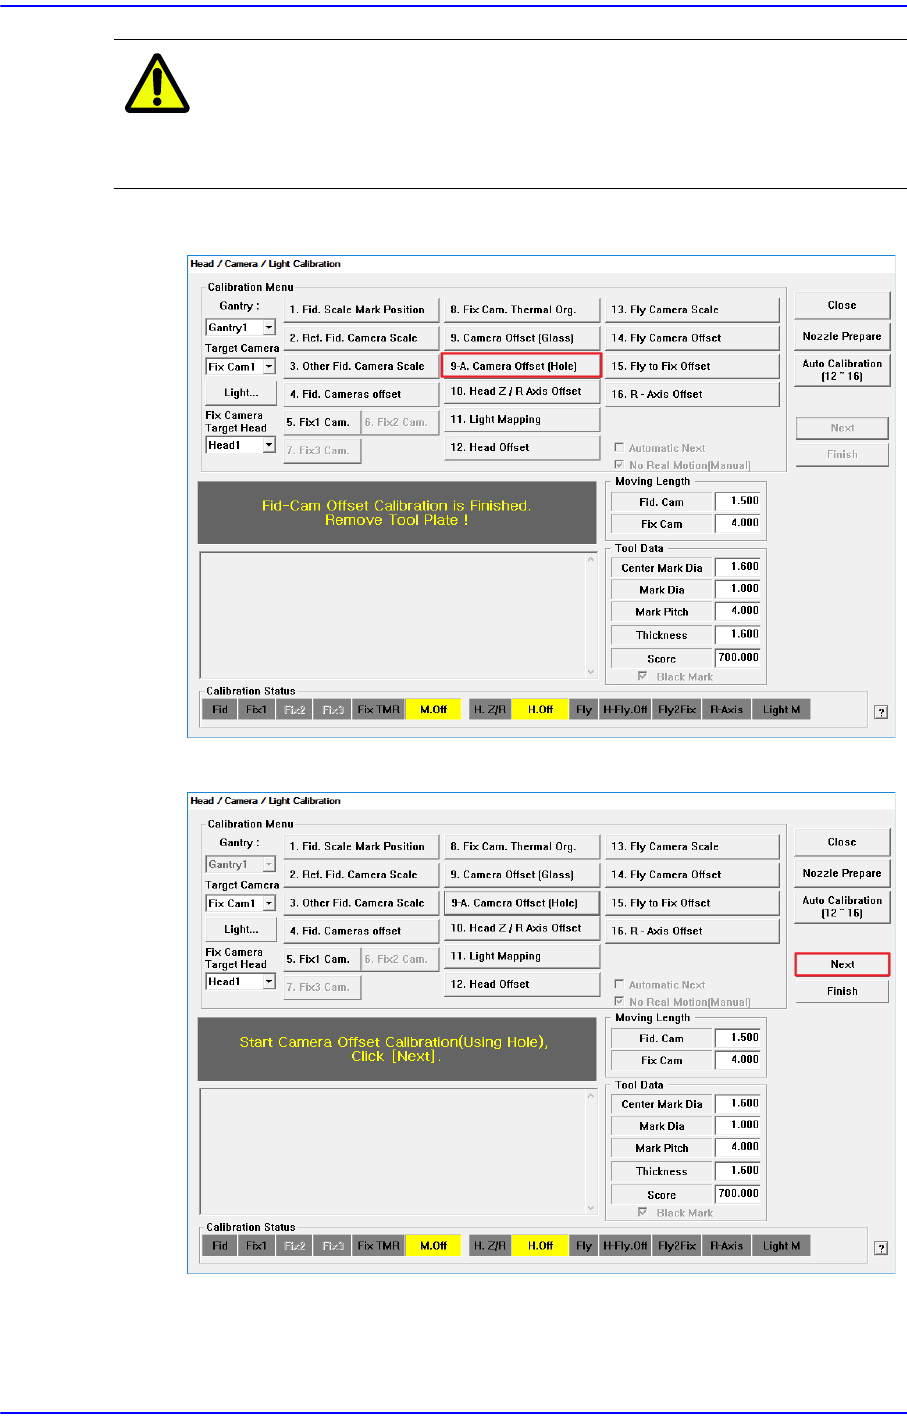
Caution Before performing this calibration, be sure to remove the
Glass used in the Camera Offset (Glass) Calibration from
the Fix Camera.
1. Click the <9-A. Camera Offset (Hole)> button.
2. Click the <Next> button.
3. The message “Move To Center Position Of [Fix 1] Camera. To Move,
Click[Next].” appears in the message window.