DECAN_S1_Administrator′s_Guide(Eng_Ver1.5)_Print.pdf - 第474页
15-8 Next Generation, Multi-Functional Plac er DECAN S1 Administrator’s Guide 15.2. Position [F4] Sets various origins of the equipment and the position of the system dump box. 15.2.1. <Feeder bas e> tab dialog Set…
15-7
System Setup
compares this width with the saved width information before turning off the power
supply. It performs 'Home’ of the conveyor rail when there is a change.
Set whether to use the fiducial on the conveyor rail in order to perform ‘Home’
quickly for the placement station. This function is activated in the Dual Lane
Conveyor machine.
<Use Rail Fiducial> check box
This check box is selected when using the fiducial on the conveyor rail in order to
check the current width of the placement station.
When performing ‘Home’ ( ) for the equipment since the width of the placement
station is changed when turning off the power supply, if the fiducial on the conveyor
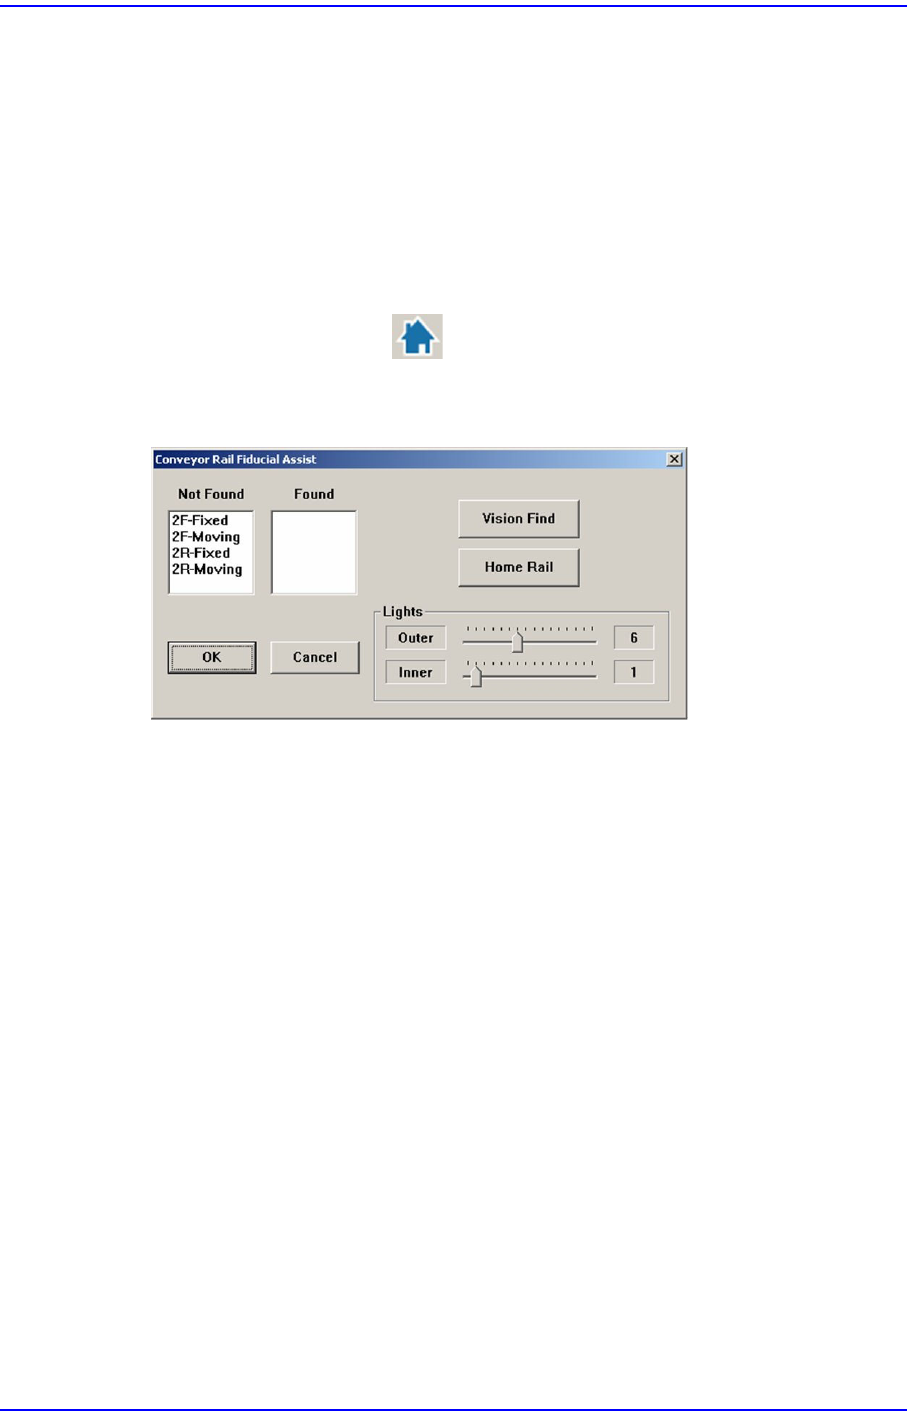
rail is not recognized, the following dialog box is displayed.
<Not Found> list box
Indicates the fiducial on the conveyor rail for which recognition has failed.
<Found> list box
Indicates the fiducial on the conveyor rail for which recognition has succeeded.
<Vision Find> button
Performs recognition of the fiducial on the conveyor rail again.
<Home Rail> button
Performs ‘Home’ of the Width Servo Motor to move the movable rail of the
conveyor to the home position.
At this time, remove the backup pin installed in the backup table.
<Update> button
Saves the set data and closes the screen.
15-8
Next Generation, Multi-Functional Placer DECAN S1 Administrator’s Guide
15.2. Position [F4]
Sets various origins of the equipment and the position of the system dump box.
15.2.1. <Feeder base> tab dialog
Sets origin of each component of the equipment.
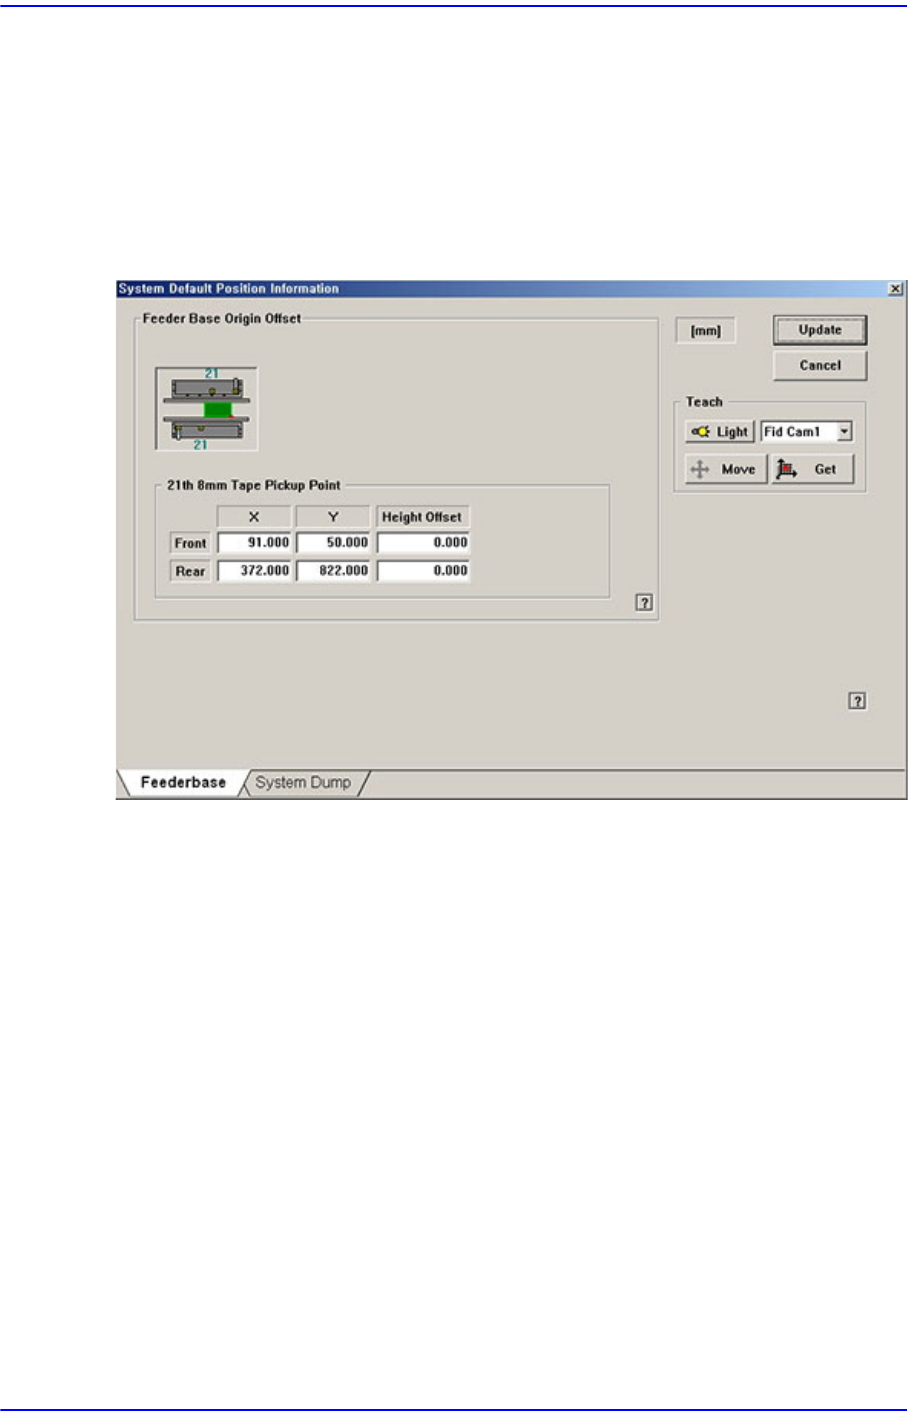
Figure15.5 “Feeder base” tab dialog
<Feeder Base Origin Offset> group
Sets feeder base related data.
<21th 8mm Tape Pickup Point> edit box
Sets the origin of the Feeder Base.
Method of setting up the ‘Feeder Base Origin’ is as follows;
1.Place reel of the smallest part (0603, 1005) and install in the 21st slot of the front
feeder base.
Before installing the feeder, be sure to check if there is any abandoned part on
the feeder base. Remove if any.
2.Select the <21st 8mm Tape Pickup Point> edit box with the mouse and select
‘Fid Cam’ in the combo box of the <Teach> area.
3.By clicking on the <Move> button, move the fiducial camera to the pickup point
of the tape feeder installed in the 21st slot of the front feeder base.
15-9
System Setup
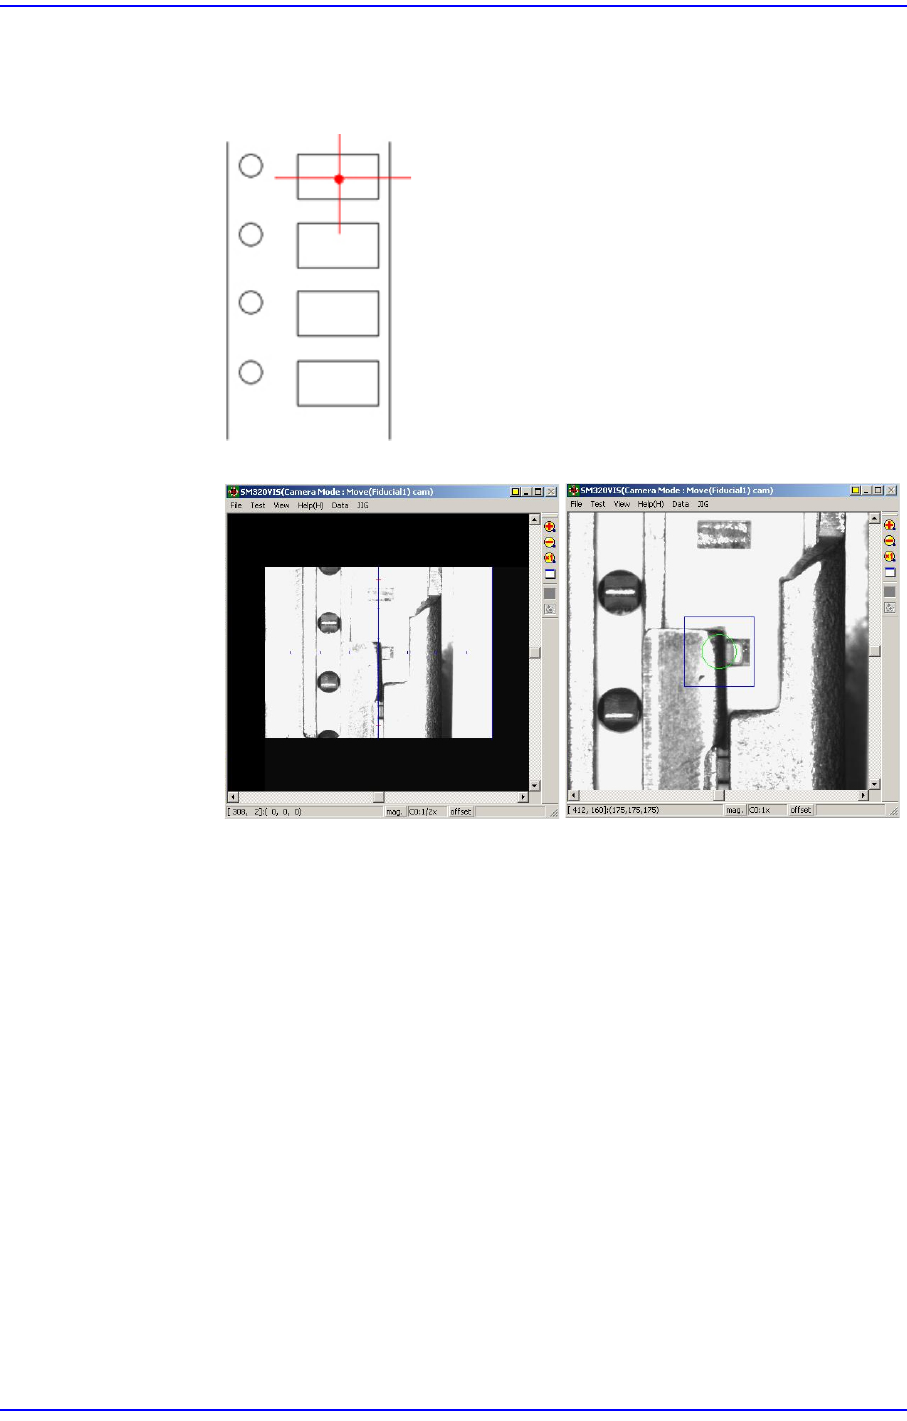
4.Perform teaching the pickup point of the tape feeder using ‘Fiducial Camera’. At
this time, teach the center point as in the figure. Teaching must be done on the
center of the pocket, not on the center of the part.
5.Fit the center of the cross lines of ‘Fiducial Camera’ indicated in the SMVision
window to the pocket center, and input the value of the present coordinates to
the selected edit box by clicking on the <Get> button.
6.In the same way, install the feeder in the 21st slot of the rear feeder base, and
perform teaching.
<Height Offset> edit box
Set the Z value of the feeder base origin.