DECAN_S1_Administrator′s_Guide(Eng_Ver1.5)_Print.pdf - 第497页
15-31 System Setup 6. Click the <OK> button in the following orde r to remove all nozz les installed on the head. Then insert the nozzle for the fly cam era test into the No. 1 hole of t he ANC. Caution If the acry…
15-30
Next Generation, Multi-Functional Placer DECAN S1 Administrator’s Guide
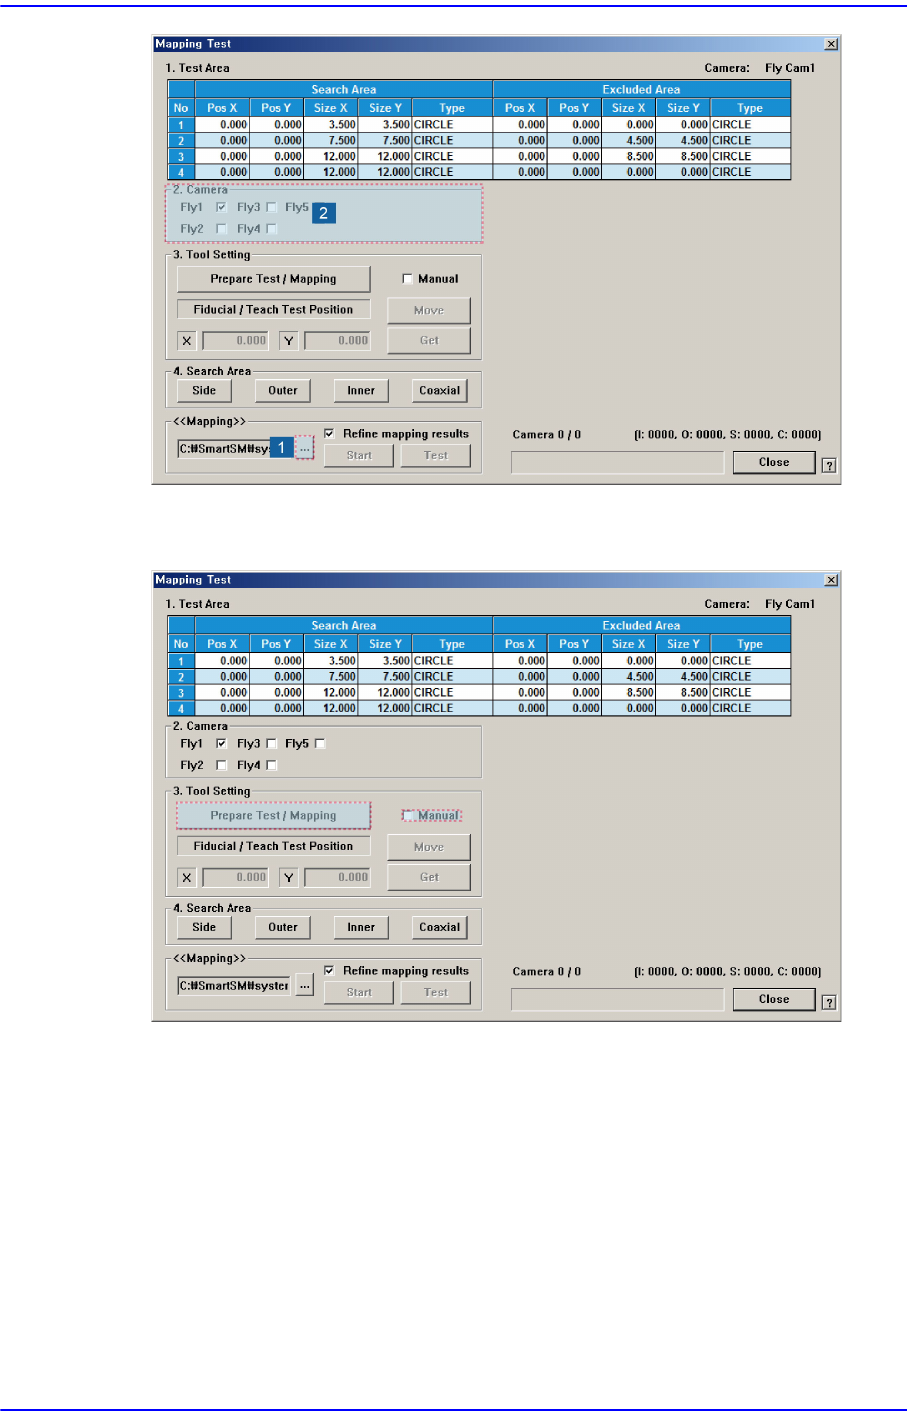
5. After unchecking the <Manual>check box in the <3. Tool Setting> group, click the
<Prepare Test / Mapping> button.
15-31
System Setup
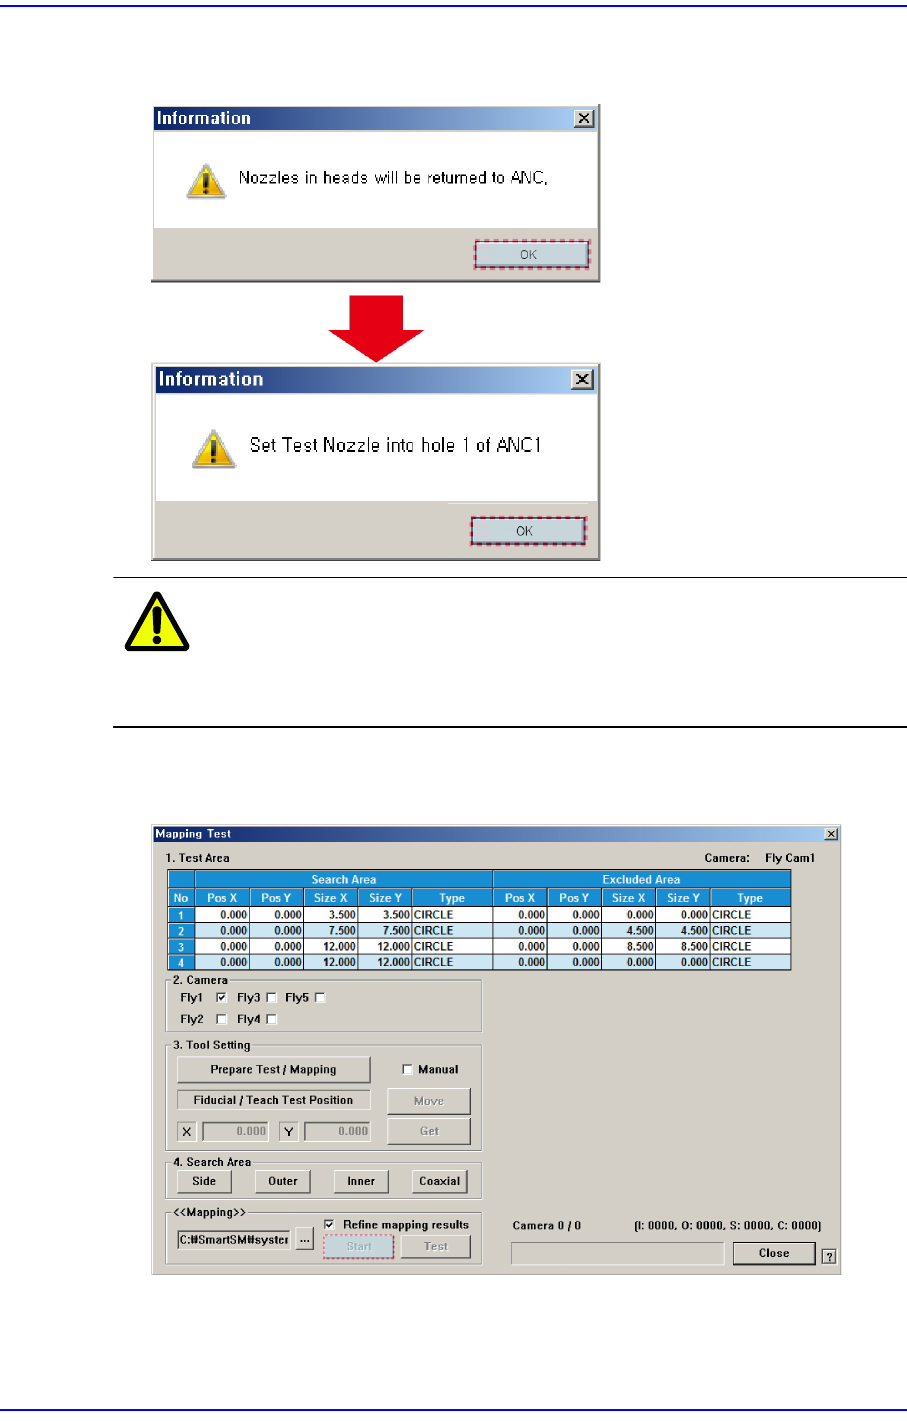
6. Click the <OK> button in the following order to remove all nozzles installed on the
head. Then insert the nozzle for the fly camera test into the No. 1 hole of the ANC.
Caution If the acrylic door is open, it affects the lighting during light
mapping. Therefore, close the acrylic door before
performing light mapping.
7. Once the <Prepare Test / Mapping> is completed, click the <Start> button in the
<<Mapping>> group to perform light mapping.
15-32
Next Generation, Multi-Functional Placer DECAN S1 Administrator’s Guide
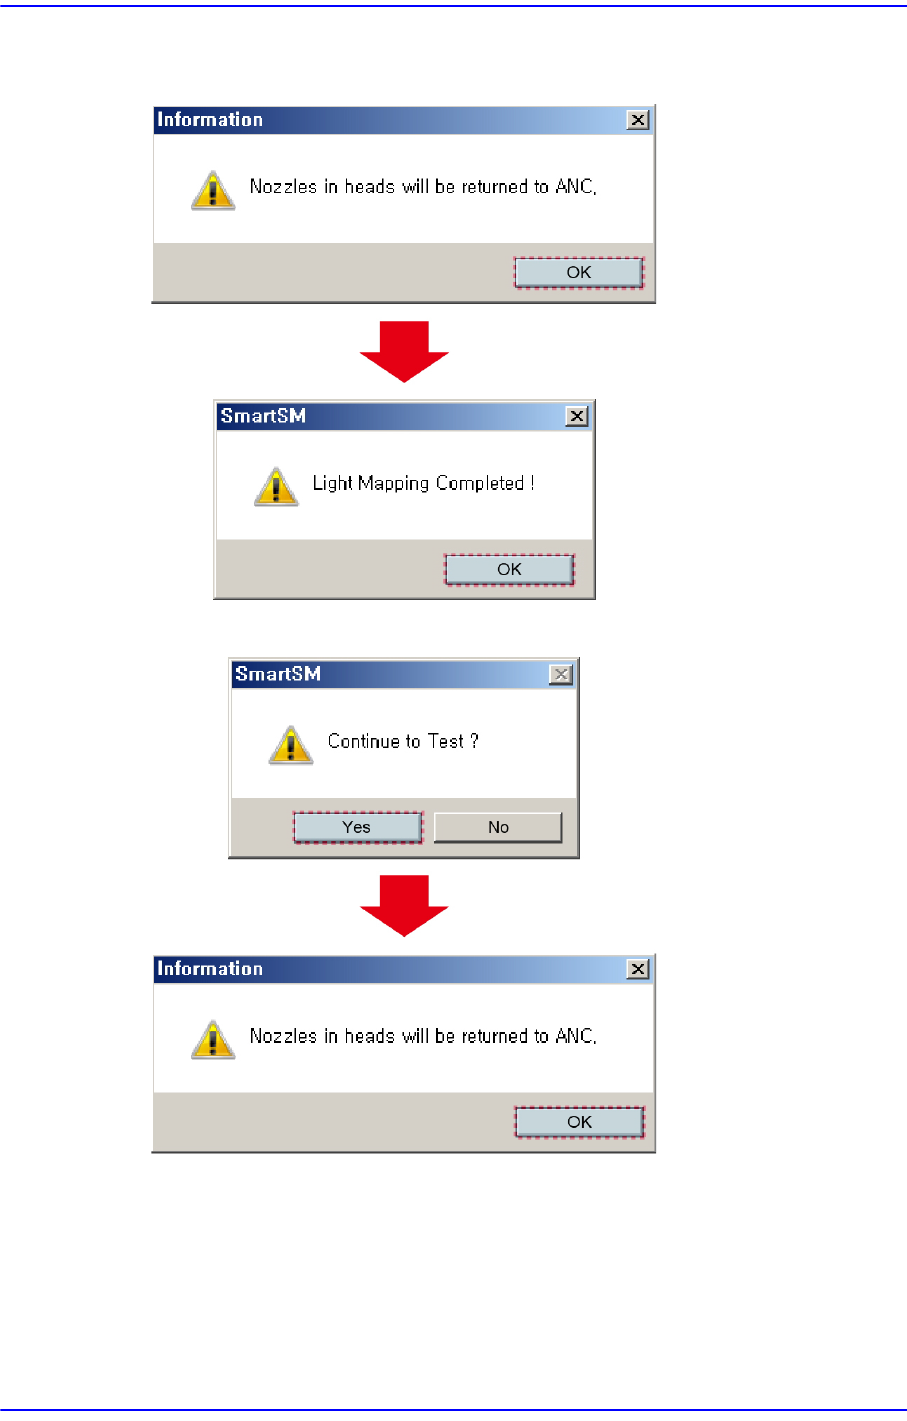
8. Once the light mapping of Fly1~Fly5 is completed, the following dialog box is
displayed. clicking the <OK> button will display the dialog box for testing.
9. Click the <(Y)> button to perform the test automatically.
10. If the dialog box saying that the light mapping test has been completed is displayed,
click the <OK> button. Then click the <Close> button to close the mapping test dialog
box.