00196931-01 SM internal DLM Star Repair.pdf - 第13页
Star Repair Workflow Replacement of defective parts V acuum hoses, Valve s, O-Rings.segment Service Manual Internal DLM Star Repair 13 1. When exchangi ng hoses ensure the hose is pushed to the end. 2. Attach the valve a…
Star Repair Workflow
Replacement of defective parts Vacuum hoses, Valves, O-Rings.segment
12 Service Manual Internal DLM Star Repair
4. The bearing is positioned correctly
5. Pass the clamp over the segment and place it against the rear of the segment.
The shape of the tool exactly matches the segment where you have already removed the brake.
6. Now tighten the other part of the tool into the segment.
7. Take the new brake and fasten it lightly with two screws .
8. Insert a Sleeve and ensure the brake is sitting correctly.
9. When the brake is sitting correctly, tighten the screws to 13Ncm
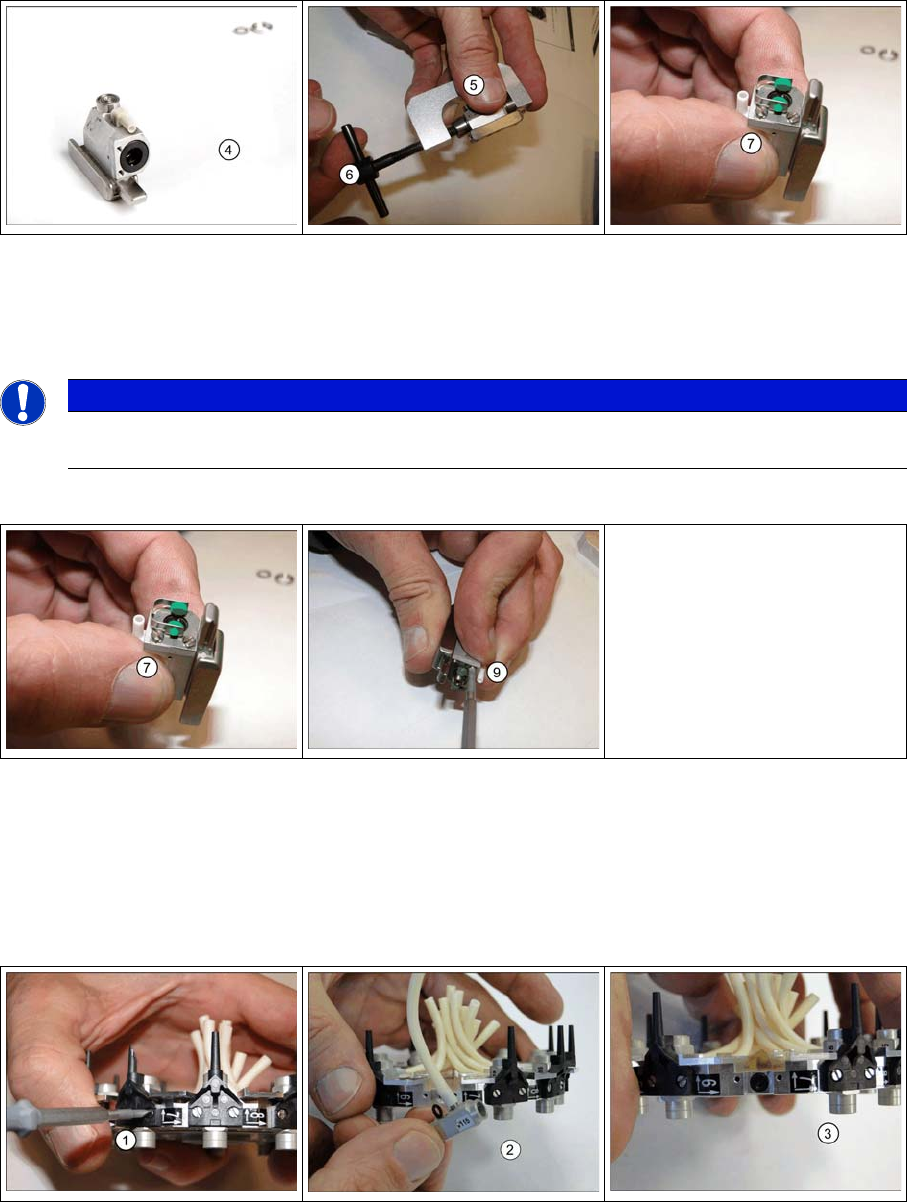
3.8 Replacement of defective parts Vacuum hoses, Valves, O-
Rings.segment
1. Release the two screws that secure the air kiss inlet to the segment
2. Remove the valve with its hose and the O-ring.
3. Replace the O-ring and lightly grease with Unsilikon.
HINWEIS
You cannot over tighten the tool, as both the caps have a stopper. In some segments, you will
hear a cracking sound. This happens when the ball bearing has shifted
Star Repair Workflow
Replacement of defective parts Vacuum hoses, Valves, O-Rings.segment
Service Manual Internal DLM Star Repair 13
1. When exchanging hoses ensure the hose is pushed to the end.
2. Attach the valve and Air-inlet on the star
3. Tighten the air kiss inlet with two screws (13Ncm).
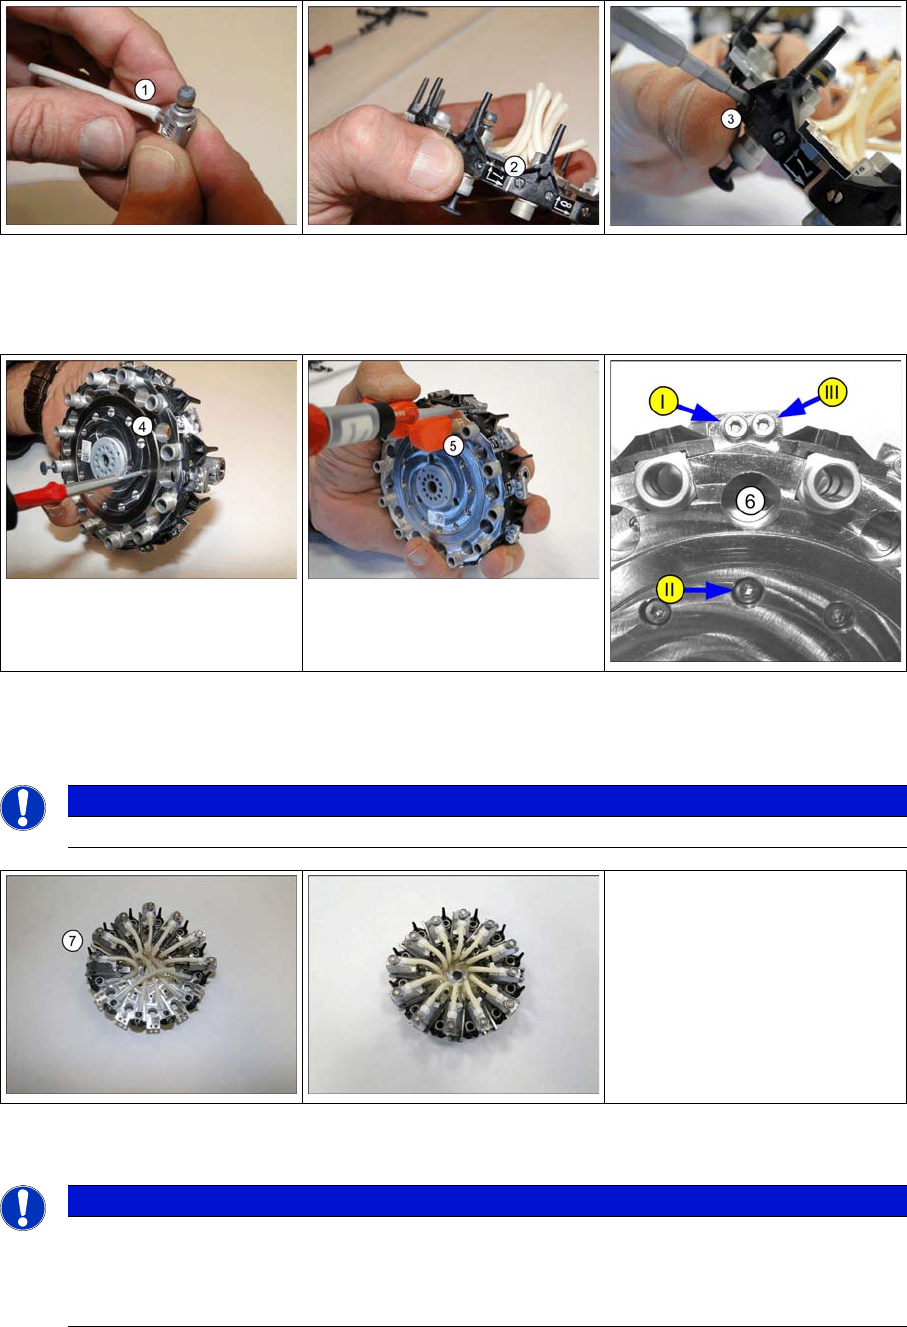
4. Place the segment on the star and screw lightly. → Do this for all 12 Segments.
5. Use the Segment Adjustment Tool to position the segment on the star correctly.
begin with Segment 1 through 12. → Tighten the screws with 45Ncm Torque Screwdriver.
7. When connecting the silicone hoses make sure that they are not damaged by rubbing against one
another.
HINWEIS
Be careful the tightening order of the screws is very important. Tighten from I to III.
HINWEIS
To ensure this, make sure that the silicone hoses have the exact length and that they are pu-
shed onto the respective connection pieces as far as possible (up to the stopper). Check the
distance while pushing all segments all the way in and out. Ideally the distances should all be
the same.
Star Repair Workflow
Replacement of detective parts Distributer Cap.
14 Service Manual Internal DLM Star Repair
3.9 Replacement of detective parts Distributer Cap.
1. Remove the distributor cap carefully using a screwdriver.
2. Clean all grease residues, ensure nothing enters the vacuum holes!
3. Take a new Distributor cap and release the adhesive foil
4. Centre the Distributor cap (pay attention to the pins) and press it tight.
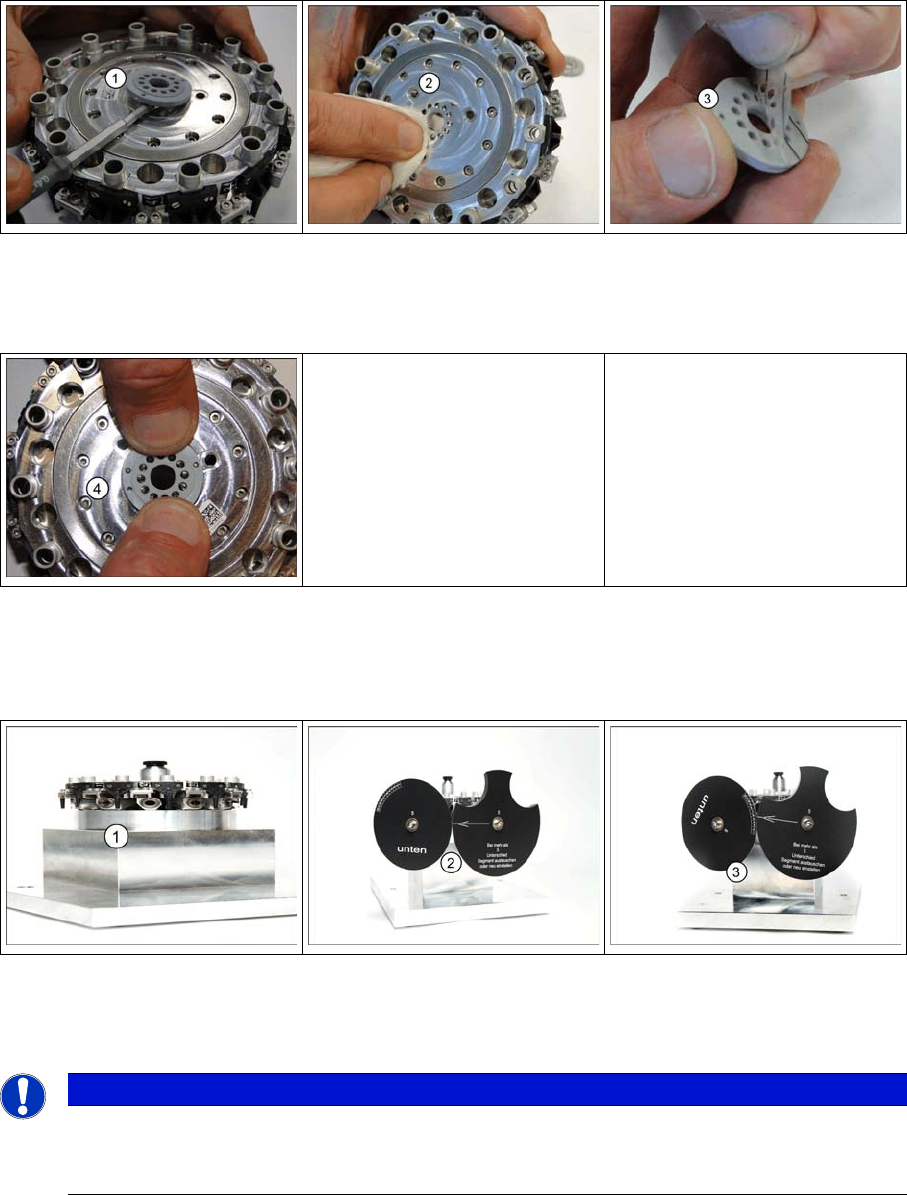
3.10 Verify all Segments with the segment-segment offset tools.
1. Place and fasten the Star on to the Star Assembly Jig.
2. Fit the segment-segment tool right in segment 1 and the segment-segment tool left in segment 2.
3. Hold the segment-segment tool right and turn the segment-segment tool left.
HINWEIS
The maximum deviation allowed is 5 between segments. If you feel friction or there is a gap
between the plates, readjust the segment. If this doesn’t help, replace the segment.
Perform the above for all 12 segments.