00197501-02_AI_WPC_Umbau_X-Series_S_DE_EN - 第77页
Review 3 Setting up and Commissioning 3.5 Fitting the Waste Tape Slide Assembly Instructions / Montageanleitung SIPLACE WPC an SIPLACE X-Serie S SIPLACE WPC on SIPLACE X Series S 03/2020 77 3.5 Fitting the Waste Tape Sli…
Review
3 Setting up and Commissioning
3.4 Fitting the bridge cover SIPLACE WPC on the SIPLACE X-Series S
76 Assembly Instructions / Montageanleitung SIPLACE WPC an SIPLACE X-Serie S SIPLACE WPC on SIPLACE X
Series S 03/2020
3.4 Fitting the bridge cover SIPLACE WPC on the SIPLACE
X-Series S
Fig.27: Bridge cover SIPLACE WPC
●
Bridge cover SIPLACE WPC
[03113720-xx] (40mm)
●
Bridge cover SIPLACE WPC short
[03117888-xx] (30mm)
When using a SIPLACE WPC with a max-
imum component height of 40mm, fit the
bridge cover for the SIPLACE WPC
[03113720-xx] (40mm).
When using a SIPLACE WPC with a max-
imum component height of 30mm, fit the
short bridge cover for the SIPLACE WPC
[03117888-xx] (30mm).
Fig.28: Bridge cover SIPLACE WPC
► Fit the bridge cover for SIPLACE WPC
[03113720-xx] (40mm) or the short
bridge cover for SIPLACE WPC short
[03117888-xx] (30mm)(1)
onto the
SIPLACE WPC.
Fig.29: Bridge cover for SIPLACE WPC with four screws
M6x8
► Fasten the bridge cover for SIPLACE
WPC with the four screws M6x8(1)
.

Review
3 Setting up and Commissioning
3.5 Fitting the Waste Tape Slide
Assembly Instructions / Montageanleitung SIPLACE WPC an SIPLACE X-Serie S SIPLACE WPC on SIPLACE X
Series S 03/2020
77
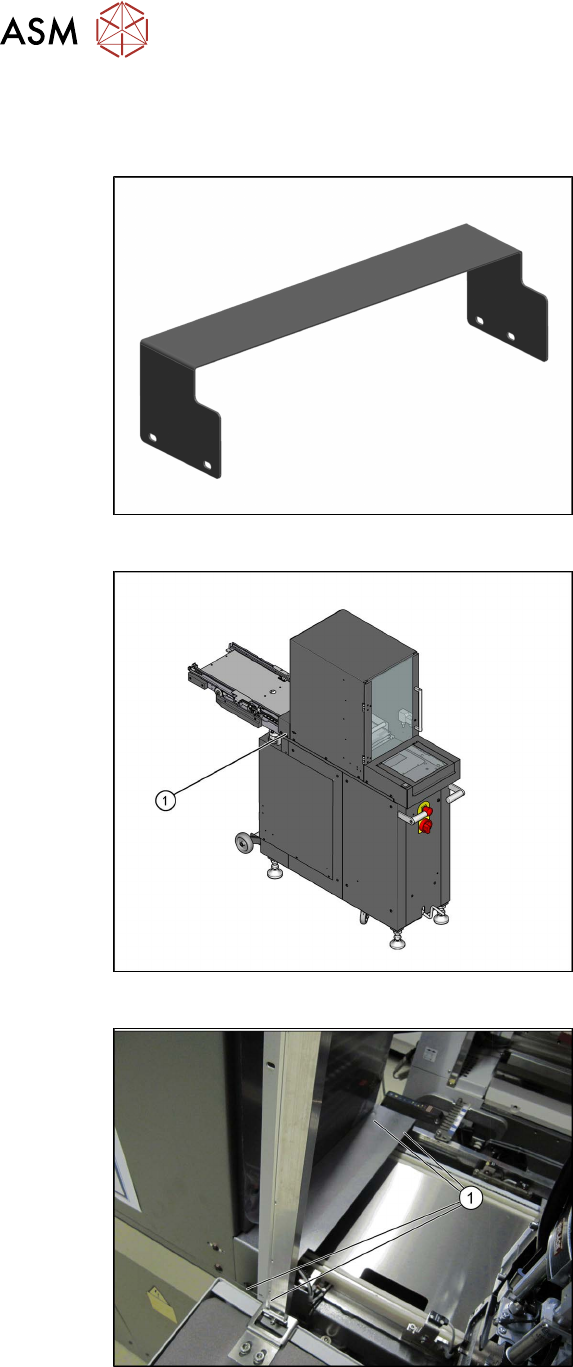
3.5 Fitting the Waste Tape Slide
Fig.30: Waste tape chute
1. Waste tape slide
2. COT insert
Fig.31: Fastening screw, left
1. Fastening screw for used tape chute,
left, at the location
Review
3 Setting up and Commissioning
3.5 Fitting the Waste Tape Slide
78 Assembly Instructions / Montageanleitung SIPLACE WPC an SIPLACE X-Serie S SIPLACE WPC on SIPLACE X
Series S 03/2020
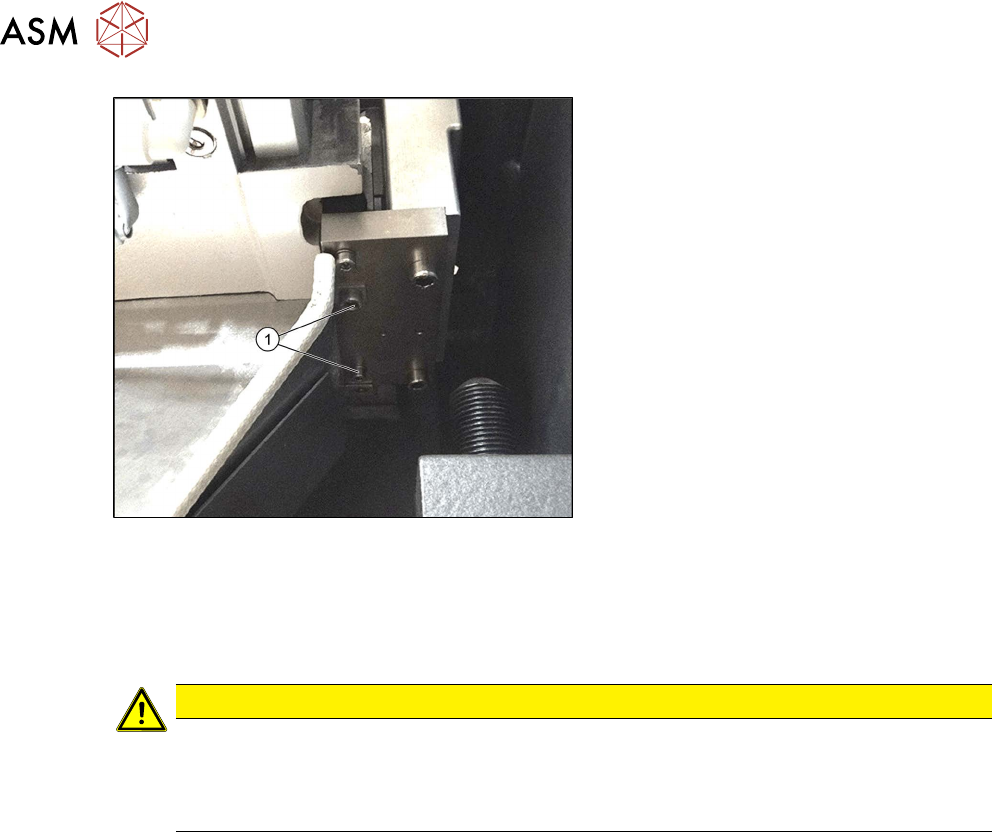
Fig.32: Fastening screw, right
1. Fastening screw for used tape chute,
right, at the location
Removal
► Remove the screws fastening the used tape chute.
► Take the used tape chute down and out of the machine.
CAUTION
Risk of cutting
The cutter, with its very sharp edges, is located under the tape duct.
► Do not reach into the cutter and make sure that it is never freely accessible for longer
periods.
Installation
► Follow the removal instructions in reverse order for installation.