N7201A617E00_0317.pdf - 第145页
NPM-W 2 EJM7DE-MB-04 M-00 4-2-5 -2 4 5 Cover the multi-recognition camera and the nozzle changer with the cloth in order to protect from adhesives Disconnect the air plug 6 Detach the syringe To 7 1 2 Every 24 hours Peri…
NPM-W2 EJM7DE-MB-04M-00
4-2-5-1
Cleaning and checking the
screw unit and the nozzles 1
(dispensing head(option))
Tool used: Lint free cloth, air blow gun Time required: 30 minutes (per location)
Describes cleaning and inspection of the syringe placed in the dispending head.
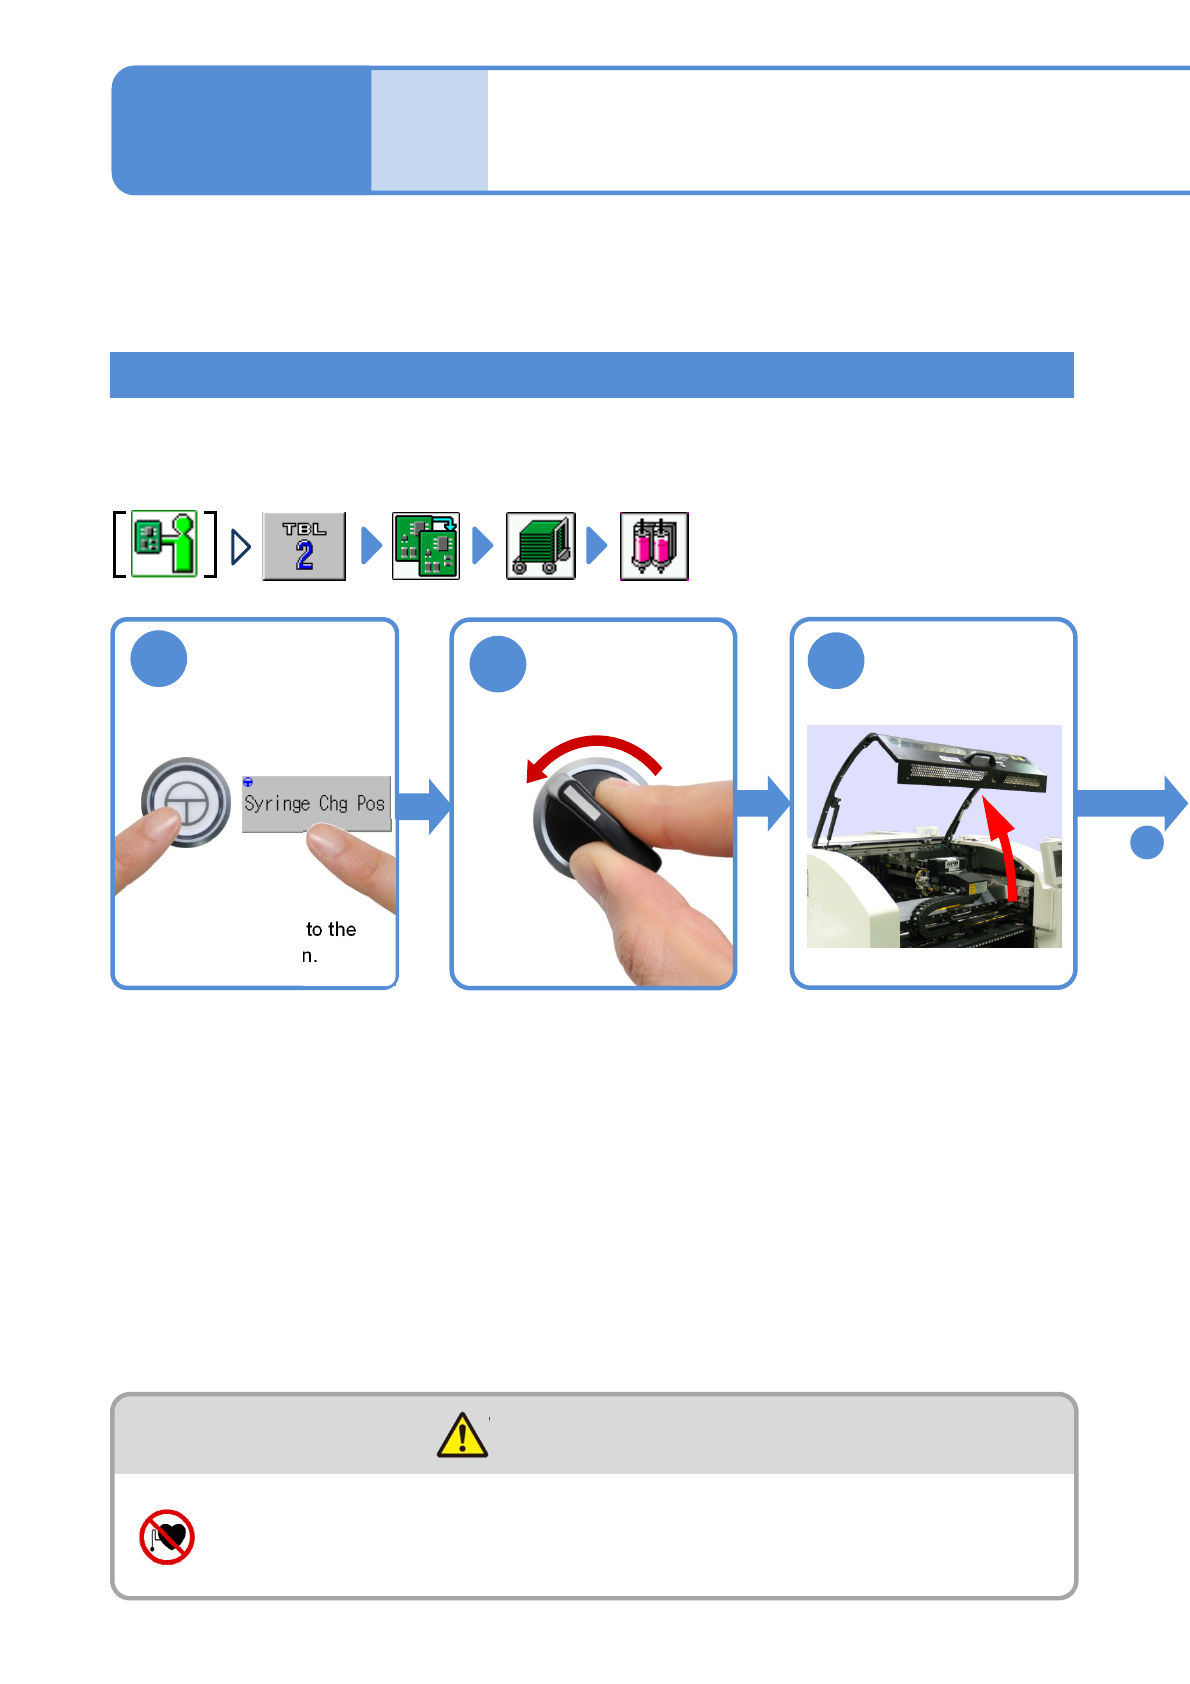
1
●The head moves to the
exchange position.
3
Detaching the syringe
Warning
Individuals with pacemakers, etc. should keep away from the linear motor
(Risk of accidents caused by errors in operation due to magnetic force)
To
4
If the dispensing head is attached to the front side, perform from the rear side, if the one attached to the rear
side, perform from the other way. The explanation in the following procedure is an example when the
dispensing head is installed on the rear side and operated from the front side.
After
opera-
tion
Maintenance
4-2-5
OFF
SERVO
2
NPM-W2 EJM7DE-MB-04M-00
4-2-5-2
4
5
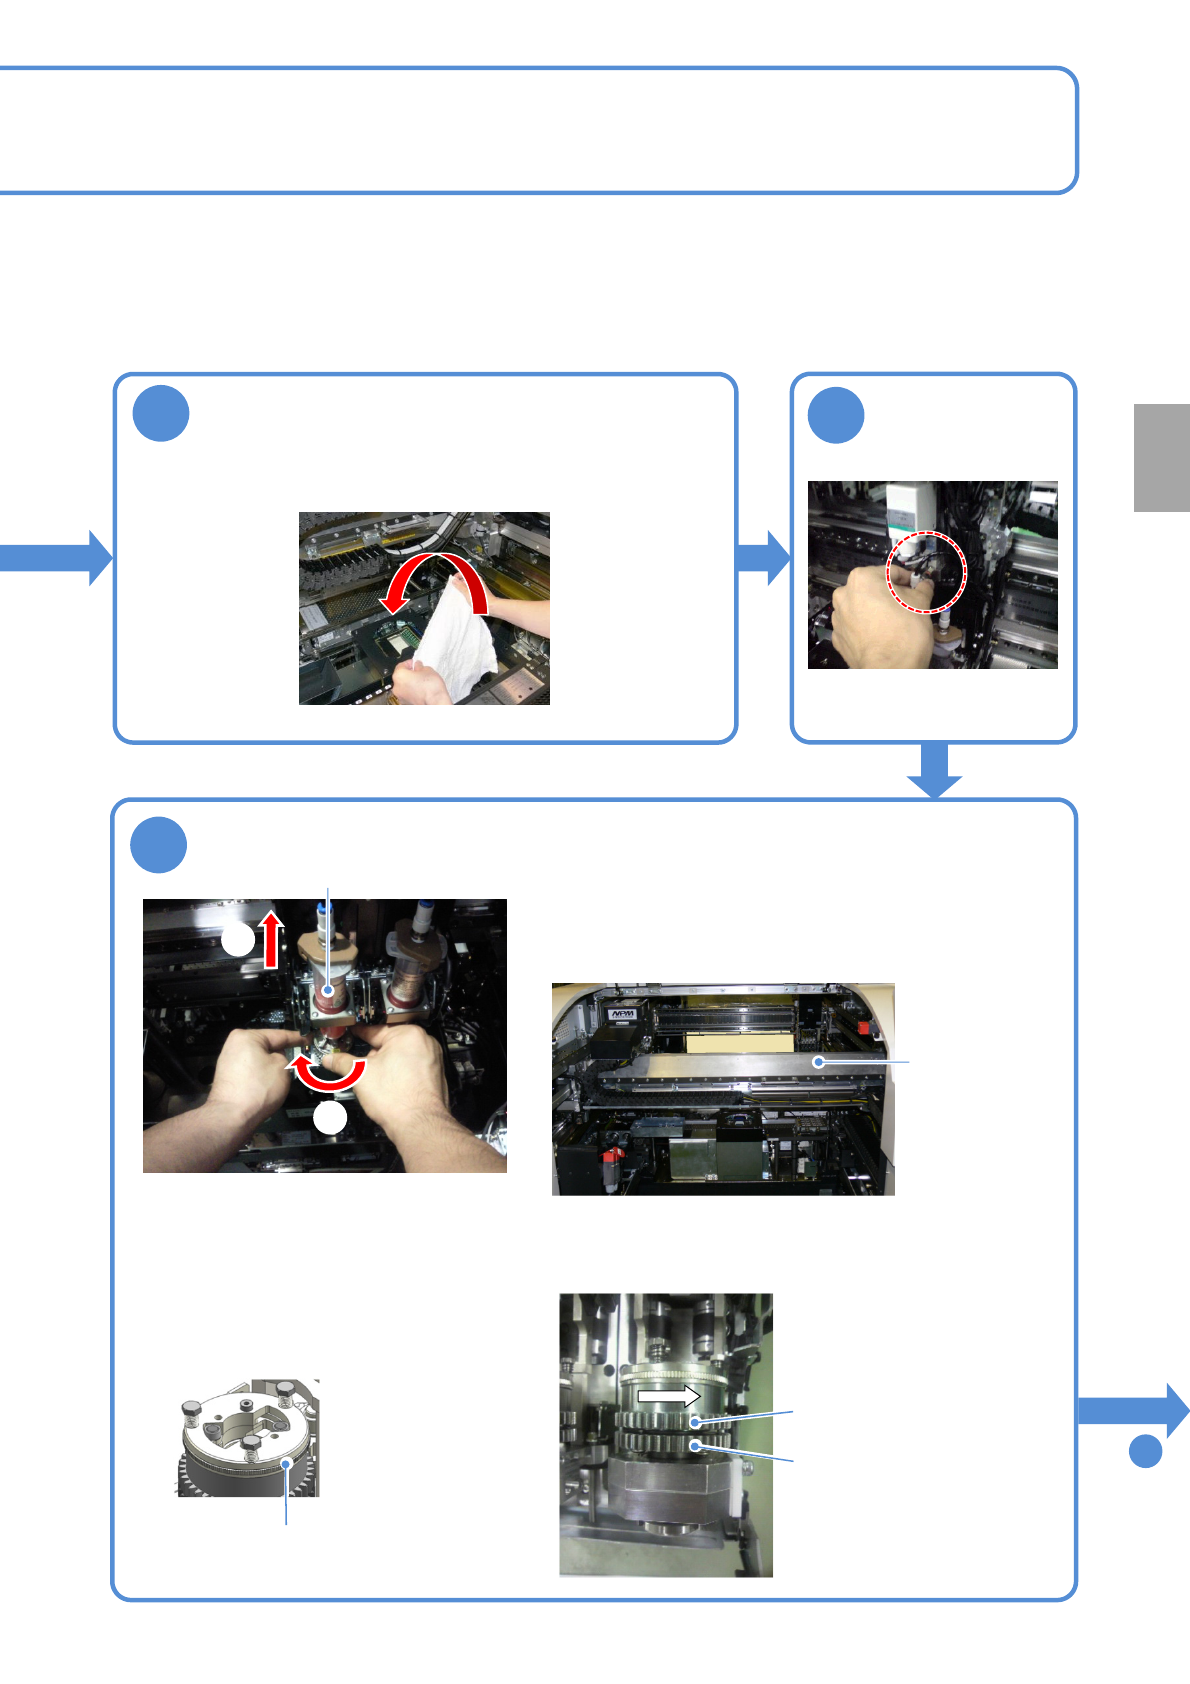
Cover the multi-recognition camera and the
nozzle changer with the cloth in order to
protect from adhesives
Disconnect the
air plug
6
Detach the syringe
To
7
1
2
Every
24
hours
PeriodicPeriodic
inspection
Linear scale
protection cover
①While securing SC-axis and θ-
axis with one hand, rotate the lock
plate with the other hand in a
clockwise direction seen from the
top to unlock the syringe.
②Pull the syringe straight out.
●Be careful not to apply force to the protection cover for
the X-axis linear scale during syringe replacement.
There is possibility for interference with the linear scale
reading head due to cover deformation.
●Be careful not to turn the gear of SC-axis in a clockwise
direction seen from the top during syringe replacement,
otherwise, adhesive may leak.
SC-axis
Θ-axis
Lock plate
Syringe
NPM-W2 EJM7DE-MB-04M-00
4-2-5-3
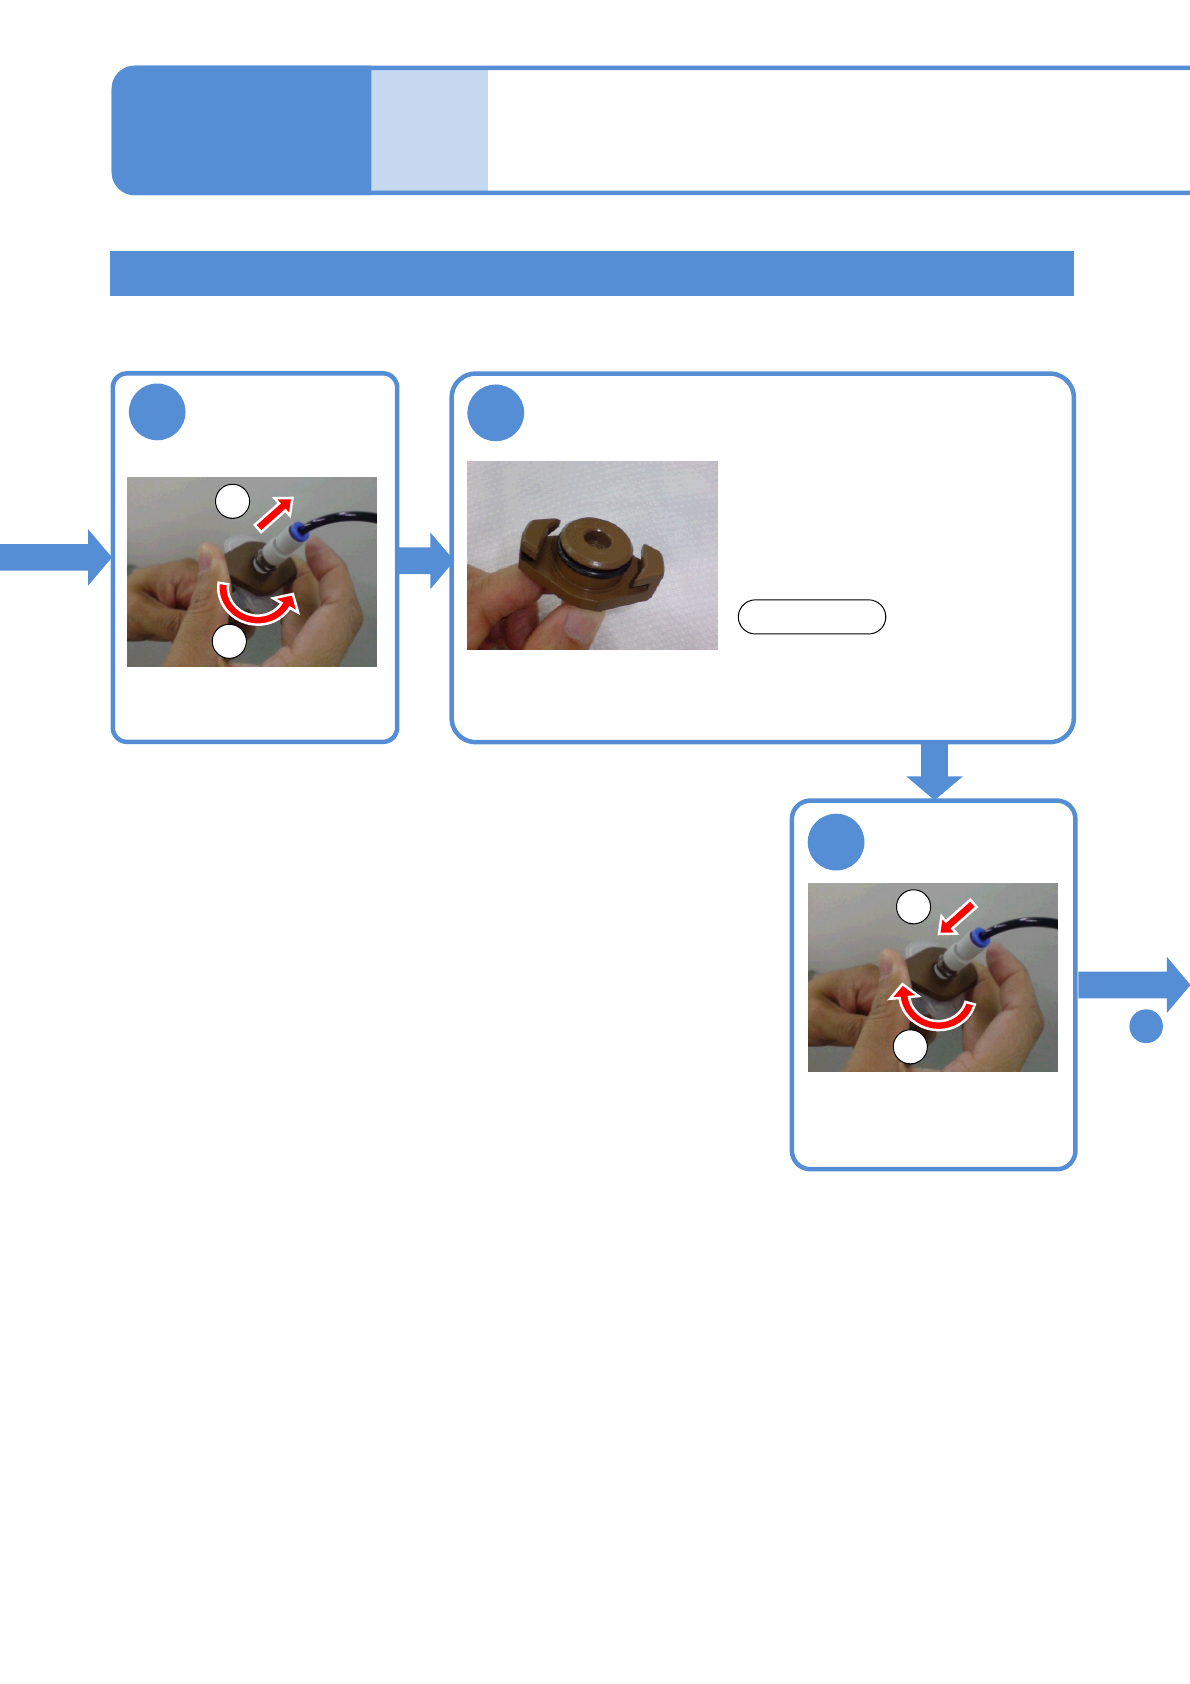
Cleaning the joint
Clean adhesive on the air joint part.
If adhesive remains , air leaks, causing poor dispensing.
7
①Turn the joint.
②Pull it out.
8
Disconnect the
joint from the
syringe
Check that there is no adhesive on the joint
●Wipe off excess around O-ring
with a lint free cloth damped with
solvent (alcohol) if it sticks.
9
To
10
NOTICE
●Please replace the O-ring if it is
cracked or deteriorated.
1
2
Attach the joint
to the syringe
①Push the joint in.
②Turn it .
1
2
After
opera-
tion
Maintenance
4-2-5
Cleaning and checking the
screw unit and the nozzles 2
(dispensing head(option))