N7201A617E00_0317.pdf - 第146页
NPM-W 2 EJM7DE-MB-04M-00 4-2-5 -3 Cleaning the joint Clean adhesive on the air joint part. If adhesive remains , air leaks, causing poor dispensing . 7 ① Turn the joint. ② Pull it out. 8 Disconnect the joint from the syr…
NPM-W2 EJM7DE-MB-04M-00
4-2-5-2
4
5
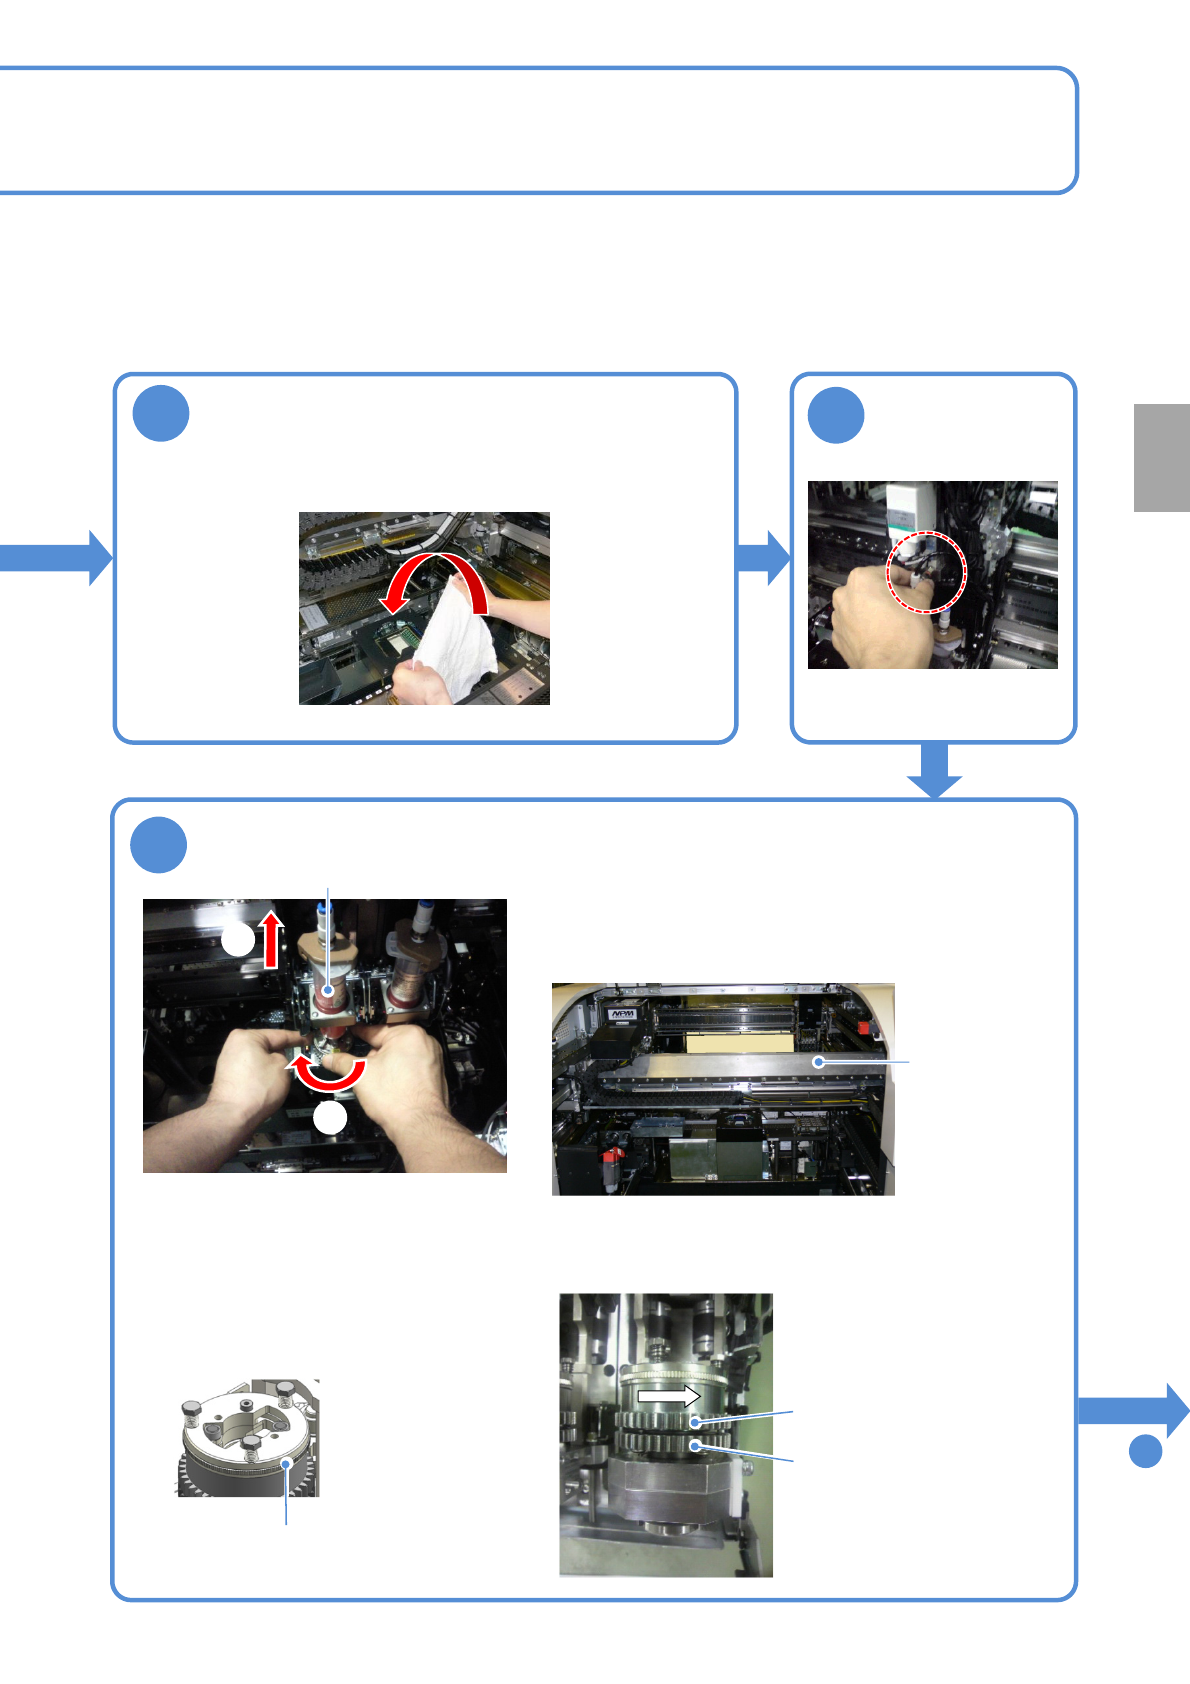
Cover the multi-recognition camera and the
nozzle changer with the cloth in order to
protect from adhesives
Disconnect the
air plug
6
Detach the syringe
To
7
1
2
Every
24
hours
PeriodicPeriodic
inspection
Linear scale
protection cover
①While securing SC-axis and θ-
axis with one hand, rotate the lock
plate with the other hand in a
clockwise direction seen from the
top to unlock the syringe.
②Pull the syringe straight out.
●Be careful not to apply force to the protection cover for
the X-axis linear scale during syringe replacement.
There is possibility for interference with the linear scale
reading head due to cover deformation.
●Be careful not to turn the gear of SC-axis in a clockwise
direction seen from the top during syringe replacement,
otherwise, adhesive may leak.
SC-axis
Θ-axis
Lock plate
Syringe
NPM-W2 EJM7DE-MB-04M-00
4-2-5-3
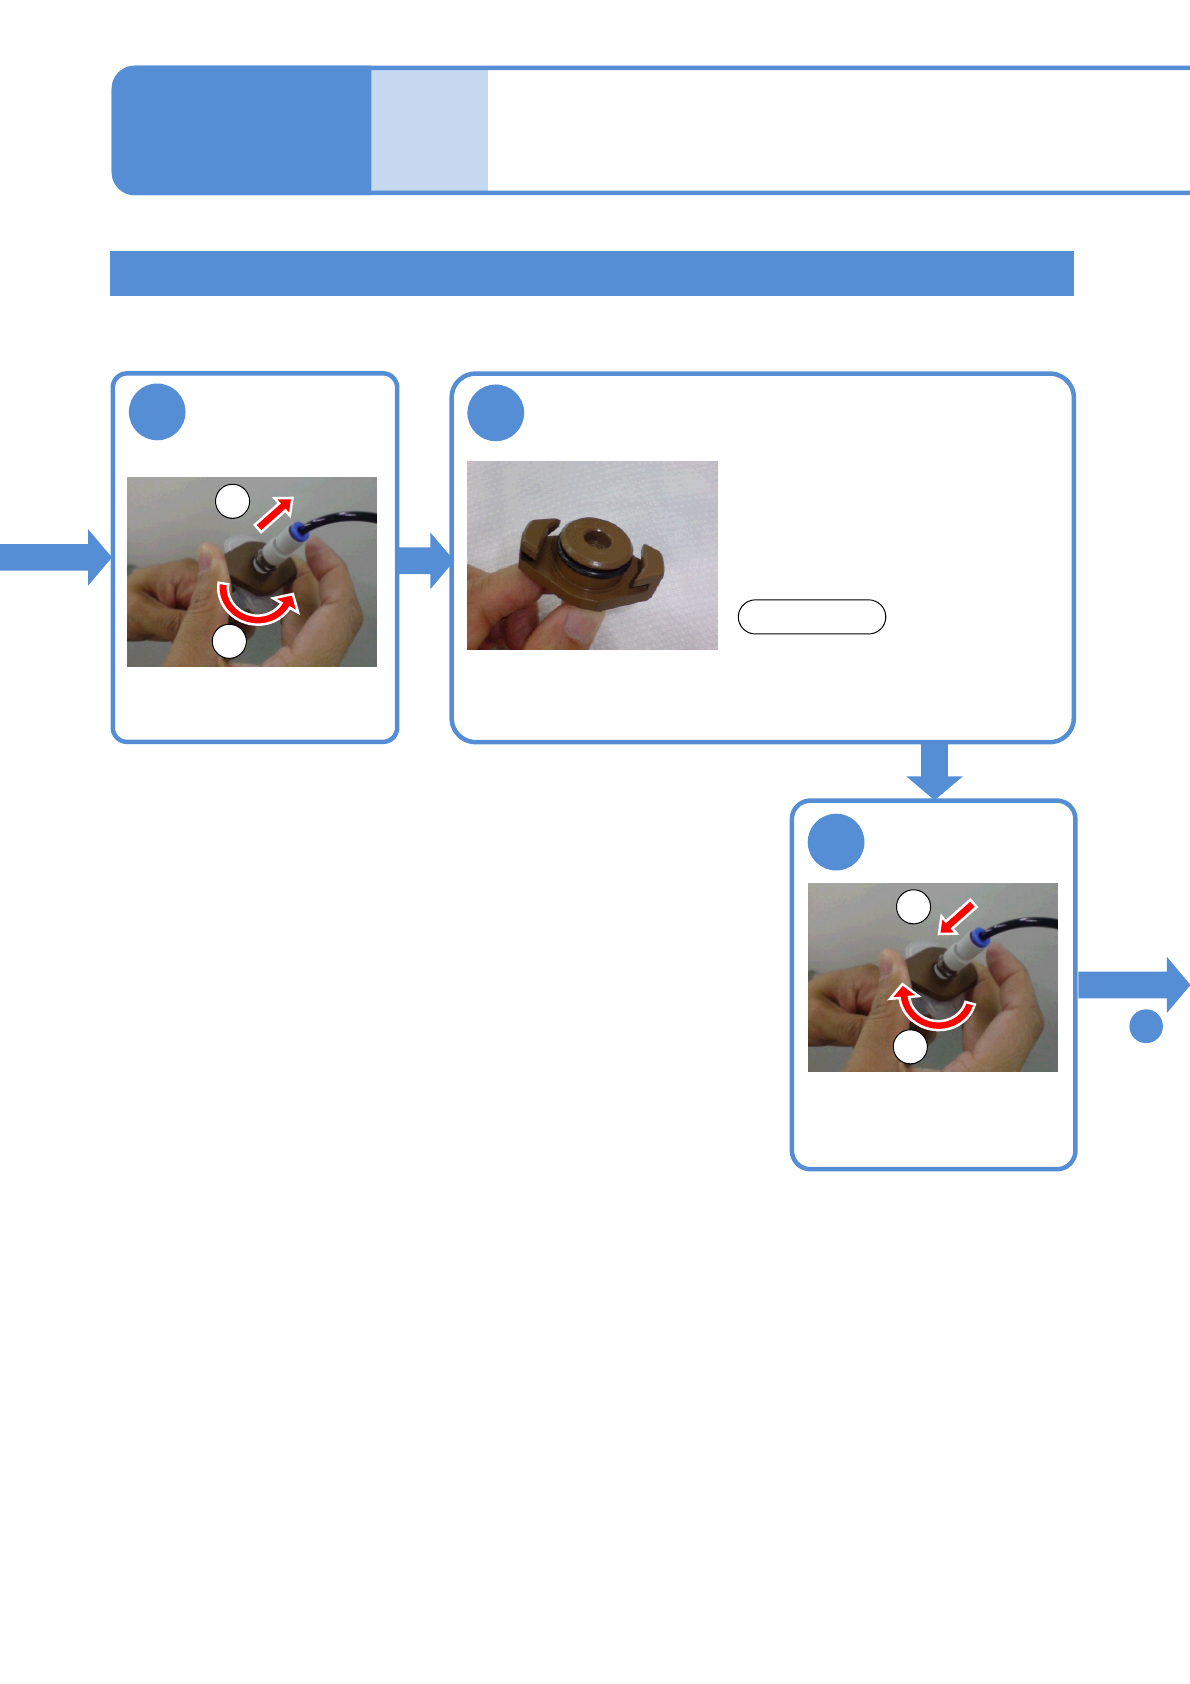
Cleaning the joint
Clean adhesive on the air joint part.
If adhesive remains , air leaks, causing poor dispensing.
7
①Turn the joint.
②Pull it out.
8
Disconnect the
joint from the
syringe
Check that there is no adhesive on the joint
●Wipe off excess around O-ring
with a lint free cloth damped with
solvent (alcohol) if it sticks.
9
To
10
NOTICE
●Please replace the O-ring if it is
cracked or deteriorated.
1
2
Attach the joint
to the syringe
①Push the joint in.
②Turn it .
1
2
After
opera-
tion
Maintenance
4-2-5
Cleaning and checking the
screw unit and the nozzles 2
(dispensing head(option))
NPM-W2 EJM7DE-MB-04M-00
4-2-5-4
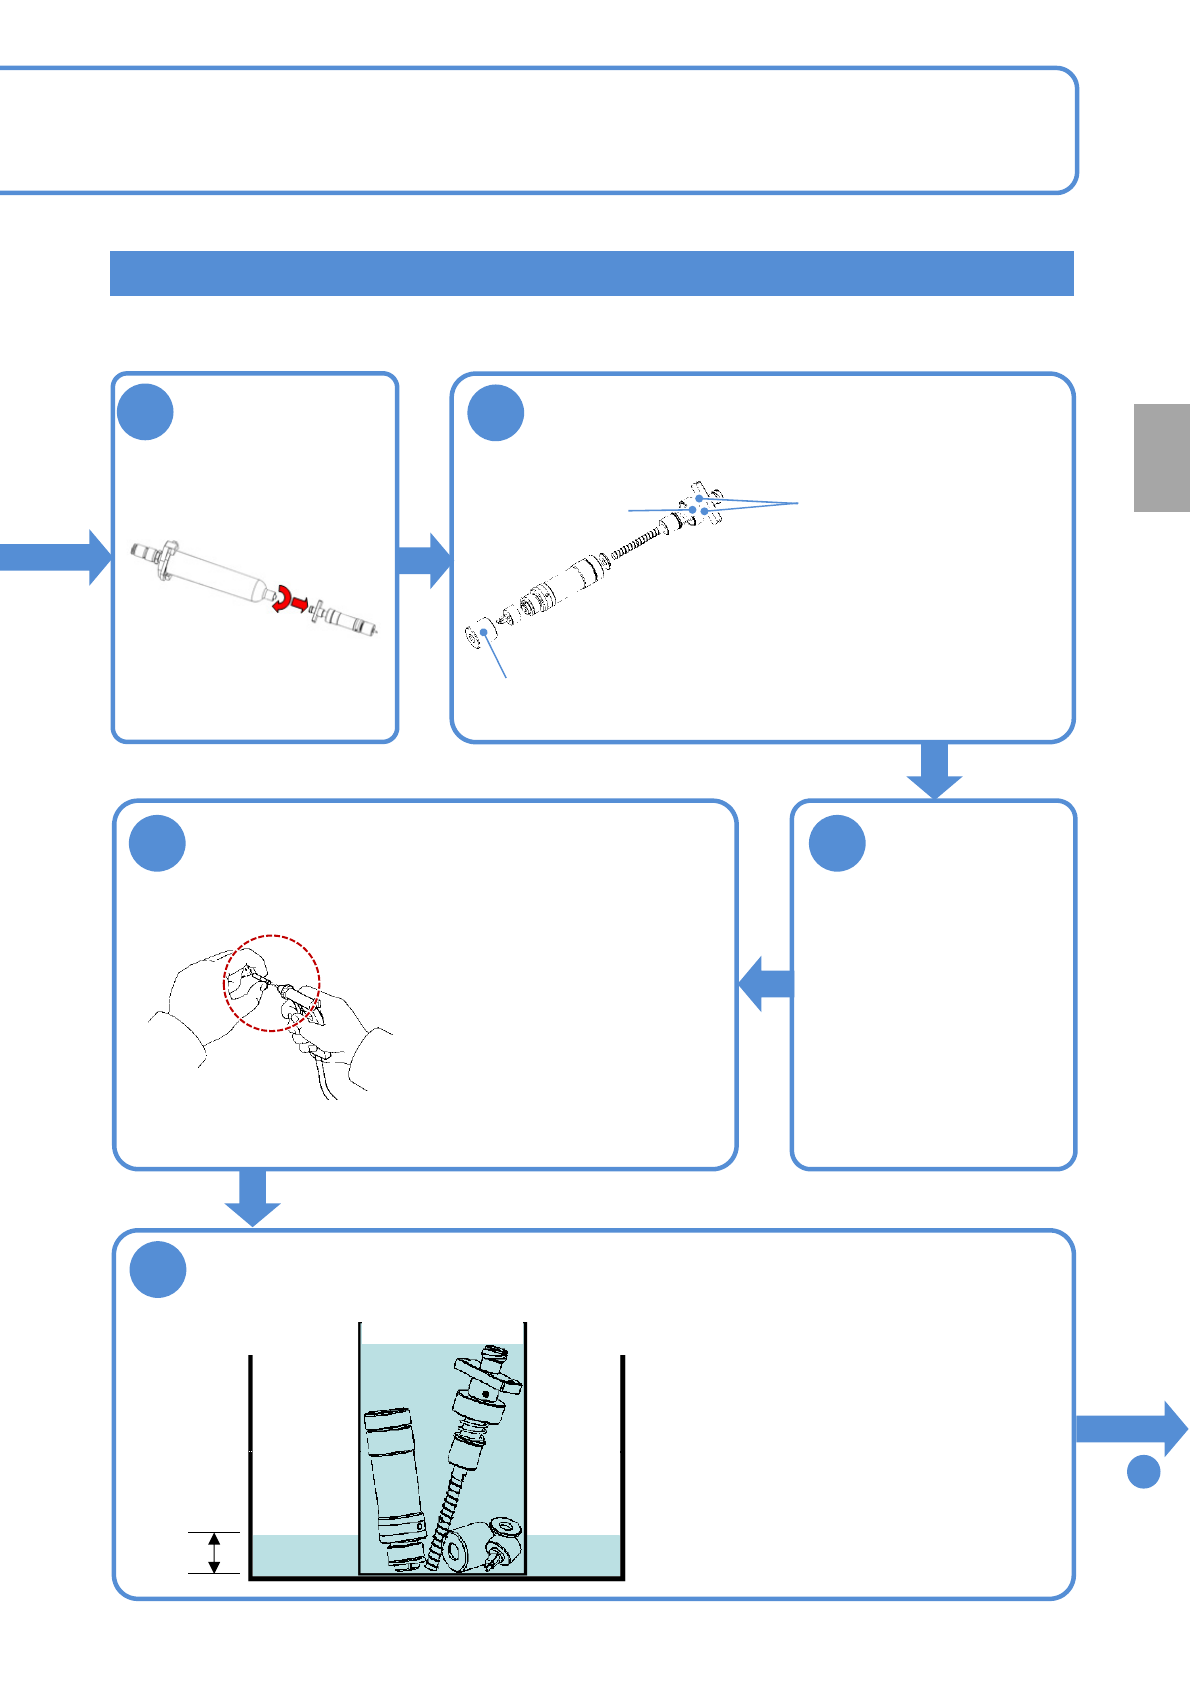
Cleaning the screw unit 1
10
11
Disconnect the
screw unit from
the syringe
(counterclockwise)
Disassemble the screw unit
●Turn the top cap in a clockwise
and turn the bottom cap in a
counterclockwise to remove.
●Do not remove the screws.
12
To
15
Bottom cap
Top cap
Screw
Wipe adhesive
on each part off
using a lint free
cloth
13
Wipe the adhesive in the screw shaft using an
air blow gun
●Cover the part when using
an air blow gun because
adhesive will scatter in all
directions.
14
Clean the parts for three minutes with an
ultrasonic cleaner
●Having the water level of the ultrasonic
cleaner tank at 1 cm, place a beaker
containing cleaning solvent (e.g. alcohol,
etc.) into the ultrasonic cleaner.
● Put the parts inside the beaker. (The
amount of cleaning solvent inside the
beaker should be sufficient to let all parts
sink under the solvent.)
● The cleaning time should not exceed 5
minutes.
(Even cleaning for 5 minutes or more brings
about the same effect.)
1 cm
Every
24
hours
PeriodicPeriodic
inspection