N7201A617E00_0317.pdf - 第149页
NPM-W 2 EJM7DE-MB-04M-00 4-2-5 -6 16 17 Blow aw ay alcohol with an air blow gun to dry them Assemble the screw unit back and check the condition of cleaned parts ① No clogging in the tip ② No adhesive stuck on the tip ③ …
NPM-W2 EJM7DE-MB-04M-00
4-2-5-5
Cleaning the screw unit 2
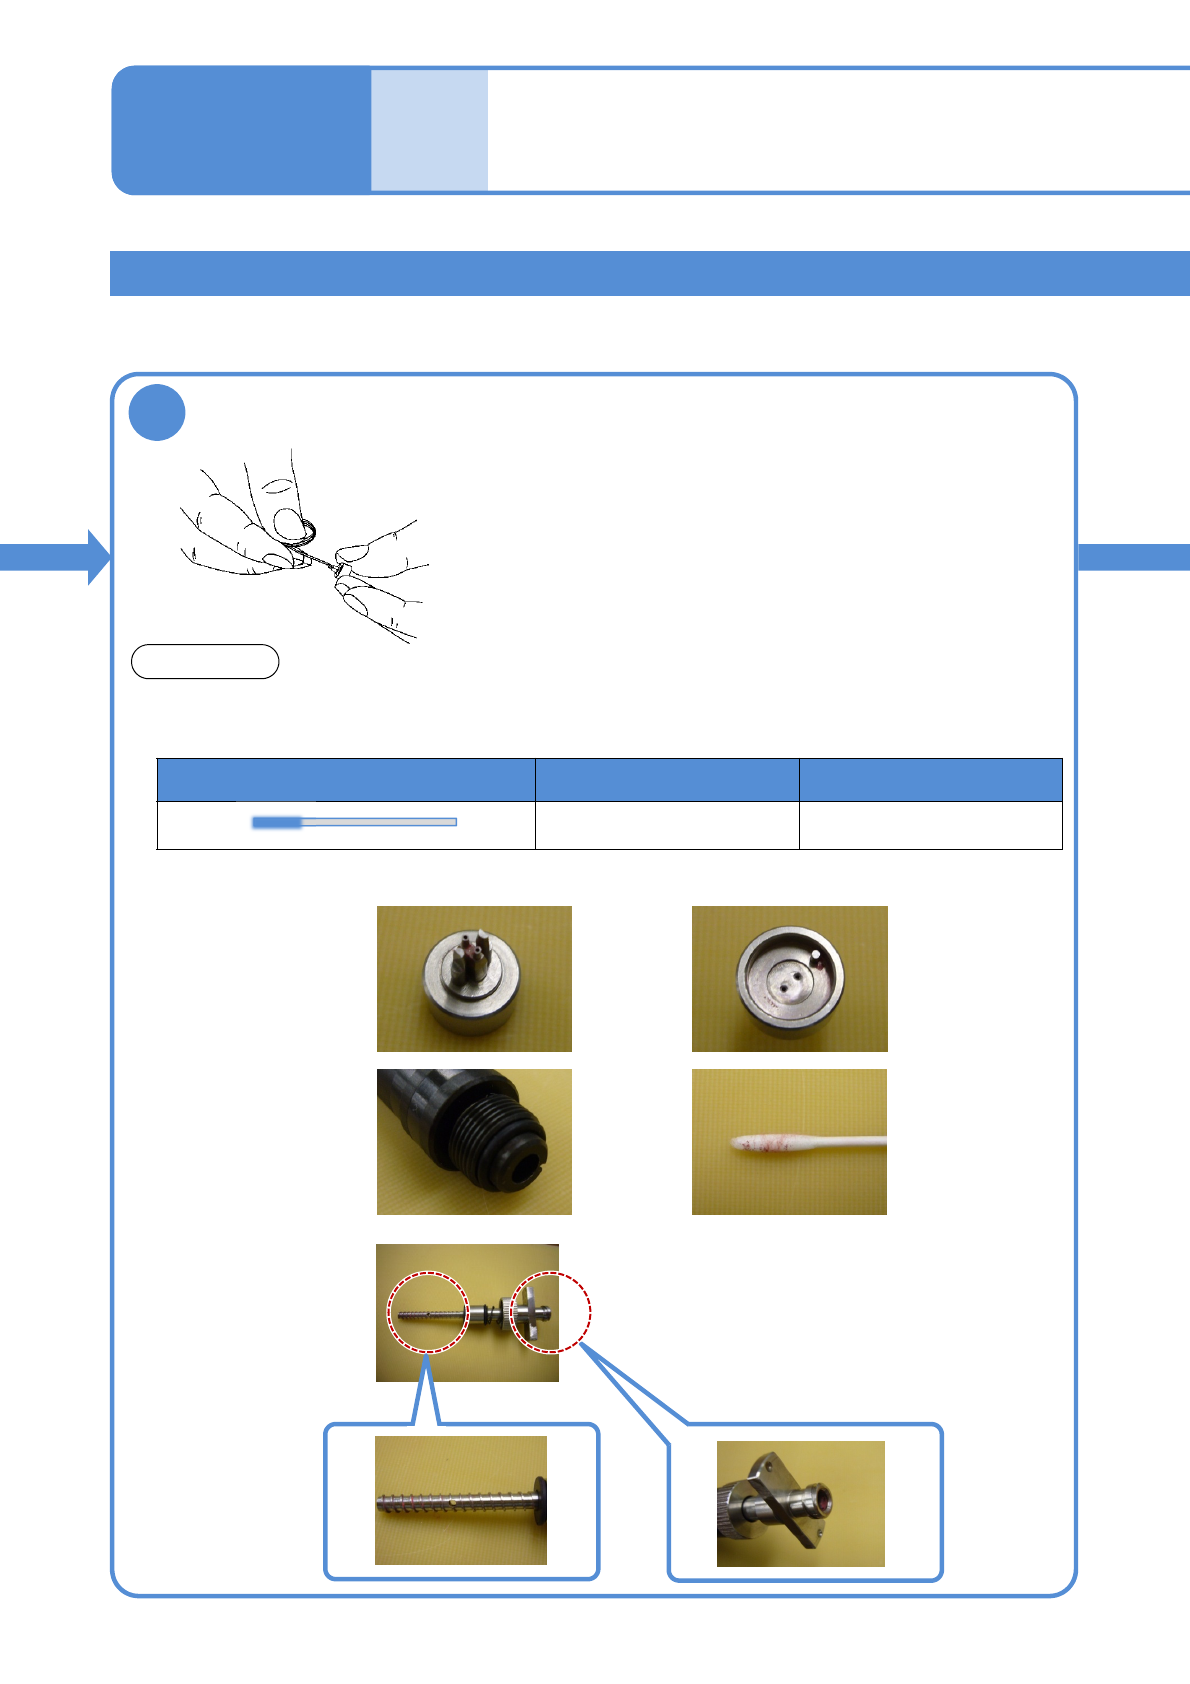
■Example of cleaning
●If the nozzle inside is clogged with adhesive, remove it with a
pin, drill, or wire that matches the nozzle hole diameter.
●Check for any adhesive on and around the O-ring.
●Using the swab of P751S sometimes sticks into the screw
shaft. Use the stick side of the swab to clean inside of the
screw shaft.
NOTICE
●Please replace the O-ring if it is cracked or deteriorated.
●Usethefollowingindustrialswabsforprecisionmachineforcleaning.
After
opera-
tion
Maintenance
4-2-5
Cleaning and checking the
screw unit and the nozzles 3
(dispensing head(option))
Nozzle holder
Screw shaft
When adhesive residue found on a
swab to wipe the part is reduced to a
relatively small amount as shown above,
any remaining adhesive will not affect
the dispensing accuracy.
15
Take the parts out and clean each part with a
swab
Dispensing nozzle
Model model No. Remarks
751S
N986P751S
200 pieces
NPM-W2 EJM7DE-MB-04M-00
4-2-5-6
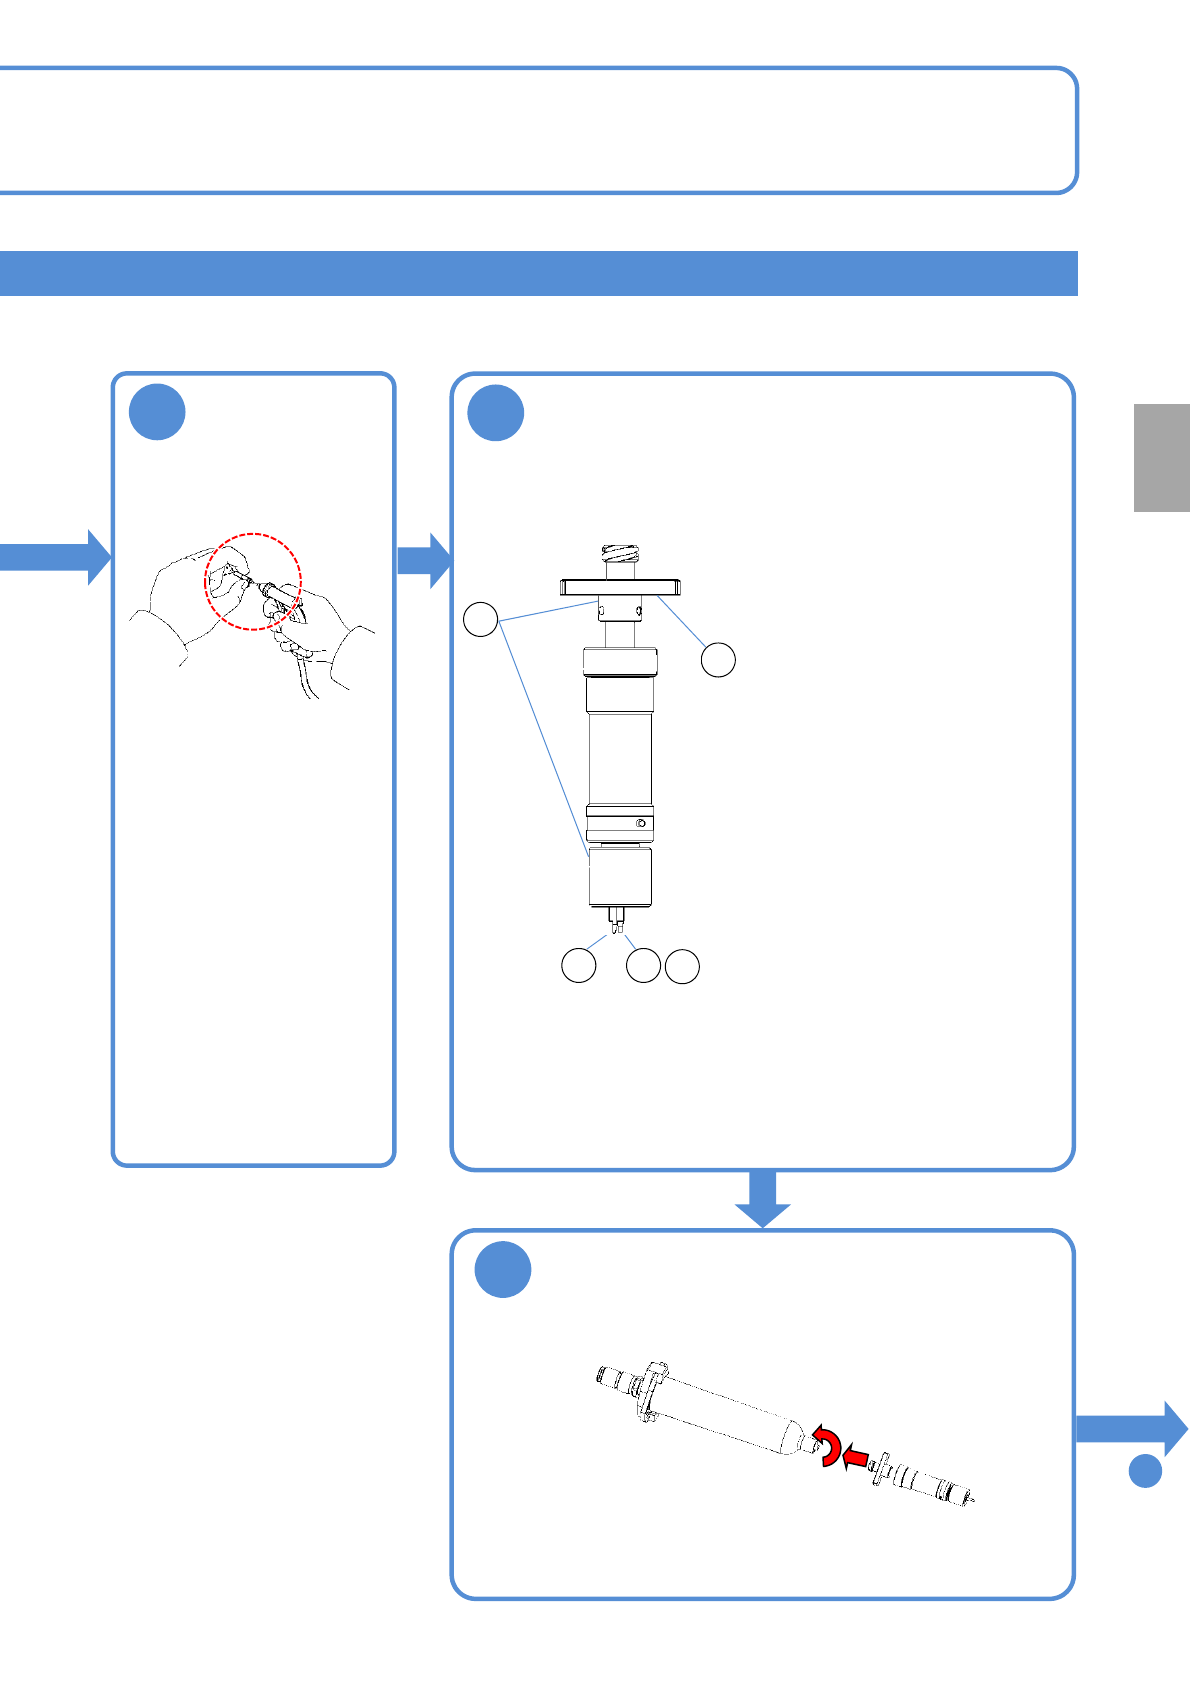
16
17
Blow away
alcohol with an
air blow gun to
dry them
Assemble the screw unit back and check the
condition of cleaned parts
①No clogging in the tip
②No adhesive stuck on the tip
③No adhesive stuck on the
outer surface
④No adhesive stuck on the
reference plane
⑤No bends in the nozzle and
the stopper
●Remaining alcohol will
harden the adhesive.
They should be dried
completely.
To
19
1
2
5
3
4
18
Set the screw unit to the syringe
(Clockwise)
Every
24
hours
PeriodicPeriodic
inspection
NPM-W2 EJM7DE-MB-04M-00
4-2-5-7
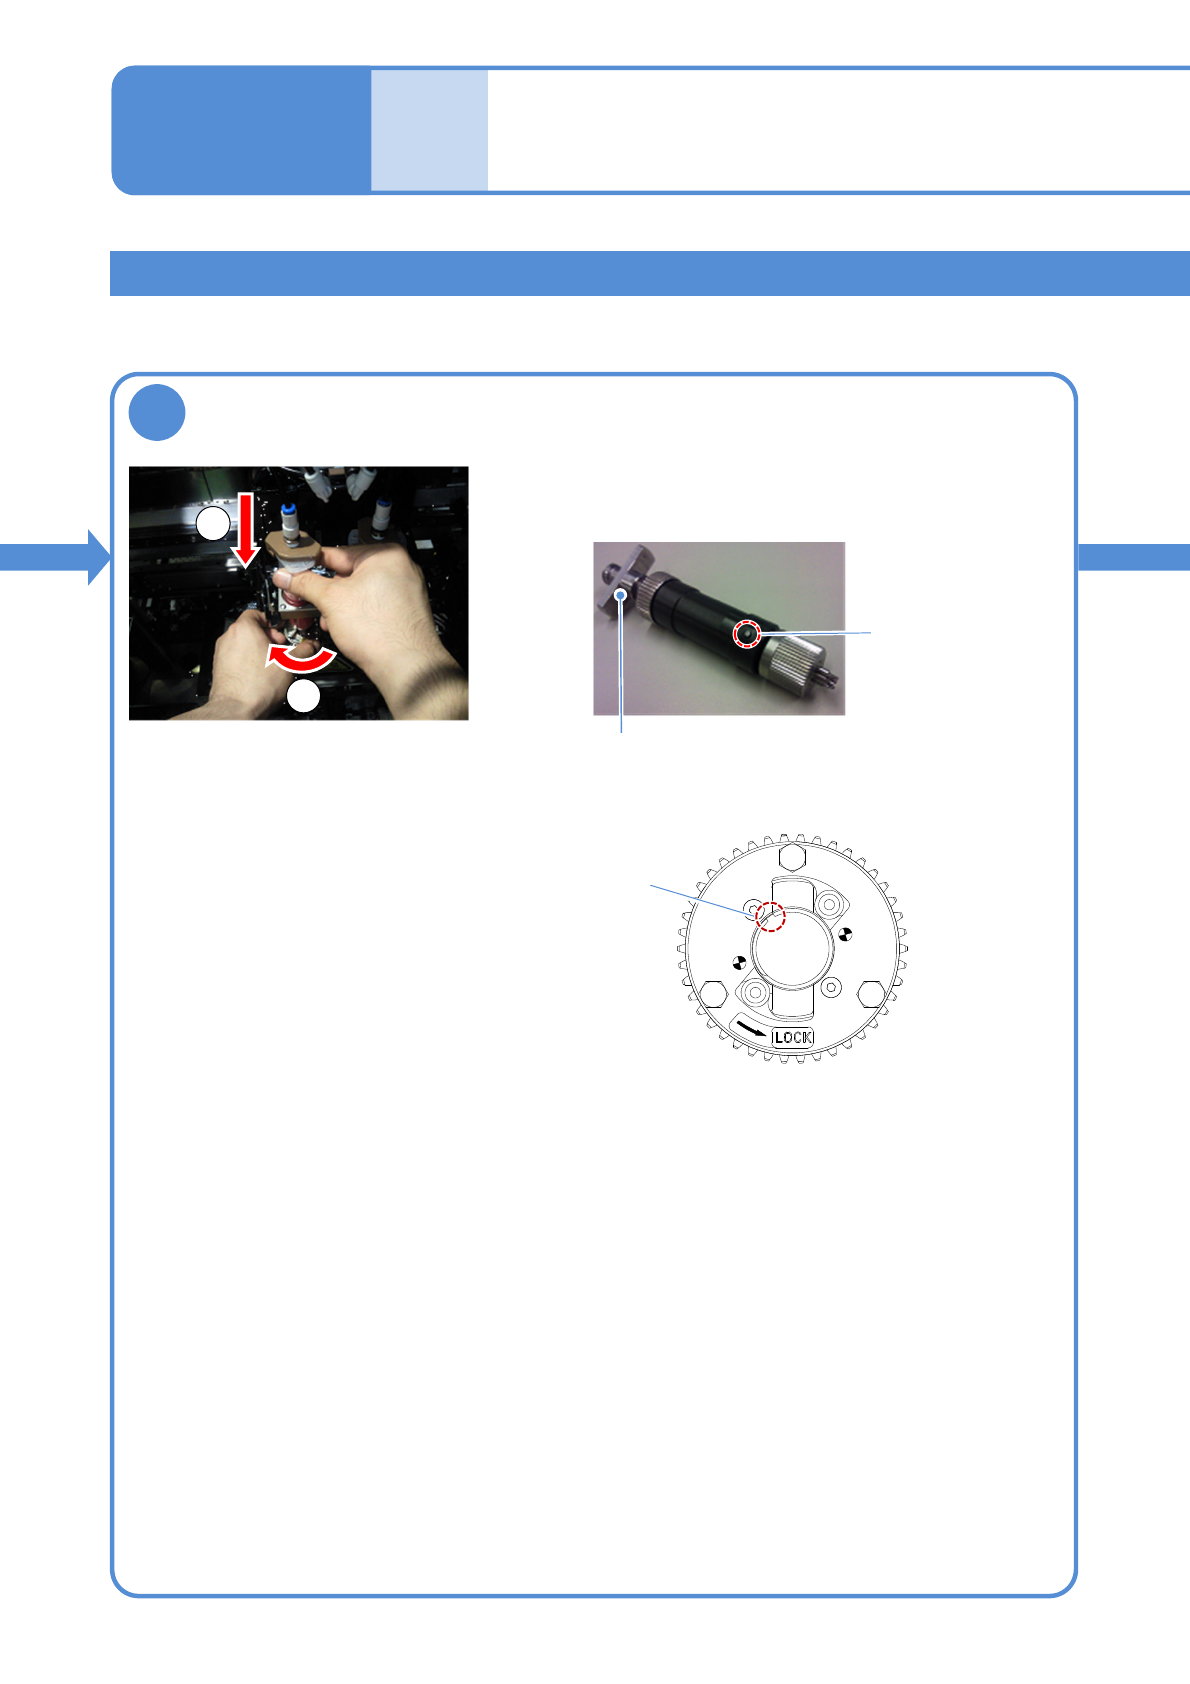
Attaching the syringe
19
Set the screw unit to the syringe holder
After
opera-
tion
Maintenance
4-2-5
Cleaning and checking the
screw unit and the nozzles 4
(dispensing head(option))
①Adjust the guide pin of the screw unit to the 9 to 11 o’clock
position. Then insert it into housing.
Housing groove
1
2
②Rotate the screw in the clockwise direction until it stops
rotating.
③Push the syringe in until it hits, with the angle of the flange
adjusted according to the holder direction.
Flange
Guide pin
●By moving it to the 9 to 11 o’clock position in the clockwise
direction, the guide pin is fitted into the groove of the
housing.