N7201A617E00_0317.pdf - 第156页
NPM-W 2 EJM7DE-MB-05 M-00 ∗∗∗∗∗ Cleaning the no zzle holder 1 (3-nozzle head (option)) Maintenance 5-2 Tool used: Air blow gun, lint free cloth, cotton swab, Allen wrench (2.5 mm), spanner (7 mm) Time required: 30 minute…

NPM-W2 EJM7DE-MB-05M-00
Every
140
hours
Periodic
inspection
5-1-2
NPM-W2 EJM7DE-MB-05M-00
∗∗∗∗∗
Cleaning the nozzle
holder 1 (3-nozzle head (option))
Maintenance
5-2
Tool used: Air blow gun, lint free cloth, cotton swab, Allen wrench (2.5 mm), spanner (7 mm)
Time required: 30 minutes per head
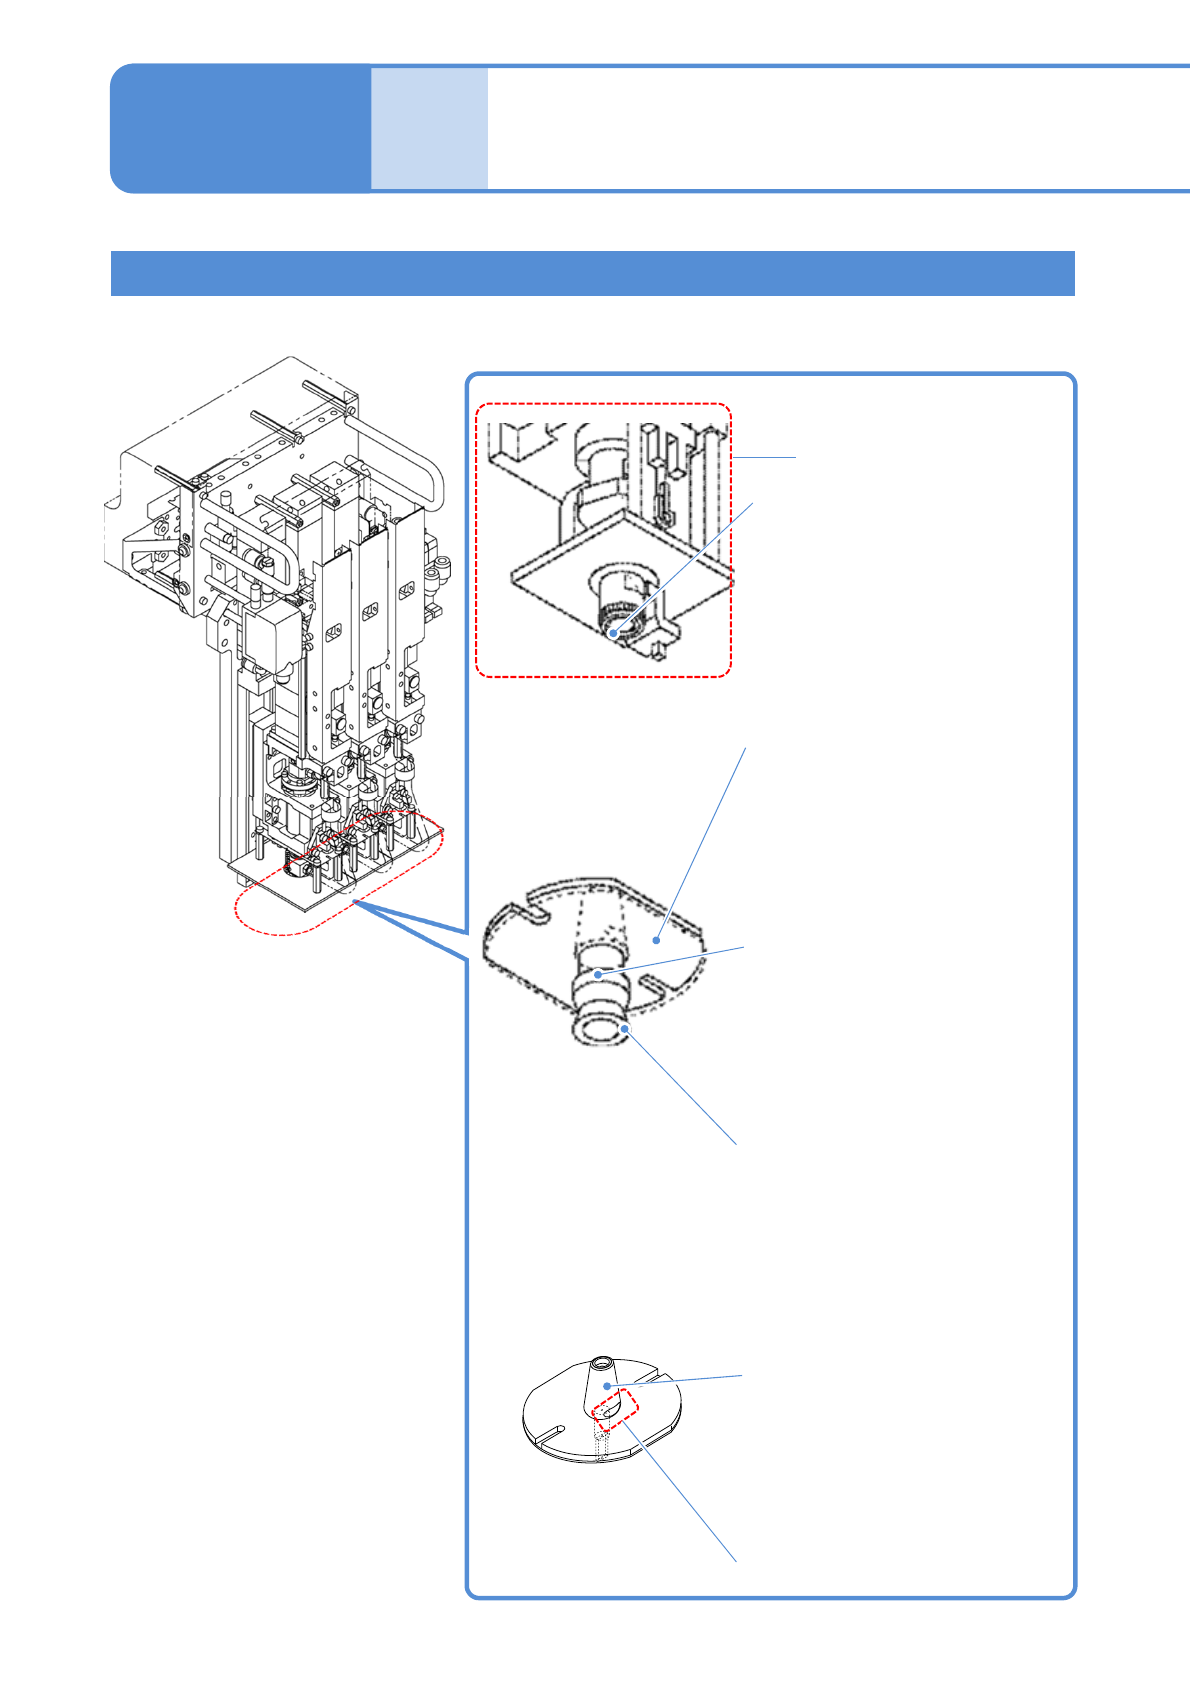
Cleaning parts
Nozzle holder taper surface
(If dust settles, it could cause a
pickup error or affect placement
accuracy due to air leaks caused
by the nozzle holder taper surface
that cannot keep in absolute
contact with the nozzle taper
surface while the nozzle is
securely fixed in place)
Nozzle reflector
●The reflector, made of black-
resin, is covered with special
coating that helps prevent
scratches. It recognizes
components by reflecting LED
light. (If dust settles, it could
cause recognition errors)
Pickup pad
●For the purpose of achieving
more stable pickups, the rubber
pad is attached to the nozzle tip.
(Cracks in the pickup pad could
cause a pickup error due to air
leaks)
Nozzle tip (Nozzle section)
●Picks up components.
(If dust settles on the side of the
tip, it could casts a shadow
during recognition, thus causing
a recognition error. And also, if
dust settles on the pickup hole,
it could cause a pickup error)
Nozzle taper surface
●The part that is grasped in the
chuck of the transfer head’s
nozzle holder. (If dust settles on
the taper surface and the
chucking groove, it could cause
air leaks or chucking problem)
5-2-1
Nozzle holder
Chucking groove
NPM-W2 EJM7DE-MB-05M-00
5-2-2
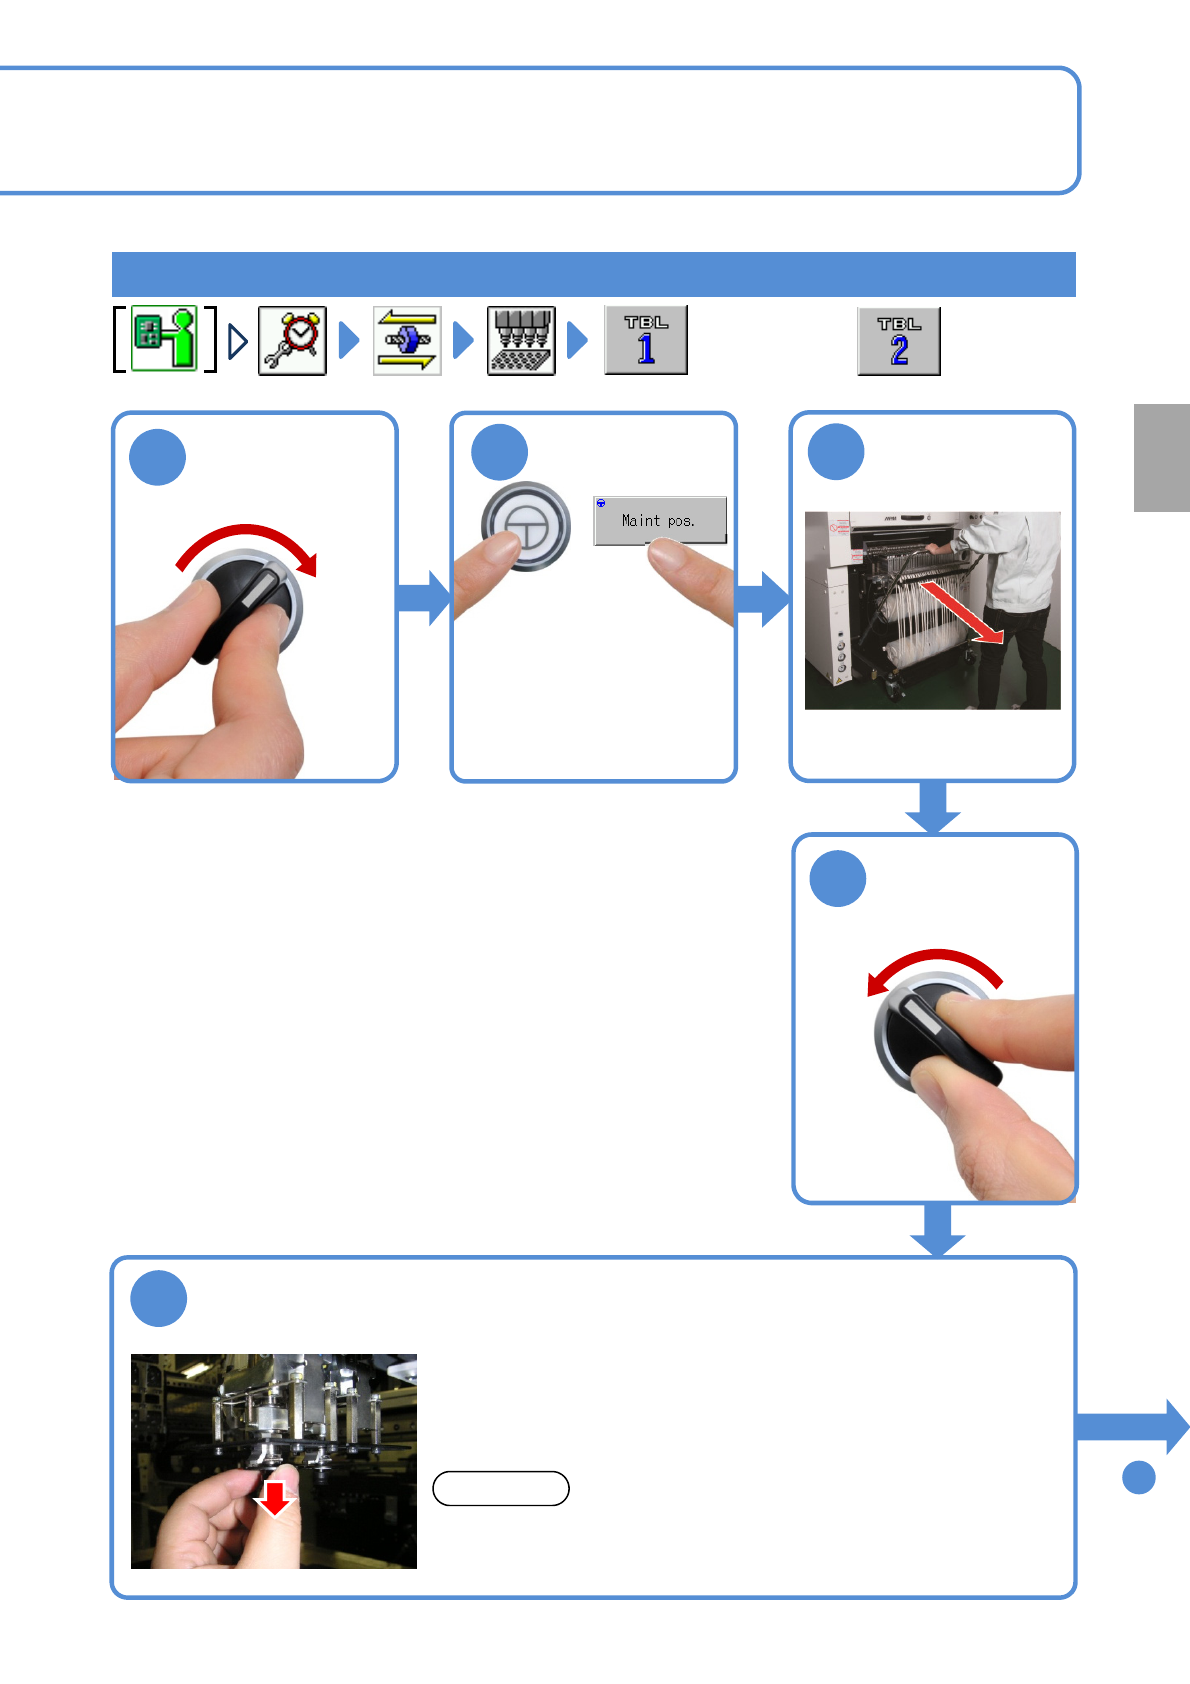
Removing the nozzle
●For the rear,
Remove the nozzle
●Pull it straight out. If pulled out at an angle, the clamp claws could
be damaged.
NOTICE
●Work at the front side for front feeder cart specification and rear tray
feeder specification.
●Work at the rear side for rear feeder cart specification.
●Move the head to the position where your workability enhances.
●Hold and pull down the edge of the nozzle reflector.
To
8
●Y-axis of the front head
moves to the front side.
●For feeder cart specification,
Y-axis of the rear head
moves to the rear side, and
for tray feeder specification,
it moves to the front side.
5
2
SERVO
ON
1
OFF
SERVO
4
3
Detach the
feeder cart
(→P.3-2)
Every
140
hours
PeriodicPeriodicPeriodic
inspection