N7201A617E00_0317.pdf - 第164页
NPM-W 2 EJM7DE-MB-05 M-00 5-3-1 -3 Cleaning the PCB- support blocks Cleaning the PCB-suppor t bloc ks (single conveyor specifications) 2 Maintenance 5-3-1 9 Stopper PCB-support block Remove the PCB-support block ● PCB-su…
NPM-W2 EJM7DE-MB-05M-00
Every
140
hours
PeriodicPeriodicPeriodic
inspection
5-3-1-2
OFF
SERVO
ENABLING
1
ENABLING
2
4
3
6
5
8
Lock lever
7
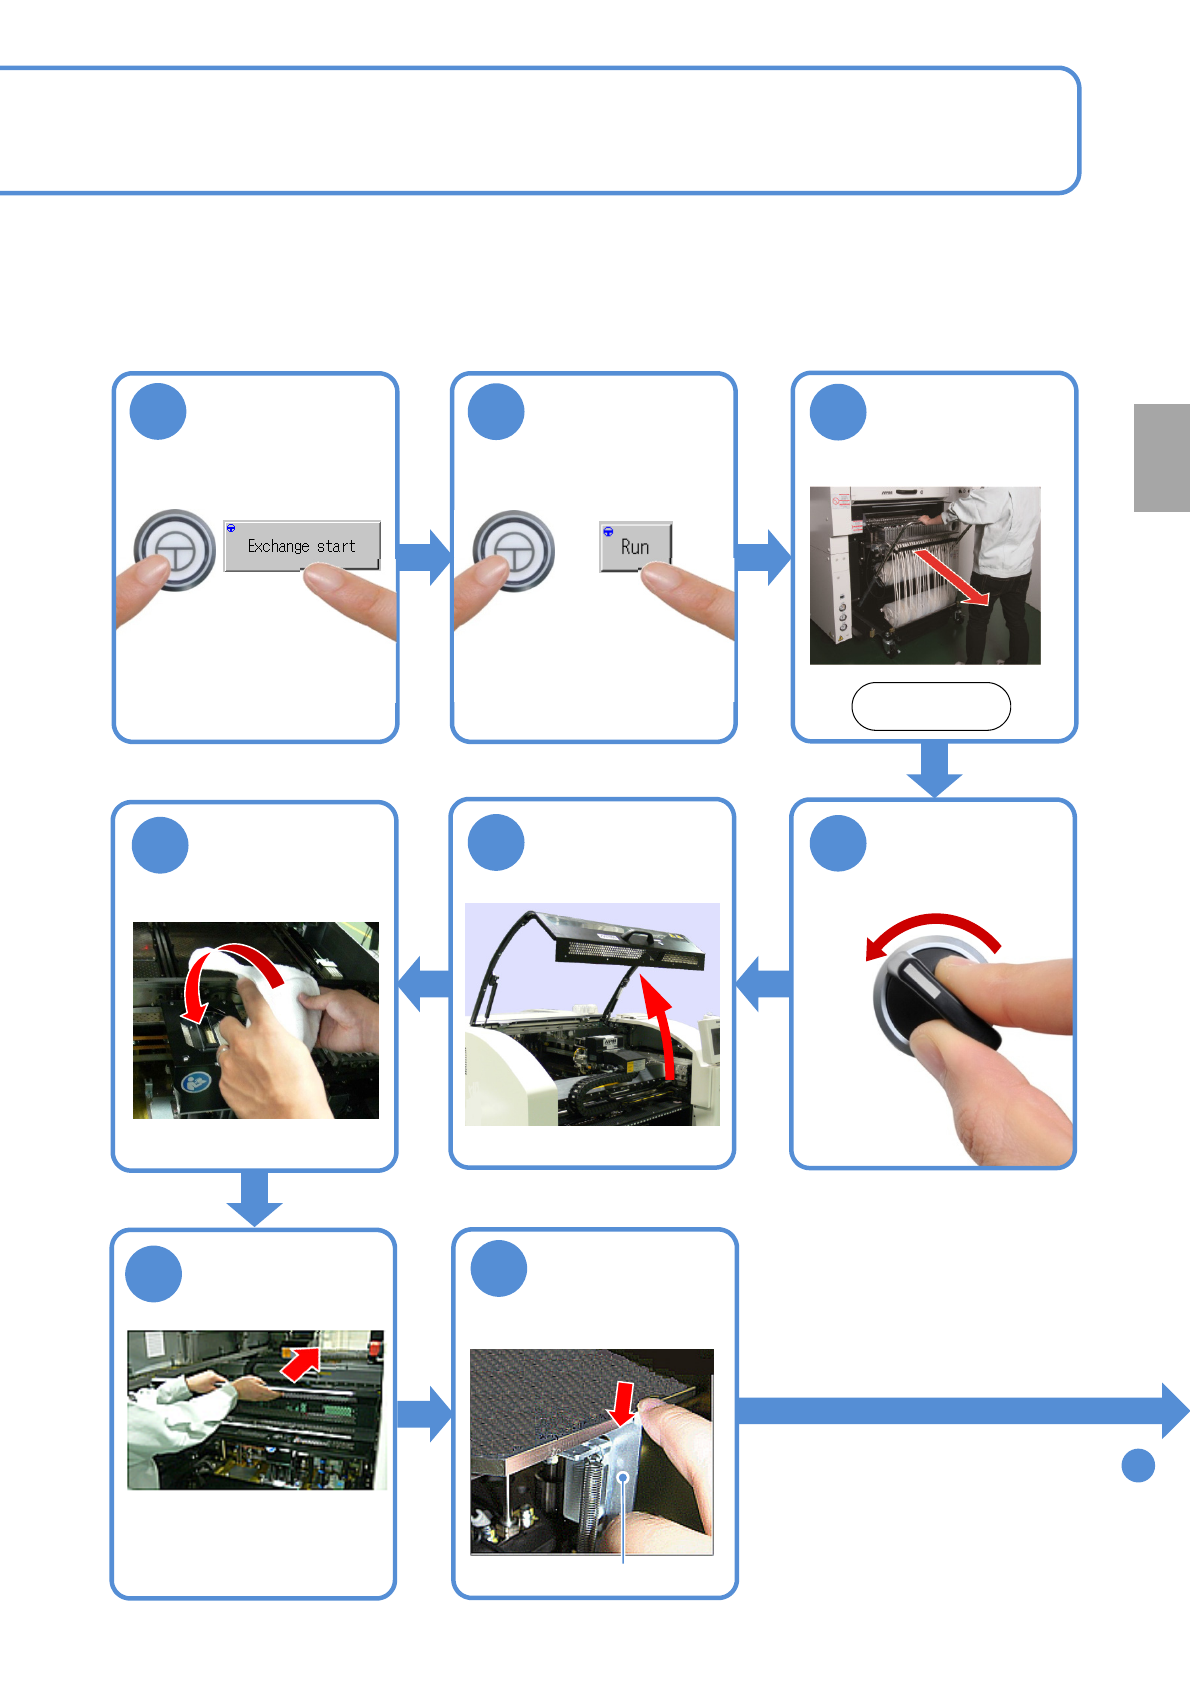
Fold the feeder
table cover to
the back
Confirm the
message
Cover the multi-
recognition
camera with a
lint free cloth
Detach the
feeder cart
(→P.3-2)
Front side
Push down the
lock lever
(X-axes in the front and
rear move to the
retraction position)
(The PCB-support block
moves upward)
To
9
●Neither lean against the
feeder table cover nor place
anything on it.
NPM-W2 EJM7DE-MB-05M-00
5-3-1-3
Cleaning
the PCB-
support
blocks
Cleaning the PCB-support
blocks
(single conveyor specifications) 2
Maintenance
5-3-1
9
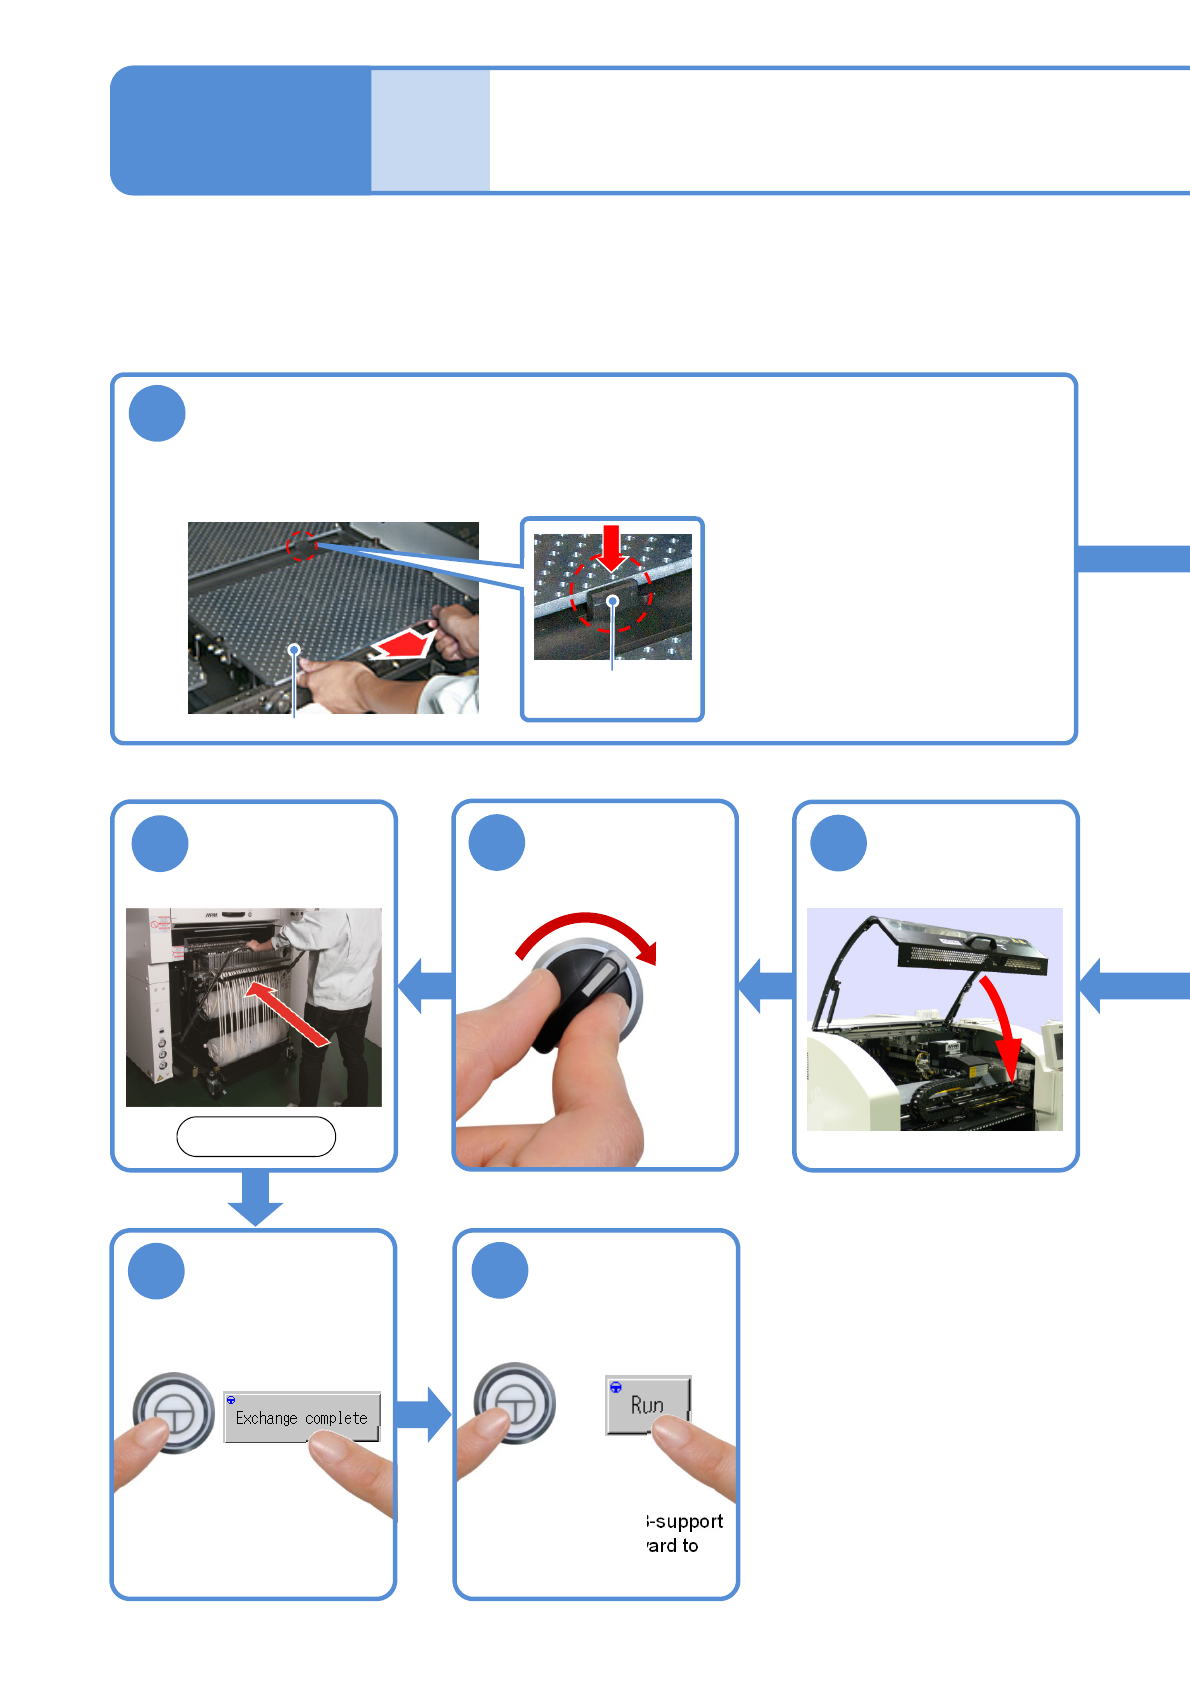
Stopper
PCB-support block
Remove the PCB-support block
●PCB-support block:4 blocks
●Be careful not to drop an object on the multi-recognition camera or bump the multi-recognition
camera.
●If there are support pins on
the PCB-support block, be
careful not to fall them.
●Draw it out slowly with both
hands. Draw out the rear
support block while holding
down the stopper.
SERVO
ON
15
16
14
Attach the feeder
cart (→P.3-2)
Front side
ENABLING
17
18
ENABLING
(Make sure the PCB-support
block moves downward to
the original position)
Confirm the
message
NPM-W2 EJM7DE-MB-05M-00
5-3-1-4
Every
140
hours
PeriodicPeriodicPeriodic
inspection
10
Clean the PCB holder and the PCB-support
block
●Use a lint free cloth or brush.
●Clean the top surface of the
PCB support block (for
automatic change) with a lint
free cloth dampened with
alcohol.
●Be careful not to scratch
coating material on the
surface of the PCB support
block (for automatic change)
by sharps.
11
Attach the PCB-
support block as
it is no tilt
13
12
●PCB-support block
:4 blocks
Bolt
Return the feeder
table cover back
Remove the lint
free cloth
●When you clean the PCB-support block, please check the support pin condition. If flux is adhered to the tip
of the support pin, wipe off with a lint free cloth.
NOTICE
●Do not apply impact such as dropping on the support pin for automatic change. It may cause deformation.
Do not use a deformed support pin.
●Please note that the vacuum hole of the support pin for automatic change is not clogged.
ATTENSION
Vacuum hole
●Put it back as the same
direction as before (the
bolt locates at the right
side toward you).
●If it tilts, it interferes with
the rail.