N7201A617E00_0317.pdf - 第165页
NPM-W 2 EJM7DE-MB-05 M-00 5-3-1 -4 Every 140 hours Periodic Periodic Periodic inspection 10 Clean the PCB holder and the PCB-support block ● Use a lint free cloth or brush. ● Clean the top surface of the PCB support bloc…
NPM-W2 EJM7DE-MB-05M-00
5-3-1-3
Cleaning
the PCB-
support
blocks
Cleaning the PCB-support
blocks
(single conveyor specifications) 2
Maintenance
5-3-1
9
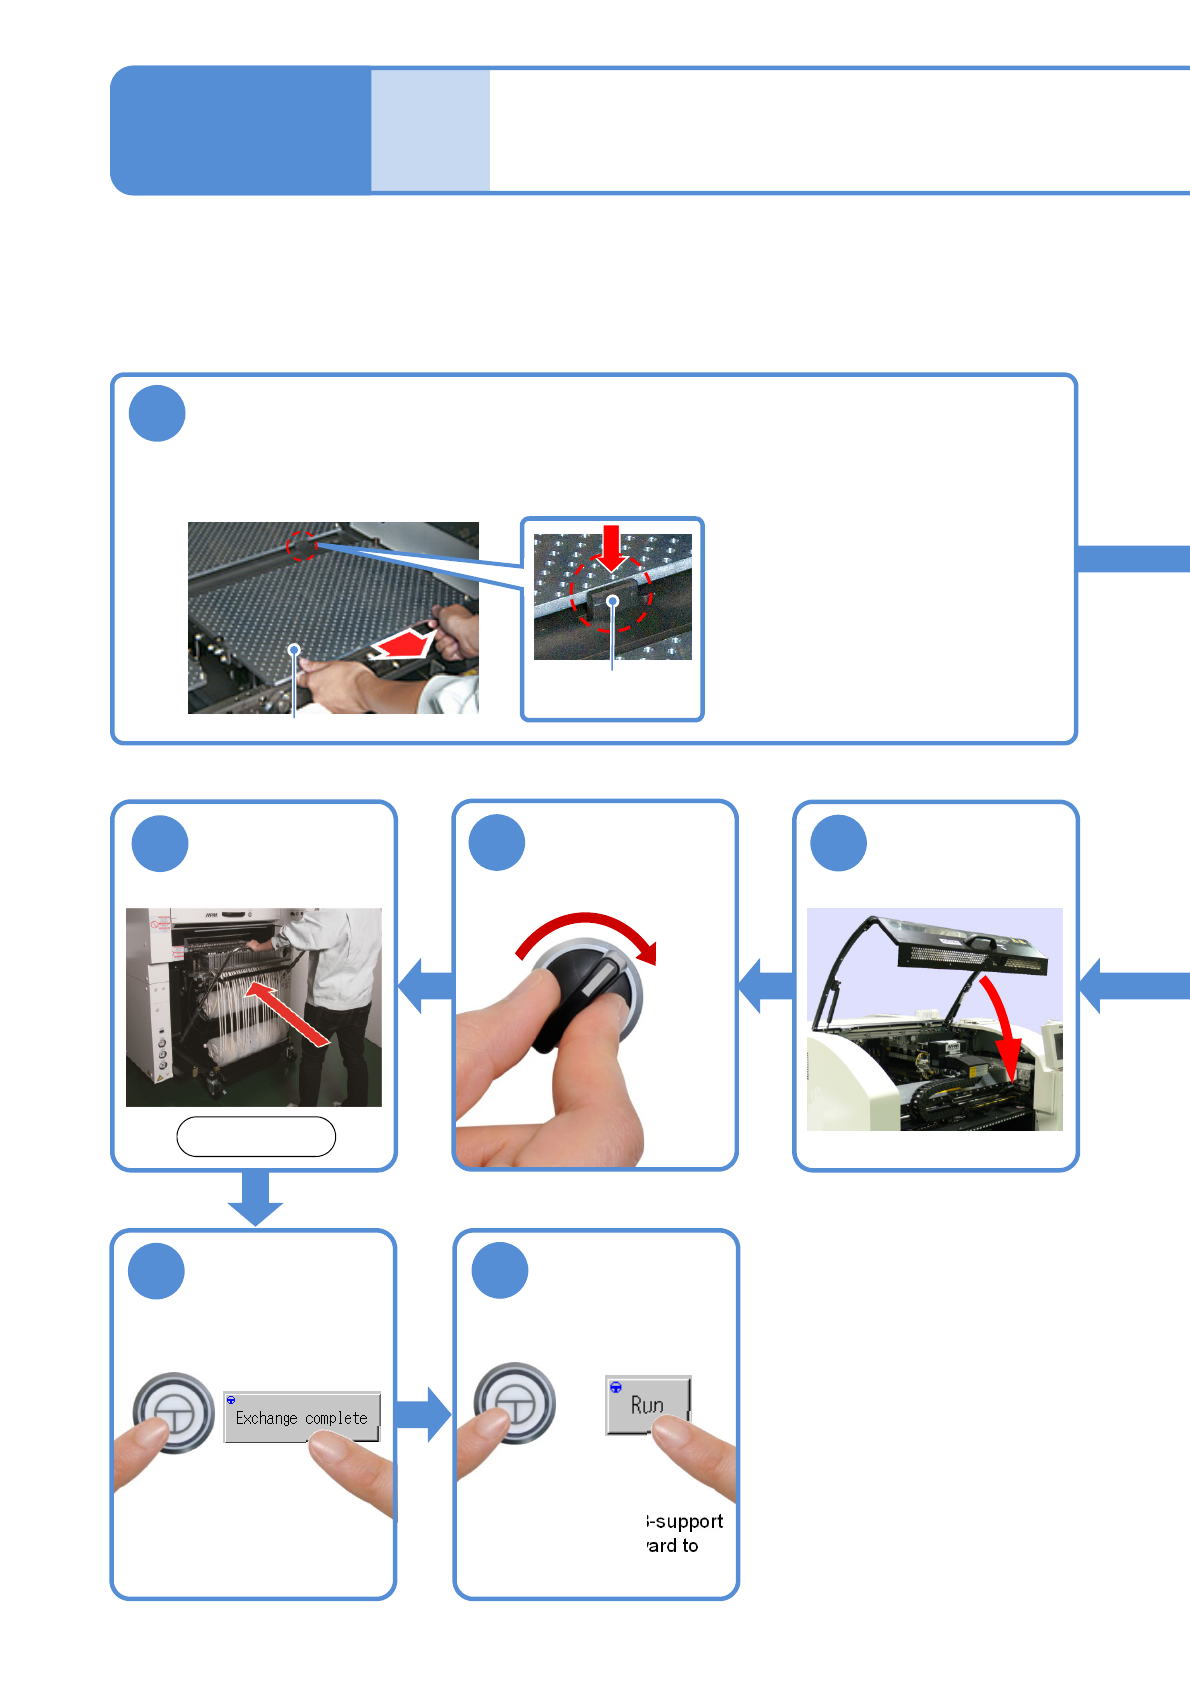
Stopper
PCB-support block
Remove the PCB-support block
●PCB-support block:4 blocks
●Be careful not to drop an object on the multi-recognition camera or bump the multi-recognition
camera.
●If there are support pins on
the PCB-support block, be
careful not to fall them.
●Draw it out slowly with both
hands. Draw out the rear
support block while holding
down the stopper.
SERVO
ON
15
16
14
Attach the feeder
cart (→P.3-2)
Front side
ENABLING
17
18
ENABLING
(Make sure the PCB-support
block moves downward to
the original position)
Confirm the
message
NPM-W2 EJM7DE-MB-05M-00
5-3-1-4
Every
140
hours
PeriodicPeriodicPeriodic
inspection
10
Clean the PCB holder and the PCB-support
block
●Use a lint free cloth or brush.
●Clean the top surface of the
PCB support block (for
automatic change) with a lint
free cloth dampened with
alcohol.
●Be careful not to scratch
coating material on the
surface of the PCB support
block (for automatic change)
by sharps.
11
Attach the PCB-
support block as
it is no tilt
13
12
●PCB-support block
:4 blocks
Bolt
Return the feeder
table cover back
Remove the lint
free cloth
●When you clean the PCB-support block, please check the support pin condition. If flux is adhered to the tip
of the support pin, wipe off with a lint free cloth.
NOTICE
●Do not apply impact such as dropping on the support pin for automatic change. It may cause deformation.
Do not use a deformed support pin.
●Please note that the vacuum hole of the support pin for automatic change is not clogged.
ATTENSION
Vacuum hole
●Put it back as the same
direction as before (the
bolt locates at the right
side toward you).
●If it tilts, it interferes with
the rail.
NPM-W2 EJM7DE-MB-05M-00
Cleaning
the PCB-
support
blocks
Cleaning the PCB-support
blocks
(dual conveyor specifications)1
Maintenance
5-3-2
5-3-2-1
Describes cleaning of the PCB-support block(for standard and automatic change(option)).
●If a foreign body such as dust is present in the PCB-support block and the PCB holder, it could cause
attachment problems with the PCB-support block, thus damaging PCBs.
●Cleaning should be performed from the near side of the PCB support block to be cleaned, while the
machine with the tray feeder equipped on the rear side, cleaning should be performed from the front side.
Tool used: Lint free cloth, brush Time required: 10 minutes
CAUTION
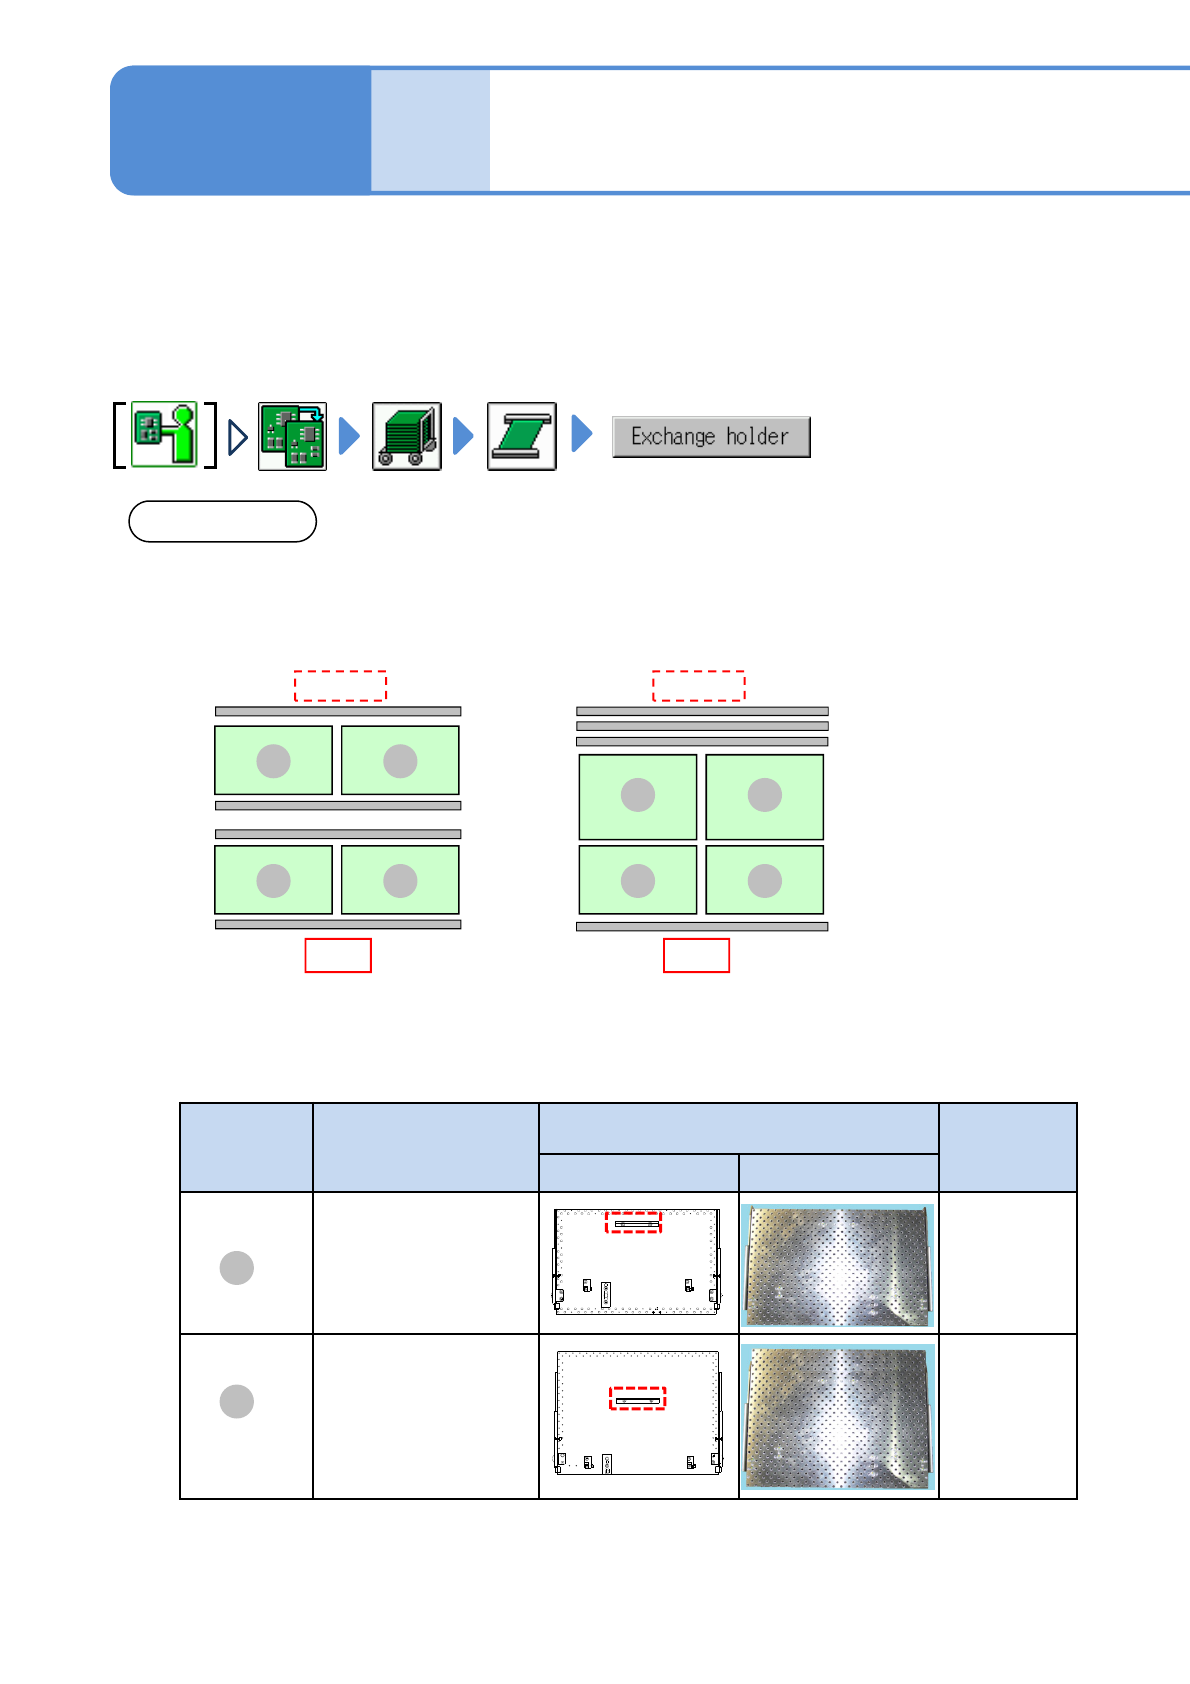
The arrangement of the PCB support block on the rear side vary between single lane mode and dual lane
mode. (See below)
* If you wrongly install the PCB support block of C with D, you cannot change to the arrangement in
single lane mode.
■For PCB support block (standard)
●Arrangement on single mode●Arrangement on dual mode
Front
Rear side
C
D
C
D
C C
C C
Front
Rear side
PCB support
block
Product No.
Outline drawing of PCB support block
Remarks
Back surface Front surface
N610134595AB Standard
N610134594AB Option
D
C