N7201A617E00_0317.pdf - 第175页
NPM-W 2 EJM7DE-MB-05 M-00 5-8 OFF SERVO SERVO ON 3 4 1 2 3 5 6 7 8 Tool used: None Time required: 2 minutes per location Desc ribes cleaning a nd checking o f t he dummy dispensing plate (option). ENABLING ● The head mov…
NPM-W2 EJM7DE-MB-05M-00
5-7
●Remove the calibration jig out of the
machine; then, using the supplied
blower brush, remove dust from the
gray-colored acrylic calibration plate,
the light-colored acrylic calibration
plate, and the glass calibration plate.
●After cleaning, put the calibration jig
back in its original position.
●Do not touch the surface with figures.
(If it may get damaged or stained,
there is a possibility of poor
calibration)
Cleaning the calibration
jig
(2D inspection head (option))
Tool used: Blower brush Time required: 1 minute
Describes cleaning of the 2D inspection calibration jig (option).
Maintenance
5-7
Clean the calibration plates with the blower
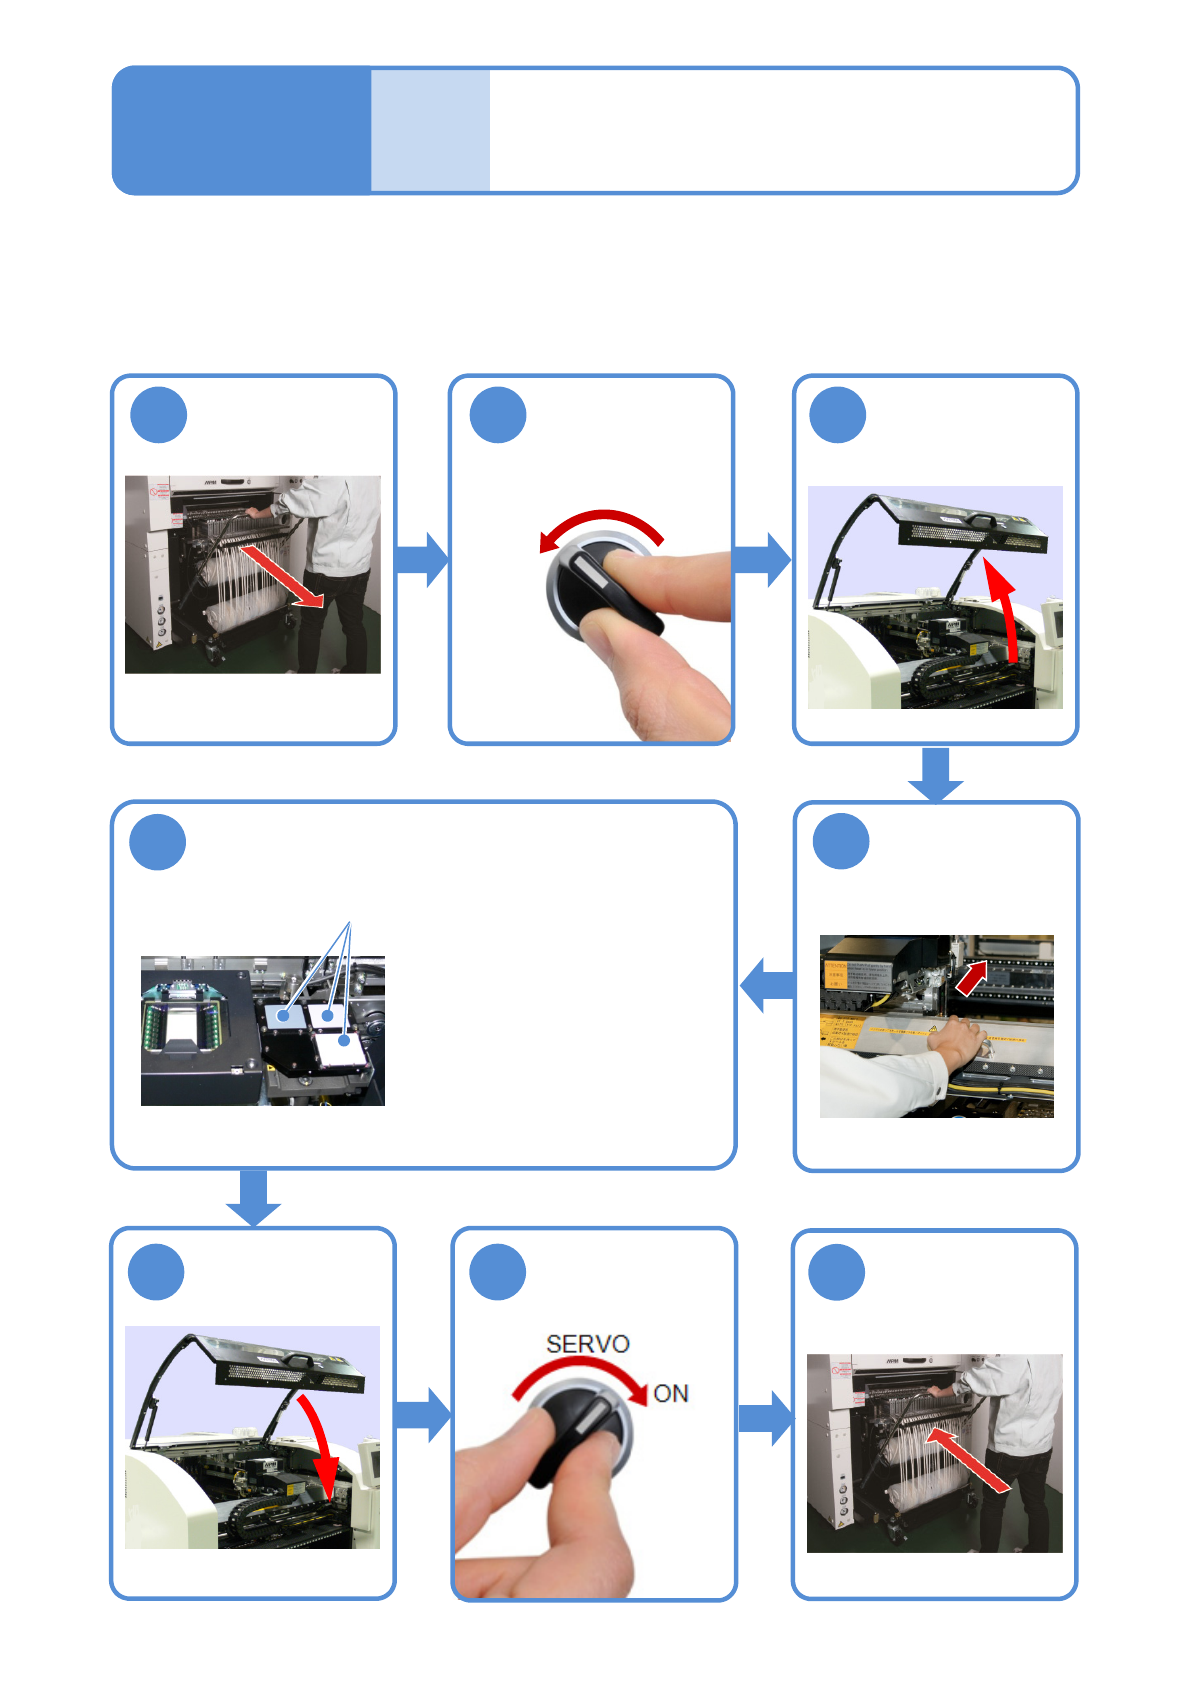
brush
Detach the
feeder cart
(→P.3-2)
Attach the
feeder cart
(→ P.3-2)
Push the X-axis
inward
8
4
OFF
SERVO
1 2 3
5
6 7
Calibration jigs
NPM-W2 EJM7DE-MB-05M-00
5-8
OFF
SERVO
SERVO
ON
3
4
1 2 3
5
6
7
8
Tool used: None Time required: 2 minutes per location
Describes cleaning and checking of the dummy dispensing plate (option).
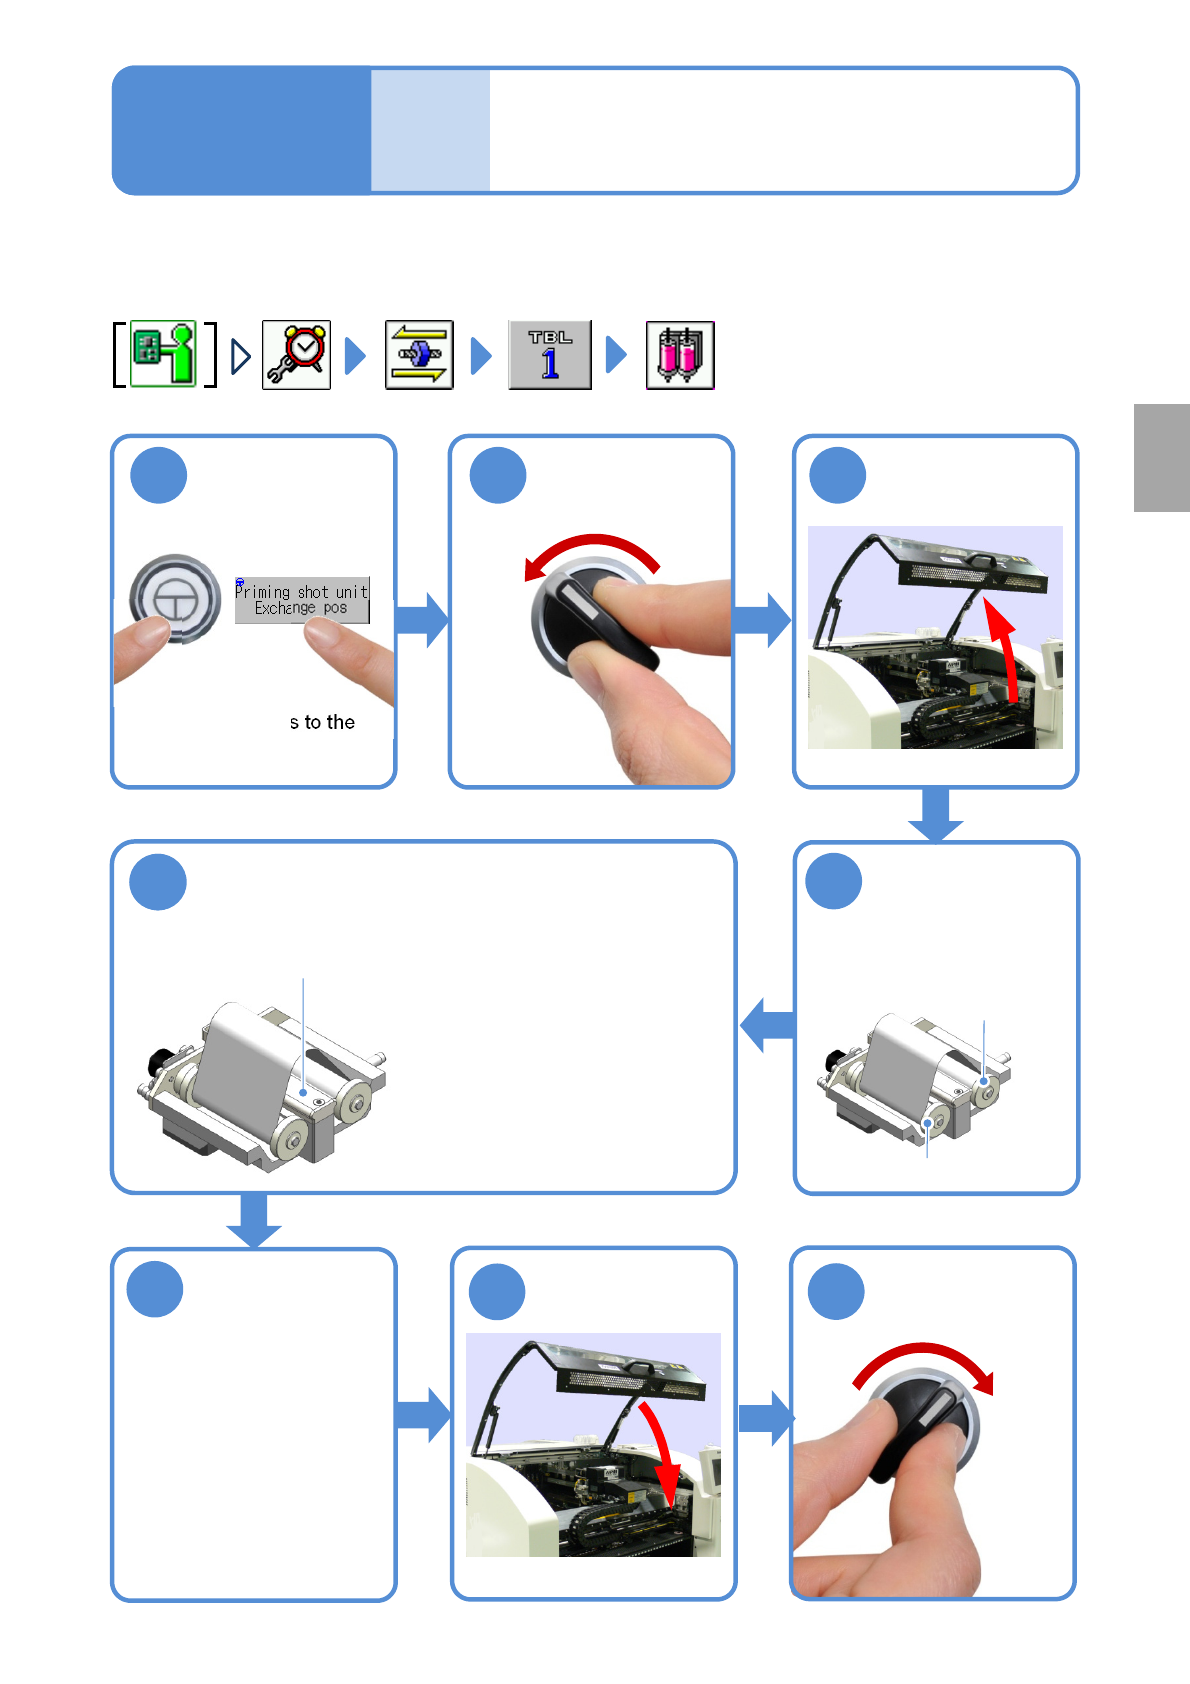
ENABLING
●The head moves to the
exchange position.
Turn the feed side
reel in a clockwise
direction to loosen
the dummy
dispensing tape
Feed side
Take-up side
Dampen a cloth with alcohol and wipe away
dirt on the dummy dispensing plate
Dummy dispensing plate
●Visually check if there is no
scratch or contamination.
If so, dispensing condition
of adhesive is wrongly
recognized, resulting in the
wrong feedback of
dispensing amount.
Turn the feed
side reel in a
counterclockwis
e direction to
stretch the
dumpy
dispensing tape
Cleaning and checking the
dummy dispensing plate
(dispensing head (option))
Maintenance
5-8
Every
140
hours
PeriodicPeriodicPeriodic
inspection
NPM-W2 EJM7DE-MB-05M-00
5-9
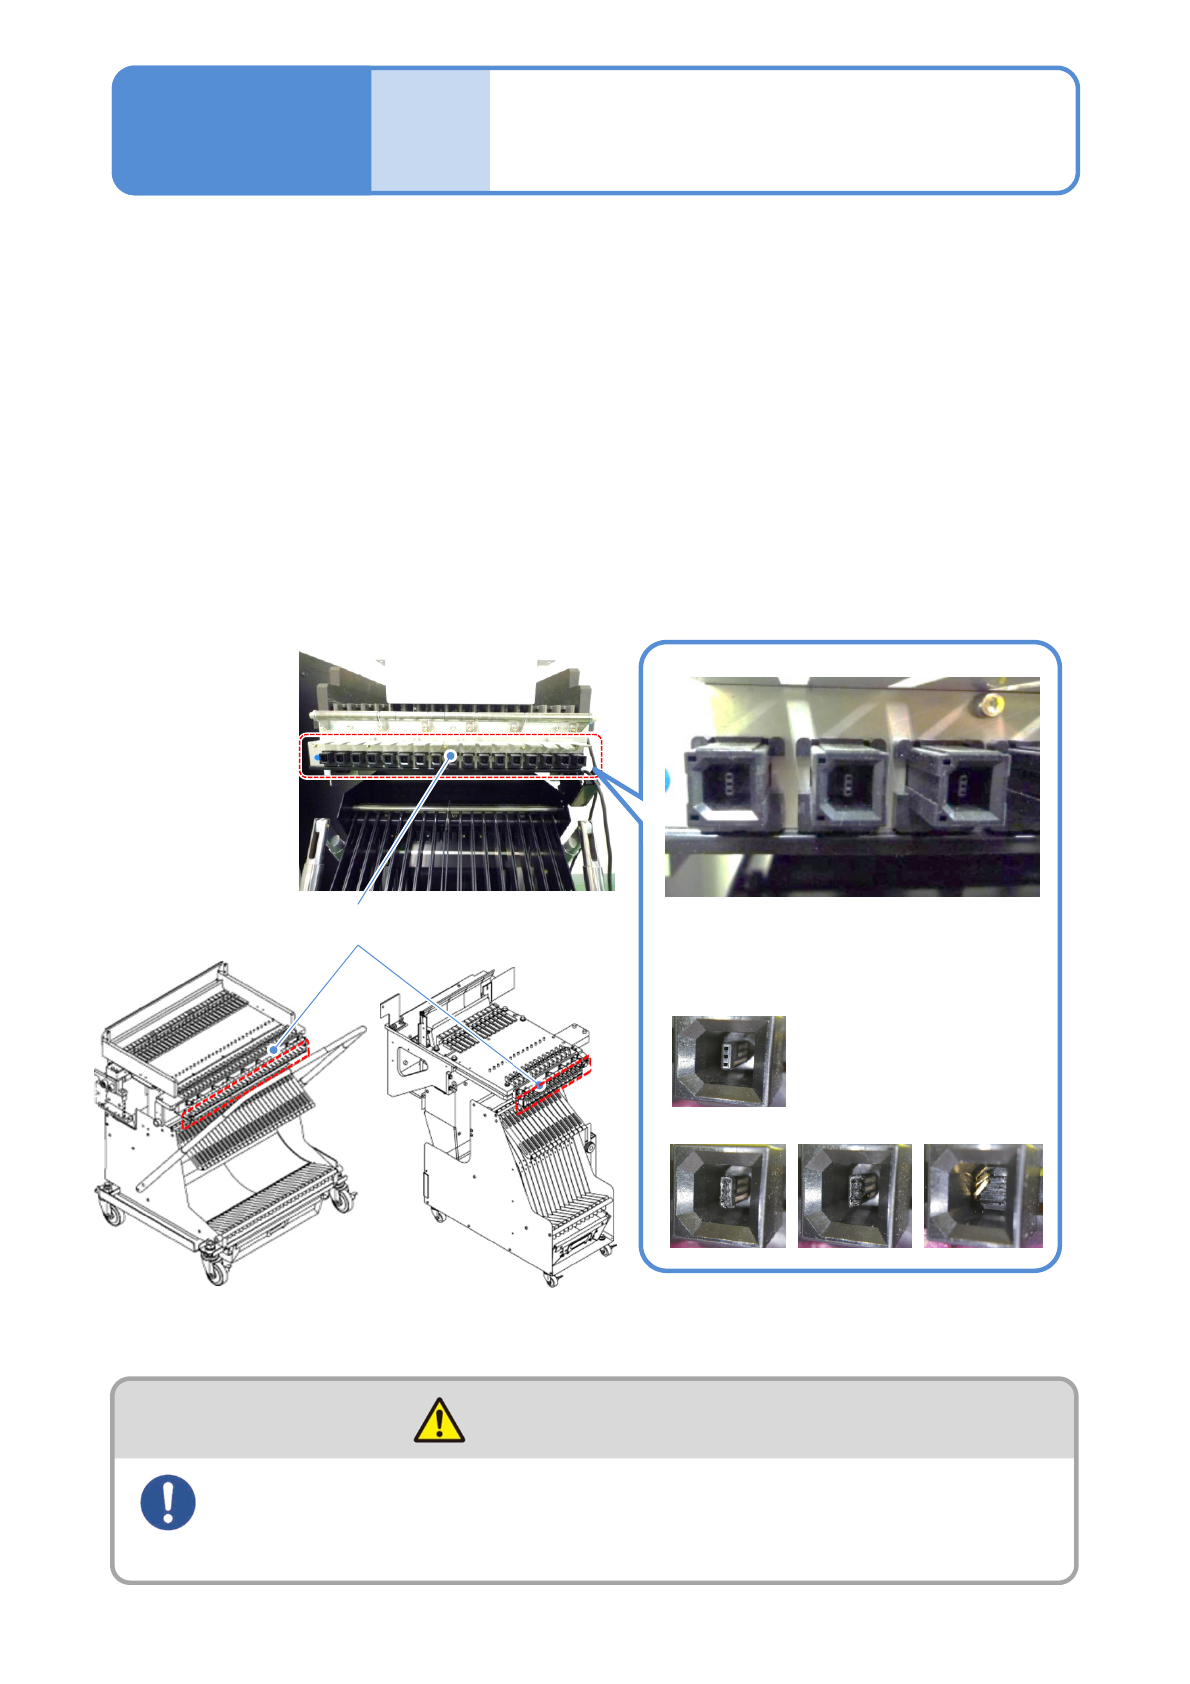
Checking connector
(feeder cart, 13-slot feeder (option))
Maintenance
5-9
Tool used: Flashlight, vacuum cleaner, brush and tweezers Time required : 15 minutes per location
Describes checking of the feeder cart connector.
●Remove the feeder cart from the machine and perform checking after all intelligent feeders are removed.
(→P.3-2 ‘How to handle the feeder cart’)
(→P.2-4-1 ‘Preparation of the intelligent feeder’ in “Operating Procedure”)
●Do not use an air blow gun. Doing so may scatter dust and chips to the machine, having a bad influence.
●Also regularly check and clean intelligent feeders as well.
( → “Intelligent feeder” operating instruction)
Check if a connector is not deformed or damaged, and insertion or adhesion of foreign materials
inside/outside of the connector. Use a flashlight to check inside of the connector.
If any foreign material is found, carefully remove it not to damage the connector using thin tweezers. Clean
dust with a vacuum cleaner or a brush.
Pay full attention to your surroundings and keep a safe distance
from people around you while moving the feeder cart
(Collisions with the feeder cart may result in injury.)
WARNING
●If any abnormality is found
Stop using the feeder cart and contact us
or sales subsidiaries/agency
Normal state
Abnormal state (cases)
Connector
13-slot feeder
Feeder cart