N7201A617E00_0317.pdf - 第181页
NPM-W 2 EJM7DE-MB-06 M-00 6-1 -4 Every 560 hours Periodic Periodic Periodic Periodic inspection ■ Select a lane; W1 or W2 Attach the feeder cart ( → P.3-2) STOP ENABLING SERVO ON ENABLING ● Make sure that there is no pin…
NPM-W2 EJM7DE-MB-06M-00
6-1-3
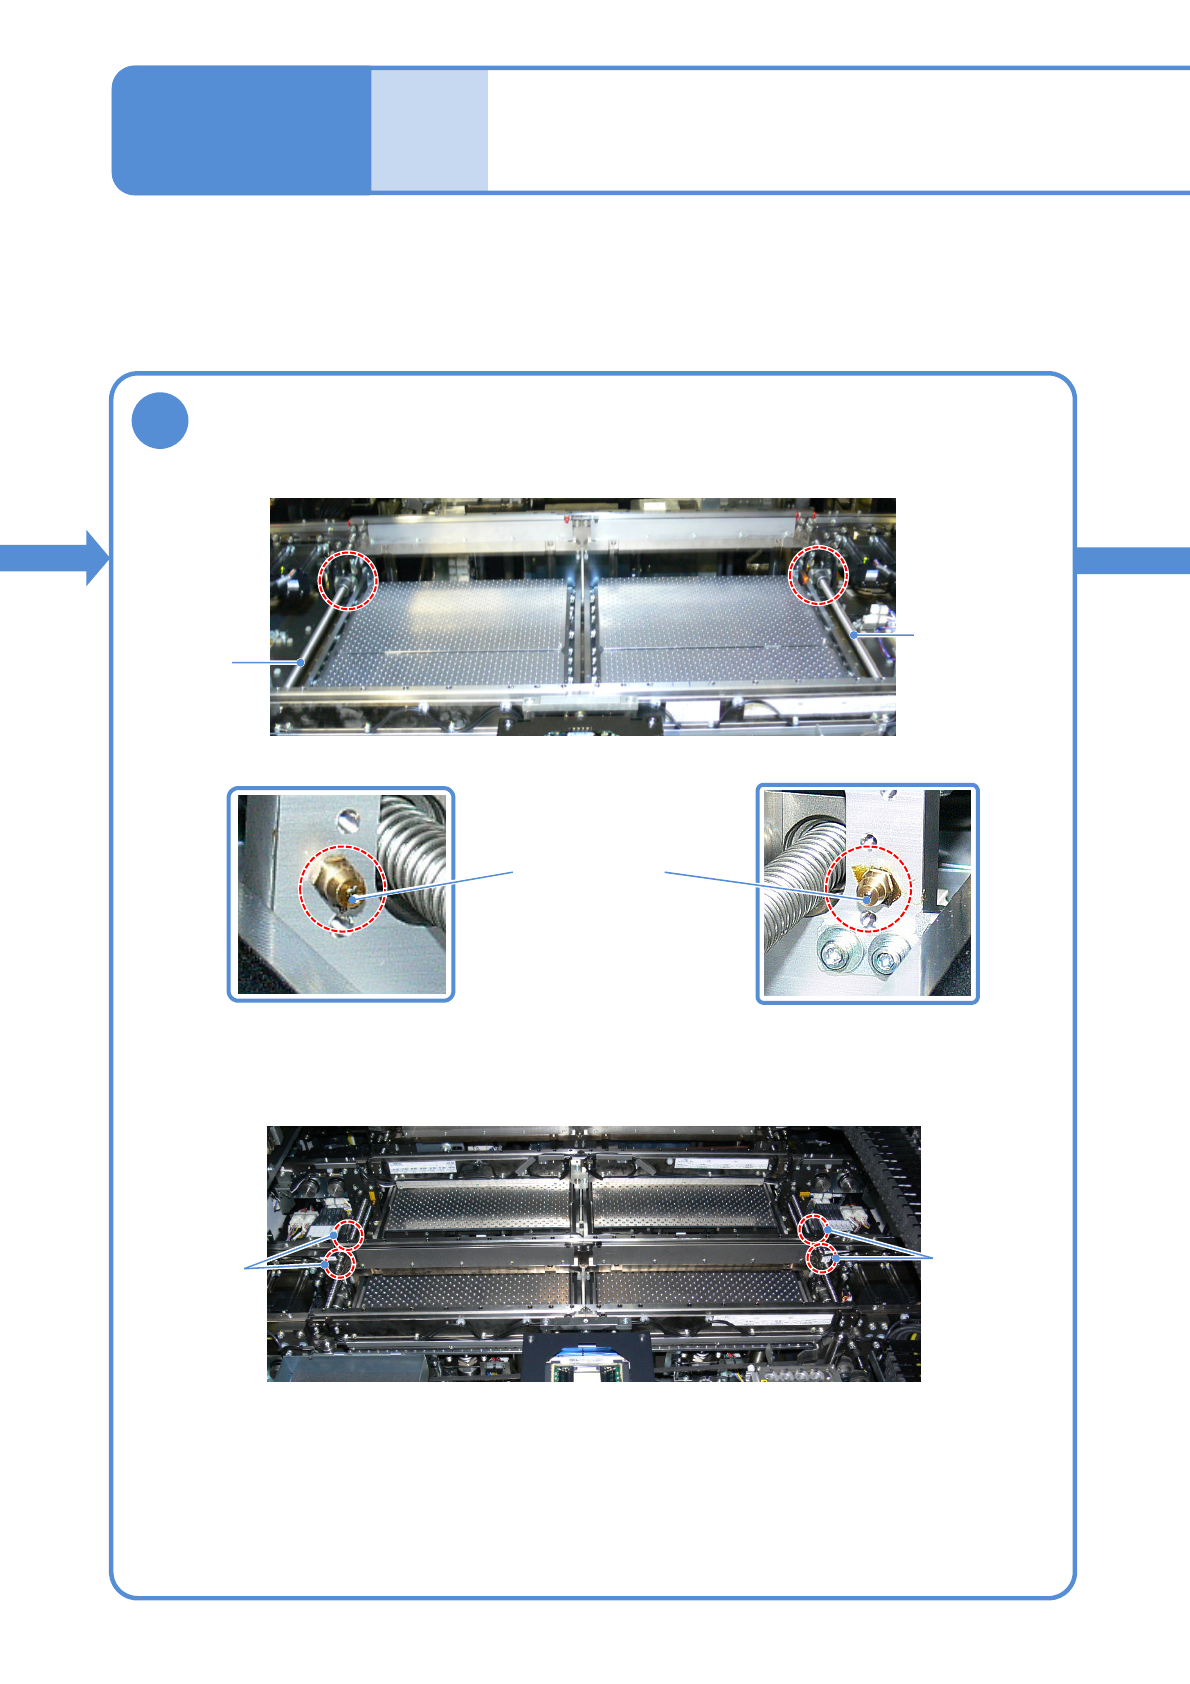
Greasing the PCB
conveyor 2
Maintenance
6-1
Grease nipple
8
Apply grease to the width-adjustment ball
screw from grease nipple
●Apply grease via each grease nipple (on the movable rail) with the grease gun.
(2 locations on each lane) (about 0.9 cm
3
per pump)
●Grease: LCG100
Width-
adjustment
ball screw
Width-
adjustment
ball screw
■Single conveyor
■Dual conveyor
Width-
adjustment
ball screw
Width-
adjustment
ball screw

NPM-W2 EJM7DE-MB-06M-00
6-1-4
Every
560
hours
PeriodicPeriodicPeriodicPeriodic
inspection
■Select a lane;
W1 or W2
Attach the
feeder cart
(→P.3-2)
STOP
ENABLING
SERVO
ON
ENABLING
●Make sure that there is no pin on
the PCB plate.
●Continuously moves the width
adjustment axis of the transfer
conveyor at least five round.
Confirm the message
Return the
feeder table
cover back
16
15
14
12
13
9
11
10
NPM-W2 EJM7DE-MB-06M-00
Describes the method for greasing the XY-axis linear guide of the XY unit.
Tool used: Grease gun, lint free cloth Time required: 20 minutes
●Grease the front and rear sides
Greasing the XY-axis
linear guide 1
6-2-1
Maintenance
6-2
Detach the
feeder cart
(→P.3-2)
Cover the multi-recognition camera with a
lint free cloth
●To prevent adhesion of grease dropped onto the camera
lenses during maintenance
Wipe away the old grease
●Wipe the old grease off the X-and Y-axis linear
guides with a clean lint free cloth.
5
6
X-axis linear
guide
Y-axis linear guide
(Front and rear)
OFF
SERVO
1
2
3
4
ENABLING