N7201A617E00_0317.pdf - 第197页
NPM-W 2 EJM7DE-MB-06 M-00 6-4 -7 3 4 Confirm the axis stopped, and turn OFF the servo 11 Wipe the nozzle reflector wi th a lint free cloth ● In this step, do not use any solvent. (The nozzle reflector could be discolore …
NPM-W2 EJM7DE-MB-06M-00
●The following description takes the 3-nozzle head as an example.
Tool used: Lint free cloth, air blow gun Time required: 15 minutes
●If the nozzle has any surface flaws on the nozzle section or the nozzle reflector, replace it with a new one.
For how to detach and attach the nozzle, see (→P.5-2)
For 3-nozzle head 1
1
6-4-6
■To clean nozzles installed on the head
■To clean nozzles stored in the head changer
3
2
Remove the
nozzles
(→P5-3)
9
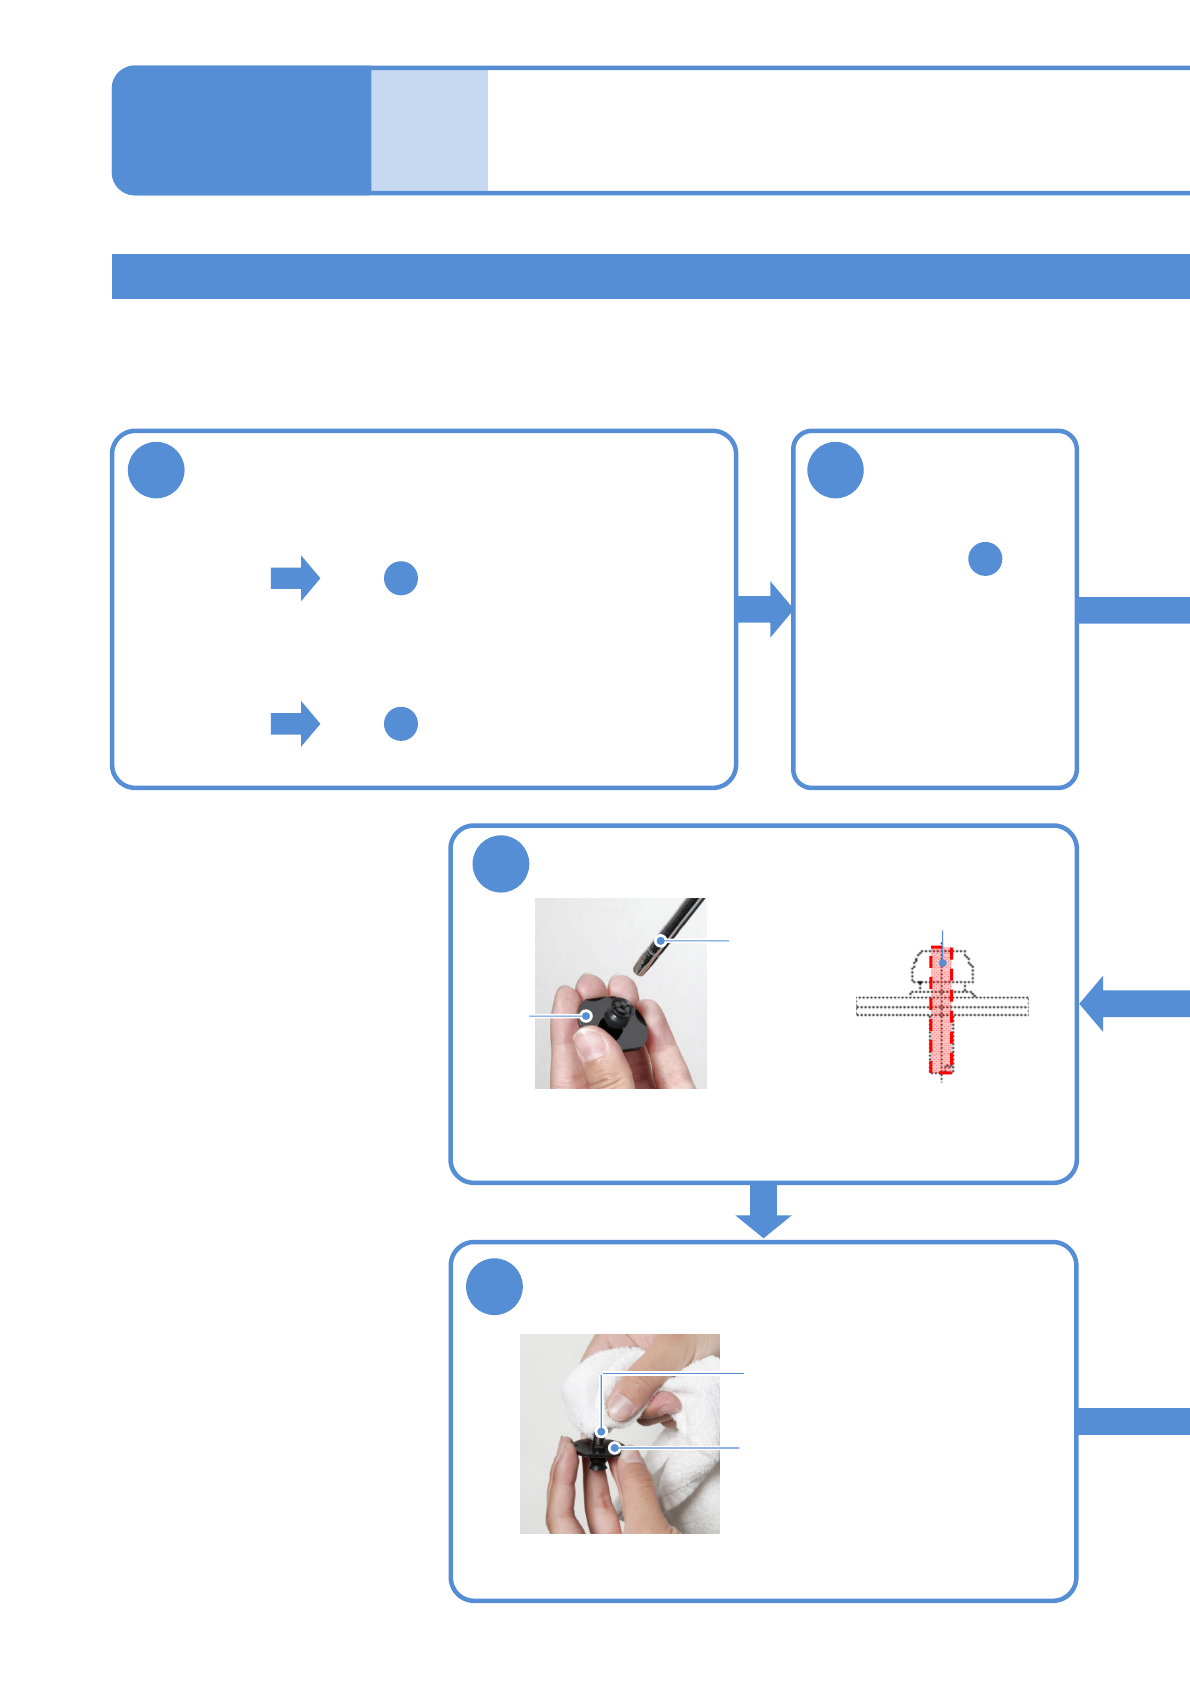
Wipe the nozzle taper surface and the nozzle
flange upper surface with a lint free cloth
Nozzle taper surface
Nozzle flange upper
surface
●Confirm that there is no dust or
scratches on the 2D code.
●Go to the step .
7
2
8
Remove dust from the air path of the nozzle
Air path of the nozzle
●Blow a blast of air at the nozzle tip. Be careful not to hit
the air blow gun against the nozzle tip.
(The nozzle tip could be damaged or deformed)
Air gun
Nozzle
Maintenance
6-4
Cleaning the nozzle (option) and
the nozzle changer
(option) 4
to
to
NPM-W2 EJM7DE-MB-06M-00
6-4-7
3 4
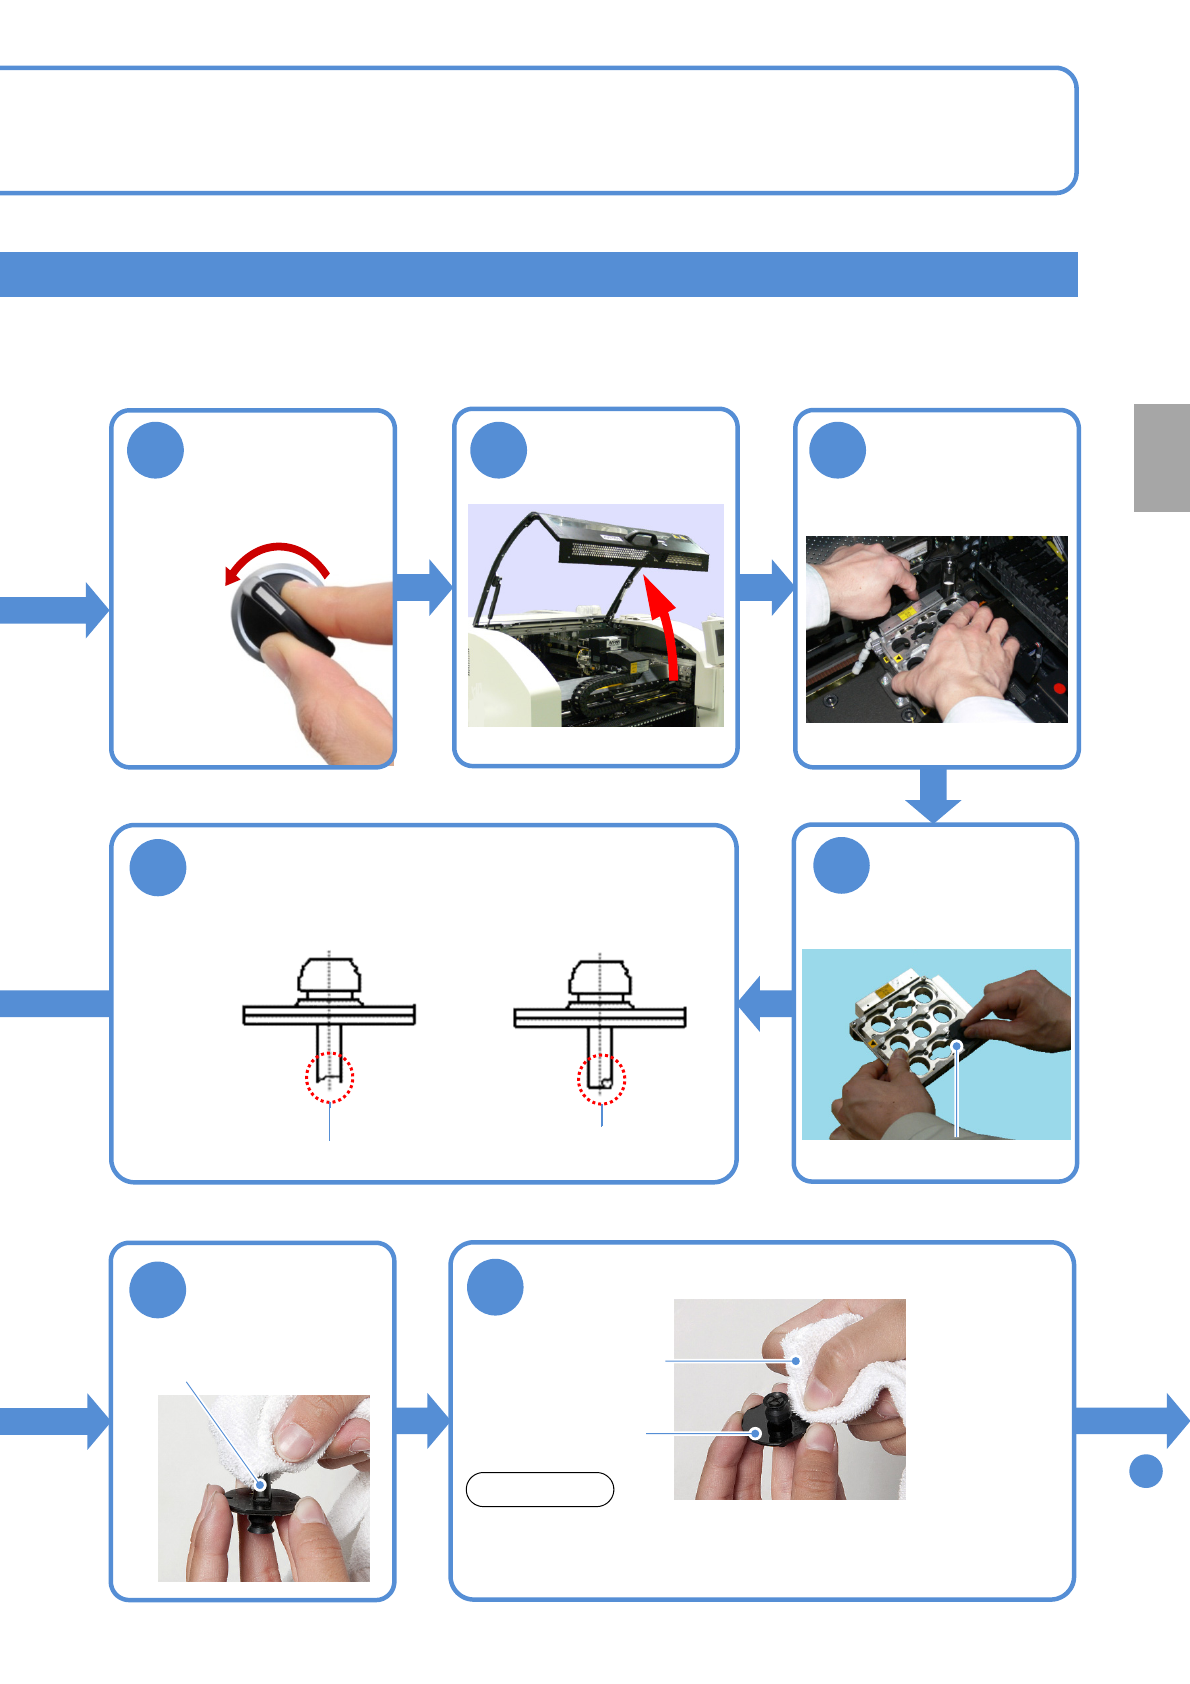
Confirm the axis
stopped, and turn
OFF the servo
11
Wipe the nozzle reflector with a lint free cloth
●In this step, do not use any solvent.
(The nozzle reflector could be discolored, deformed, or peeled
off of adhesives)
ATTENSION
To
12
6
Remove nozzles
from the nozzle
changer
Nozzle
(→[Operating procedure]
P.2-5-2)
5
Remove the
nozzle changer
(→ [Operating
procedure] P.2-5-1)
Check wear-out and deformation of the
nozzle tip
●If the nozzle tip resembles the figures below, replace the
nozzle.
7
Deformation of a
nozzle tip
Worn out nozzle tip
Wipe the
nozzle tip with
a lint free cloth
10
Nozzle tip
Nozzle
Lint free cloth
OFF
SERVO
Every
560
hours
PeriodicPeriodicPeriodicPeriodic
inspection
NPM-W2 EJM7DE-MB-06M-00
6-4-8
For 3-nozzle head 2
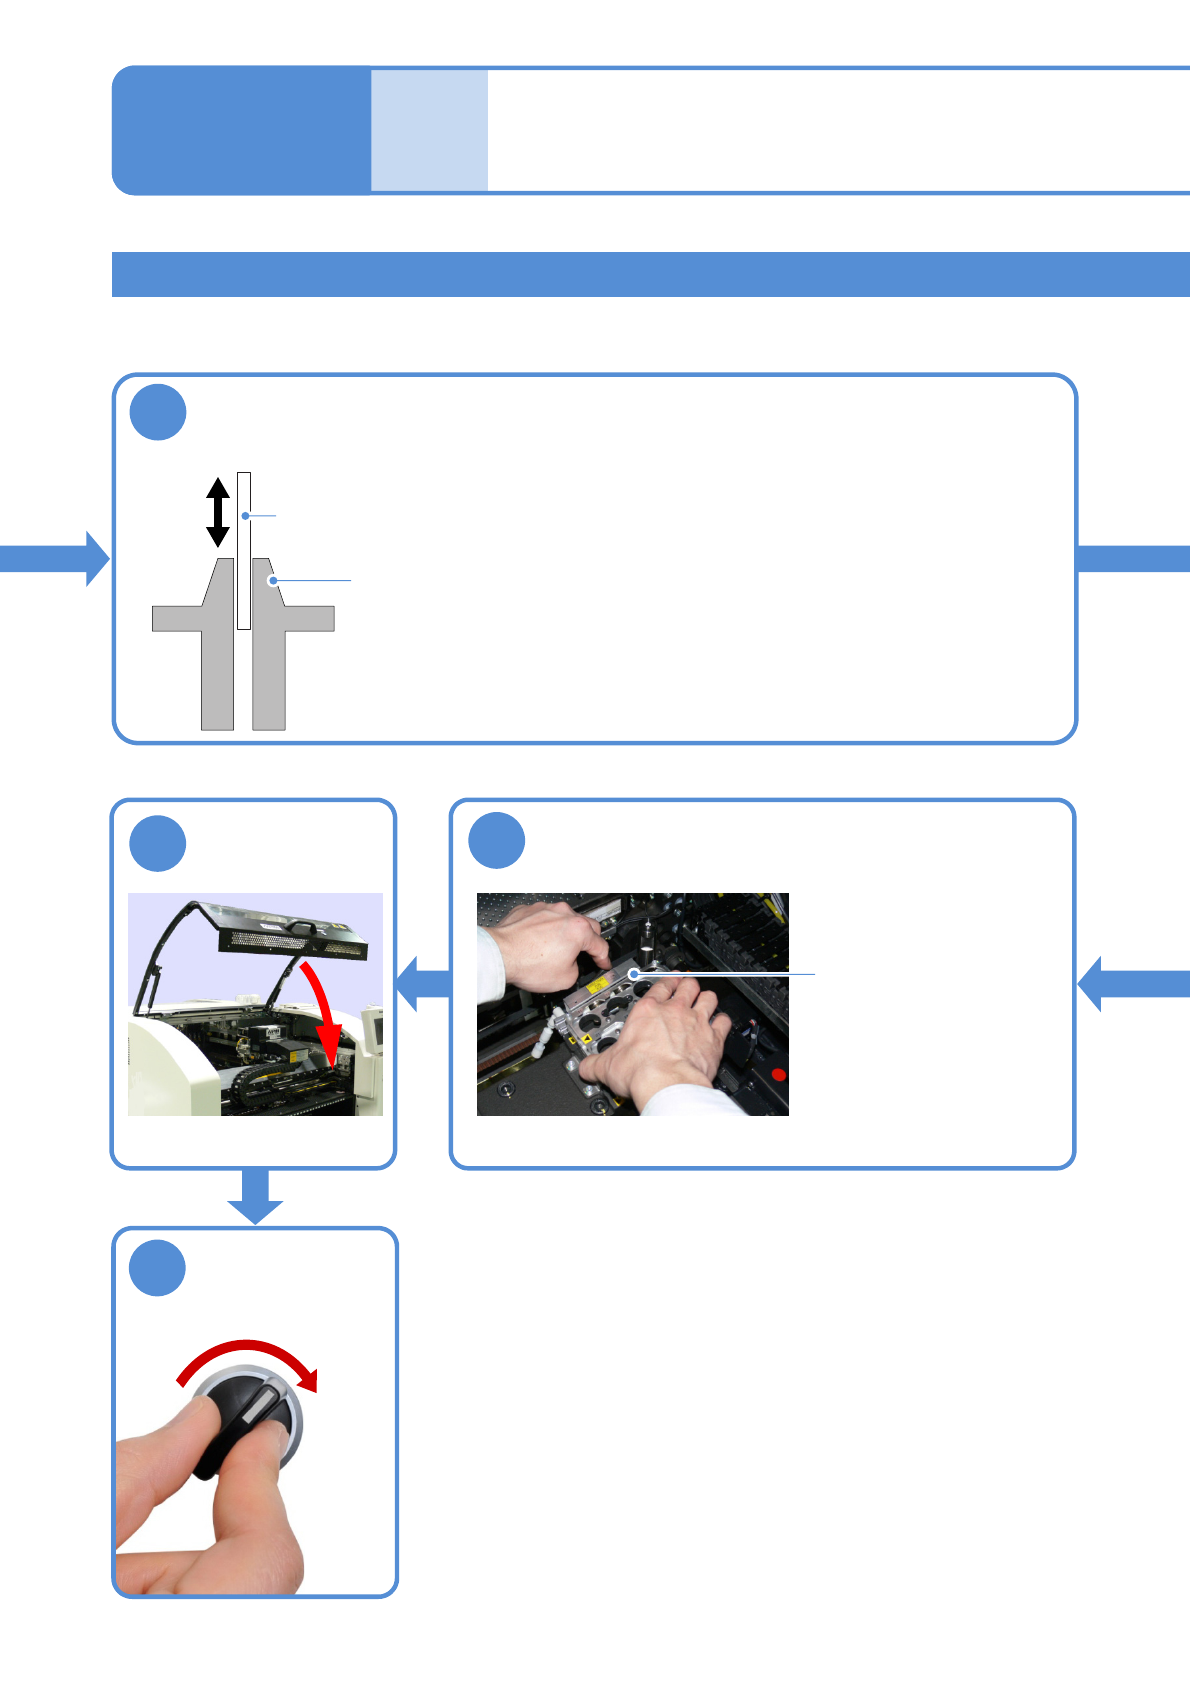
12
Clean the nozzle inside
●Insert a nozzle cleaning pin and push lodgment out of the nozzle upper
part (the shank side) in the nozzle inside.
Nozzle cleaning pin
Shank
17
16
Set the nozzle changer
●How to attach
(→『 Operating procedure 』
P.2-5-1)
Nozzle changer
Maintenance
6-4
Cleaning the nozzle (option) and
the nozzle changer
(option) 5
SERVO
ON
18