N7201A617E00_0317.pdf - 第206页
NPM-W 2 EJM7DE-MB-06 M-00 6-6 -1 Describes how to clean the large reflector. Tool used: Lint free cloth Time require d: 15 minutes ● Leaving the large reflector dirty results in an recognition error. ● For tray feeder sp…
NPM-W2 EJM7DE-MB-06M-00
6-5-6
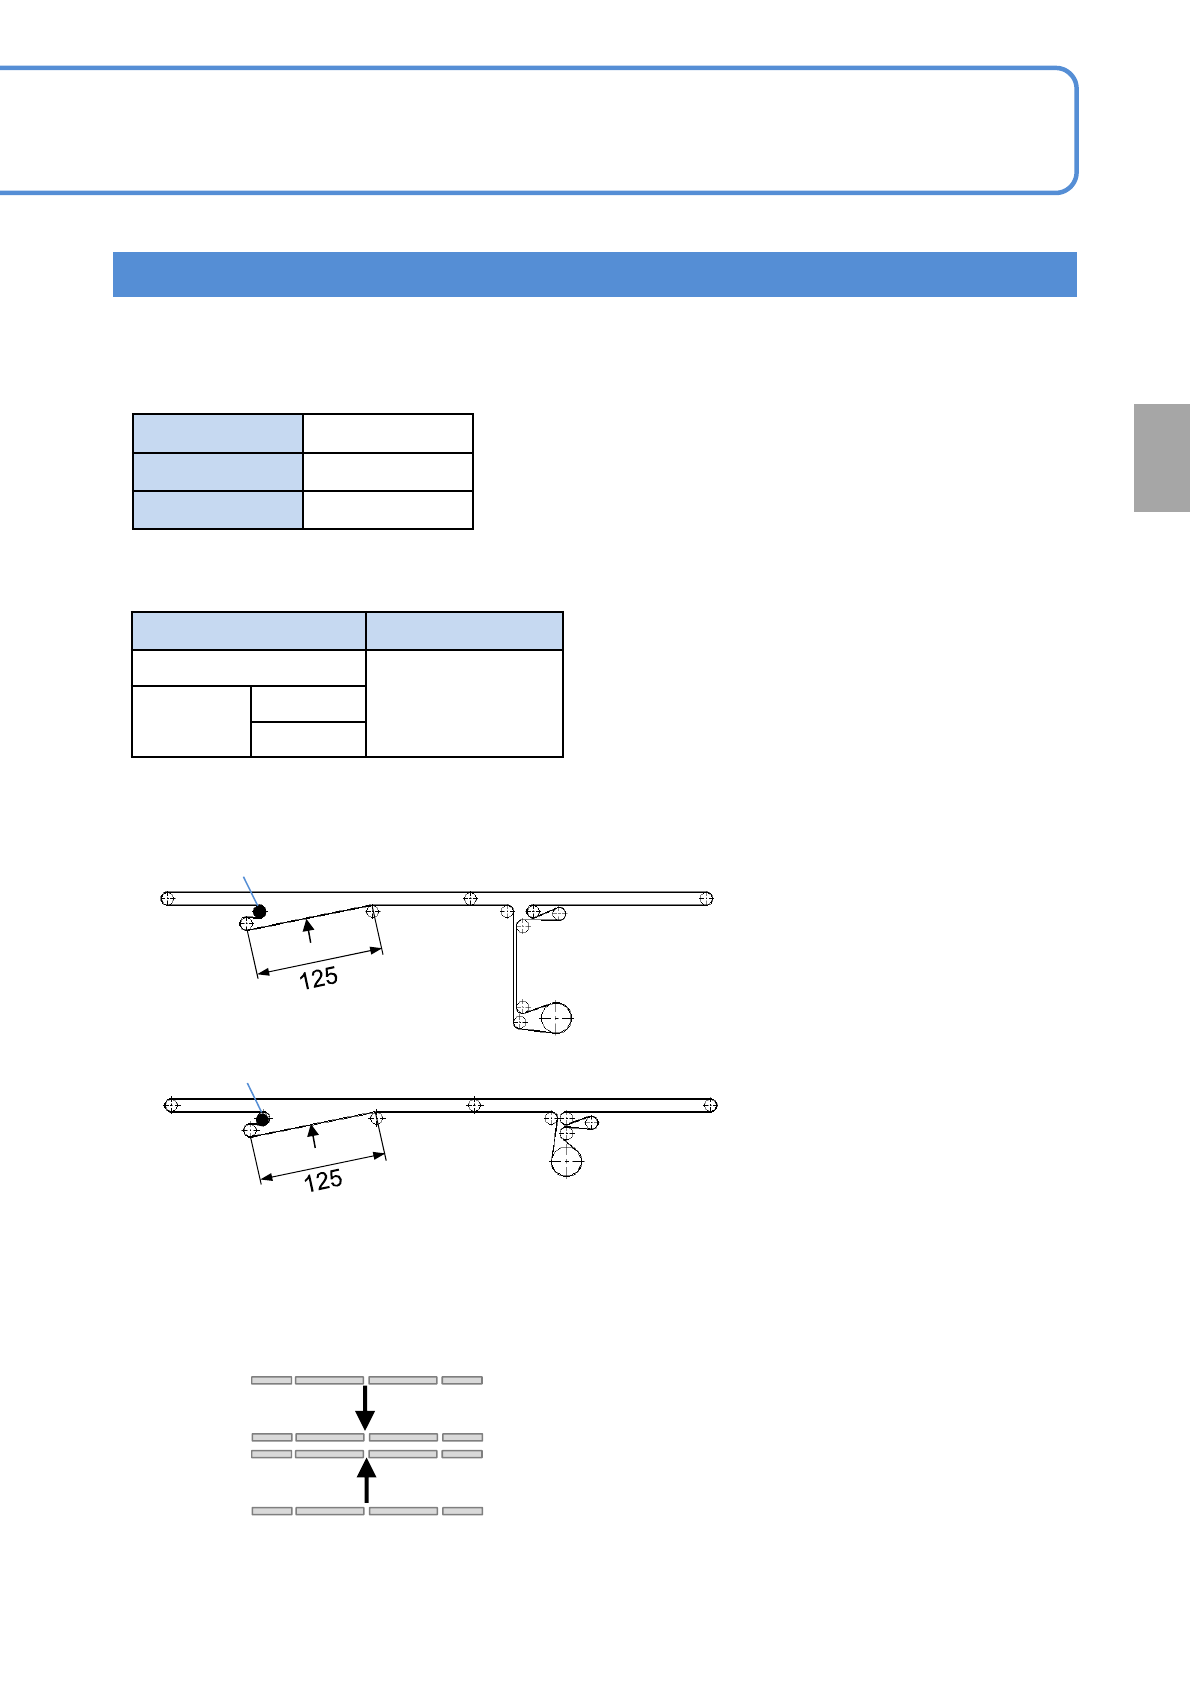
Inspecting the belt tension of the PCB conveyor
●Enter the following numerical values to the frequency measuring instrument (Acoustic belt tension meter
provided by a belt manufacturer) in advance. Flicking your fingers at the center section (P shown in the
drawings below) of each span, measure the natural frequency with the frequency measuring instrument.
Input value
●Adjust and fix the tension pulley if the measurement value falls under the prescribed value.
Belt unit mass 0.7 g/m
Belt width 4.5 mm
Span length See below
Prescribed value
Every
560
hours
PeriodicPeriodicPeriodicPeriodic
inspection
Conveyor type Standard value (Hz)
Single
315 ±20Hz
Dual
Lane 1
Lane 2
●Fixed rail
●Movable rail
Tension pulley
■Single conveyor (1 rails on each)/ Dual conveyor (2 rails on each)
(Unit:mm)
P
P
Tension pulley
E
F
Movable side
Fixed side
Movable side
Fixed side
Lane 1
Lane 2
●Arrows of PCB conveyor movable rails
NPM-W2 EJM7DE-MB-06M-00
6-6-1
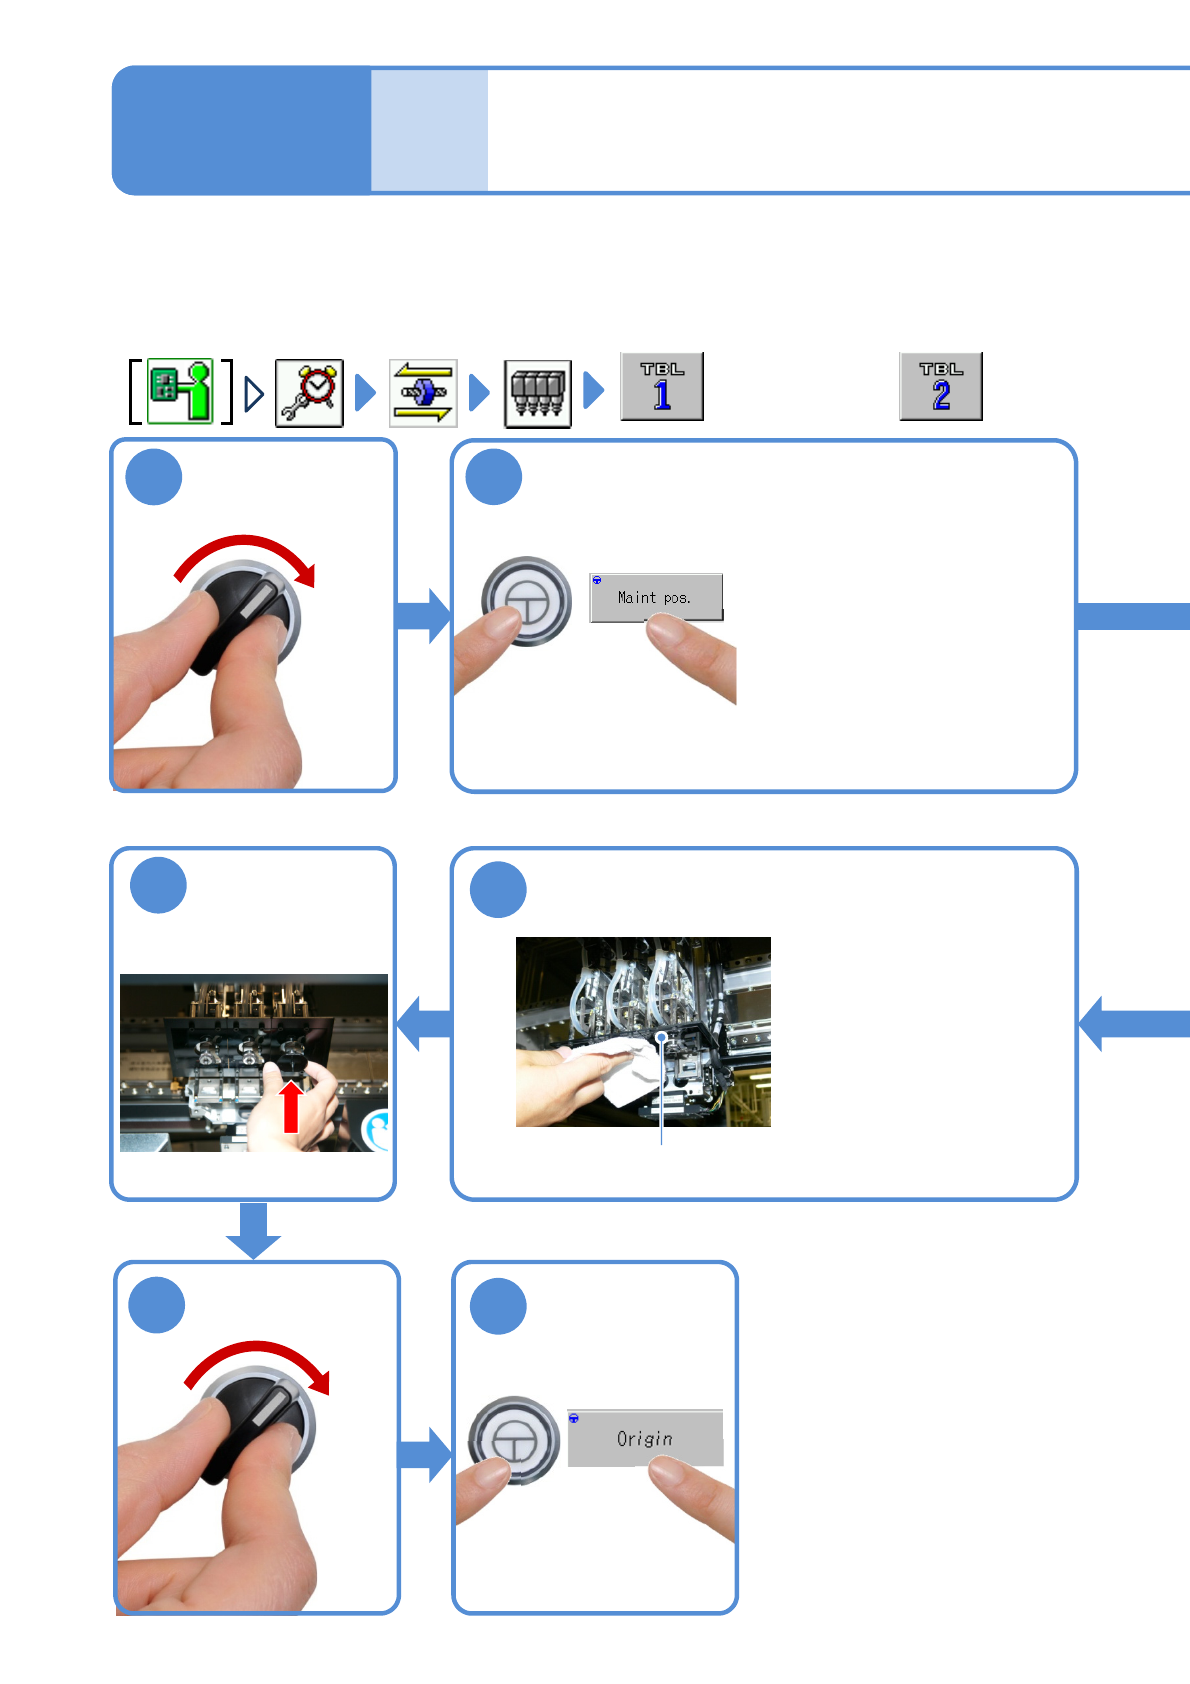
Describes how to clean the large reflector.
Tool used: Lint free cloth Time required: 15 minutes
●Leaving the large reflector dirty results in an recognition error.
●For tray feeder specification, move Y-axis of the rear side to the front and work at the front.
Cleaning the large
reflector
(3-nozzle head(option))
Maintenance
6-6
●For the rear side,
1
2
ENABLING
9
SERVO
ON
8
SERVO
ON
7
6
●Y-axis of the front placement
head moves to the front side.
●For feeder specification, Y-
axis of the rear placement
head moves to the rear side,
and for tray feeder
specification, it moves to the
front side.
Wipe the large reflector with a clean lint free
cloth
Large reflector
Attach the
nozzle to the
placement head
●Move the placement head
to the position where you
can work easily
NPM-W2 EJM7DE-MB-06M-00
6-6-2
Every
560
hours
PeriodicPeriodicPeriodicPeriodic
inspection
OFF
SERVO
4
3
5
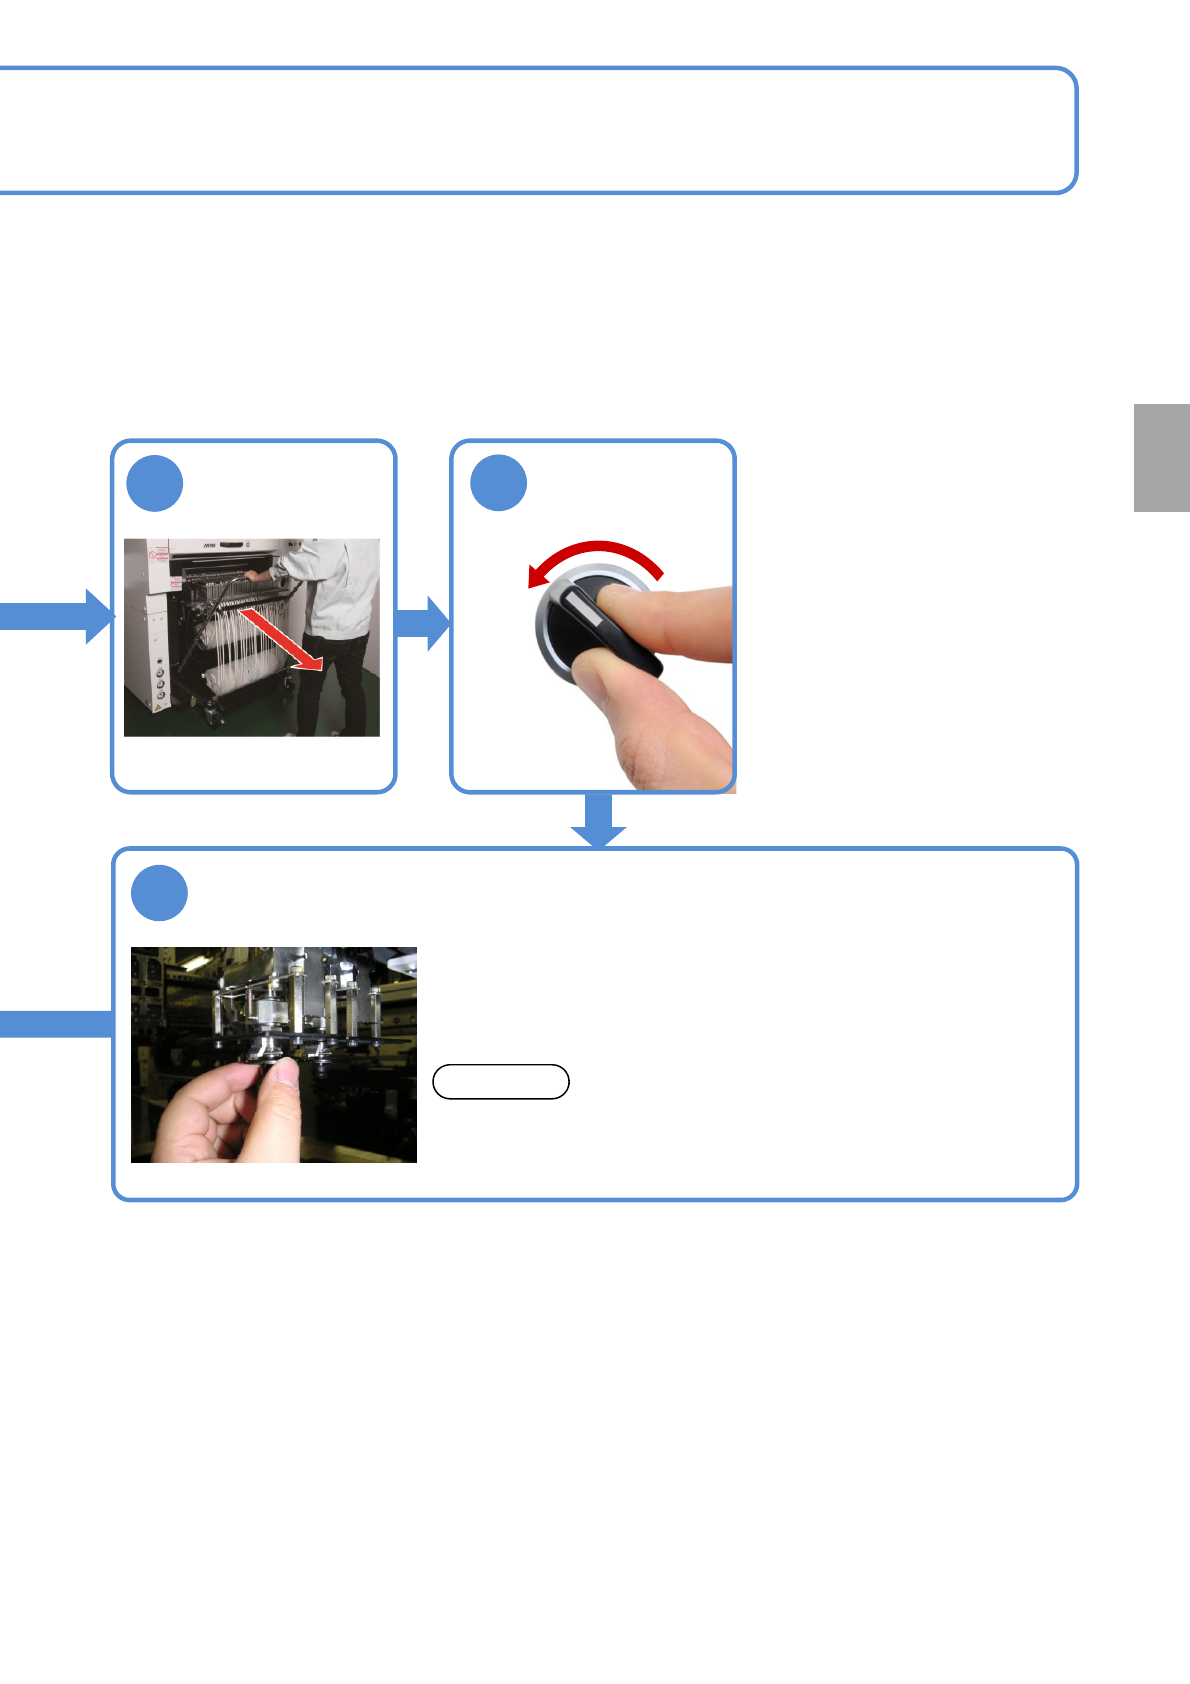
Detach the
feeder cart
(→P.3-2)
Remove the nozzle
●Pull it straight out. If pulled out at an angle, the clamp claws could
be damaged.
NOTICE
●Work at the front side for front feeder cart specification and rear tray
feeder specification.
●Work at the rear side for rear feeder cart specification.
●Move the head to the position where your workability enhances.
●Hold and pull down the edge of the nozzle reflector.