N7201A617E00_0317.pdf - 第215页
NPM-W 2 EJM7DE-MB-06M-00 6-9 -4 4 ■ Sensor position installed to the upstream process of the dual conveyor Clean the PCB detecti on sensors using a swab ● Use a swab. Every 560 hours Periodic Periodic Periodic Periodic i…
NPM-W2 EJM7DE-MB-06M-00
Tool used: Swabs, Allen wrench (3 mm) Time required: 5 minutes
Extension conveyor (option)
Cleaning the PCB
detection sensors 2
Maintenance
6-9
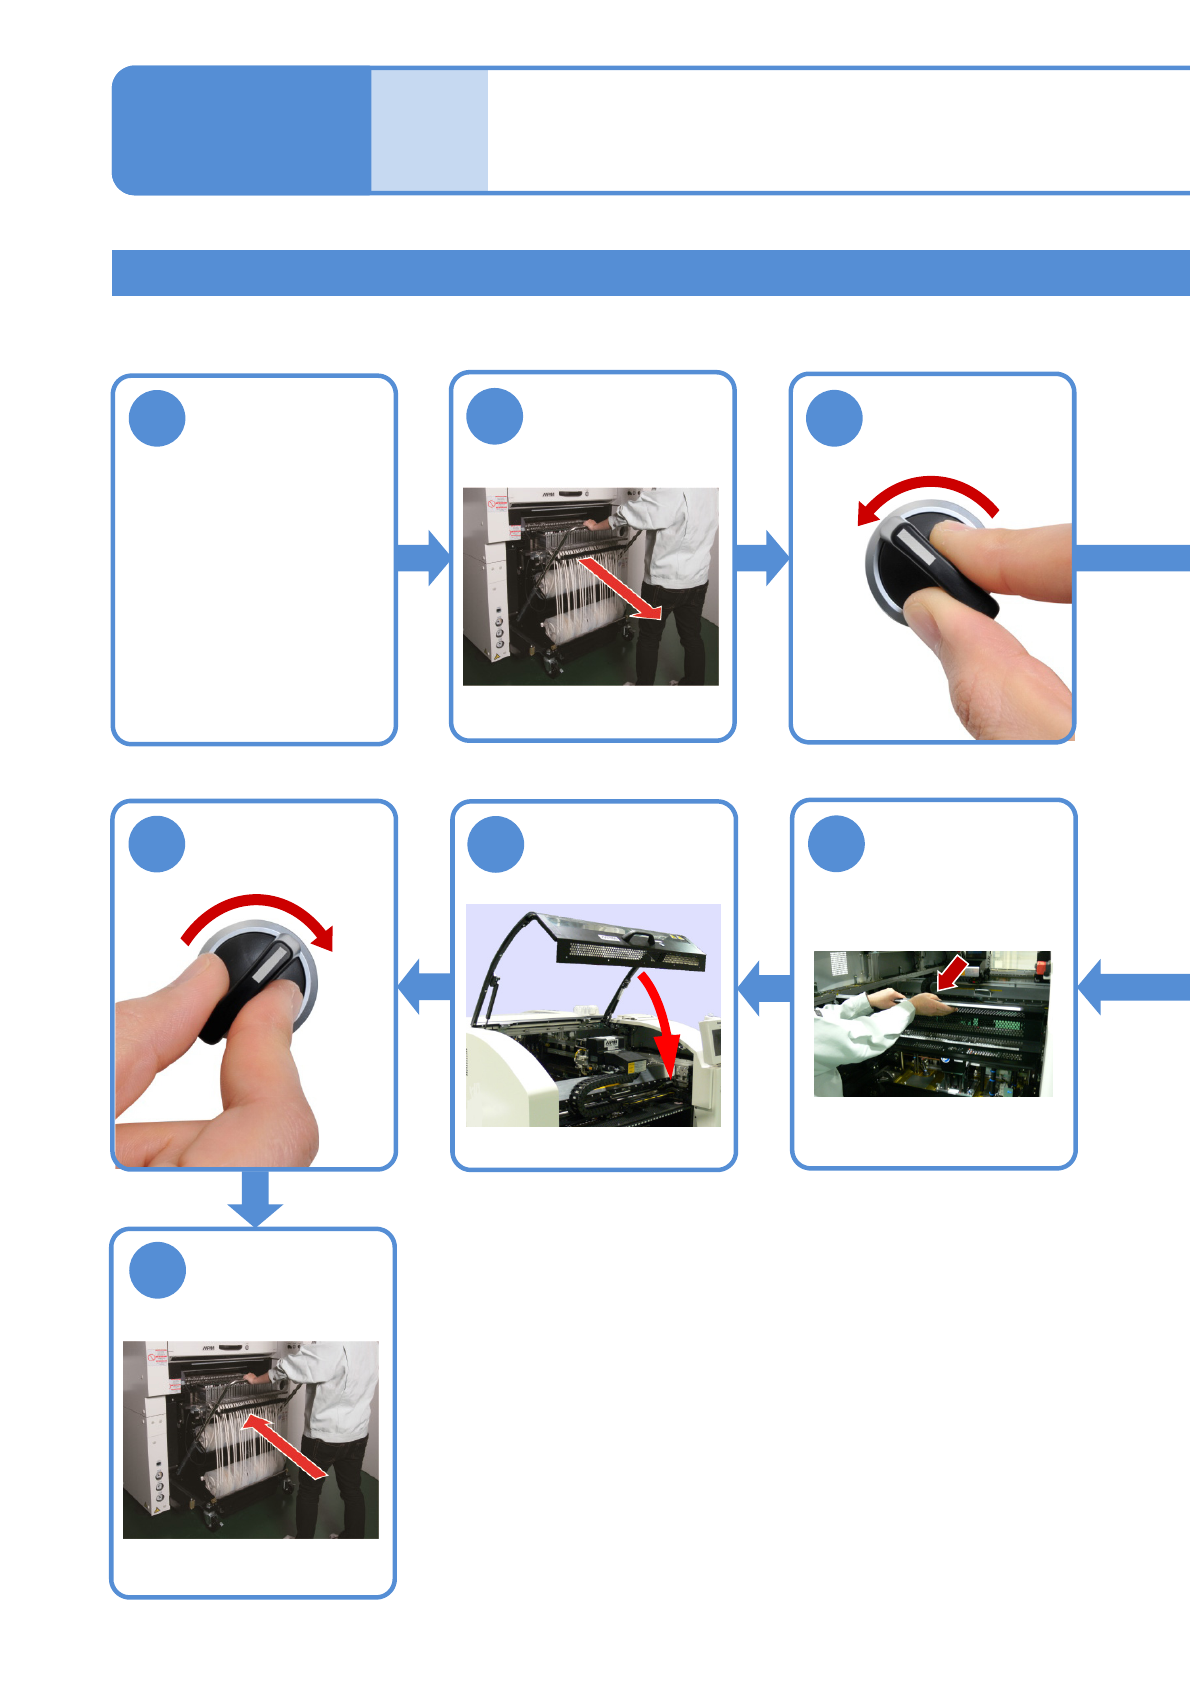
Detach the
feeder cart
(→P.3-2)
Adjust the
conveyor
width of 150mm
(→[Operating
procedure] P.2-5-4)
●For better workability
1
2
OFF
SERVO
3
SERVO
ON
10
9
8
7
Attach the
feeder cart
(→P.3-2)
Return the
feeder table
cover back
6-9-3
NPM-W2 EJM7DE-MB-06M-00
6-9-4
4
■Sensor position installed to the upstream process of the dual conveyor
Clean the PCB detection sensors using a swab
●Use a swab.
Every
560
hours
PeriodicPeriodicPeriodicPeriodic
inspection
4
5
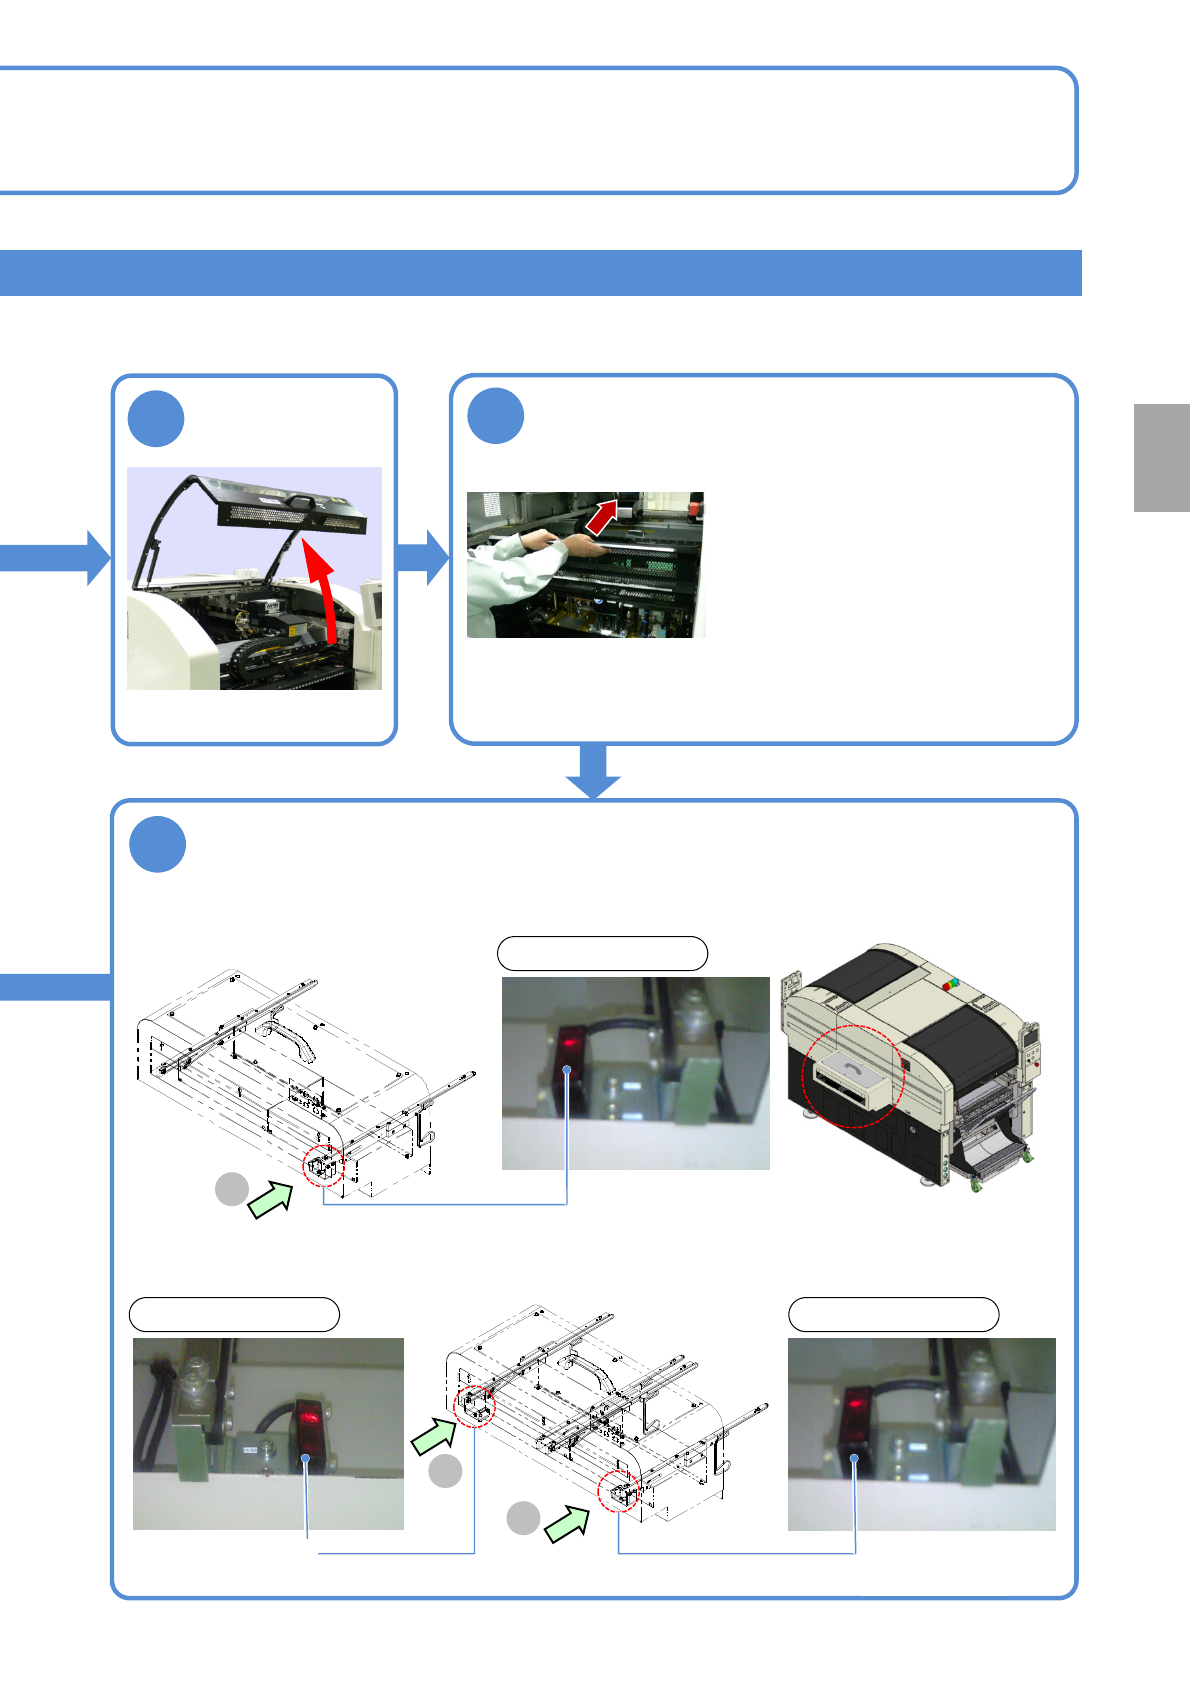
Hold the feeder table cover to the back
■Sensor position installed to the upstream process of the single conveyor
A
(Reflection type)
PCB detection sensor
View on arrow A
A
B
View on arrow AView on arrow B
(Reflection type)
PCB detection sensor
(Reflection type)
PCB detection sensor
●If it is difficult to perform the work,
remove the feeder table cover.
●Neither lean against the feeder
table cover nor place anything on
it.

NPM-W2 EJM7DE-MB-06M-00
Inspecting the vacuum
air path (placement head(option))
6-10-1
Describes how to inspect the vacuum air path using the 12-nozzle head as an example; however, the same
procedure is also applicable to the light weight 16-and 8-nozzle head.
Tool used: None Time required: 2 minutes (per stage)
Maintenance
6-10
or
A
(The display color changes from
the light blue to the gray, and the
vacuum suction ends)
ENABLING
Return to step
and repeat the same
procedure for each
position (pos)
5
1
2
7
8