N7201A617E00_0317.pdf - 第219页
NPM-W 2 EJM7DE-MB-06 M-00 6-1 1 -2 5 Insert an Allen w rench into the end of the θ -axis pulley of the head edge, and then turn it around 10 times or more ● It has no problem if showing no variations in the rotational to…
NPM-W2 EJM7DE-MB-06M-00
Inspecting the θ-axis
belt (Placement head(option))
Describes how to inspect θ-axis belt by using the 12-nozzle head as an example; however, the same
procedure is also applicable to the light weight 16-and 8-nozzle head.
Tool used: Allen wrench (size: opposite side 2.0 mm (a ball-point-end) and 2.5 mm)
Time required: 10 minutes for light weight 16-nozzle head, 10-minutes for 12-nozzle head and 20 minutes for
8-nozzle head.
6-11-1
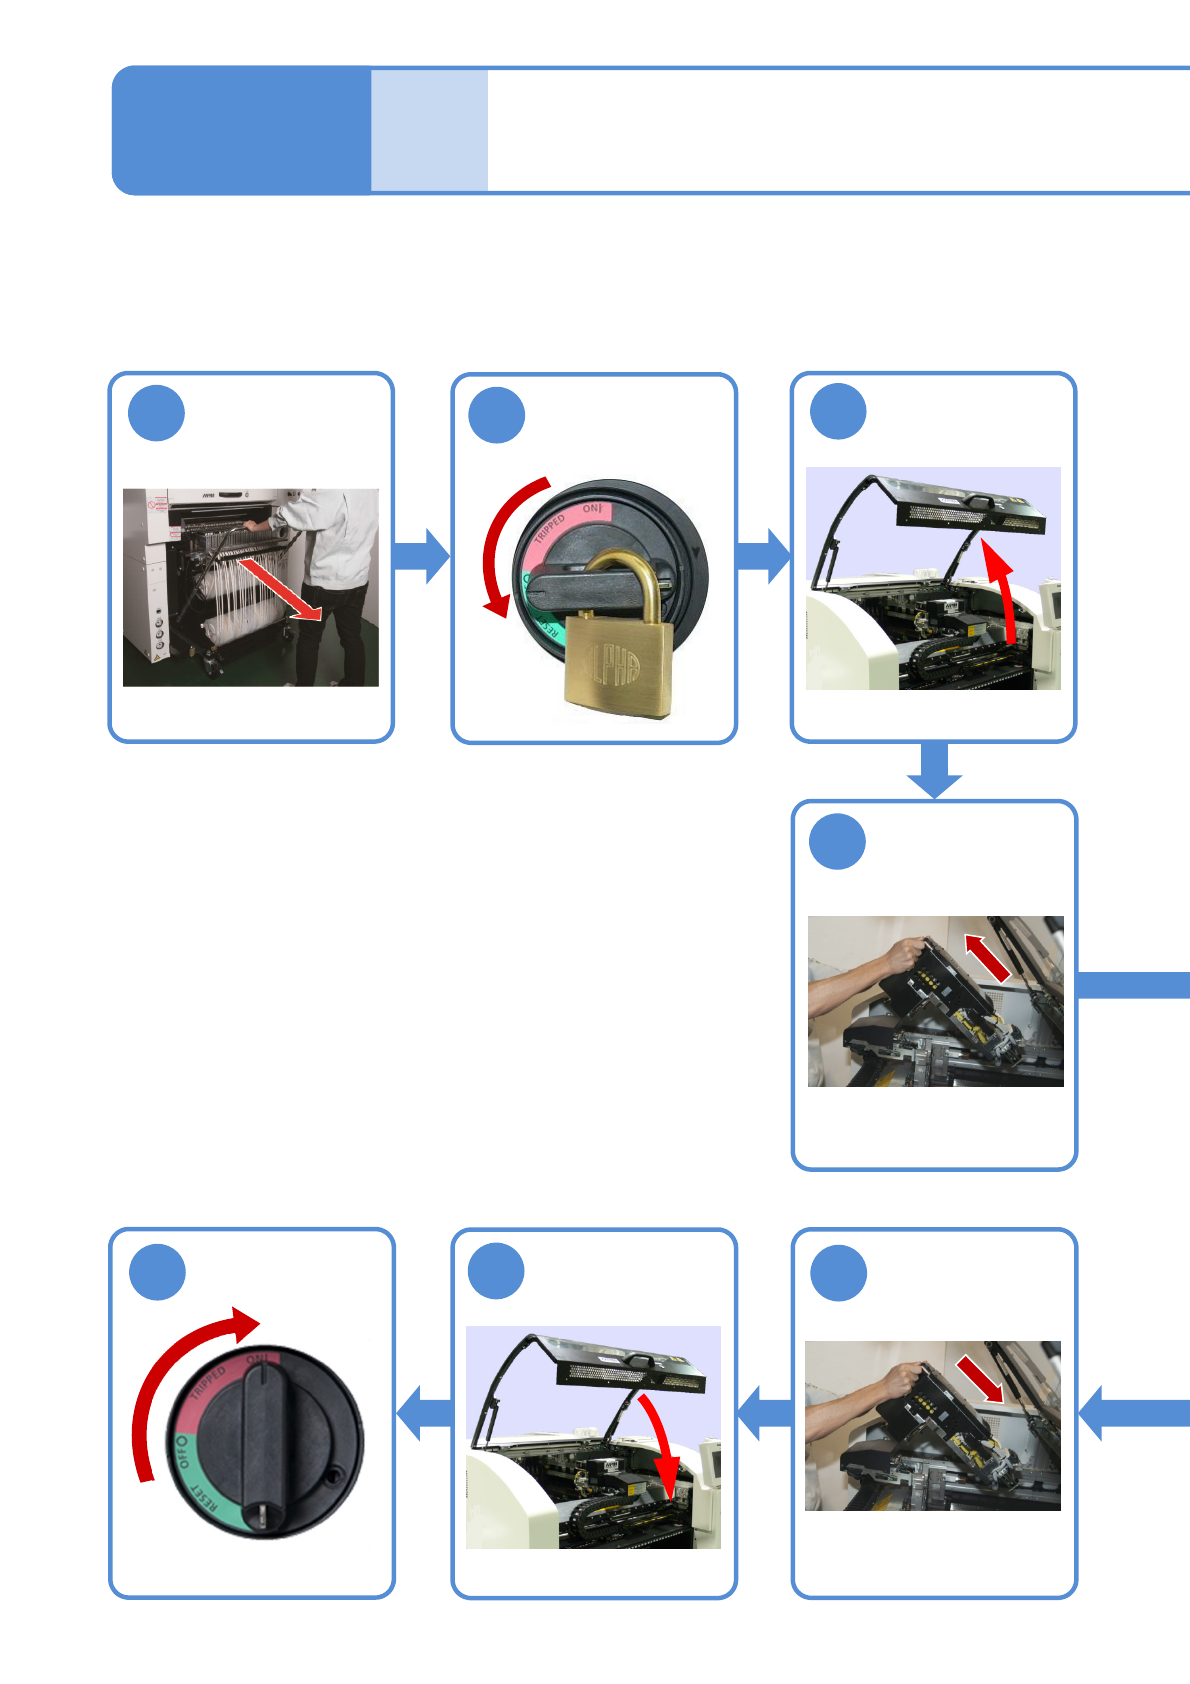
Detach the
feeder cart
(→P.3-2)
1
4
Detach the head
8
6
Attach the head
●How to detach
→P.11-1-1
3
7
●How to attach
(→P.11-1-3)
Maintenance
6-11
4
2
Turn OFF the
power and lock
the machine
OFF
Unlock the
machine and
ON
NPM-W2 EJM7DE-MB-06M-00
6-11-2
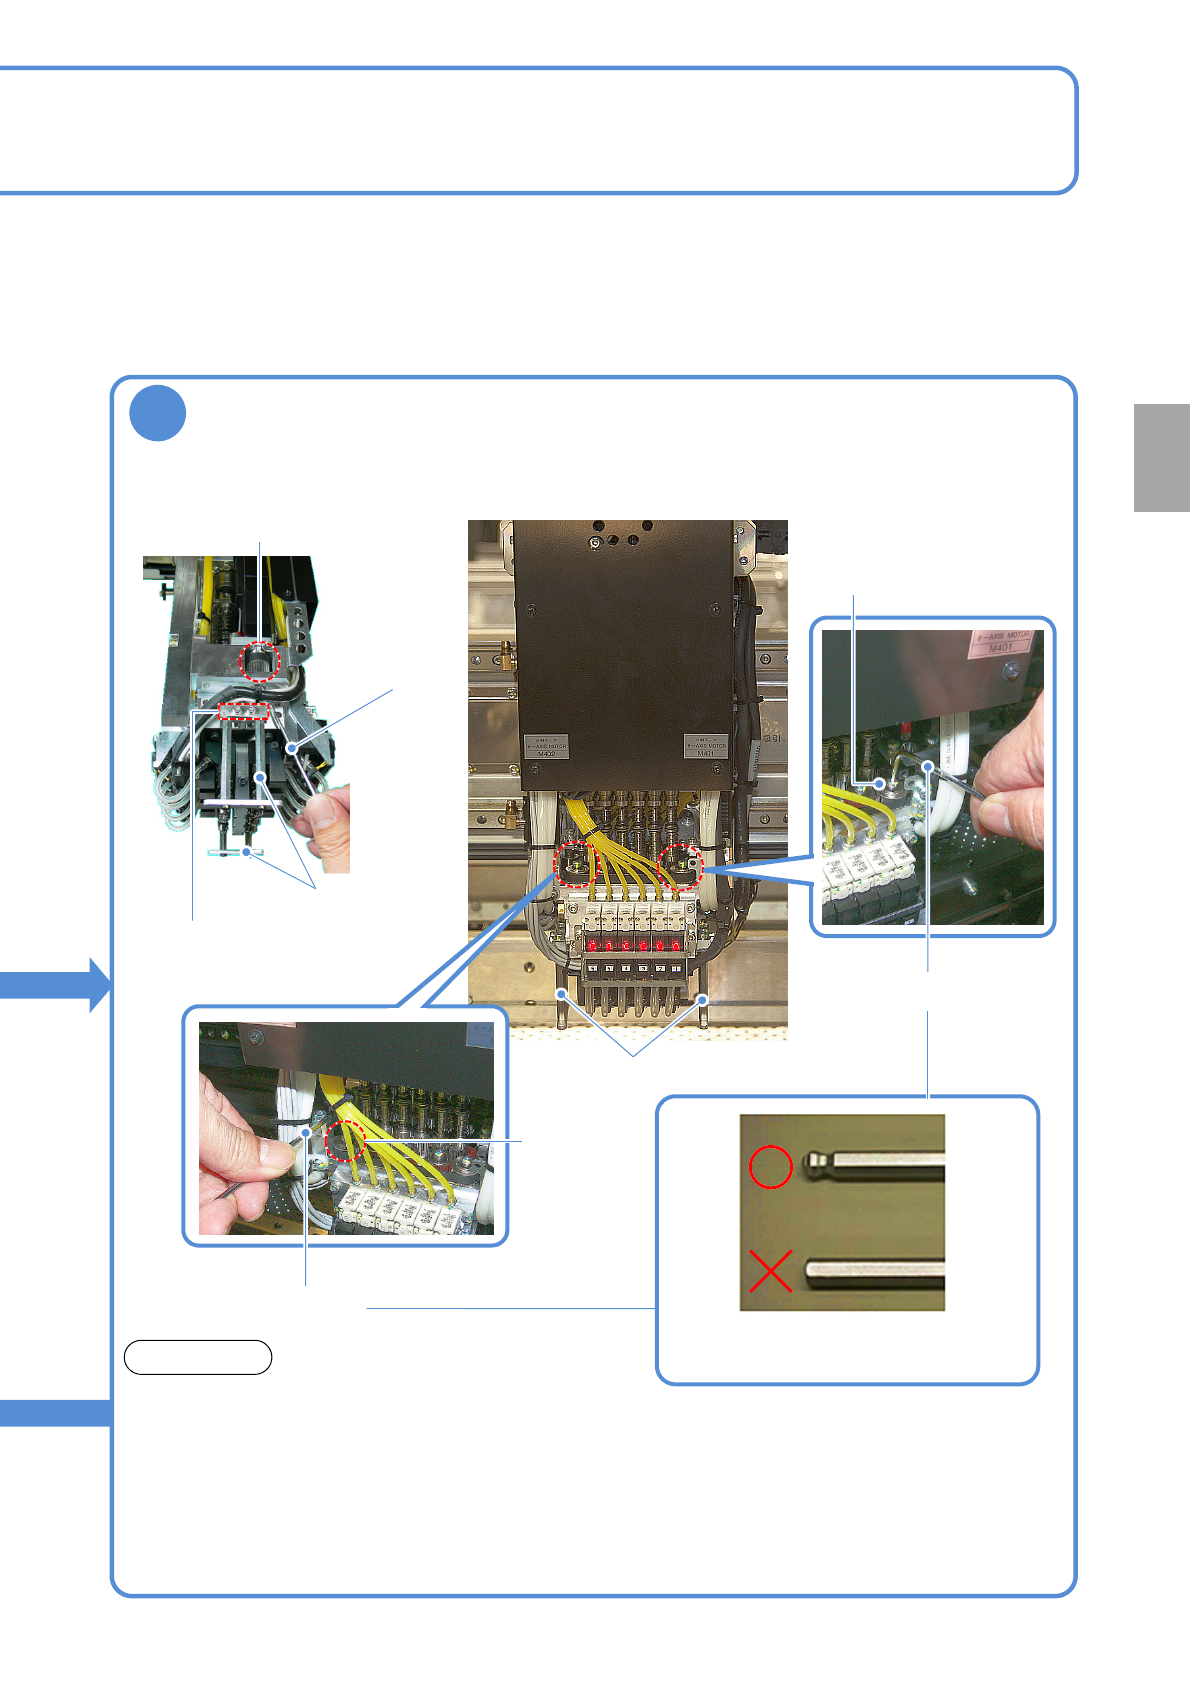
5
Insert an Allen wrench into the end of the θ-axis pulley of the head edge, and
then turn it around 10 times or more
●It has no problem if showing no variations in the rotational torque.
●If showing some variations in the rotational torque (Rotational resistance can be either high
or low sometimes while turning it around), contact us.
●Two θ -axis motors are located on the right and left sides. Inspect both of them.
●For 8-nozzle head, remove the nozzle protection guard during inspection.
(For light weight 16-, and 12-nozzle, you do not need to remove it during inspection.)
*Use a ball-point-end Allen wrench (the
one at the top of the photo above)
■12-nozzle head■8-nozzle head
θ-axis head
Allen wrench
NOTICE
Remove screws
(Two locations
each
on right and left)
θ-axis head
Allen wrench
θ-axis head
Allen wrench
Nozzle protection
guard
Nozzle protection guard
Every
560
hours
PeriodicPeriodicPeriodicPeriodic
inspection
NPM-W2 EJM7DE-MB-06M-00
1
2
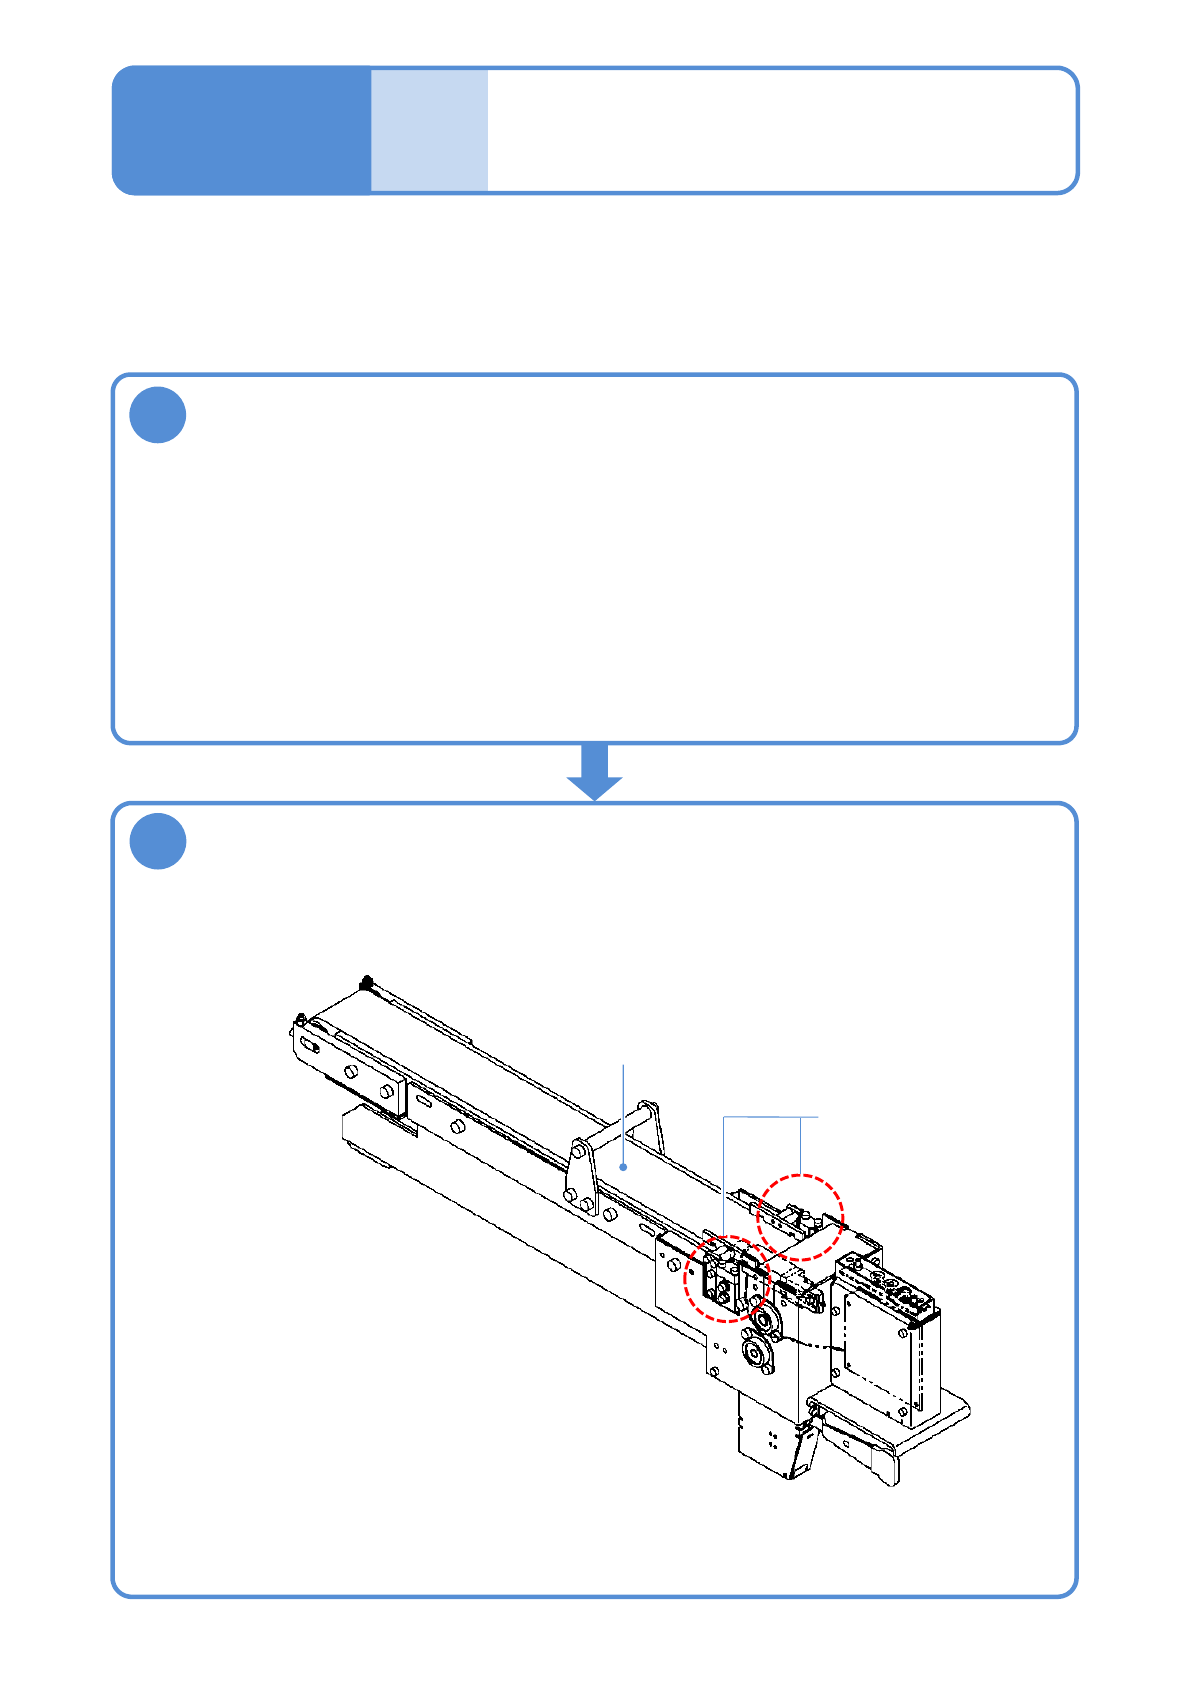
Wipe dust off the surface of the conveyor belt and around the perimeter of
the components detection sensor
Cleaning the components-
ejection conveyor
(option)
Describes how to clean the components-ejection conveyor.
Tool used: Lint free cloth Time required: 2 minutes
Install the components-ejection conveyor to the feeder cart that has been
disconnected from the machine, or to the feeder pedestal
●Use a lint free cloth
●It is also acceptable to disconnect from the machine the feeder cart that has been installed
with the components-ejection conveyor.
Conveyor belt
Components
detection sensor
6-12-1
●When handling the components-ejection conveyor, be careful not to hit the roller on the end.
Maintenance
6-12