N7201A617E00_0317.pdf - 第252页
NPM-W 2 EJM7DE-MB-07 M-00 Model Model No. Remarks BB-001:fo r 12-nozzle hea d and 8-nozzle hea d BB-002:for ligh t weight16-nozzle he ad 式 BB-001 : N510058057AA BB-002 : N510058058AA BB-001: 5 000 pieces BB-002: 6 250 pi…

NPM-W2 EJM7DE-MB-07M-00
To
5
7-1-4
4
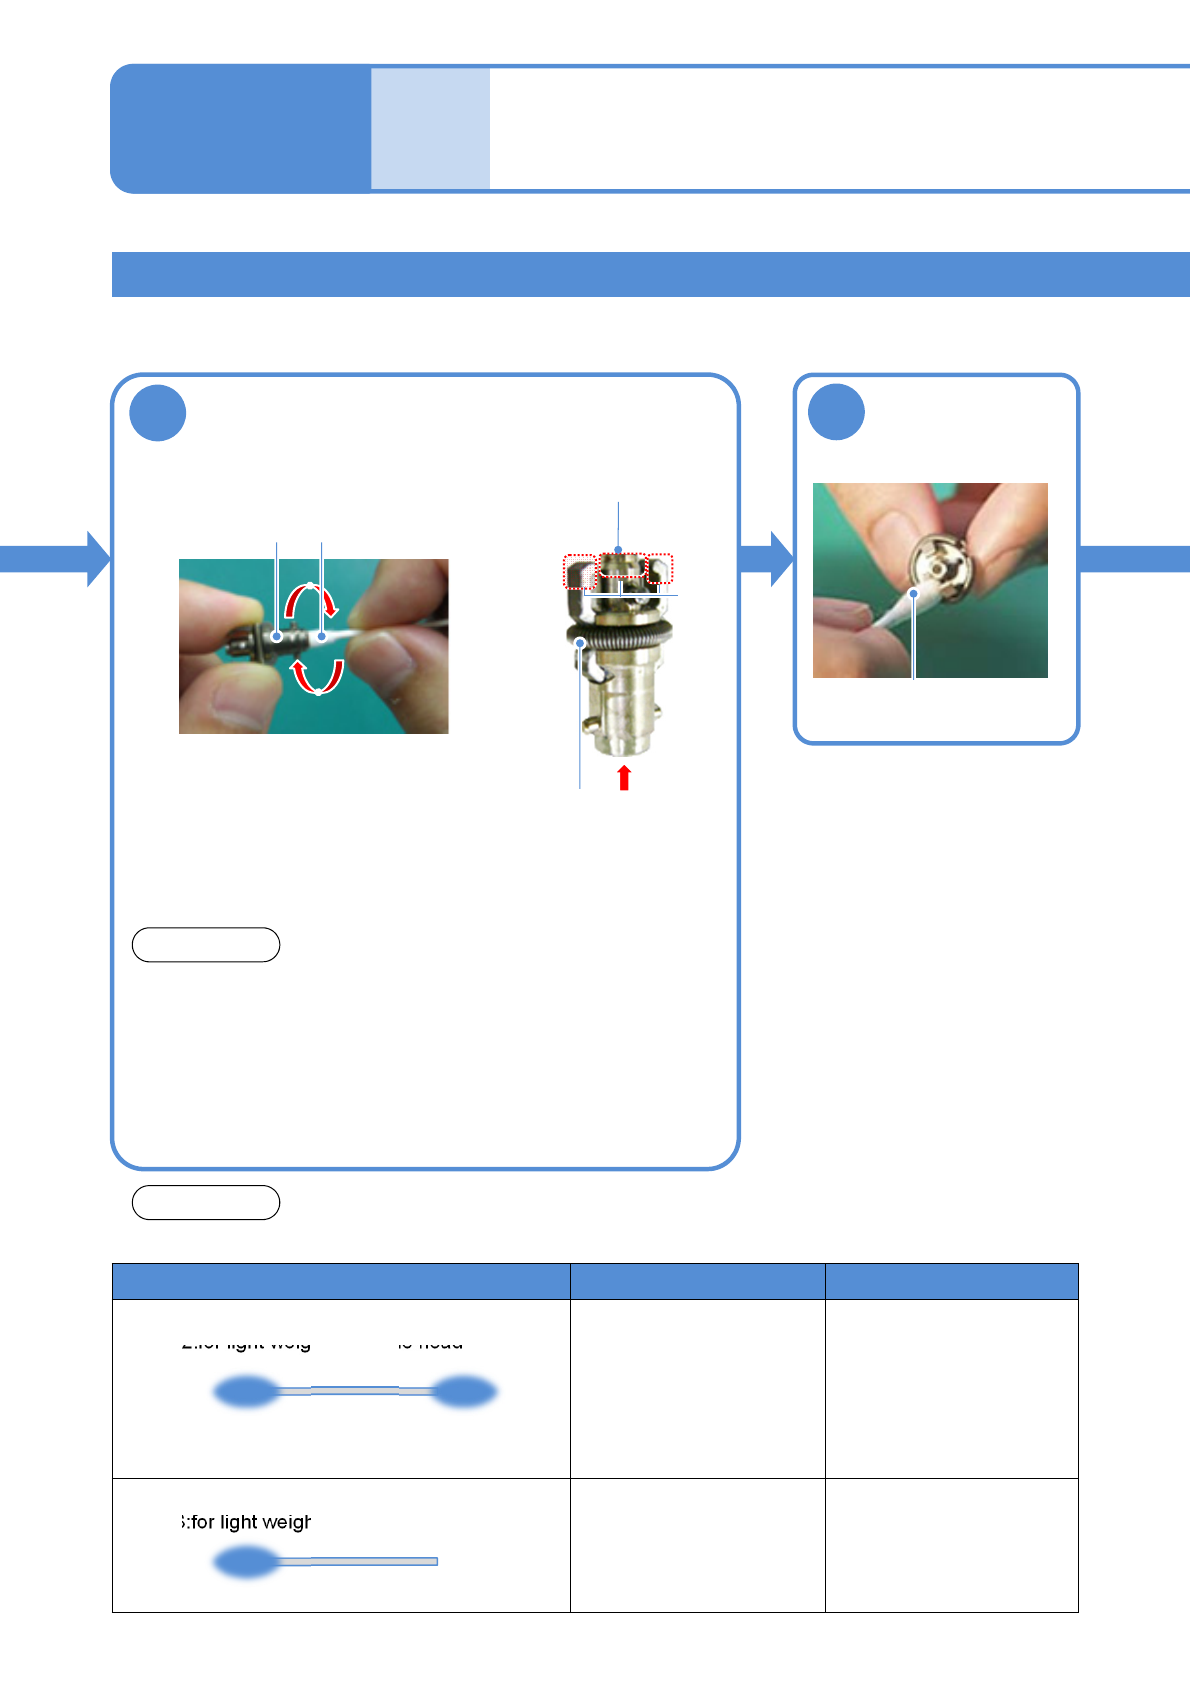
Pull the nozzle out
Nozzle holderNozzle
●Pull it straight out. If pulled out at
an angle, the clamp claws could
be damaged.
NOTICE
3
Detach the nozzle holder
●Turn the nozzle clockwise as viewed from below while
pushing up it.
●Be careful not to let the nozzle cushion use spring pop out.
●The spring for holding clamp claws can be easily
deformed so you should avoid pressing it tightly with your
fingers.
●Follow the same procedure to detach all nozzle holders
from the transfer head.
■With nozzles attached
●Use the nozzle holder shaft cleaning tool (option).
●Align the groove on the 12-nozzle cleaning side with the
positioning pins of the nozzle holder.
●Turn the nozzle clockwise as viewed from below while
pushing up the cleaning tool.
■Without nozzles attached
Positioning pin
Cleaning tool
Groove
5
To
●Move the head to the position where your workability enhances.
●Work at the front side for front feeder cart specification and rear tray feeder specification.
●Work at the rear side for rear feeder cart specification.
Every
1000
hours
PeriodicPeriodicPeriodic
inspection
NPM-W2 EJM7DE-MB-07M-00
Model Model No. Remarks
BB-001:for 12-nozzle head and 8-nozzle head
BB-002:for light weight16-nozzle head式
BB-001 : N510058057AA
BB-002 : N510058058AA
BB-001: 5 000 pieces
BB-002: 6 250 pieces
You can also purchase
these items from;
Sanyo Co., Ltd.
Phone number: +81-721-
24-3376
P753S-A:for 12-nozzle head and 8-nozzle head
P752S:for light weight16-nozzle head
P753S-A : N510058942AA
P752S : N986P752S
P753S-A : 2 500 pieces
P752S : 200 pieces
5
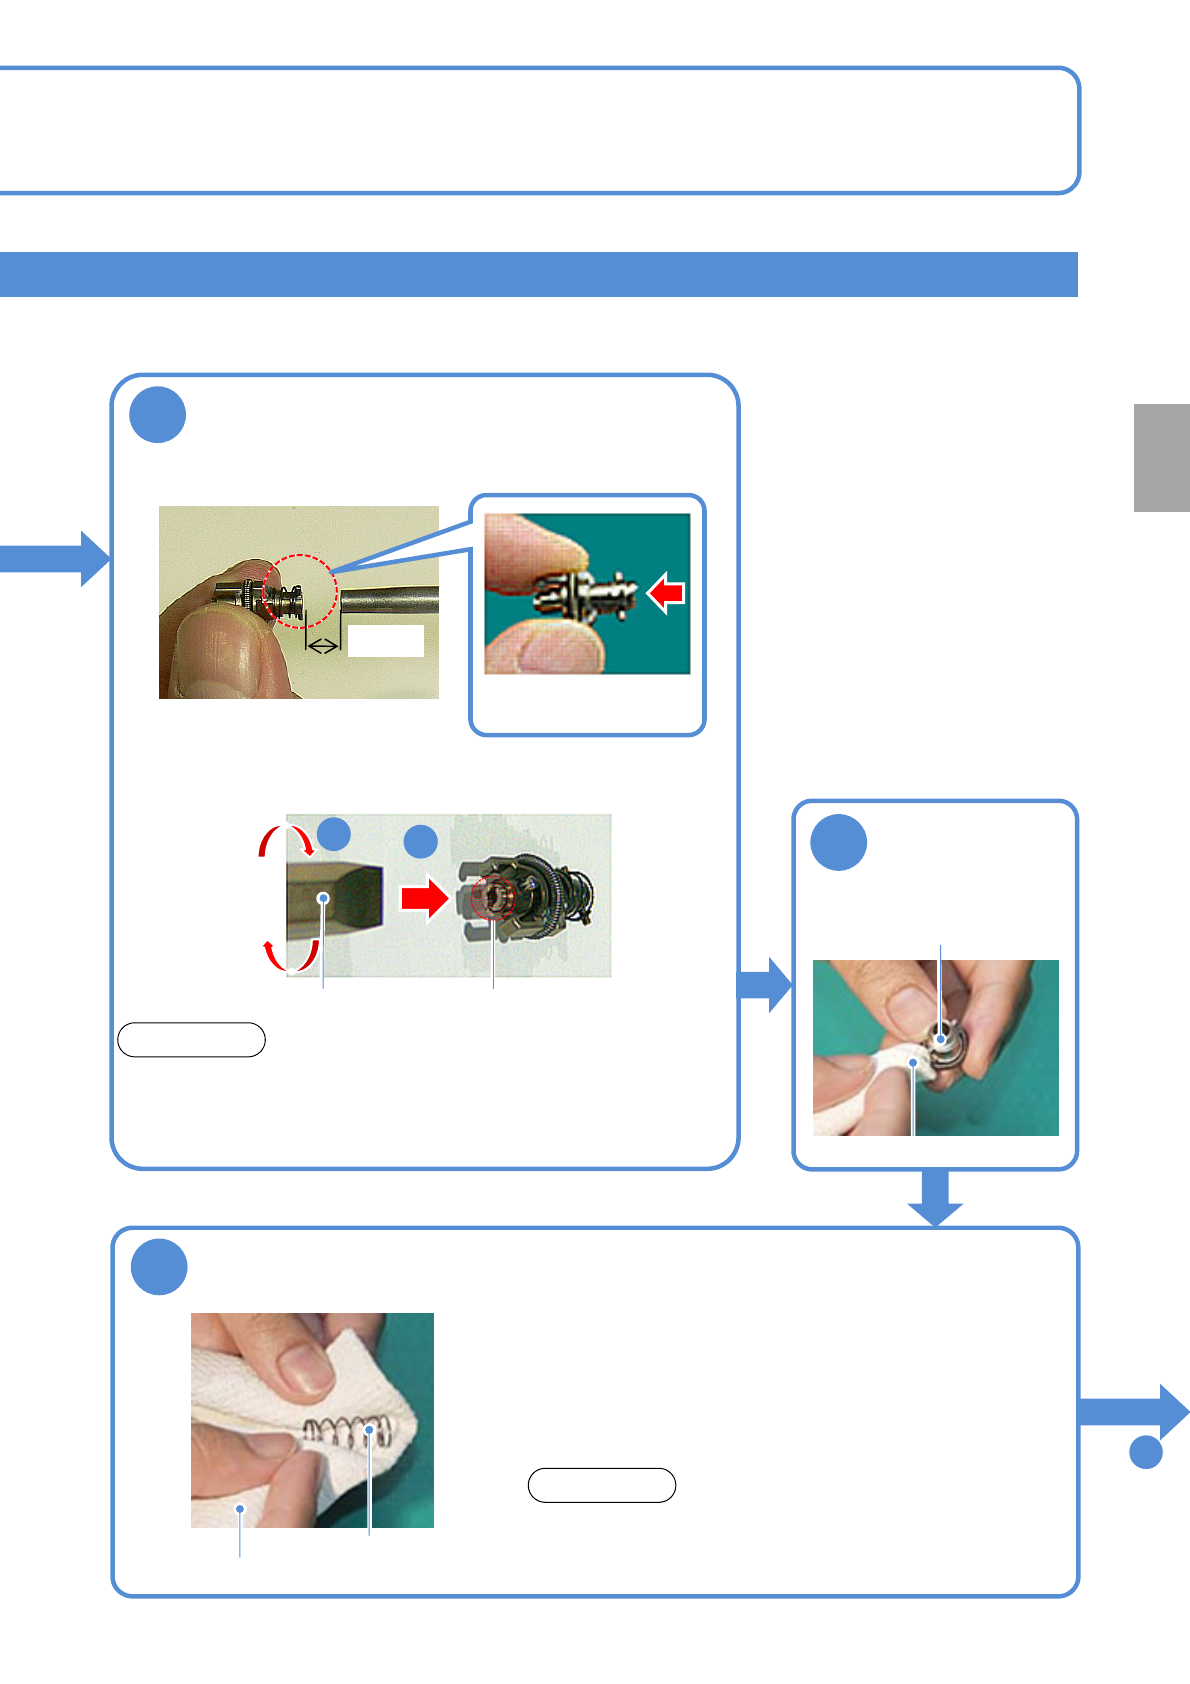
Clean the nozzle holder
Nozzle holder
●Wipe it clean a few times
and then leave it to dry.
NOTICE
●Do not wipe the nozzle holder tip (filter) and the spring for
holding clamp claws, with a cotton swab.
Cleaning the nozzle holder
Cleaning the nozzle holder 3
(Light weight16-/12-/8-nozzle head(option))
Maintenance
7-1
7-1-5
Spring for holding
clamp claws
Tip of nozzle holder
(filter)
A
B
●Clean only the parts A and B (the hole area of the nozzle
holder). Otherwise, the filter may get clogged with dust, or
wiping off grease can cause the spring to get rusted.
6
Clean the taper
face and the
clamp claw tip
Alcohol-dampened baby
cotton swab
Alcohol-dampened baby
cotton swab
Use the following industrial swabs for precision machine for cleaning.
NOTICE
NPM-W2 EJM7DE-MB-07M-00
7-1-6
Replace the filter
Flat head
screwdriver
1
2
Nozzle holder tip (filter)
●Remove the filter at the nozzle holder tip with a flat head
screwdriver.
●Be careful not to forget to tighten the screw when installing the
filter.
Filter No.: N610097899AA
(Common to 16-/12-/8-nozzle heads)
NOTICE
■If dust still settles
To
10
7
Keep an air blow gun 1.5cm away from the
nozzle holder and blow air for about 10
seconds (Air pressure at 0.5 MPa)
Nozzle
(fit surface and clamp claw
tip)
8
Wipe the outer
part
Dried lint free cloth
9
Clean the spring for the nozzle cushion use
(for 12-/8-nozzle)
●Replace the spring if deformed. Otherwise, It may cause a sliding
problem with the nozzle holder, thereby leading to a pickup or
placement error. Moreover, it may cause the nozzle holder to be
unable to be dismounted from the head so that you need to
disassemble the head to dismount it.
●Push the spring in to the nozzle holder as deep as possible. Also,
be careful not to lose it during maintenance work.
Spring for nozzle
cushion
Dried lint free cloth
●For the light weight 16-nozzle head, the spring is built
into the nozzle holder. So, blow off dust and others with
an air blow gun.
NOTICE
1.5cm
●Blow air in the
direction of the arrow.
Every
1000
hours
PeriodicPeriodicPeriodic
inspection