N7201A617E00_0317.pdf - 第254页
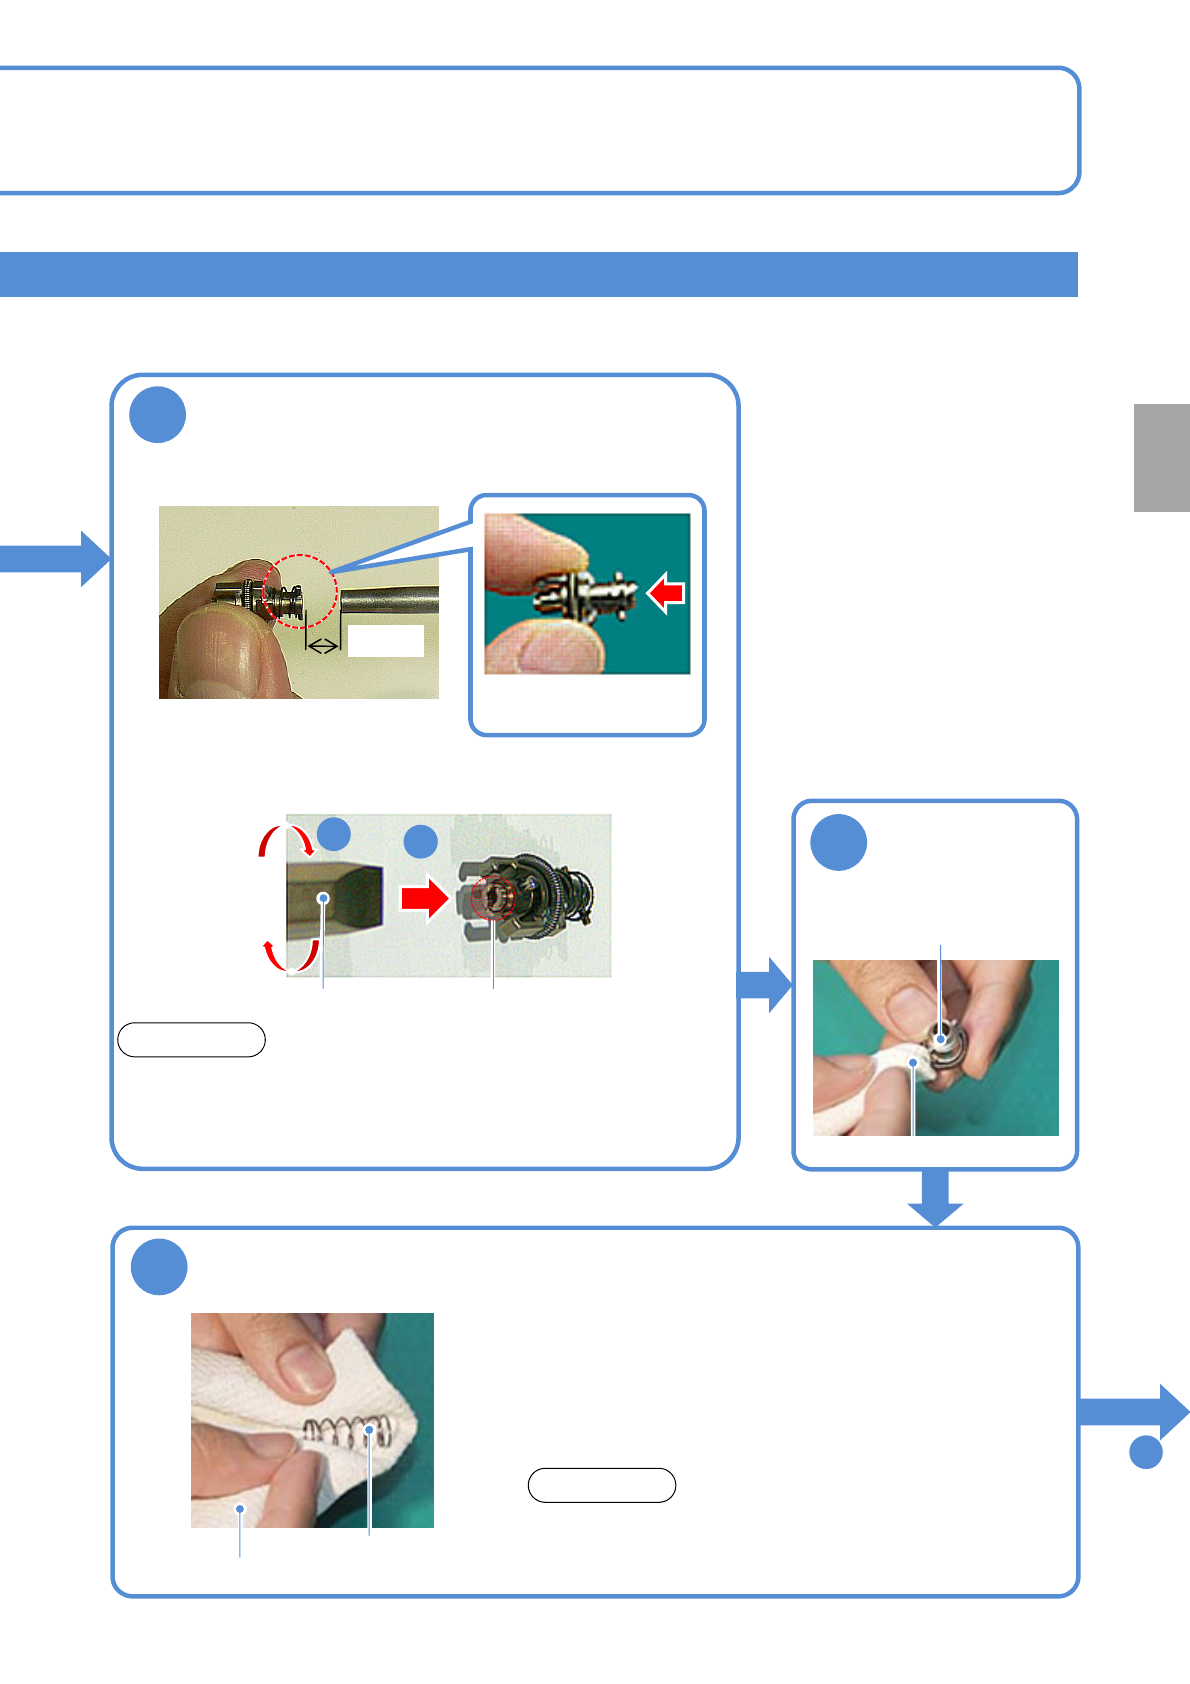
NPM-W 2 EJM7DE-MB-07 M-00 Cleaning the nozzle holder shaft Cleaning the no zzle holder 4 (Light weight 16-/12-/8-nozzle head(option)) Maintenance 7-1 7-1 -7 ● Turn the nozzle clockwise as viewed from below while pushing …
NPM-W2 EJM7DE-MB-07M-00
7-1-6
Replace the filter
Flat head
screwdriver
1
2
Nozzle holder tip (filter)
●Remove the filter at the nozzle holder tip with a flat head
screwdriver.
●Be careful not to forget to tighten the screw when installing the
filter.
Filter No.: N610097899AA
(Common to 16-/12-/8-nozzle heads)
NOTICE
■If dust still settles
To
10
7
Keep an air blow gun 1.5cm away from the
nozzle holder and blow air for about 10
seconds (Air pressure at 0.5 MPa)
Nozzle
(fit surface and clamp claw
tip)
8
Wipe the outer
part
Dried lint free cloth
9
Clean the spring for the nozzle cushion use
(for 12-/8-nozzle)
●Replace the spring if deformed. Otherwise, It may cause a sliding
problem with the nozzle holder, thereby leading to a pickup or
placement error. Moreover, it may cause the nozzle holder to be
unable to be dismounted from the head so that you need to
disassemble the head to dismount it.
●Push the spring in to the nozzle holder as deep as possible. Also,
be careful not to lose it during maintenance work.
Spring for nozzle
cushion
Dried lint free cloth
●For the light weight 16-nozzle head, the spring is built
into the nozzle holder. So, blow off dust and others with
an air blow gun.
NOTICE
1.5cm
●Blow air in the
direction of the arrow.
Every
1000
hours
PeriodicPeriodicPeriodic
inspection
NPM-W2 EJM7DE-MB-07M-00
Cleaning the nozzle holder shaft
Cleaning the nozzle holder 4
(Light weight 16-/12-/8-nozzle head(option))
Maintenance
7-1
7-1-7
●Turn the nozzle clockwise as viewed from below while pushing
it up.
●Be careful not to let the nozzle cushion use spring pop out.
●The spring for holding clamp claws can be easily deformed so
you should avoid pressing it tightly with your fingers.
●Follow the same procedure to attach all the nozzle holders to
the transfer head.
■With the nozzles attached
10
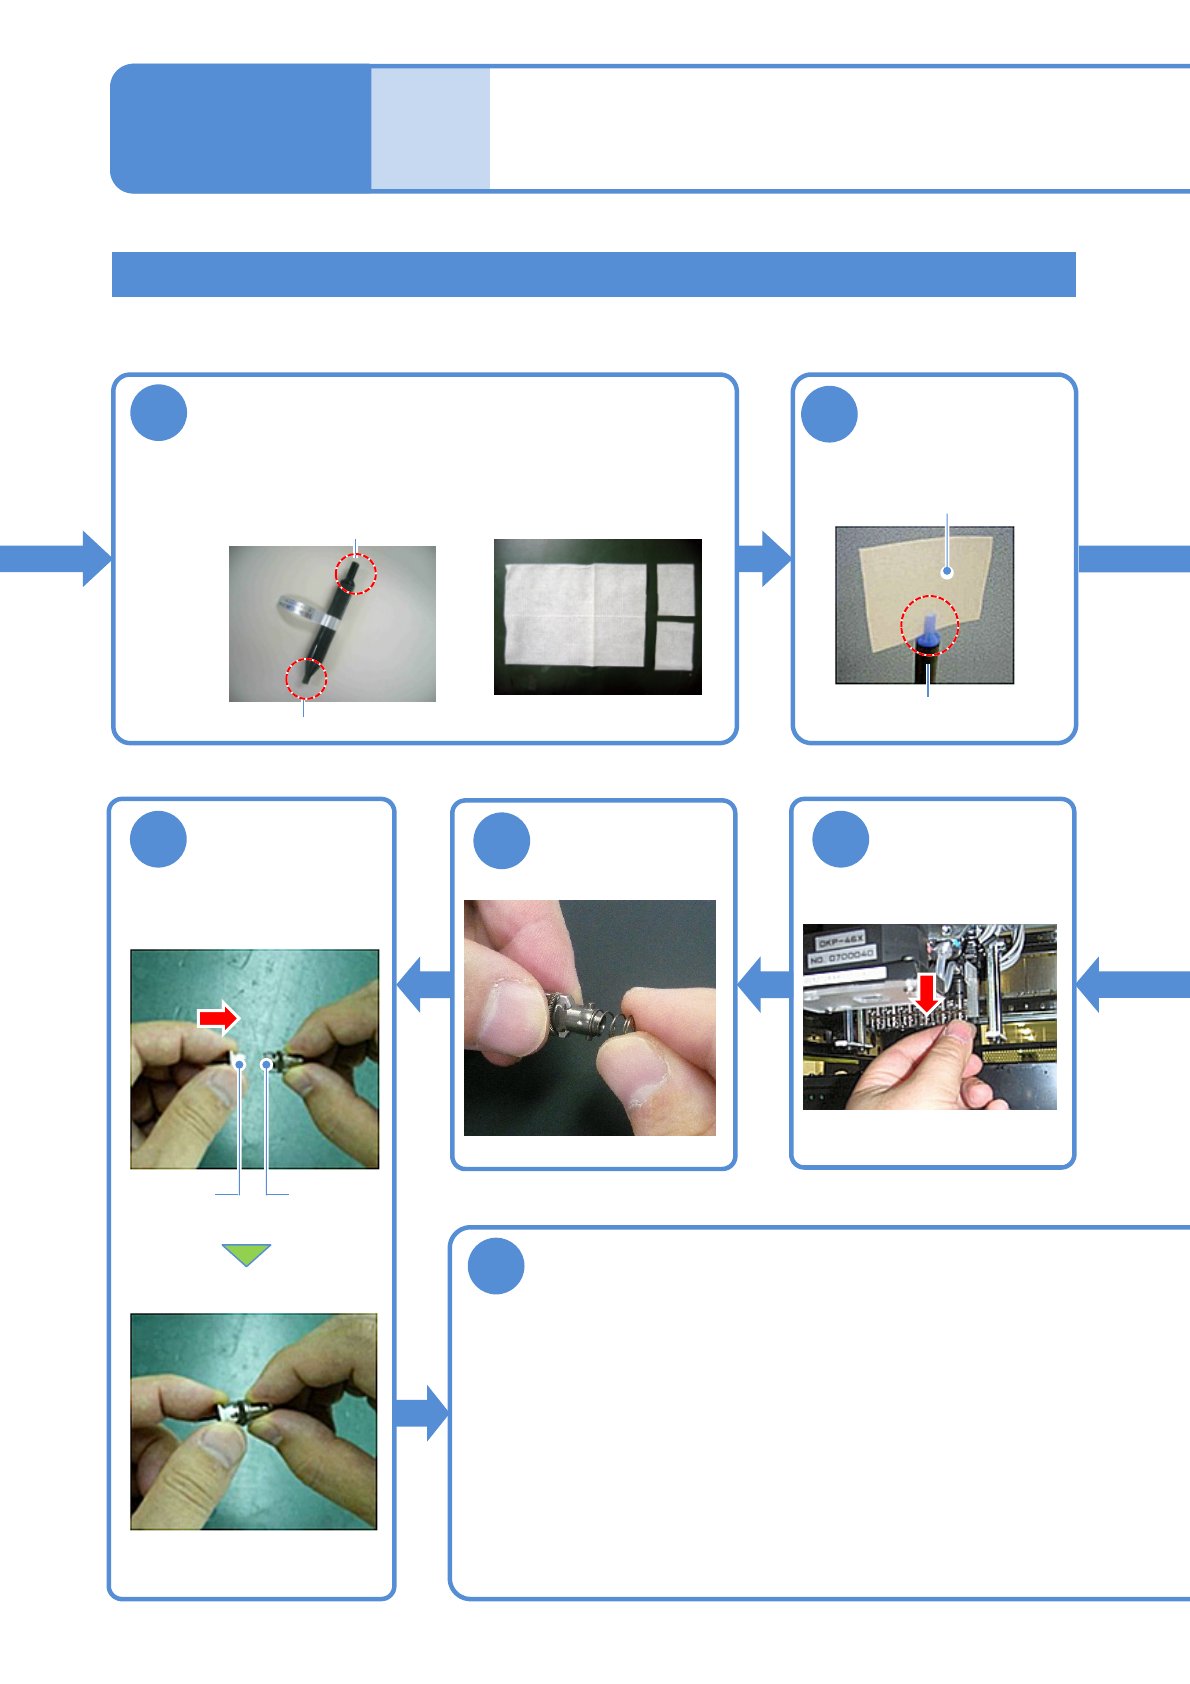
Prepare for cleaning
■Nozzle-holder shaft
cleaning tool
■Cleaning paper
( Approx. 40 x 50 mm)
φ5: for 8-nozzle head and 12-nozzle head
φ4: for 16 nozzle head
11
Attach the
cleaning paper to
the cleaning tool
φ5: for 8 nozzle head and
12-nozzle head
Cleaning paper
17
Detach the
nozzle holder
18
Attach the
spring
19
Nozzle
holders
Nozzle
Attach the
nozzle (If any)
20
Attach the nozzle holder
NPM-W2 EJM7DE-MB-07M-00
7-1-8
Attaching the nozzle holder
13
Turn down the
end of the
cleaning paper
●Use the nozzle holder shaft
cleaning tool (option).
●Align the groove on the 12-
nozzle cleaning side with the
positioning pin of the nozzle
holder.
●Turn it clockwise as viewed from
below while pushing up the
cleaning tool.
■Without the nozzle
attached
12
15
Remove the
spring
●Push the nozzle holder up with
a finger and make sure that it
does not get stuck, and remove
the finger and make sure it
lowers by its own weight.
16
Attach the nozzle holder
NOTICE
●If the holder gets stuck or does
not lower (→P.7-1
-11 to 12)
Positioning pin
Cleaning tool
To
21
14
Clean the shaft
●Insert the cleaning tool into
the shaft, and turn it in the
direction of nozzle rotation
two to three times.
●Replace the paper when it
becomes dirty.
Every
1000
hours
PeriodicPeriodicPeriodic
inspection
Groove