N7201A617E00_0317.pdf - 第273页
NPM-W 2 EJM7DE-MB-08M-00 8-3 -6 4 Put a new O-ring 2 Remove the O- ring 3 Wipe adhesive away 5 Put the screw unit back together again ● To assemble the propeller, after the markings are aligned, tighte n the screws. Be c…
NPM-W2 EJM7DE-MB-08M-00
Replacing the O-ring 3
(dispensing head(option))
Maintenance
8-3
8-3-5
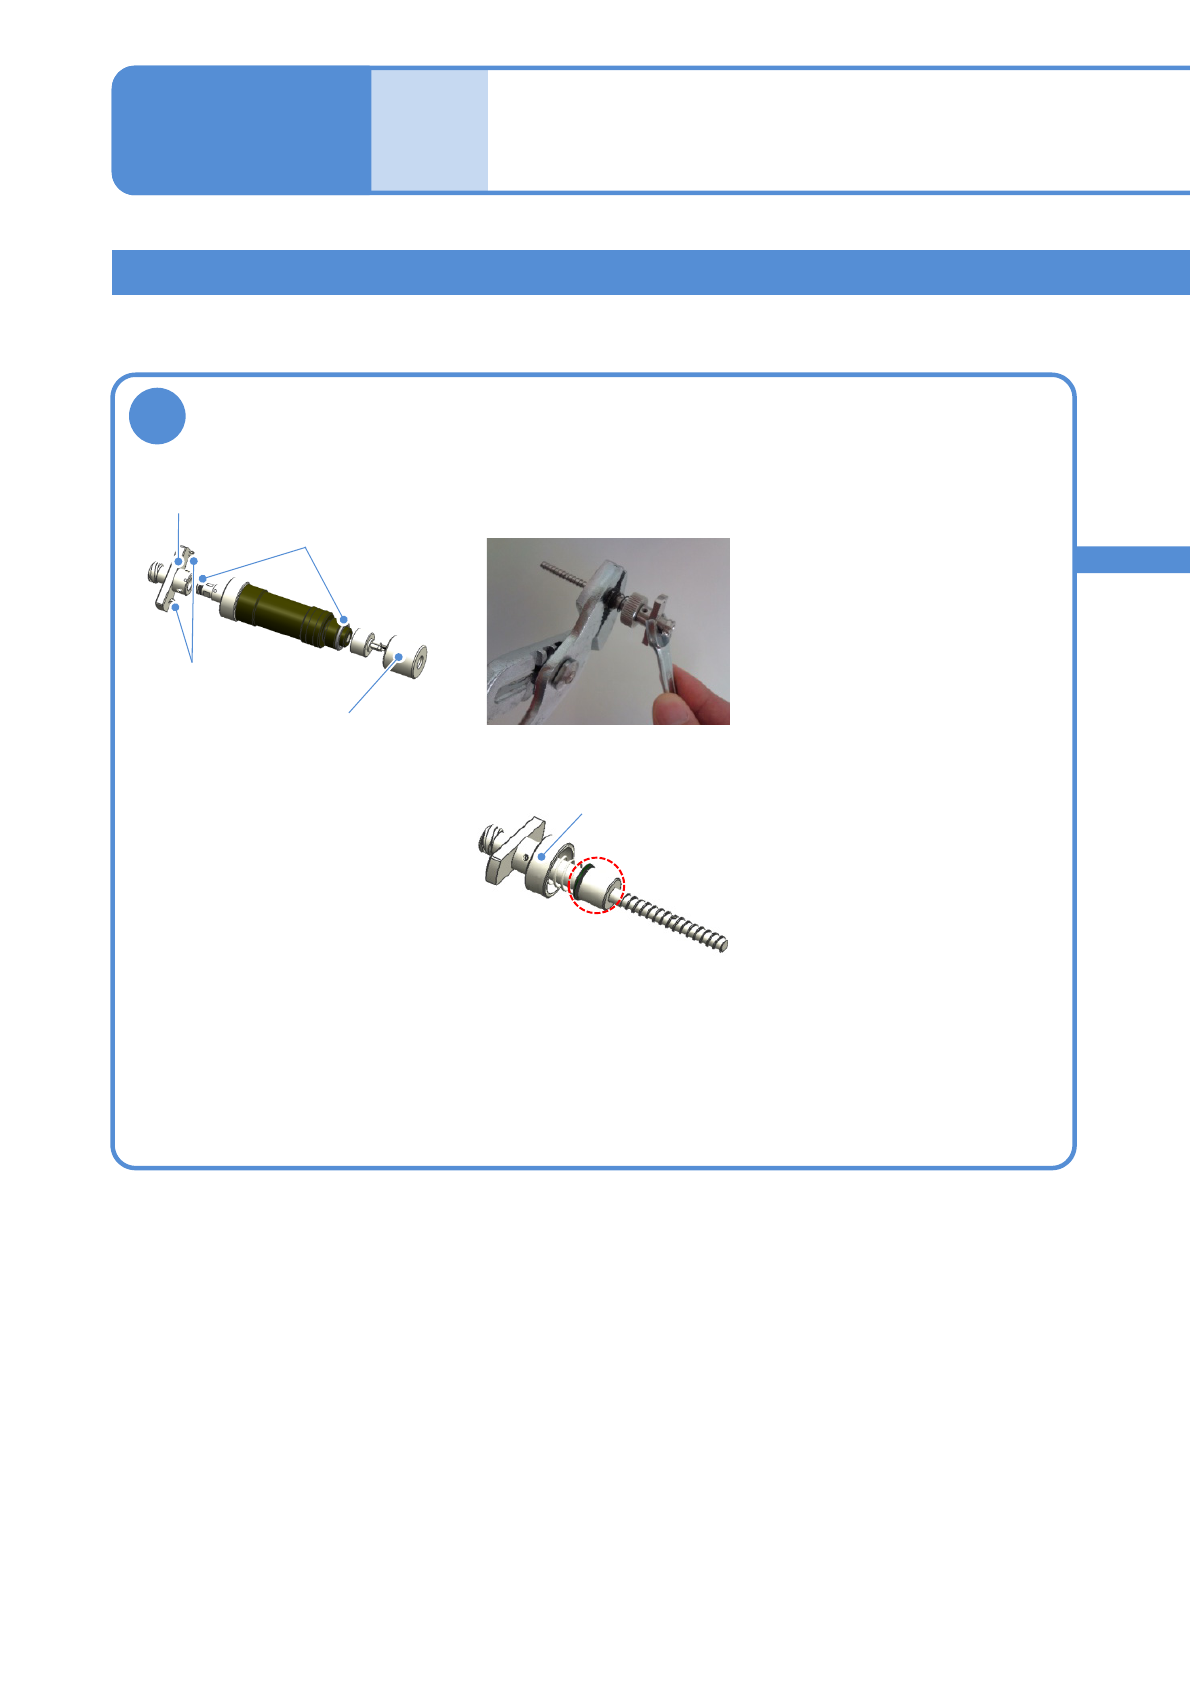
Disassemble the screw unit
1
●Loosen screws to disassemble the propeller.
Screw unit
Screw
Propeller
O-ring
Lower cap
Upper cap
●Turn the upper cap in a clockwise
direction to loosen.
●If it is difficult to remove the
propeller, hold the center of the
screw shaft with the pliers and
disassemble it.
●There is no problem if the center
of the screw shaft is scathed.
NPM-W2 EJM7DE-MB-08M-00
8-3-6
4
Put a new O-ring
2
Remove the O-
ring
3
Wipe adhesive
away
5
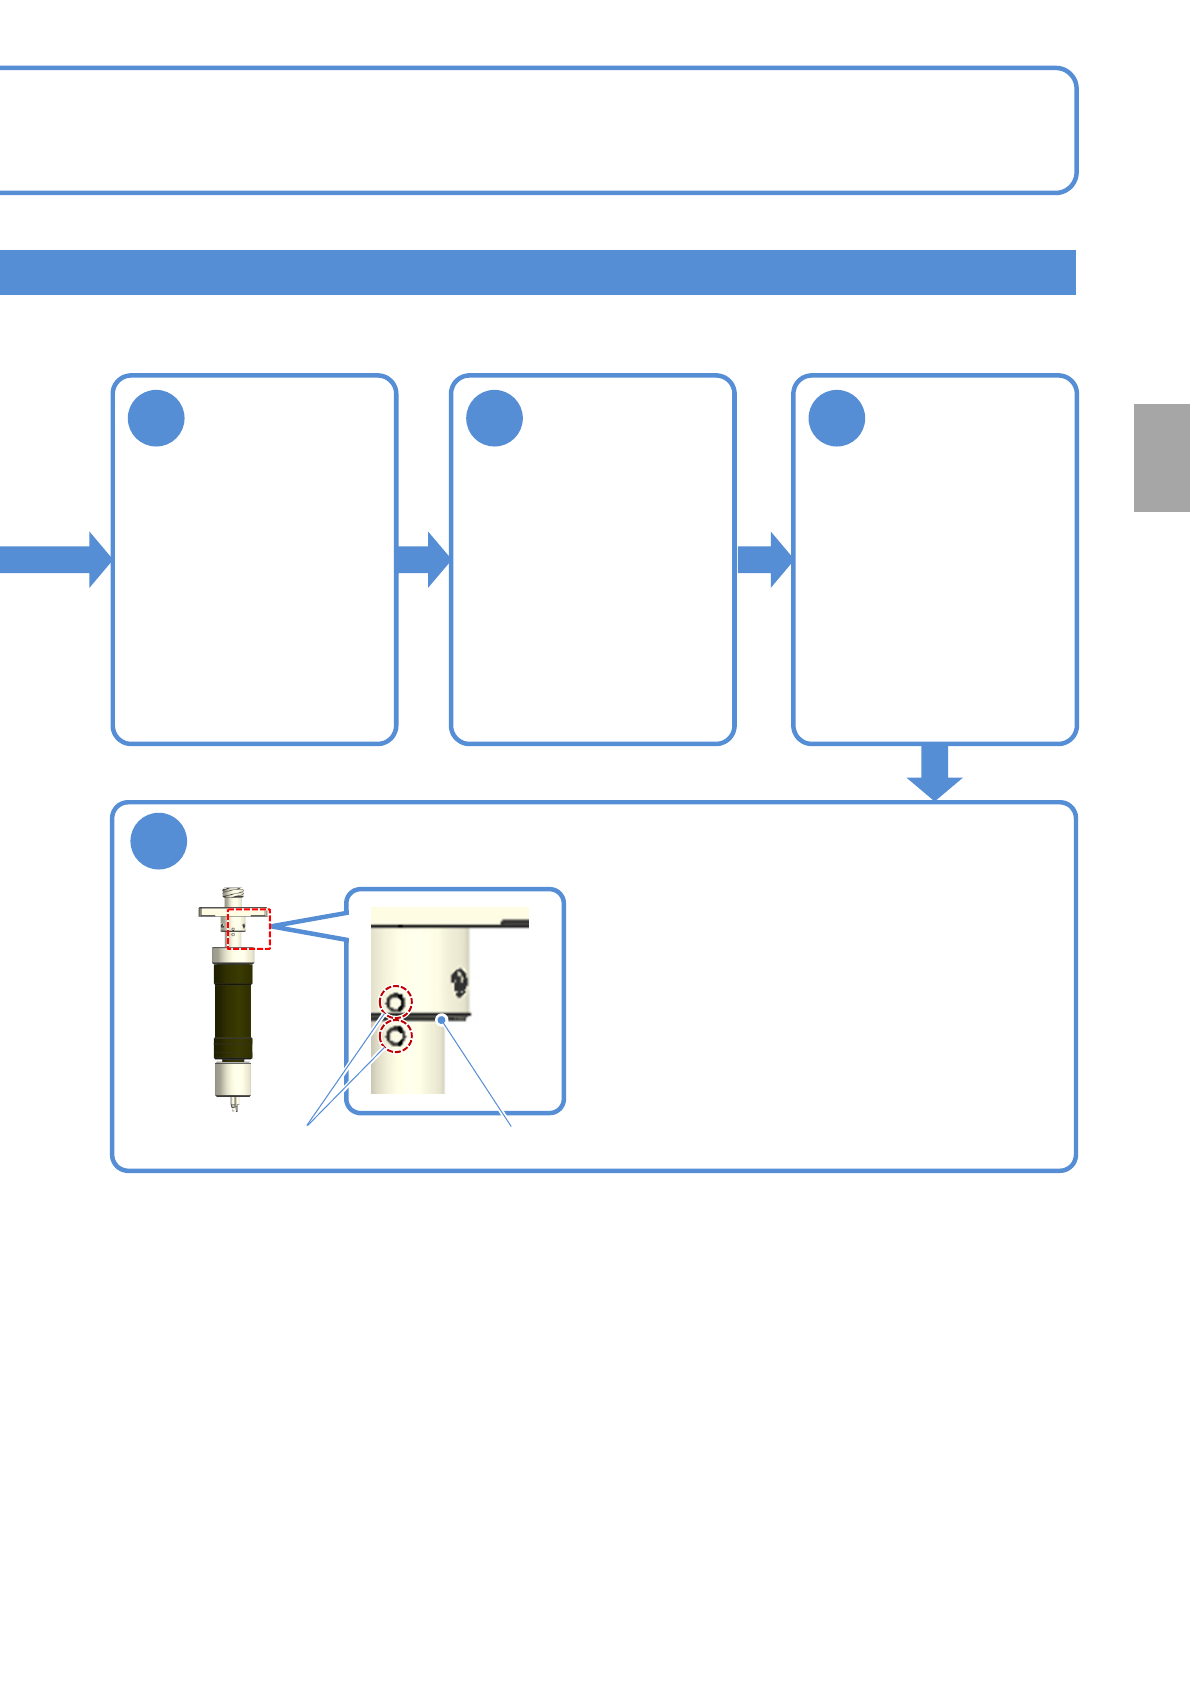
Put the screw unit back together again
●To assemble the propeller, after the markings
are aligned, tighten the screws.
Be careful not to leave any clearance .
Marking
●If adhesives are attached,
an air may leaks and it
leads to dispensing
defect.
Wipe off excess around
O-ring with a lint-free
cloth damped with solvent
(alcohol) if it sticks.
Every
3000
hours
PeriodicPeriodicPeriodicPeriodicPeriodic
inspection
NPM-W2 EJM7DE-MB-08M-00
Describes how to replace the collar.
Tool used: Allen wrench Time required: 10 minutes
●Be sure to replace it at the consumable parts replacement cycle.
●Detach the screw unit from the machine before work.(→P.4-2-5)
Replacing the collar
(dispensing head(option))
Maintenance
8-4
8-4-1
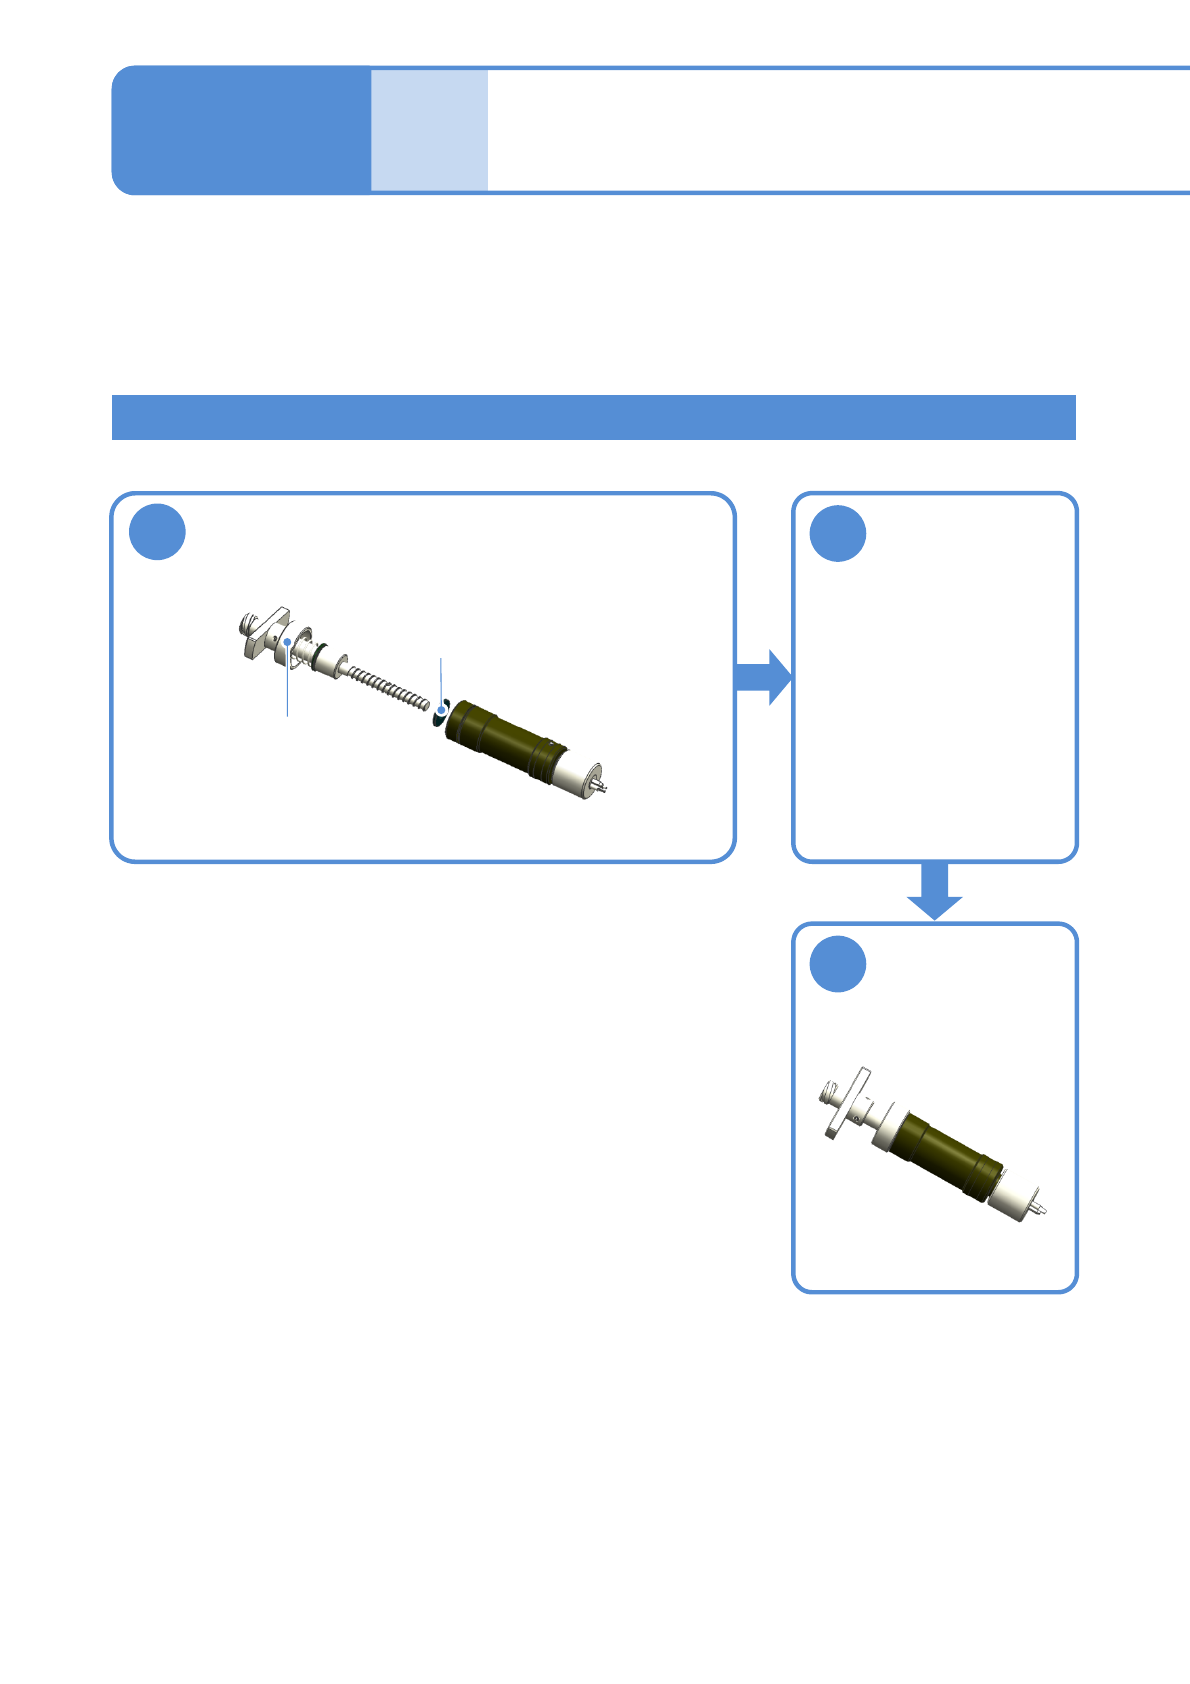
1
2
Replacing the lower collar
Loosen the top cab (turn in a clockwise
direction), and detach the screw shaft and
Lower collar from the screw unit
Upper cap
Lower collar
Replace the
lower collar
●There is no difference
between front and rear
sides.
3
Put the screw
unit back
together again