N7201A617E00_0317.pdf - 第294页
NPM-W 2 EJM7DE-MB-11M-00 Time required:10 minutes (Time taking to install a head) Maintenance 11 - 1 Head and no zzle c h anger r eplacement 2 Attaching a head 1 2 5 T ighten the head w ith fixing bolts ● Tighten the fix…
NPM-W2 EJM7DE-MB-11M-00
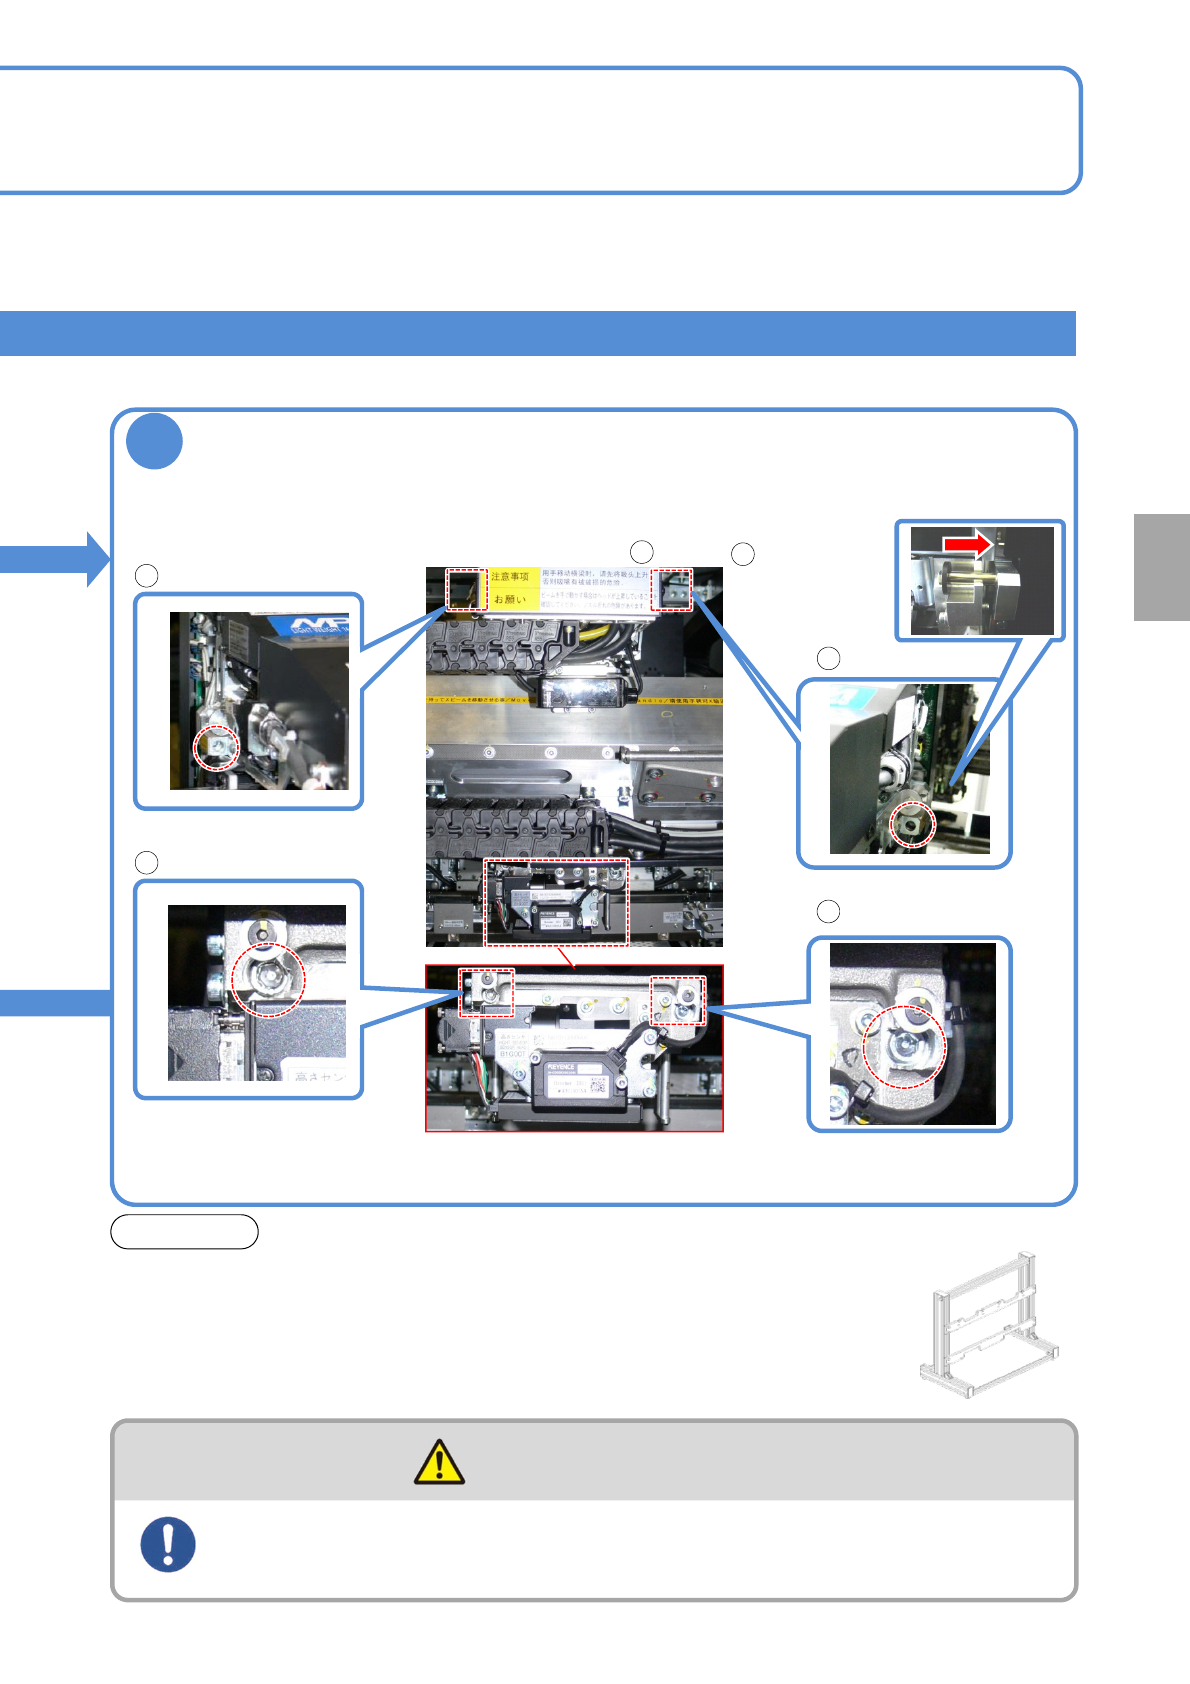
●Loosen the fixing bolts (4 locations) in the order of through .
1
●For the upper-right bolt, if the mounting surface is in close contact, all the screw parts cannot be
pulled out. Slide the head unit to the rear, and ensure that the screw parts of the bolt are
completely pulled out.
11-1-2
4
Loosen the head fixing bolts
NOTICE
For the head replacement work, prepare a workbench
(0.9 m to1.2 m in height) on your own.
*The removed head should be kept in the head stand
or the head storing box.
●Head storing box
Model No.:N610128856AA
●Head stand (option)
Model No.:N610124224AA
Be careful of handling a head when it carries
(Risk of injury due to drop/Risk of back pain)
CAUTION
Replacement
Lower right of head
4
1
3
4
2
Upper left of head
Lower left of head
Upper right of head
NPM-W2 EJM7DE-MB-11M-00
Time required:10 minutes (Time taking to install a head)
Maintenance
11-1
Head and nozzle
changer replacement 2
Attaching a head
1
2
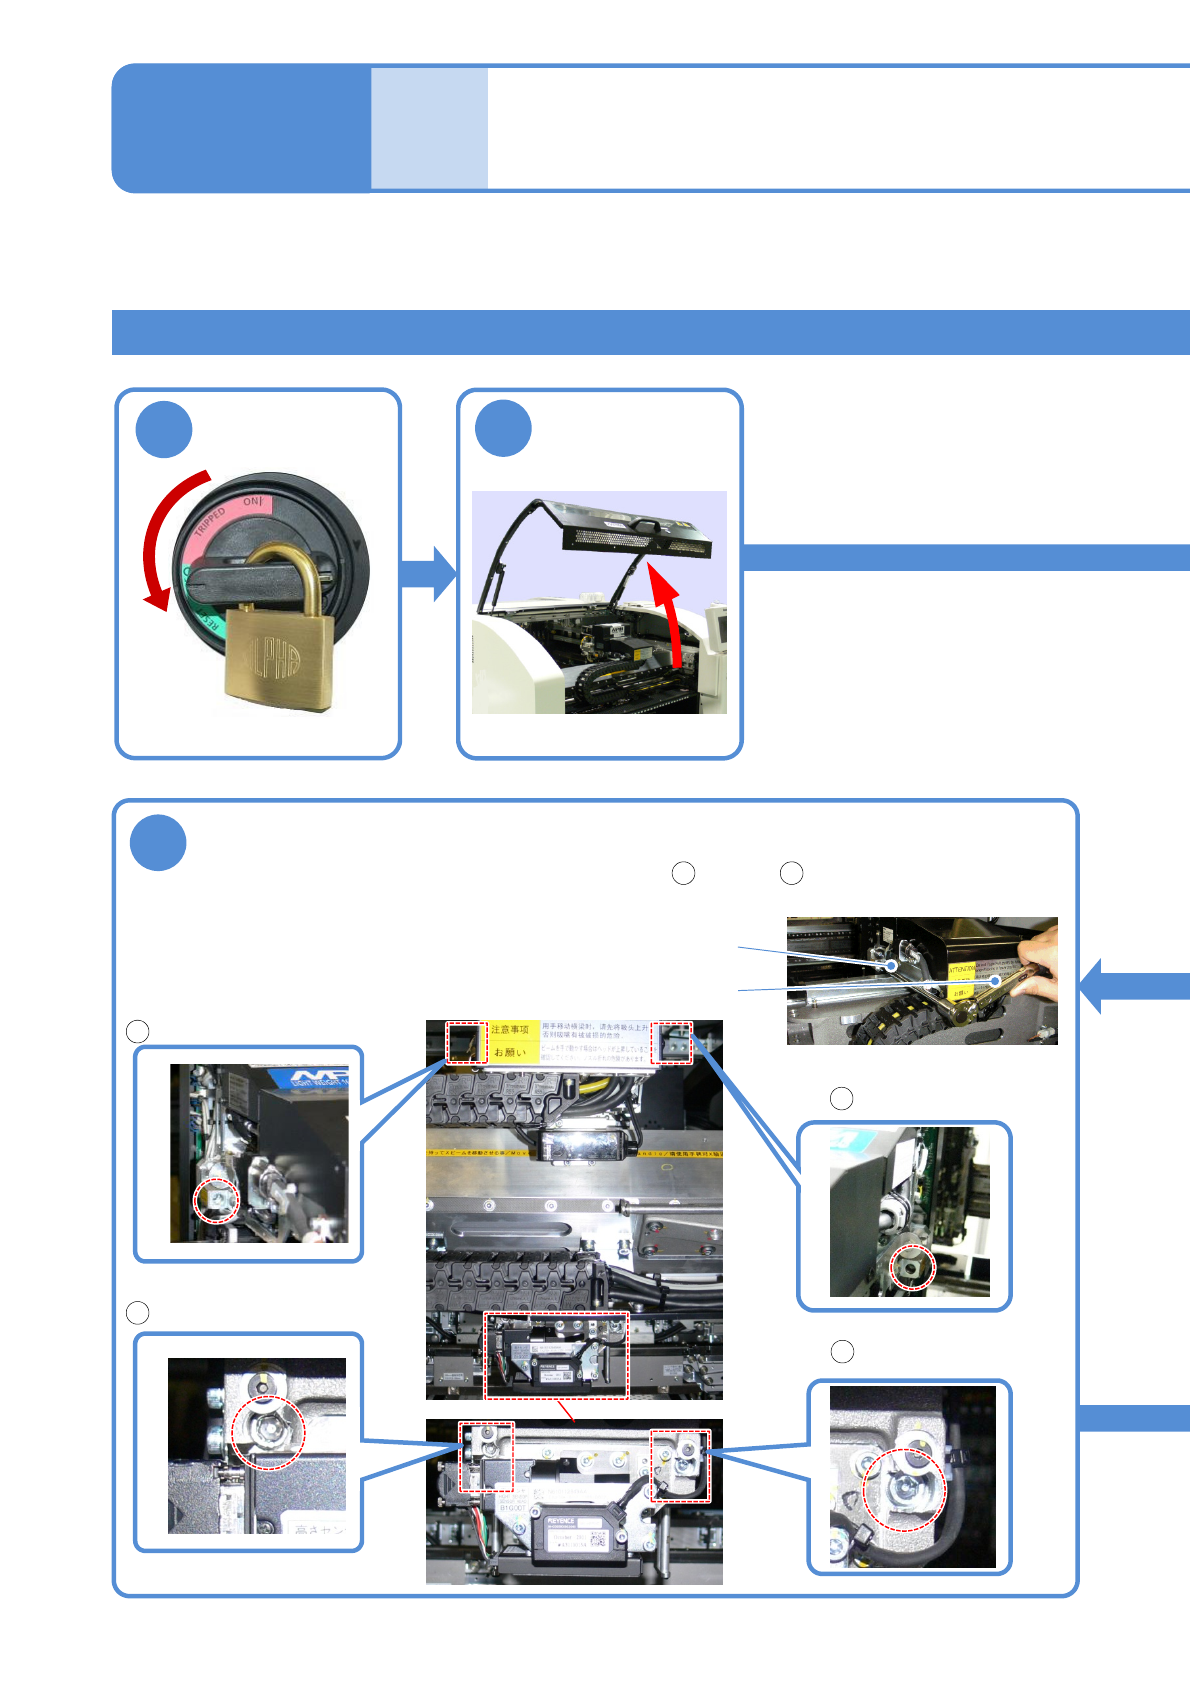
5
Tighten the head with fixing bolts
●Tighten the fixing bolts (4 locations) in the order of through with torque wrench
and a long bit.
● Prescribed tightening torque :9.8 ±0.5 N·m
1
11-1-3
OFF
4
Lower right of head
Upper right of head
Upper left of head
Lower left of head
1
3
4
2
Torque wrench
Long bit
NPM-W2 EJM7DE-MB-11M-00
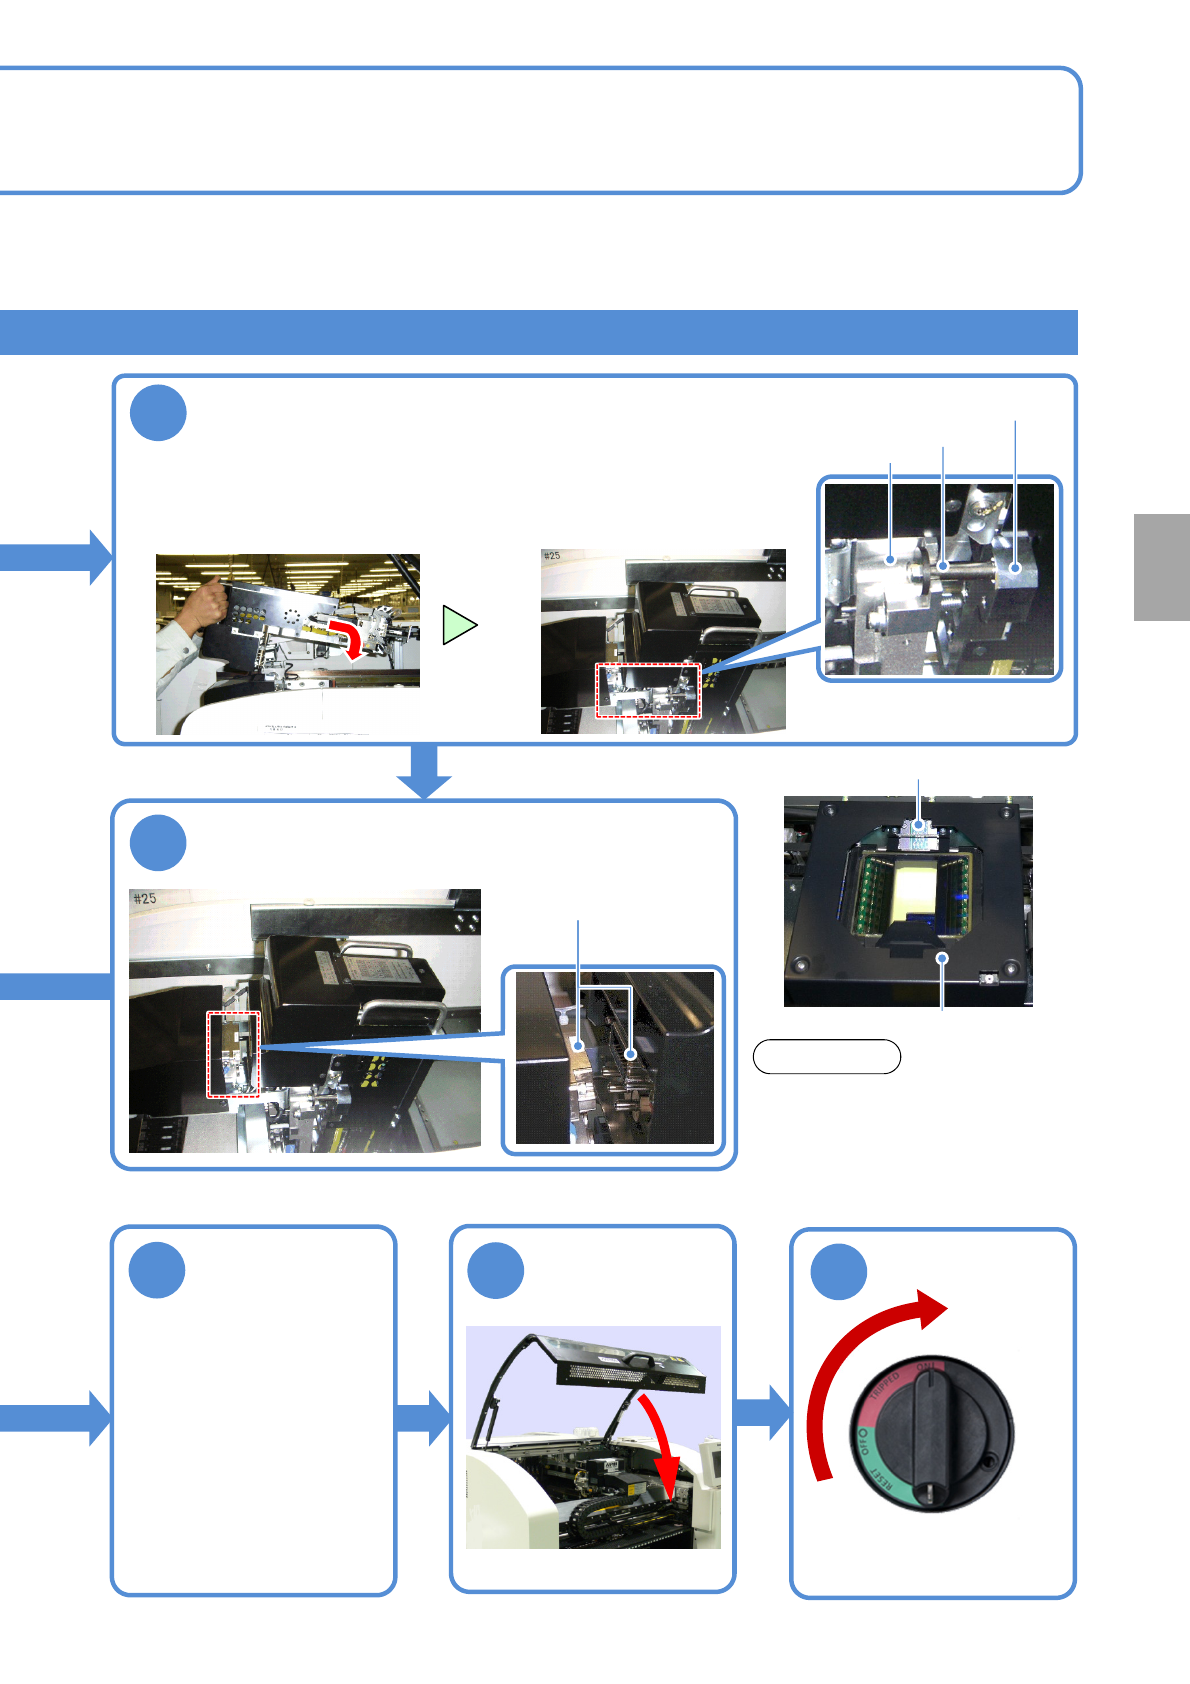
4
Pull the head to the front to insert the
connector section
Connector
11-1-4
6
7
NOTICE
When the BGA or CSP is attached
with the 8-nozzle head or 3-nozzle
head, make sure that the multi-
recognition camera unit has a
lateral lighting attached to it.
Lateral lighting
Head plate
●Head stopper: (one
each on right and left)
Head stopper
●Hold the handle in the upper part of the head, and hook the head
stopper to X-axis plate with paying attention not to let it interfere with
the cover.
●Confirm the installation surface for any foreign objects beforehand.
X-axis plate
3
Install the head
ON
8
Replace the
nozzle changer
Replacement
Multi-recognition camera unit
●Use a nozzle changer that
matches the attached head.
●For the dispensing head,
attach the dummy
dispensing unit.
●For the inspection head,
replace it with the
calibration jig